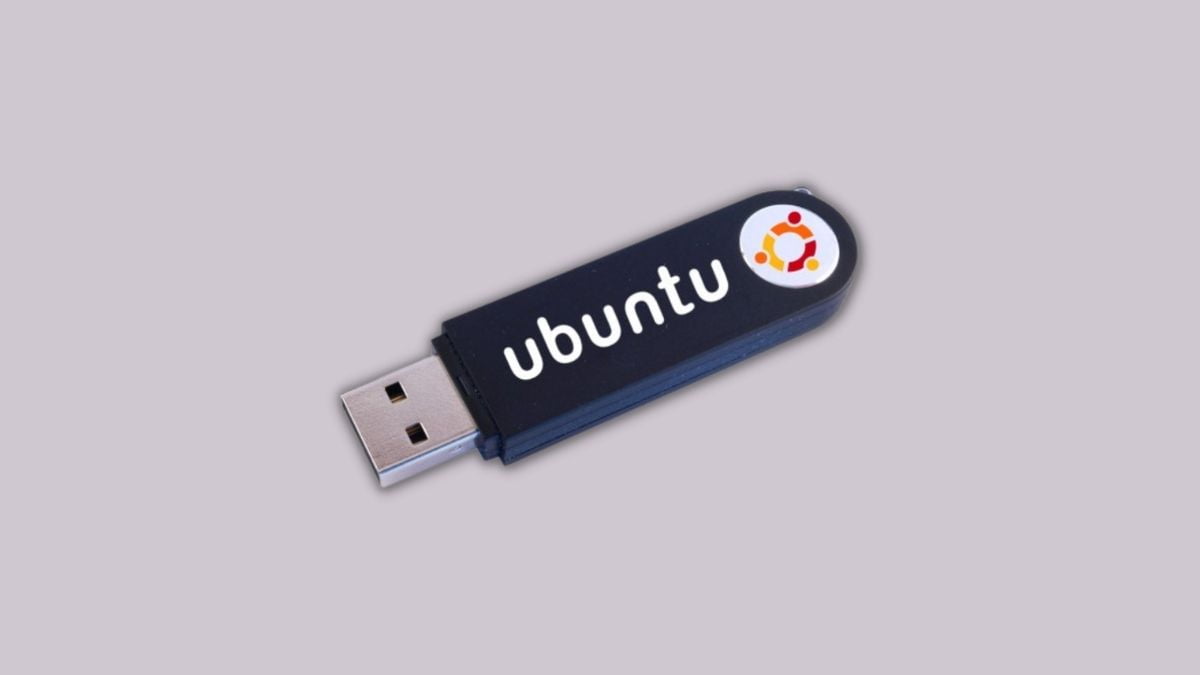
If you want to create a dual boot system or build a Ubuntu system, you need a bootable Ubuntu USB drive to install the operating system. Here is a guide on; how you can create a bootable Ubuntu USB drive in Windows 11.
There are few free software that allows you to create a bootable USB drive using the image file or the ISO file of the operating system. Here we are going to use the Etcher to create a bootable drive. However, if you want to install Ubuntu on your Virtual machine, you don’t need to create a bootable Ubuntu USB drive.
Things Required to Create a Bootable Ubuntu USB Brive
To begin with, you’ll need all of the tools required and files to create a bootable drive. Here is the list of things you require:
- A USB drive with at least 8GB of Storage.
- Download and Install Etcher
- Download the ISO file for Ubuntu.
We already have a guide on; how to download and install Etcher on Windows 11. Follow the guide to download and install Etcher on the Windows operating system.
After that, download the Ubuntu ISO file. For that, go to Ubuntu.com, select Download, and then download Ubuntu for Desktop. Ubuntu 22.04 LTS is the most recent version at the time of writing.
Here are the recommended system requirements to install Ubuntu to your system:
- 2 GHz dual-core processor
- 4 GB system memory
- 25 GB of free hard drive space
- Either a DVD drive or a USB port for the installer media
- Internet access is helpful
Note
We are going to use the Windows operating system, to create a bootable drive.
How to Create a Bootable Ubuntu 22.04 LTS USB Drive
Once you have installed Etcher and downloaded the Ubuntu ISO file, you can follow the following steps to create a bootable Ubuntu USB drive.
1. You must first connect your USB Pendrive to your computer.
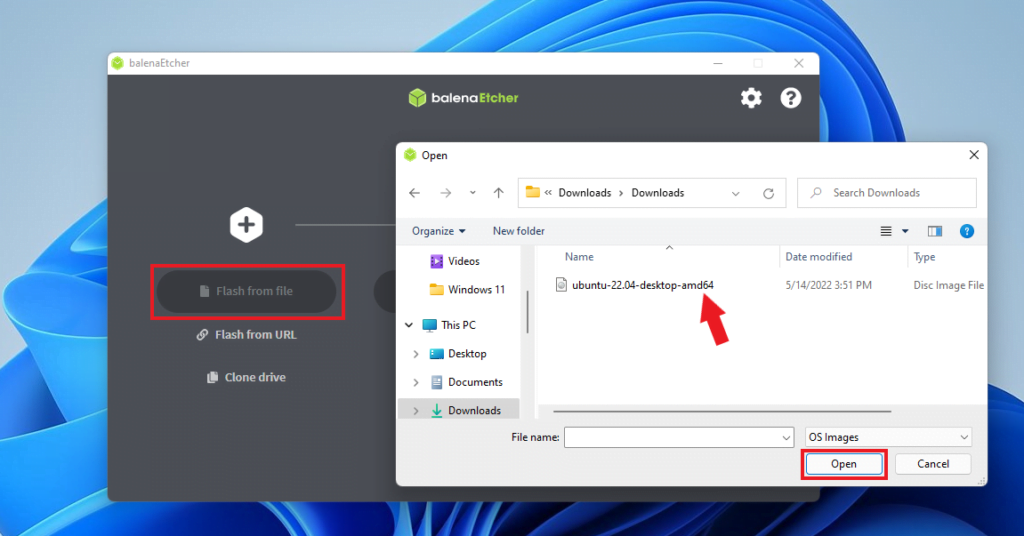
2. Once connected, open Etcher and click on the Flash From File option.
3. After that, select the Ubuntu ISO file that you have downloaded.
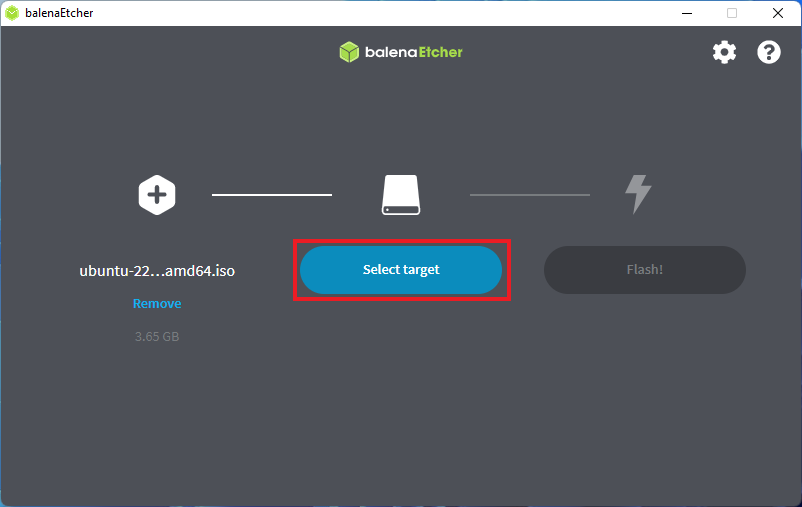
4. Once you have selected the Ubuntu ISO file. You have to choose the Pendrive, where you want to flash the ISO file. For that, click on the Select Target option.
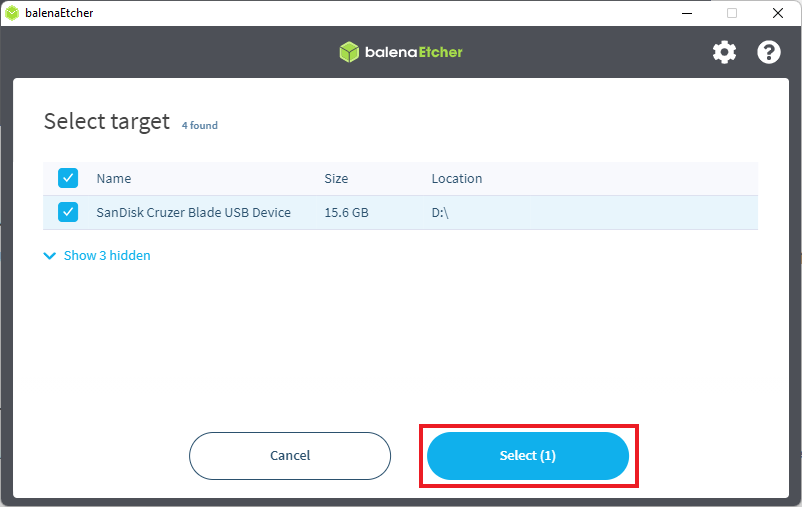
5. You will get a list of USB drives connected to your computer. Here choose the USB drive you want to flash and click on the Select option.
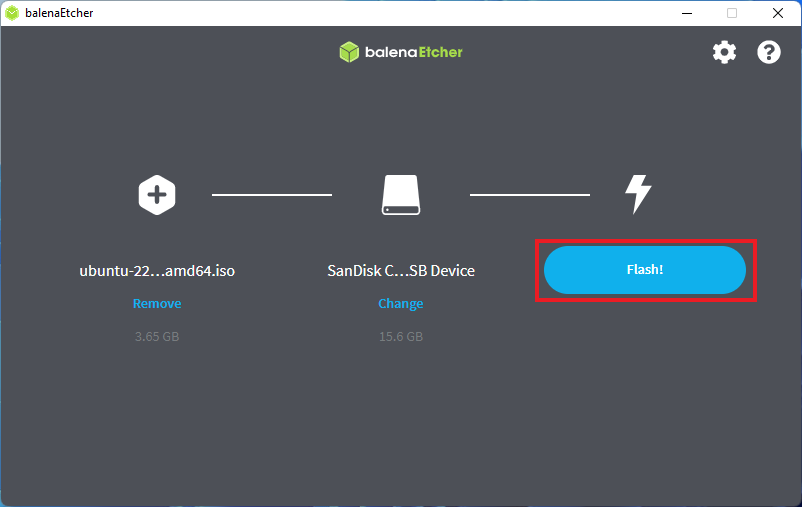
6. Now, click on the Flash button to create a bootable Ubuntu USB drive. The process will take some time, depending on the size of the ISO file and the USB stick speed.
7. The following screen will appear once the process is complete, informing you that – Flash Complete!

Now, you can use the bootable USB drive to install Ubuntu on any system. The process of installing an operating system like Ubuntu from a bootable USB drive is straightforward and offers a convenient way to set up or upgrade your computer’s software.
Conclusion
That’s it! This is how you can create a bootable Ubuntu USB drive. Now, you can use this Pendrive to install Ubuntu on any system. However, if you want to use the bootable USB drive as a regular pen drive, then you have to format it. Check out our guide on; how to convert a bootable Pendrive back to normal.
We hope this guide was helpful to you. However, if you have any doubts regarding the process, please ask in the comments section below. We are always there to assist you.