If you have installed Windows 11 on your VirtualBox then you may face resolution-related problems on the VirtualBox. Here, we are going to discuss how to fix the Windows 11 resolution issue in VirtualBox.
Let me tell you, Microsoft has not yet released the stable version of Windows 11 24H2. So, it is better to install it on VirtualBox. If you want to try out the latest features of Windows 11 without affecting your primary PC. However, Windows 11 23H2 is officially available, here is our guide on how to upgrade from Windows 10 to Windows 11 for free.
How to Fix Windows 11 Resolution in VirtualBox
If you are facing a screen size issue, you probably need to install the VirtualBox guest tools in Windows 11 on the virtual machine, just as you would install an additional driver on your main Windows computer.
Here’s how you can install additional tools on VirtualBox:
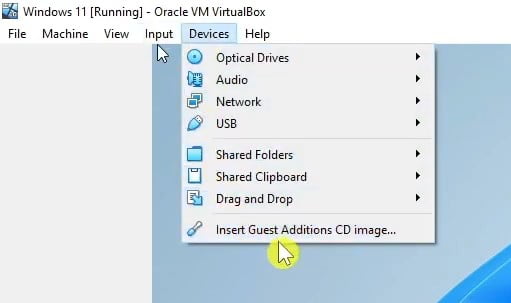
1. Power On the Virtual machine containing Windows 11, then go to the Devices and choose the Insert Guest Addition CD Image tools.
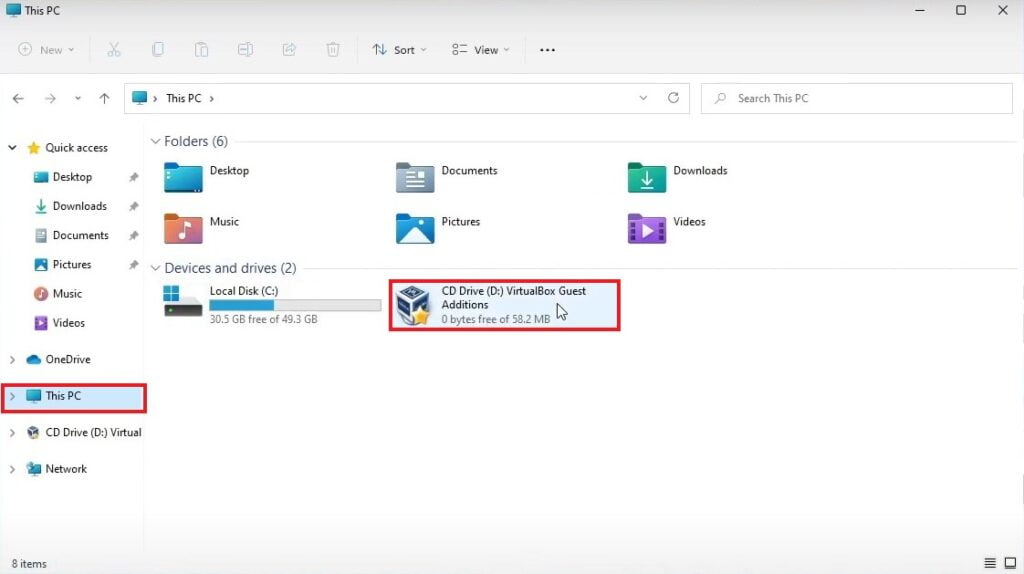
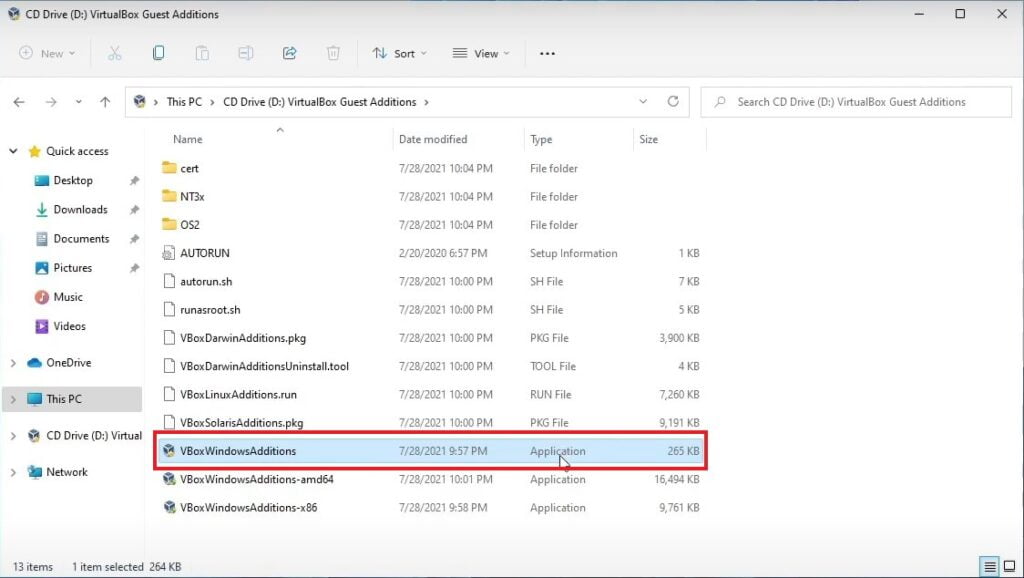
2. Now open File Explorer on Windows 11 on your VirtualBox and select the This PC option.
3. Here you will find the VirtualBox Guest Addition Tools, just open it.
4. Inside it, you will find all the VirtualBox tools, but you need to install the VBoxWindowsAdditions application. To install it, double-click on it and open the installation wizard.
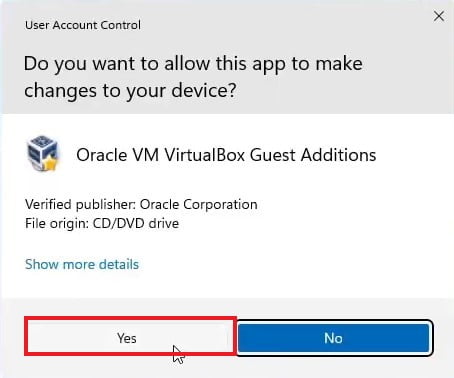
5. It will open a warning window from the User Account Control, here click on the Yes button.
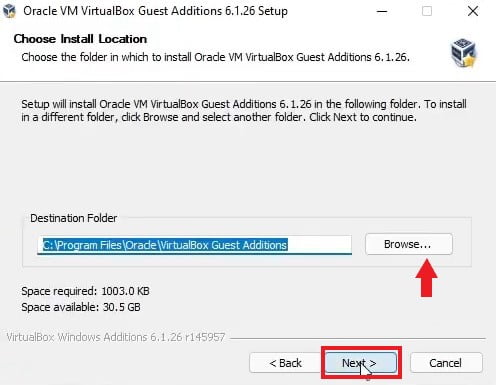
6. Now it will open the installation window. Here, click on Next, and select the installation location. You can also keep everything to default and click on the Next button to continue.
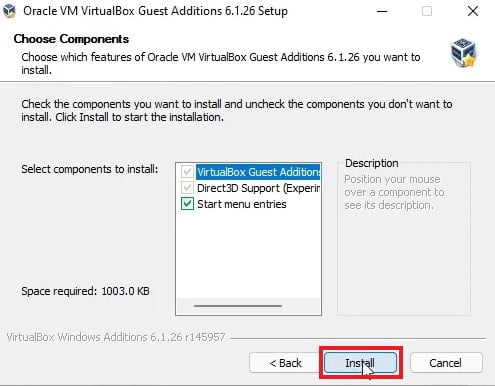
7. The VirtualBox guest additions have some components available within them. Select all the components and click on Install.
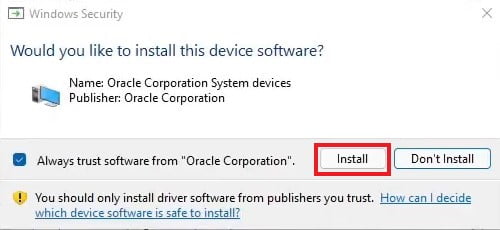
8. During the installation of the VirtualBox tools on Windows 11 within the virtual machine, you will encounter a Windows security warning asking if you would like to install this device software. Here, you will need to click on the Install button.
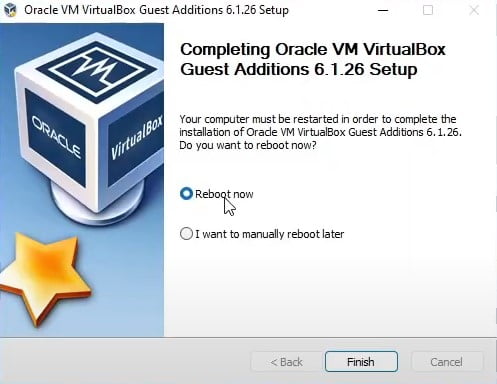
9. Once the installation is done, you will see a Reboot Now option. Just reboot your Windows operating system inside the VirtualBox.
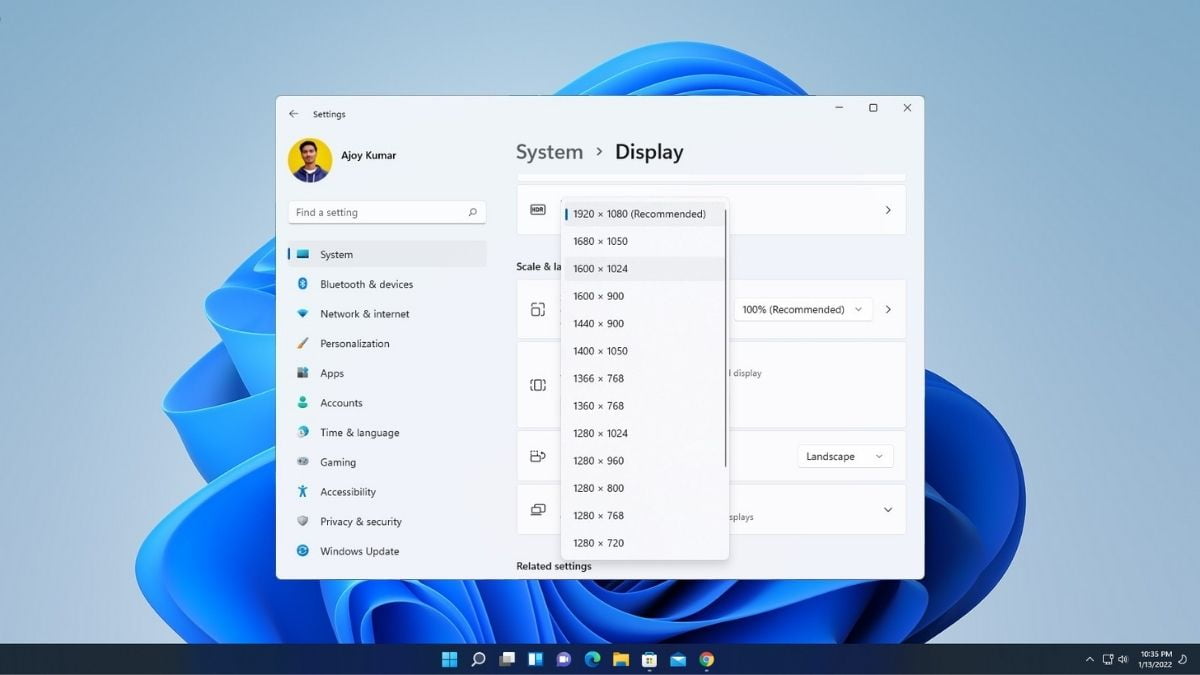
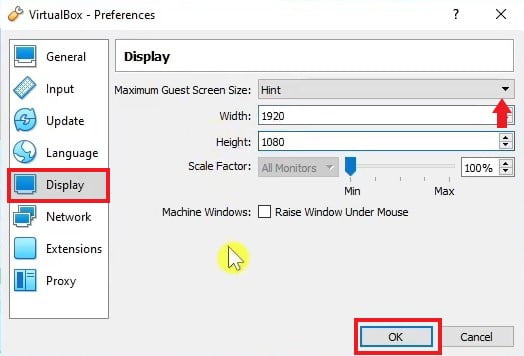
10. Now you have to change the Display setting on VirtualBox, Go to File > Preferences > Display, and from the drop-down menu select Hint, enter your preferred display resolution, and click on OK.
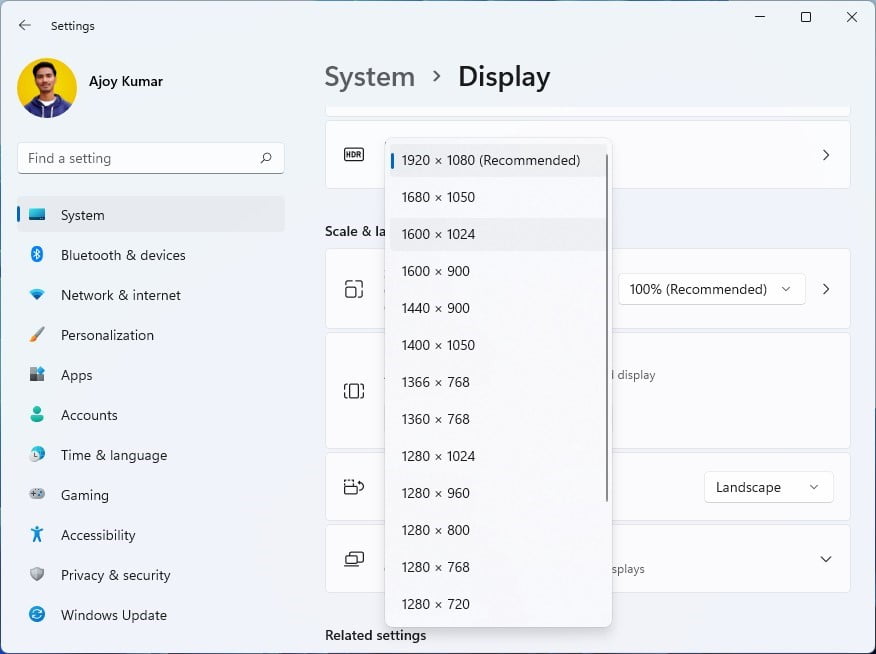
11. After that, turn off your Windows 11 machine and restart your Virtual machine. Once the Virtual machine is restarted, you can adjust the screen resolution using the Windows settings or from the VM settings itself. Both of them will work.
Conclusion
After doing all these, if your VirtualBox Screen Resolution is not fixed then you have to run this command on your VirtualBox Using CMD.
cd "C:\Program Files\Oracle\Virtualbox"
VBoxManage setextradata “Your Virtual Machine Name” VBoxInternal2/EfiGraphicsResolution 1920x1080
That’s it, this article is all about how you can fix display resolution on Windows 11 in VirtualBox. However, if you are not able to install and use VirtualBox on your Windows 11 operating system, then you can check out our guide on fixing VirtualBox installation failure in Windows 11.