If your Windows 11 PC has multiple storage devices and you want to know whether you have an SSD (Solid State Drive) or HDD (Hard Disk Drive), then this article is for you. Here is the guide on how you can check whether you have an SSD or HDD on your Windows 11 PC.
Some Windows PCs come with multiple storage devices – they can be SSDs or HDDs, or both. If you have built your own PC, you can install both storage devices into your system. When comparing the fundamental differences, SSDs outperform HDDs. So, if you want optimal performance on your system, then you must have an SSD as the primary storage drive, and for the secondary storage device, you can use an HDD.
How to Check If You Have an SSD or HDD on Windows 11
In this section, we are going to discuss different ways by which we can find out whether we have an SSD or HDD, or both on your Windows 11 PC.
The below-mentioned methods will also work if you are running Windows 10. So, let’s delve into it.
1. Using Task Manager
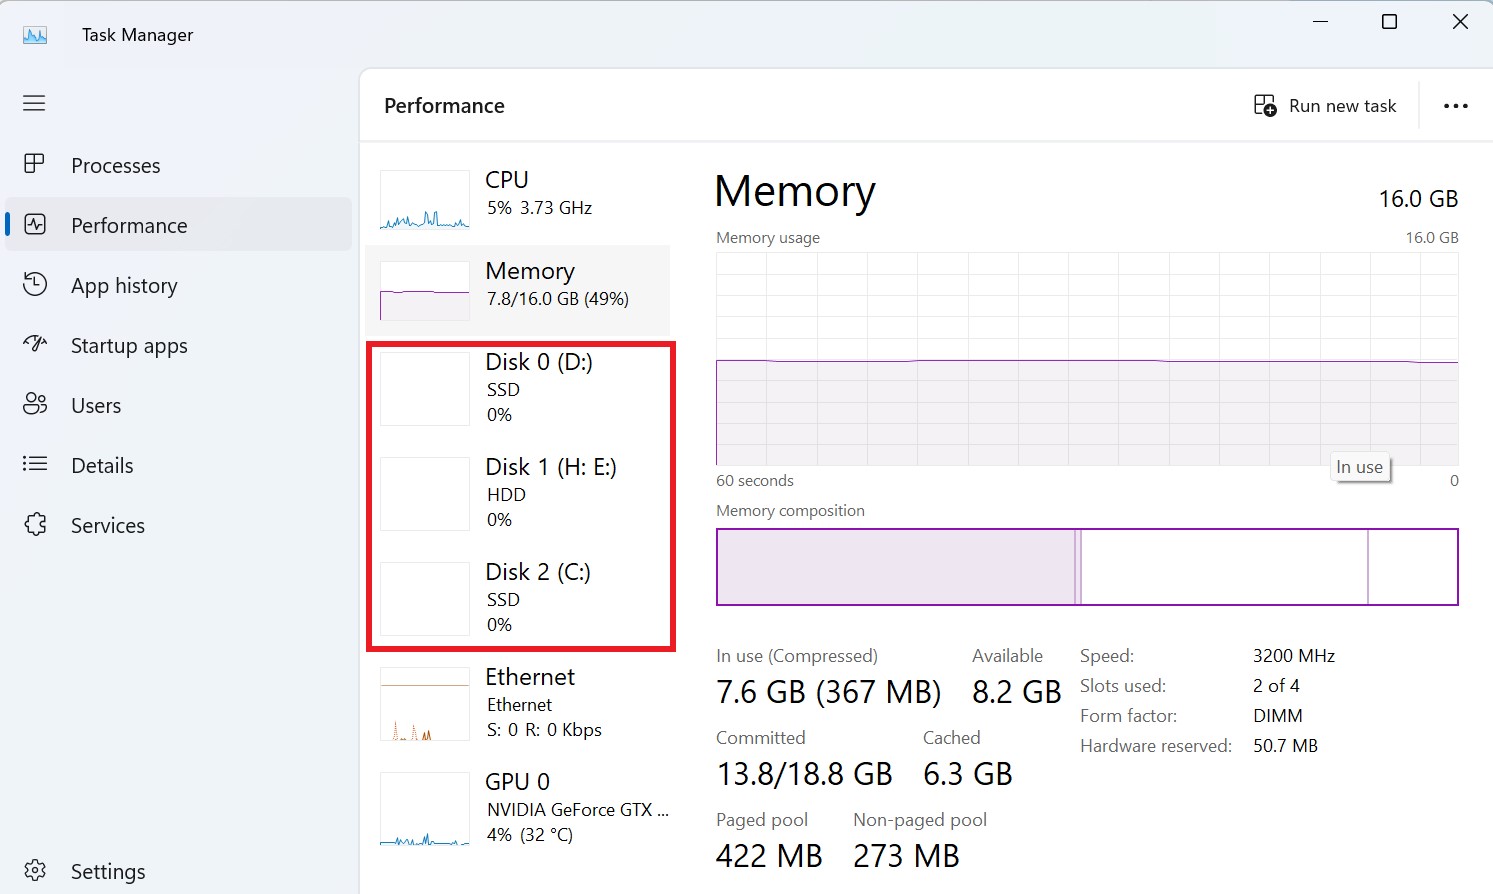
Task Manager is an all-in-one place to keep track of our system processes, tasks, CPU and GPU information, Ethernet, RAM, and Disk usage. Also, using Task Manager, you can easily check whether you have an SSD or HDD.
Here are the steps to find out:
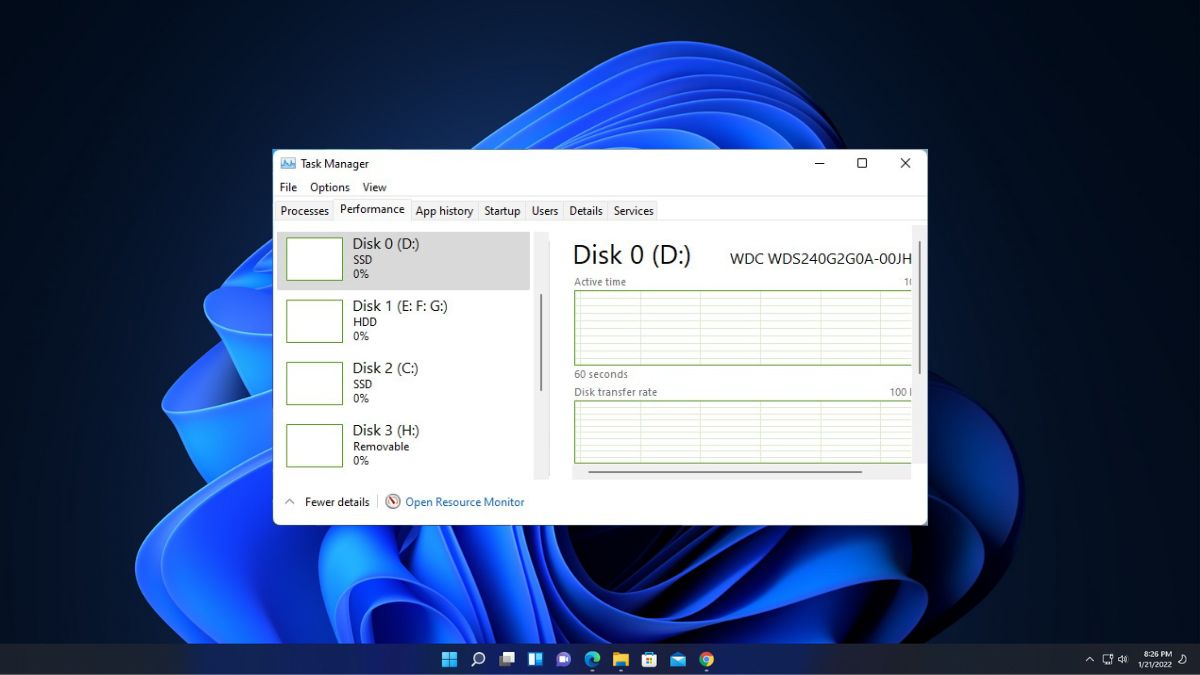
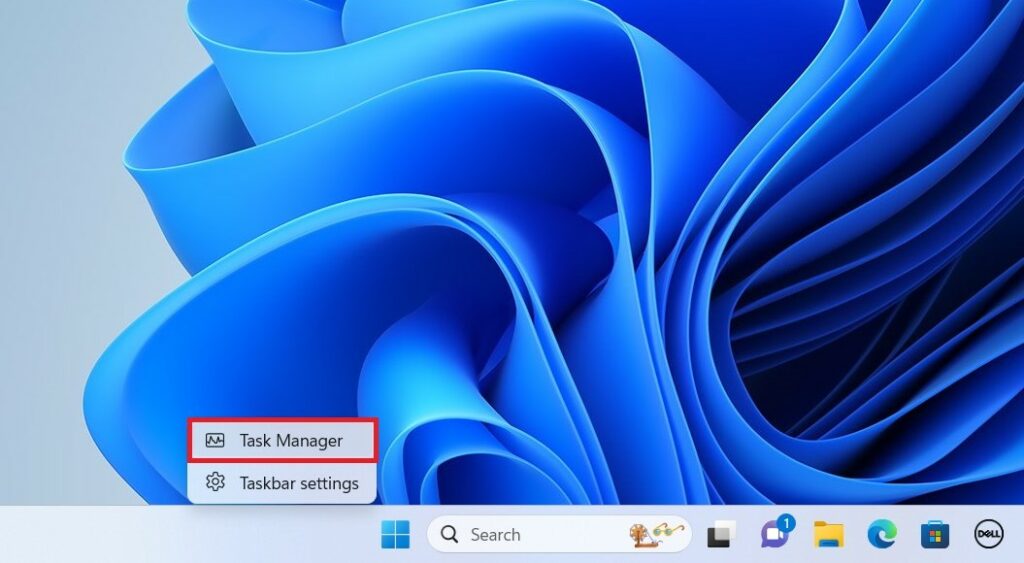
1. Right-click on the taskbar area and select the Task Manager option from the menu that appears to open it.
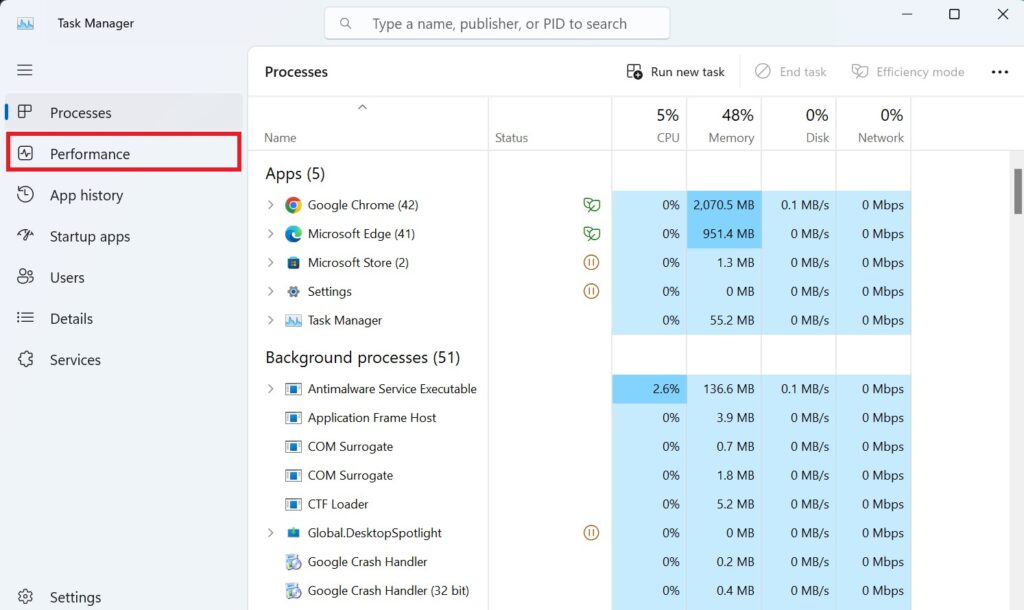
2. It will open the Task Manager window. Here, click the Performance tab to get a list of all the storage devices installed on your system.
3. Now, look for the Disk list, here you can find out whether you are using SSD or HDD. If you have both storage devices installed on your system, you will find multiple disk lists with their type.
2. Check via Settings
There’s another way to check whether you have an SSD or HDD on your Windows 11 PC from the System section. Here’s how you can check:
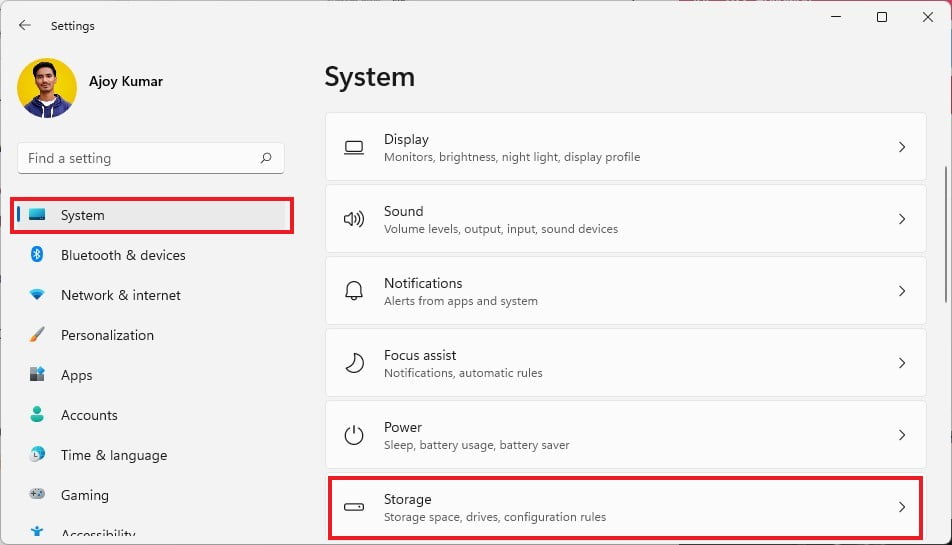
1. Click on Start Menu and click on Settings.
2. Now click on System and then click on the Storage option.
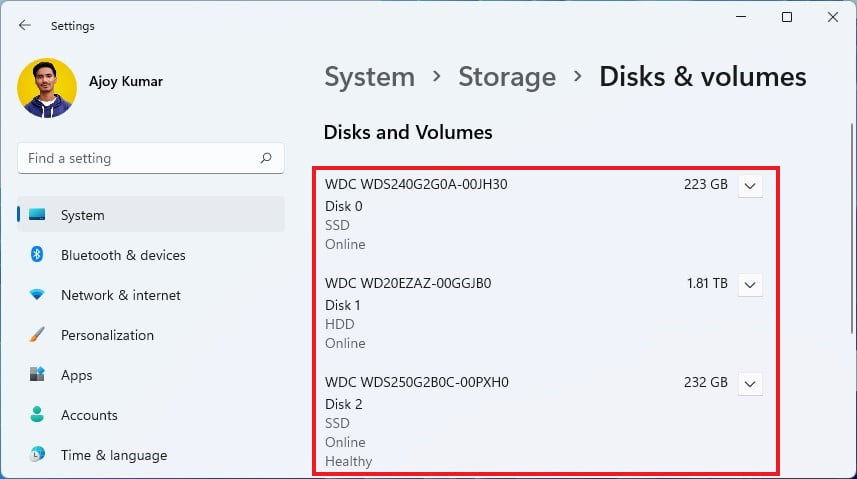
3. After that, expand the Advanced Storage Settings option and click on the Disks & Volumes option.

4. Here you can get the list of all the disks and volumes installed on your system. Select the disk and click on the Properties option to check whether the disk is SSD or HDD.
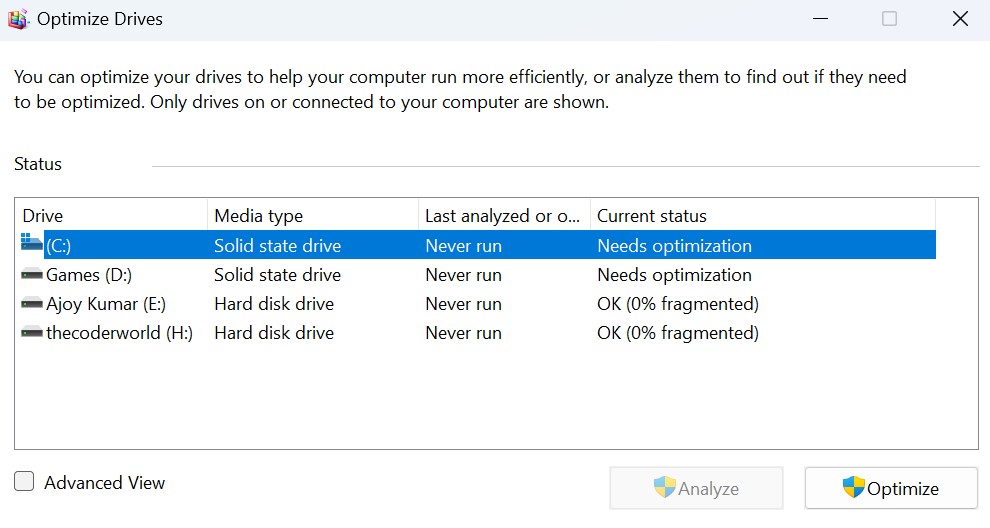
3. Using Disk Defragmenter
Windows 11 also offers a utility tool to manage and optimize drivers on your system called Disk Defragmenter. Here’s how you can use the disk defragmenter to check the drive type:
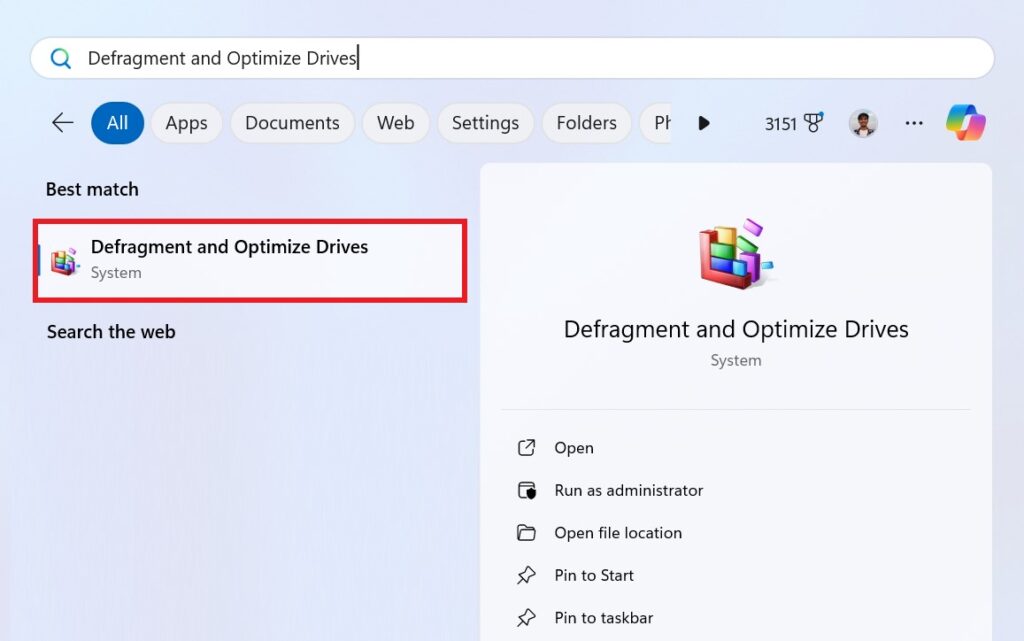
1. Click on the Start button to open the Windows search feature.
2. Type Defragment and Optimize Drives and open it from the search result.
Note
Alternatively, you can also use the Run box to open it. Press Win + R, type dfrgui, and press Enter to open the Optimize Drives window.
3. Now, you will get a clear table of your disk type. To check whether it is a Solid State Drive or a Hard Disk, click on the Media Type column next to your preferred drive.
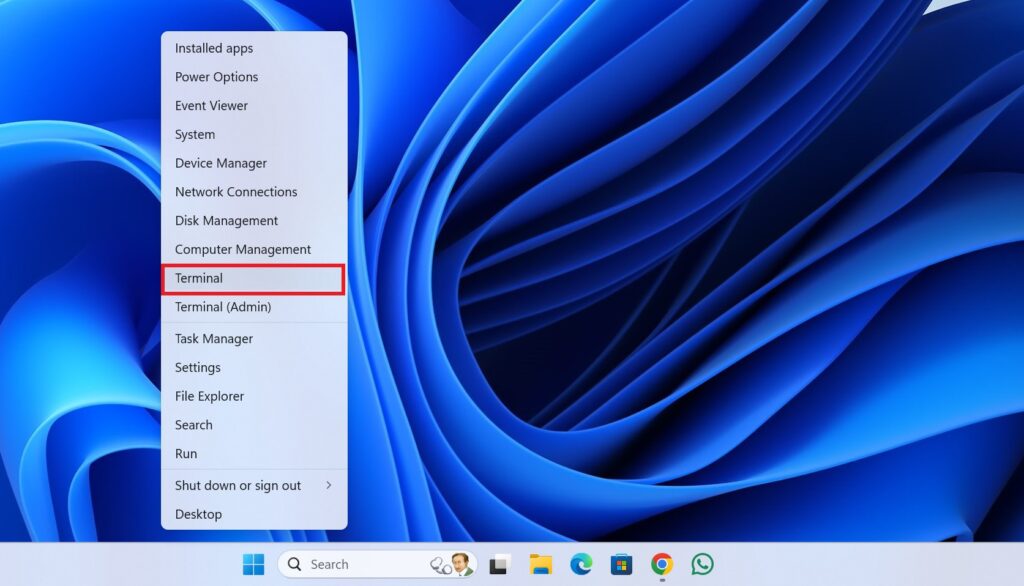
4. Using Terminal
You can also check whether you have an SSD or HDD on your system using the Terminal, PowerShell, or Command Prompt. You just need to run one terminal command. Here, we are going to use Terminal.
For that, follow these steps:
1. Right-click on the Start Button.
2. From the menu that appears, select Terminal and open it.
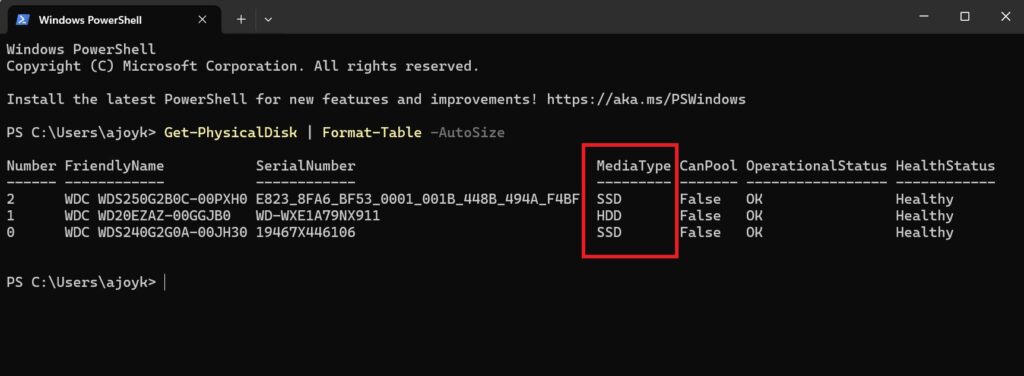
3. On the terminal window, type the following command and press Enter key:
Get-PhysicalDisk | Format-Table -AutoSize
4. Disk media type will be shown in the Media Type column. You can verify whether you have SDD or HDD.
Conclusion
That’s it, this is how you can check whether you have an SSD or HDD on your Windows 11 PC. However, if you are curious to know the hard disk’s model and serial number on your Windows 11 system, then you can check out our guide on finding the hard disk model name.
I hope this article was helpful to you. However, if you know another method, don’t hesitate to leave it in the comments section below. We will add it to the guide so that it can help others.