If you have not installed any audio driver on your Windows 11, you can download and install Realtek HD Audio Driver on your Windows system. It is one of the most popular audio drivers for the Windows operating system.
Realtek HD Audio helps you manage audio settings on your Windows system. Recently, many users have reported facing problems with Realtek HD audio manager. Realtek HD Audio Manager, for instance, is missing, and the applications keep disappearing. Here is a complete guide on; how to download and install Realtek HD Audio Driver on Windows 11.
How to Download Realtek HD Audio Driver
To download the Realtek HD Audio Driver, you need to download it from your device manufacturer. For instance, if you have an HP device, you need to visit the HP support page, and for an assembled PC, visit the motherboard manufacturer support page.
Note
Every device manufacturer has its own support – software and driver downloads page. Visit the manufacturer page. If you don’t know the link, you can google it; for example, HP support drivers, and Dell support drivers.
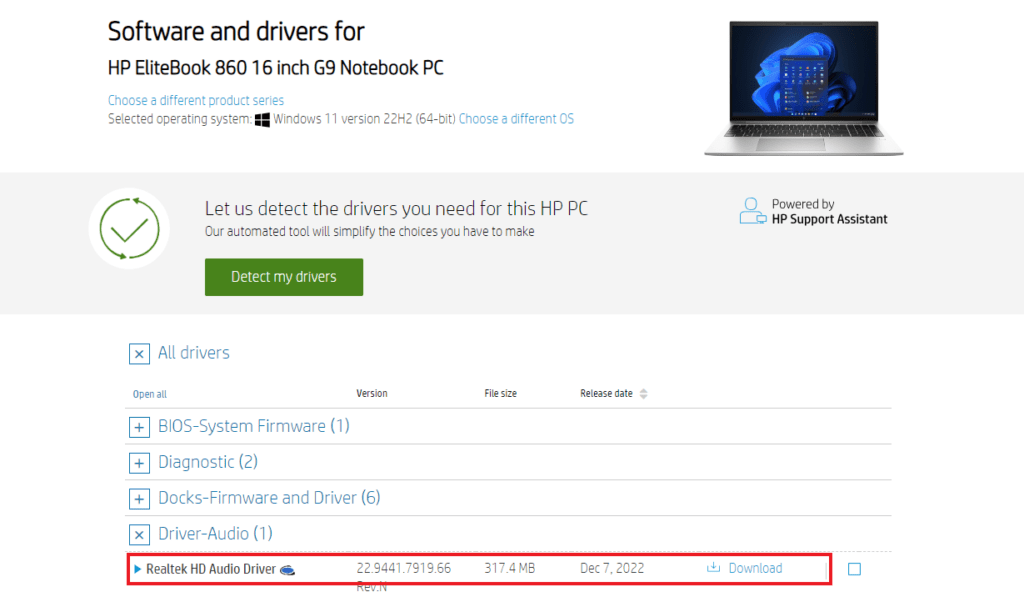
The download process is the same for all manufacturers. For example, I have an HP EliteBook 860. I will visit the HP support page and follow the following steps:
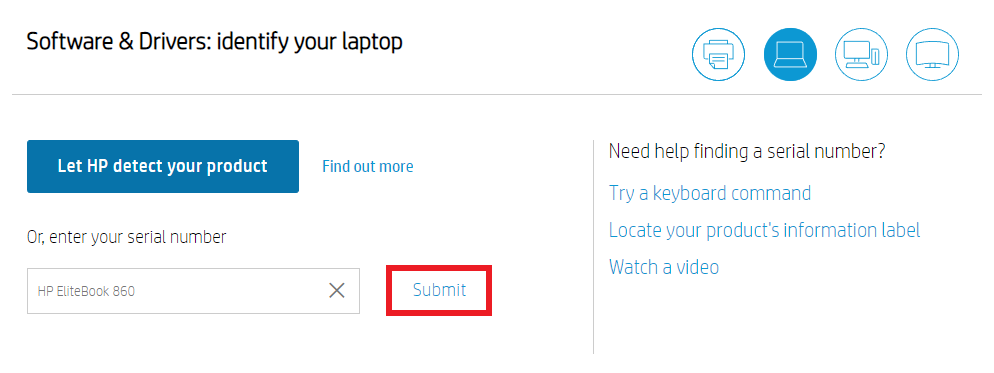
1. On, enter your serial number text box, enter HP EliteBook 860, and click on the Submit button.
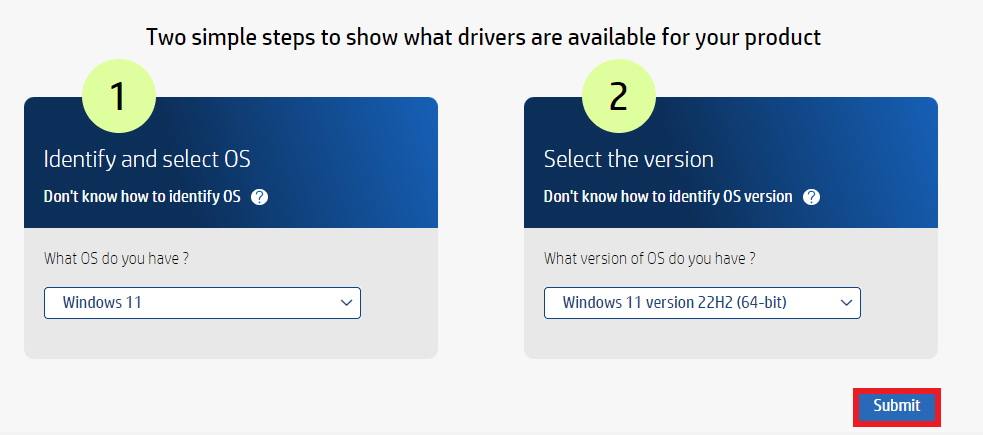
2. Now select the Windows operating system and version running on your device.
3. Then click on the Submit button. It will show you the list of drivers for your device accordingly.
3. Here, you get the list of drivers for your device. You can download any device driver. As my system is missing the Realtek HD Audio Driver, I will download it.
How to Install Realtek HD Audio Driver on Windows 11
Once the download is complete, you can install it. To fix the Realtek HD Audio Manager missing, the Realtek Audio Console not working, and other audio issues.
For that, follow the below steps:
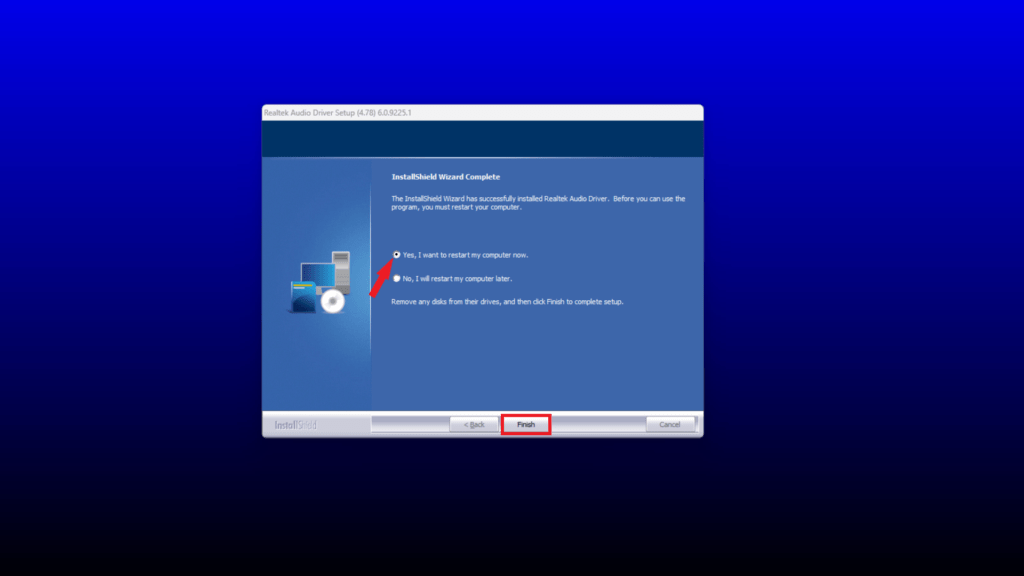
1. Open the download file and click on the Setup” application, it will open the Realtek HD Audio Driver setup.
2. Here, click on the Next button to continue the installation process.

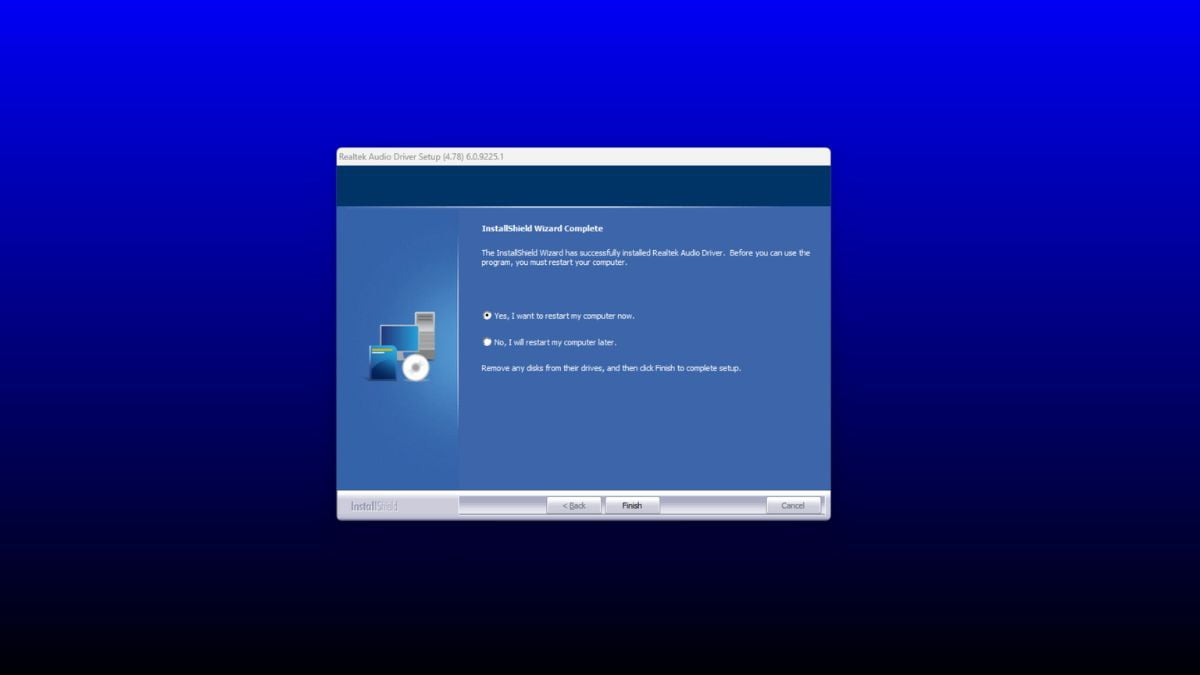
3. Once the installation is complete, you need to restart your system to apply the changes. For that, select Yes, I want to restart my computer now and click on the Finish button.
4. Now, wait for the reboot to complete. After that, you need to check for the driver update.
How to Update the Realtek HD Audio Driver
Once you have installed it on your system, you can check for updates to the Realtek HD Audio Driver to ensure you are running the latest version. To do so, follow these steps:
1. Press the Win + X together on your keyboard to open a context menu. In that context menu, select the Device Manager option.
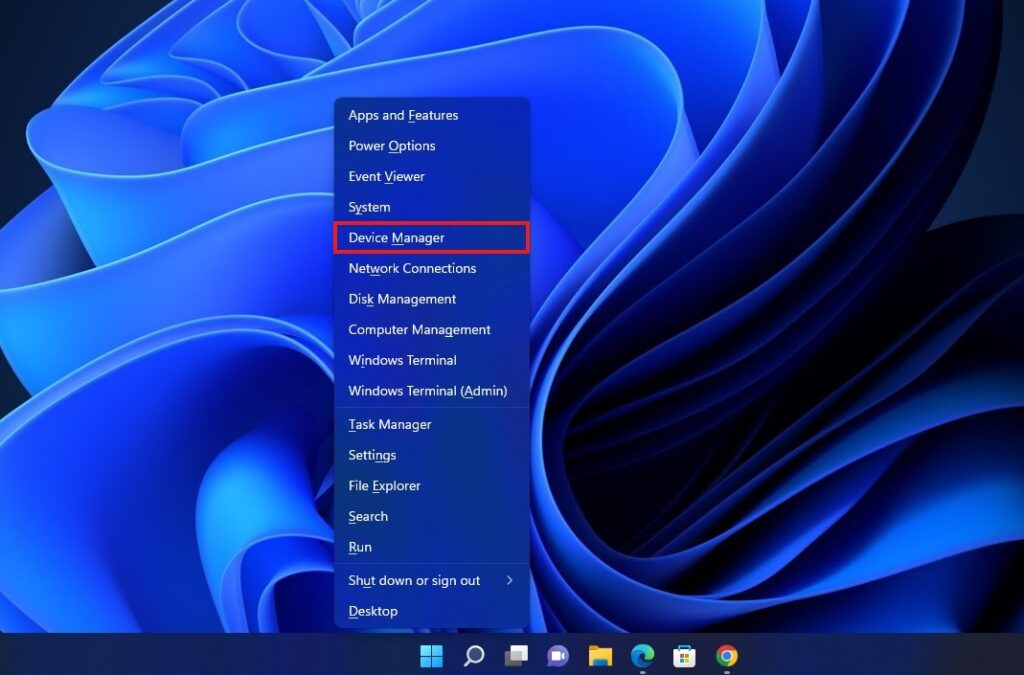
2. Here, you will get a list of all the devices installed on your Windows 11. Select the Sound, Video and Game Controllers option, right-click on the Realtek Audio driver, and select the Update Driver option.
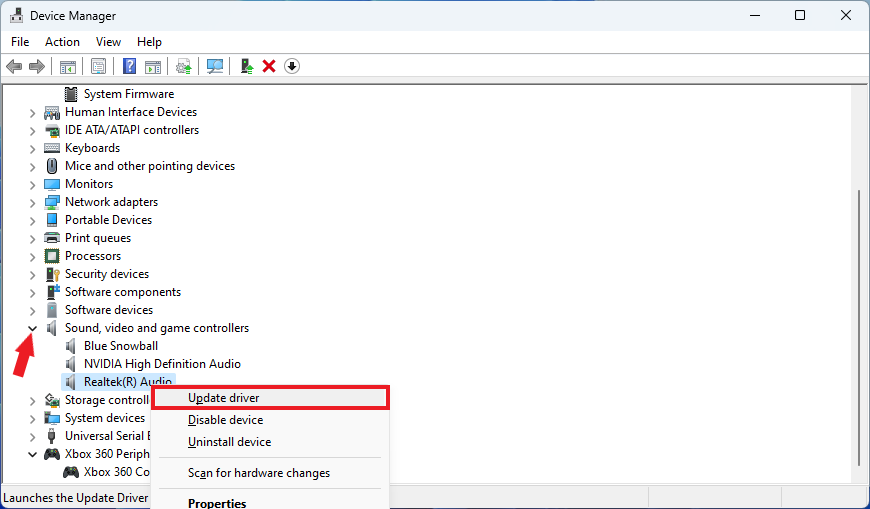
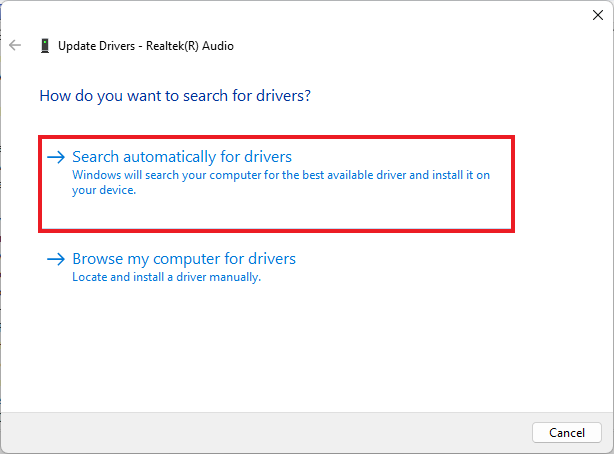
3. On the next window, click on Search automatically for drivers. It will check for the latest driver from the internet and install the latest version of Realtek HD Audio Driver on your Windows 11 system.
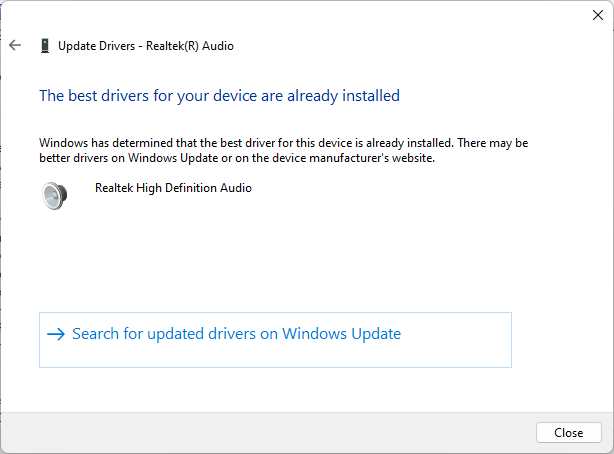
4. Once the installation is complete, click the Close button.
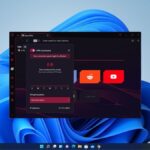
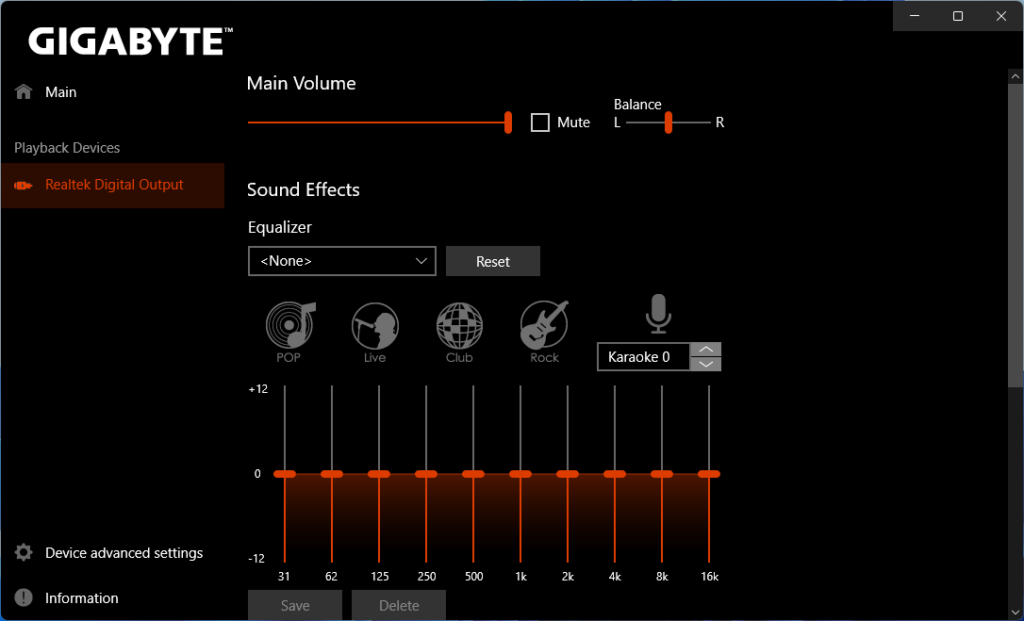
5. Now search the Realtek Audio Manager on the Windows search bar and open it to manage audio settings on your system. You will see Realtek Audio Console on AMD systems and Realtek HD Audio Manager on Intel systems.
Conclusion
That’s it; this is how you can download and install Realtek HD Audio Driver on your Windows 11. To fix audio issues from your system. However, if you have some suggestions or doubts regarding the installation process, do not hesitate to leave them in the comments section. We are always there to assist you.