One of the most outstanding features ever to arrive at the forefront of Chrome OS is the integration of Android applications. The latest release of Chrome OS has received support for Android and Linux. If you want to install the Android app on your Chromebook, you have to install the Google Play Store on your Chromebook.
On the latest version of ChromeOS, Google Play Store comes pre-installed. But if you are using the older version of Chrome OS, you have to enable it. Here is the guide on; how to enable the Google Play Store on Chromebook. However, if you are looking for a way to install Linux apps then you need to install Linux on your Chromebook.
How to Enable Google Play Store on Chromebook
If you have any Chromebooks released in or after 2017, support Android. To run Android apps on your Chromebook, ensure that it is running the latest Chrome OS version and Google Play Store is enabled.
Do you know?
You can convert your old Windows laptop and MacBook to a Chromebook. To know how, check out our guide on installing ChromeOS Flex.
To do so, follow the following steps:
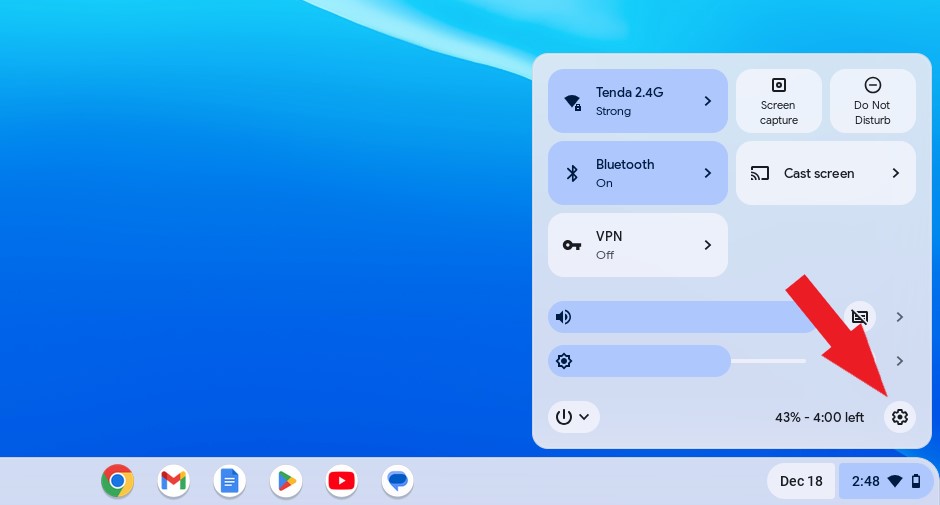
1. Open the Settings on your Chromebook. For that, click on the Quick Settings Panel at the bottom right of your screen.
2. Then click on the gear icon to open the settings.
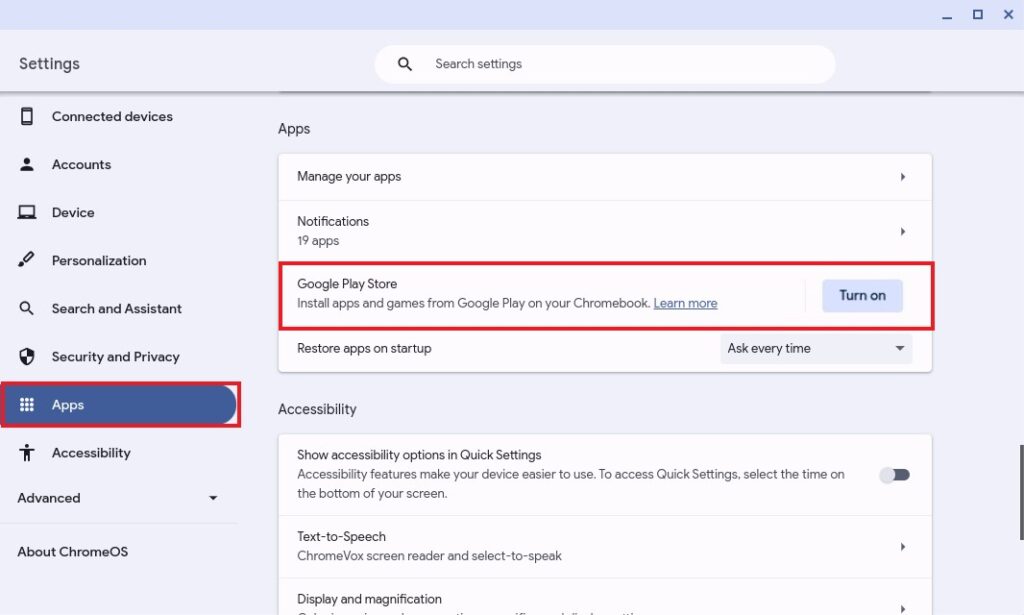
3. Scroll down; till you get to the Google Play Store option. Or else, click on the Apps tab and look for Google Play Store.
4. Click on the Turn On button to enable it. However, if the Google Play Store is already enabled on your Chromebook, you will not get this option.
5. Once done, a window will appear on your screen, and it will take you through the installation of the Google Play Store on your Chromebook.
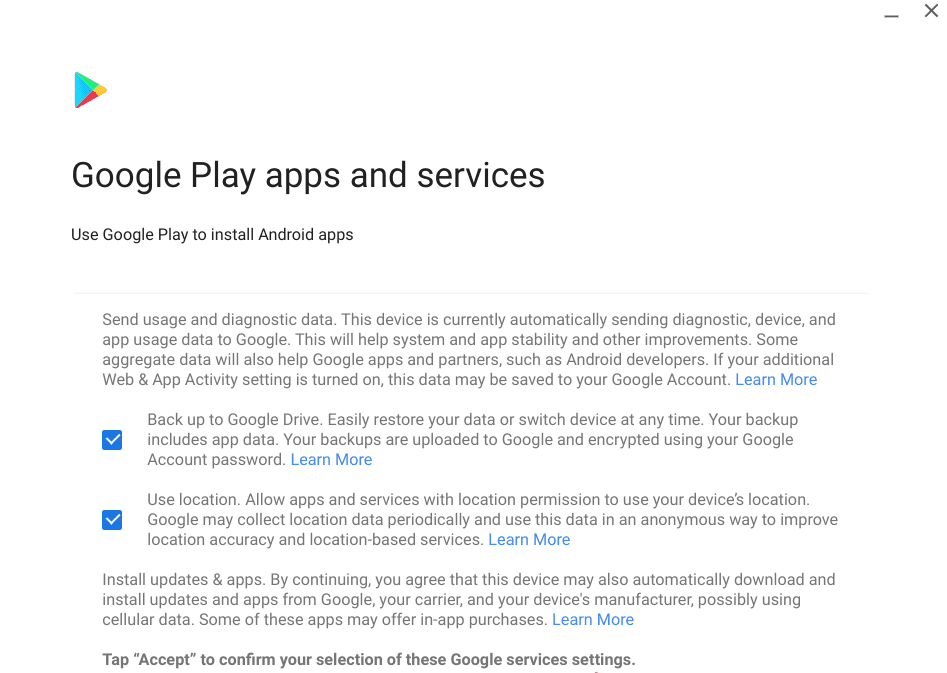
6. Here, you’ve to accept the Google Play Terms of Service. For that, click on the Accept button.
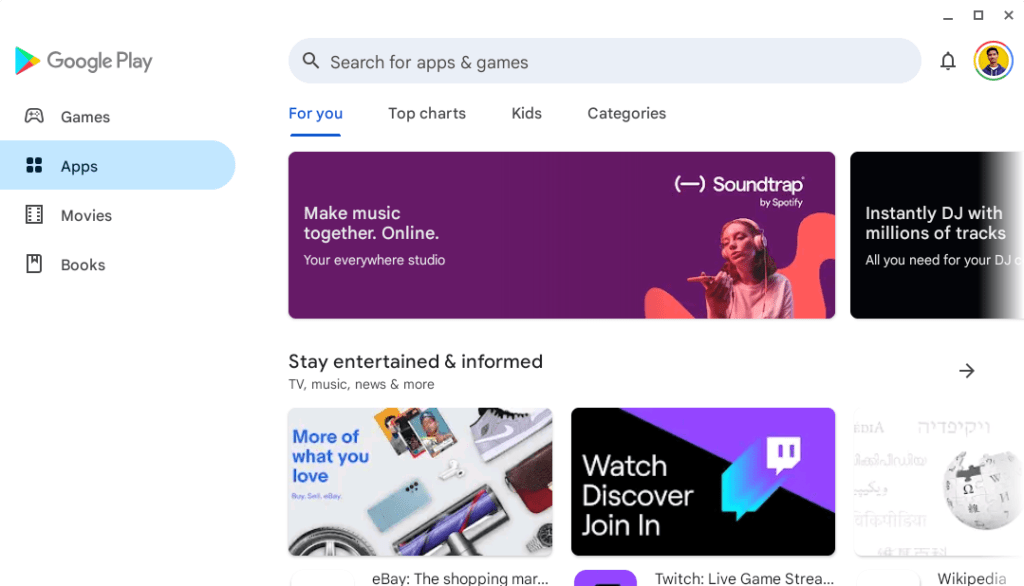
7. Now, you are ready to download and install Android apps on your Chromebook.
Note
All the Android apps are not supported; on Chrome OS due to hardware compatibility issues.
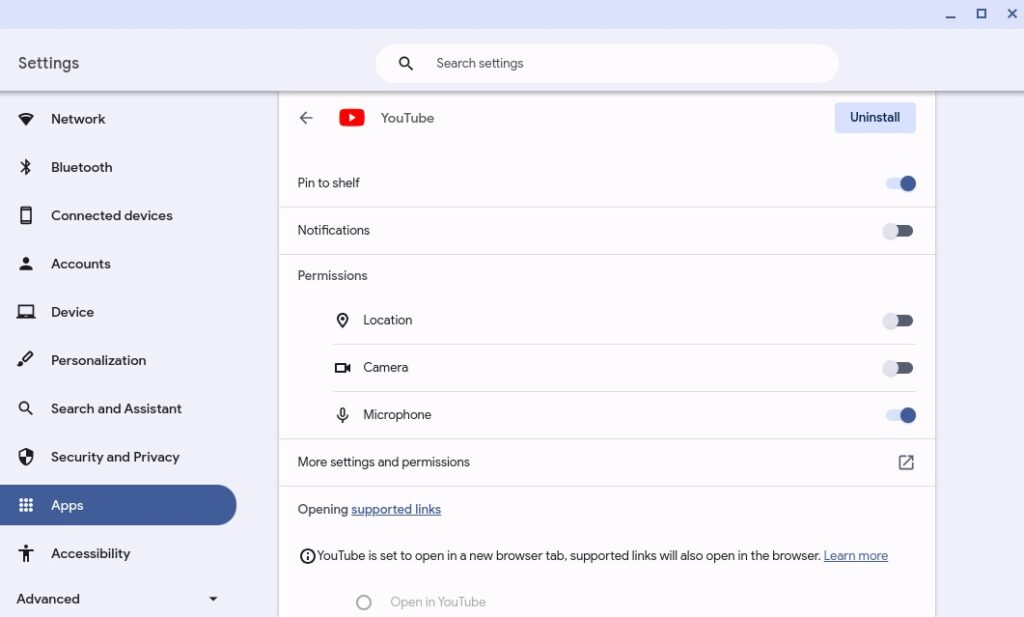
How to Manage Your Android Apps on Chromebook
To install Android apps, now you can use the Google Play Store. If you want to manage your Android apps, permissions, and notifications, then you can follow the following steps.
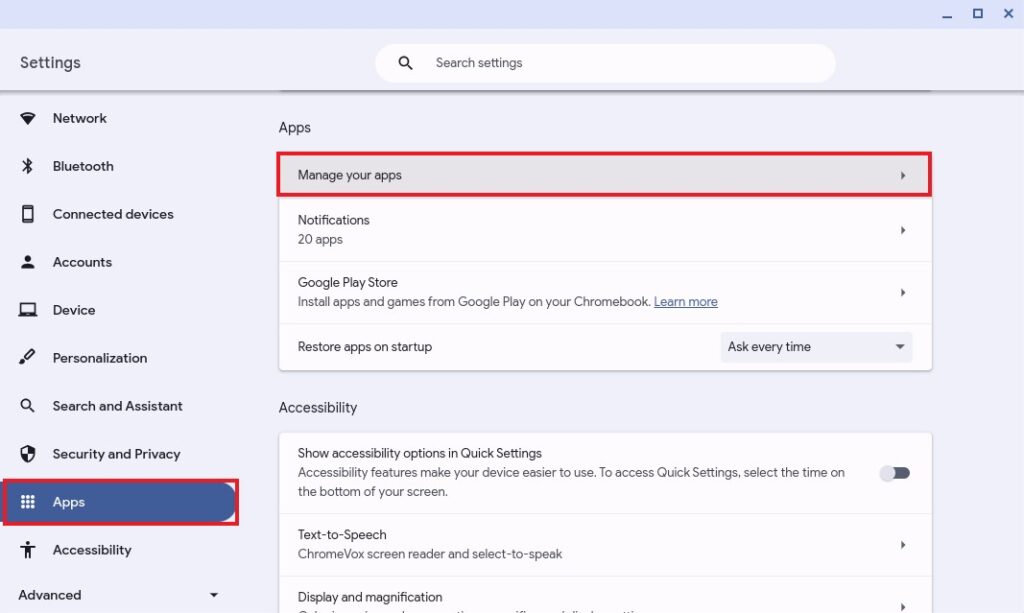
1. Open the Settings app on your Chromebook.
2. Now click on the Apps tab. Here, you will find the Manage your apps option.
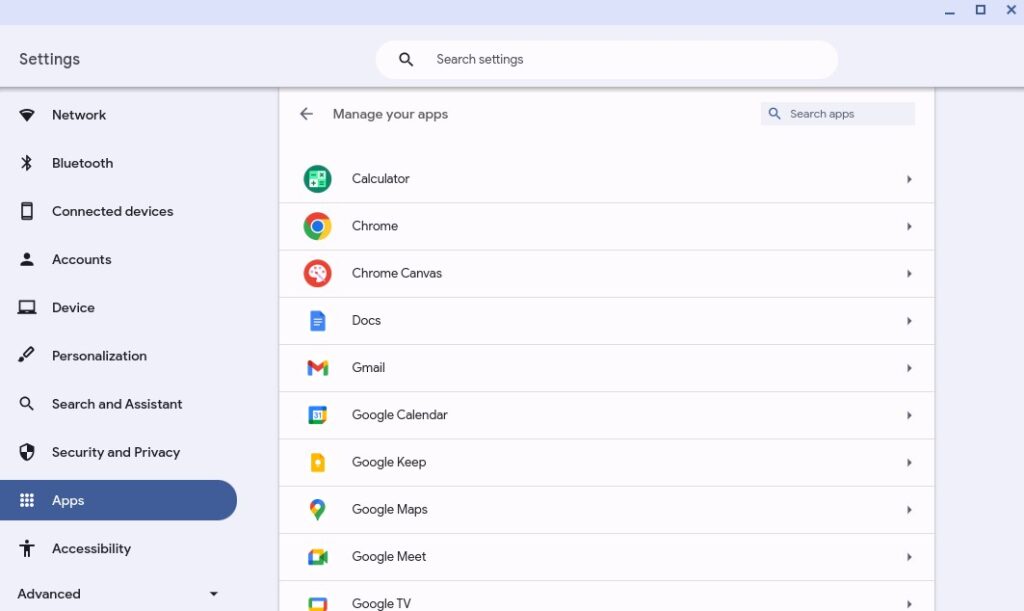
3. Click on it; to see a list of Android apps installed on your Chromebook.
4. Now, select the app you want to manage. Here, you find all the options to manage notifications and permissions of the app.
5. From here, you can also remove the Android app. To uninstall the Android app, click on the Uninstall button.
Conclusion
That’s it! You have successfully enabled Google Play Store on your Chromebook, which means you can now install and use Android apps. If you’re unsure which version of Android your Chromebook is running, check out our guide on how to check Android Version on Chromebook. Moreover, you can install Flatpak and Snap App Store in Linux on your Chromebook to access and install Linux applications.