If you wish to upgrade your computer to Windows 11, the most important requirement is TPM 2.0. TPM stands for Trusted Platform Module, and Microsoft introduced it with the Secure Boot feature as a mandatory requirement for any system that wants to upgrade to Windows 11.
If you have a Gigabyte motherboard with an AMD processor, this guide is for you. Here, we will discuss some important points about TPM and how you can enable TPM 2.0 on a Gigabyte Motherboard for AMD Based Platforms.
What is TPM?
TPM stands for Trusted Platform Module. It is a standard for a secure cryptoprocessor, a dedicated microcontroller with cryptographic technology built-in.
The primary purpose of this technology is to provide an extra layer of security by preventing unwanted access to sensitive data such as passwords and encryption keys.
TPM is available in two forms: physical and as part of the chipset. If your motherboard has a socket for it, it can be installed as a stand-alone physical component. It can also be a component of the chipset, which provides the same level of safety and security.
TPM 2.0 is the most recent iteration of TPM technology, which is more secure than the older version.
How to Check If Your PC Has TPM 2.0
If you are running Windows 10 on your system, then there is a chance that your system has TPM (Trusted Platform Module) built into your CPU. If you wonder why you need it, let me tell you that you need TPM to use BitLocker encryption and decryption features on the hard disk. In fact, Windows 8.1 also requires TPM for BitLocker.
There are many ways by which you can know whether your system has TPM or not. We already have a guide on; how to check if your PC has TPM. For that, follow the guide to know. However, you can also check Intel and AMD-supported processors that have TPM.
How to Enable TPM 2.0 on Gigabyte Motherboard
To enable TPM 2.0 on your Gigabyte motherboard with an AMD processor, first of all, you need to get into the Gigabytes BIOS Settings. For that, follow the following steps:
Note
Changing BIOS settings can damage your computer and possibly prevent it from starting. We strictly recommend you follow the exact steps to avoid making unnecessary changes.
1. To access the Gigabyte BIOS settings. Turn on your computer, or restart it, if it is already turned on.
2. Then, press and hold the Del or Delete key on the boot screen before the Gigabyte logo appears.
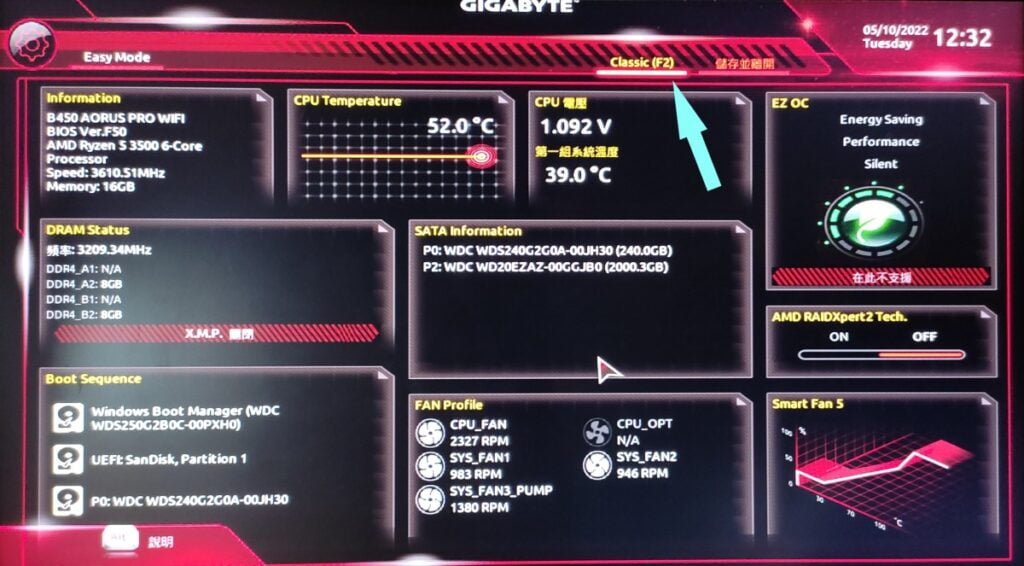
3. After that, you will get the BIOS setting. If it is on Easy Mode, press F2 to switch to Advanced Mode to enable the TPM.
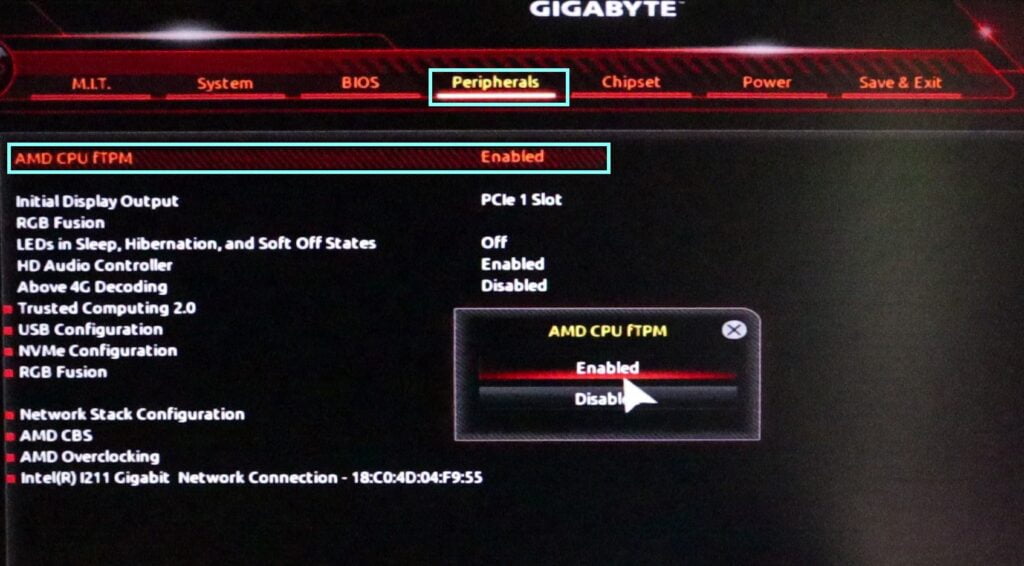
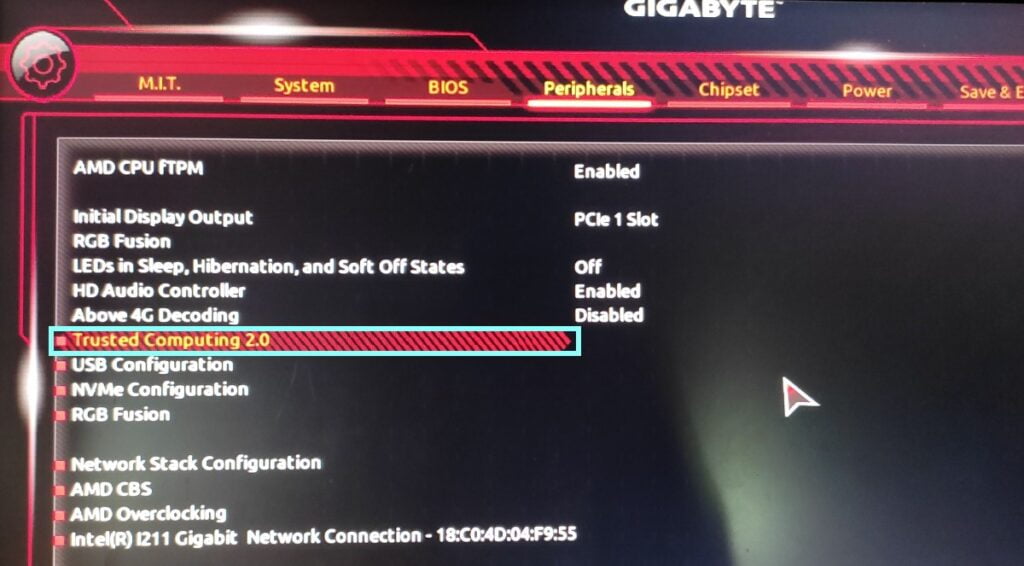
4. If you are already in advanced mode, click on the PerIpherals option. From there, click on AMD CPU fTPM option.
5. Now, from the pop-up window, select the Enabled option to turn on TPM.
6. TPM is now enabled on your Gigabyte motherboard. You can check it by booting back into the BIOS settings and clicking on Trusted Computing 2.0.
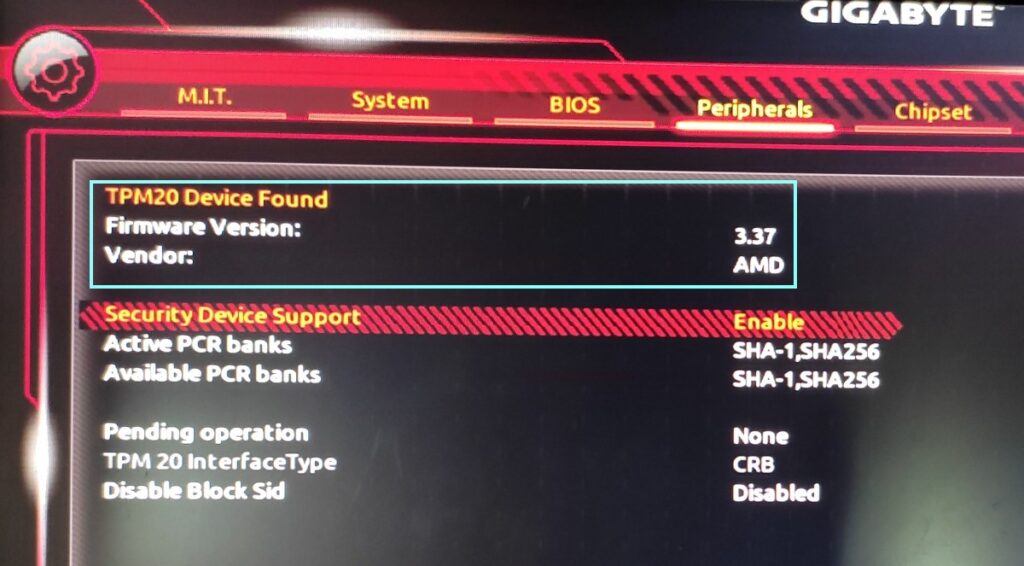
7. If it shows the TPM 2.0 Device Found with the version of the TPM firmware and the vendor. Then the TPM is successfully enabled on your Gigabyte motherboard with an AMD-based processor.
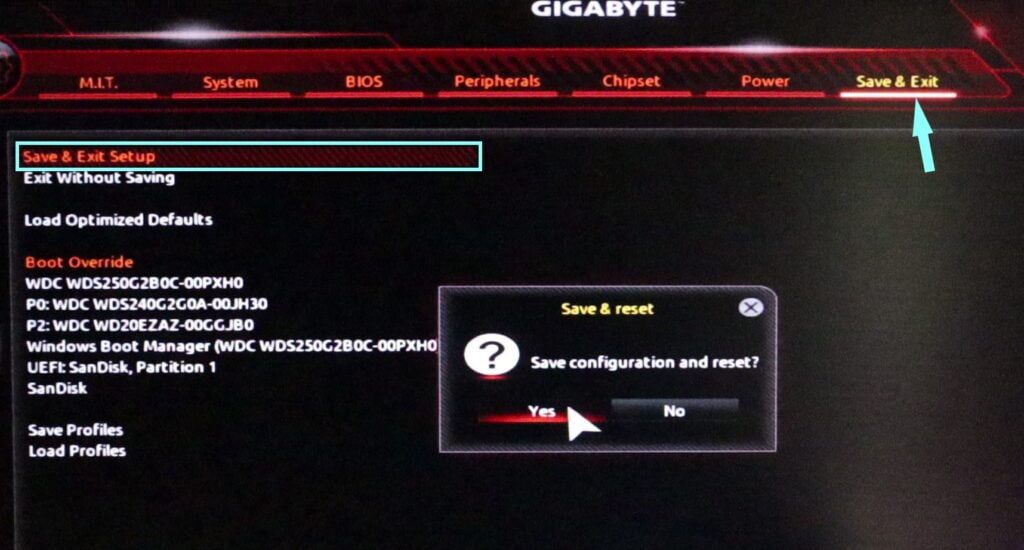
8. After that, click on Save & Exit to save the settings.
9. Finally, exit the BIOS settings menu and boot back into the Windows system.
Conclusion
That’s it. This is how you can enable TPM 2.0 on a Gigabyte motherboard with AMD-based processors. TPM 2.0 is required by Windows 11 in order to protect you from hackers and other security threats by integrating an additional layer of safety and security into the system. Now your system is ready for the Windows 11 operating system.
I hope this article was helpful to you. However, if you run into any issues during the process, please let us know in the comments section below. We are always willing to assist you.