Windows Security is the default security tool for Windows 11 devices. It acts as an anti-malware or antivirus tool for your devices. Also, come with ransomware protection for your device. It keeps your PC safe from numerous threats.
To use this application, first, you have to know how to open Windows Security. Here, we will discuss how you enable Windows Security in Windows 11. You can also check our guide on; how to fix high CPU usage in Windows 11.
How to Check if Windows Security is Running?
Sometimes Windows Security is already running in the background on your Windows 11. In such a case, you can check whether Windows Security is on/off.
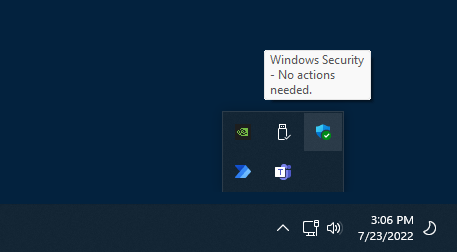
To check, click on the notification area along the taskbar. You should find a small icon that looks like a castle wall. If you get a tick, that means Windows Security is running. If off, the icon will appear with a cross (×) in the tray. Also, if the application is on, you need not take any steps.
Note:- You can follow the guide to explore the features of Windows Security and how you can enable them.
How to Enable Windows Security in Windows 11
Now, let us discuss how we can enable Windows Security on Windows 11. Do you know? Windows Security is also available on Windows 11. No matter whether you have Windows 10 or Windows 11, activation is the same.
Note:- To use/enable Windows Security, you have to disable/uninstall third-party antivirus software from your system.
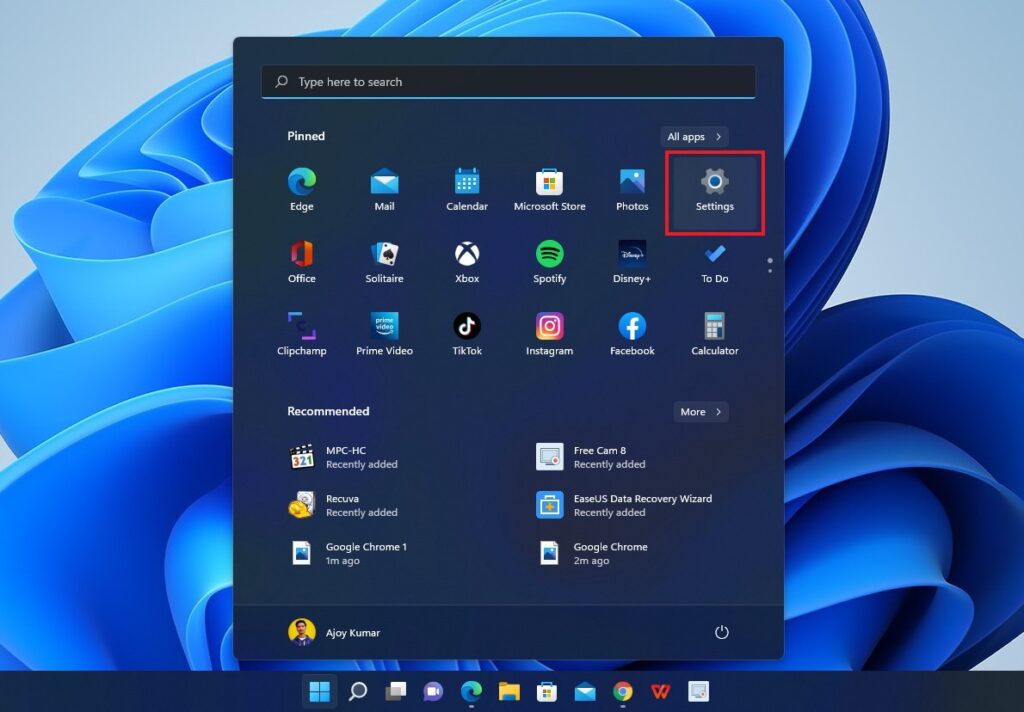
Step 1: On Windows 11, we get a centred taskbar. Here, click on the windows icon to open the “Start Menu” and click on “Settings.”
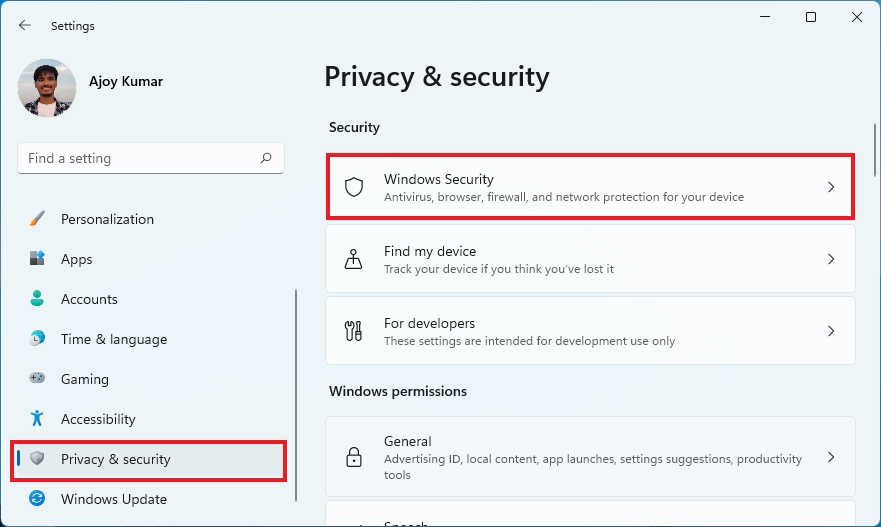
Step 2: Settings window will appear. Here, click on the “Privacy & Security” tab from the left panel of the Settings window. Then, select the “Windows Security” options present to the right of your screen.
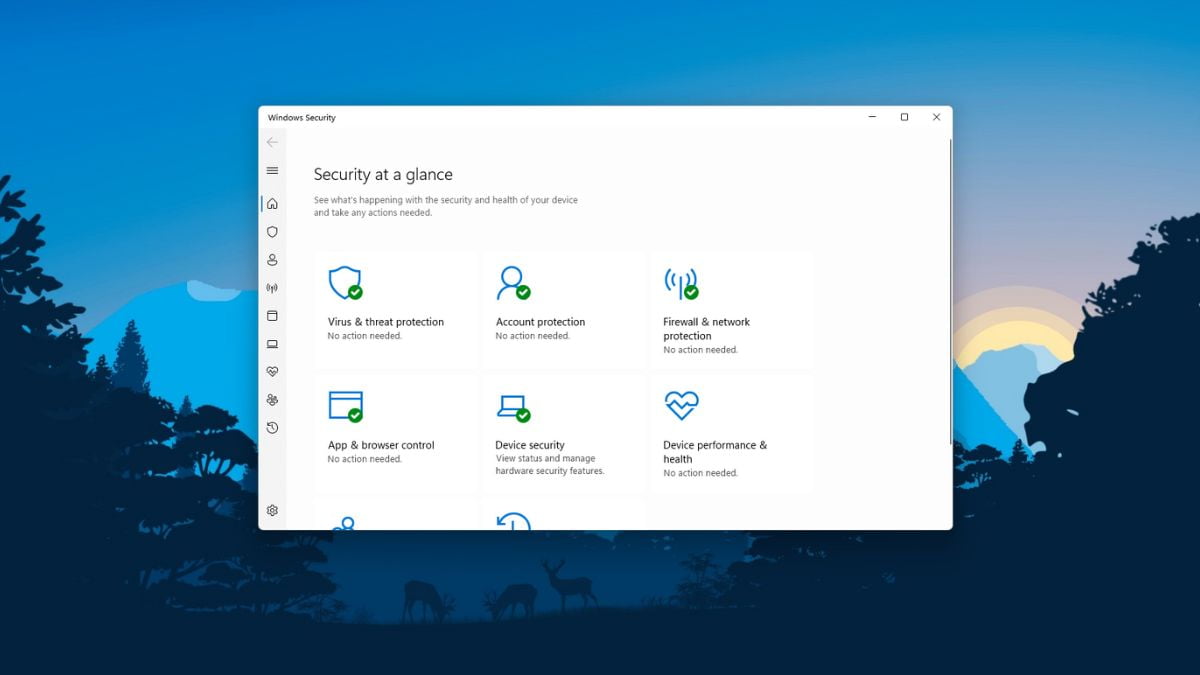
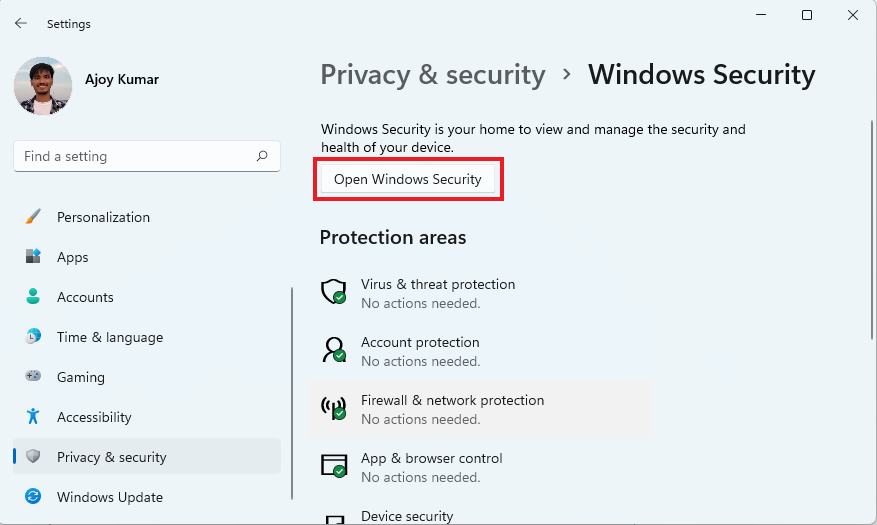
Step 3: Here, you will find the option to open Windows Security. It is your home to view and manage the security and health of your device. To open it, click on “Open Windows Security.”
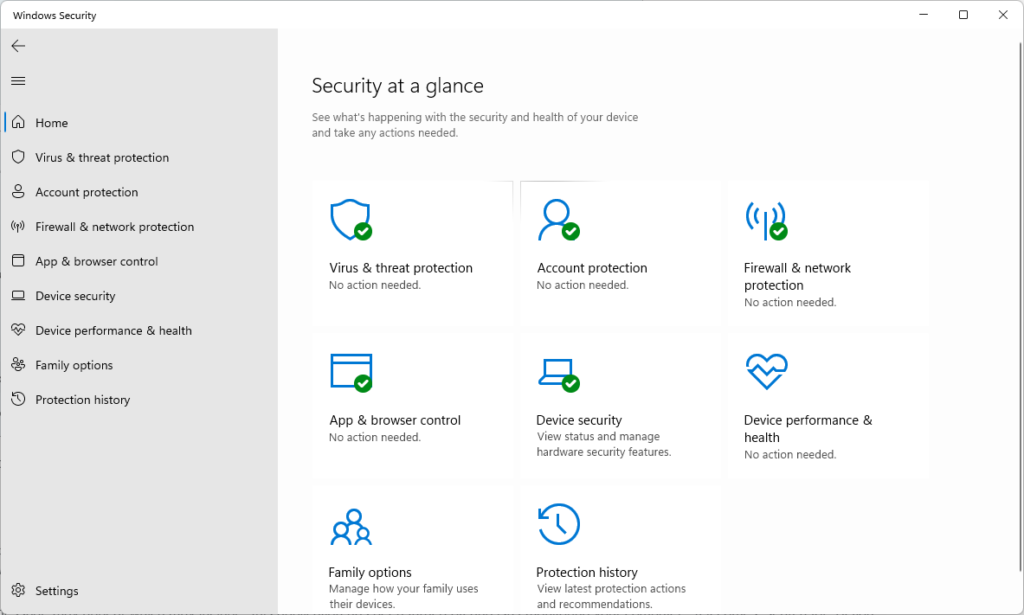
Step 4: That will open the Windows Security app. You will see the various protection that the site provides and the status.
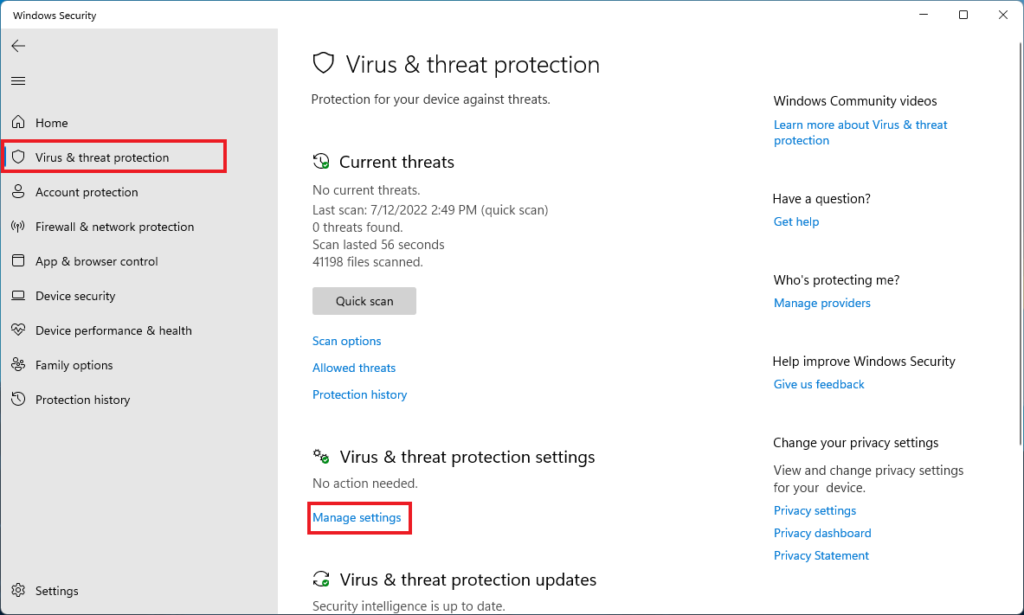
Step 5: To turn on the virus and threat protection on your Windows 11, click on the “Virus & Threat Protection” option. Then, click on the “Manage Settings.”
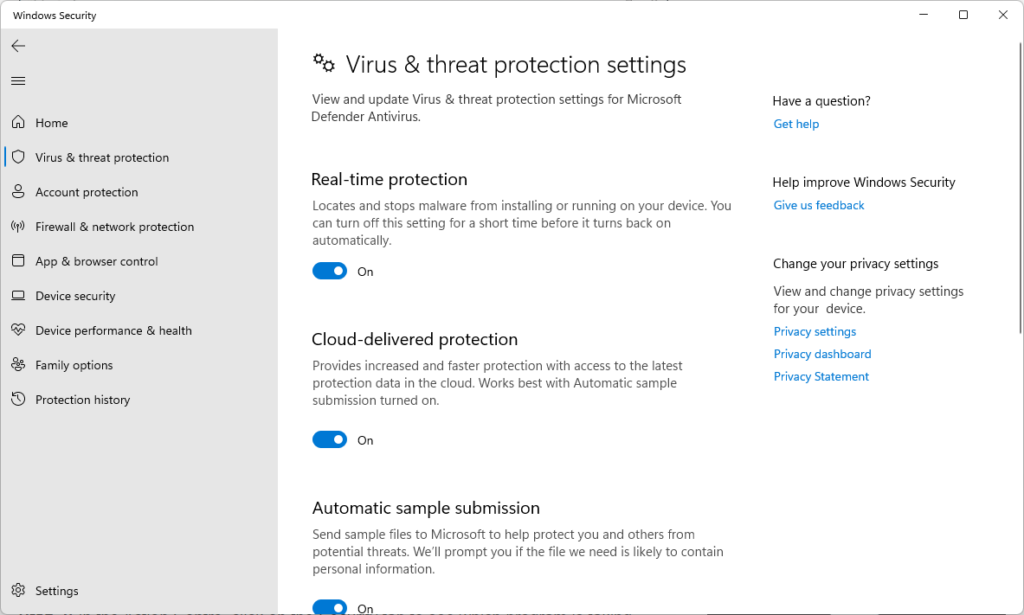
Step 6: Here, go through the protection option and turn on the toggle. Our suggestion would be to turn on all the options, don’t turn off Real-time protection for better blocking.
Conclusion
The process of enabling and use of Windows Security is so simple. We have mentioned it in detail in this article. You don’t need any third-party application to secure your device. You can also check our detailed guide on; how to automatically skip bundled adware in Windows 11.
I hope this article was helpful to you. If you liked the article, share it with your friends and family. If you have some suggestions, do not hesitate to leave them in the comments section below.