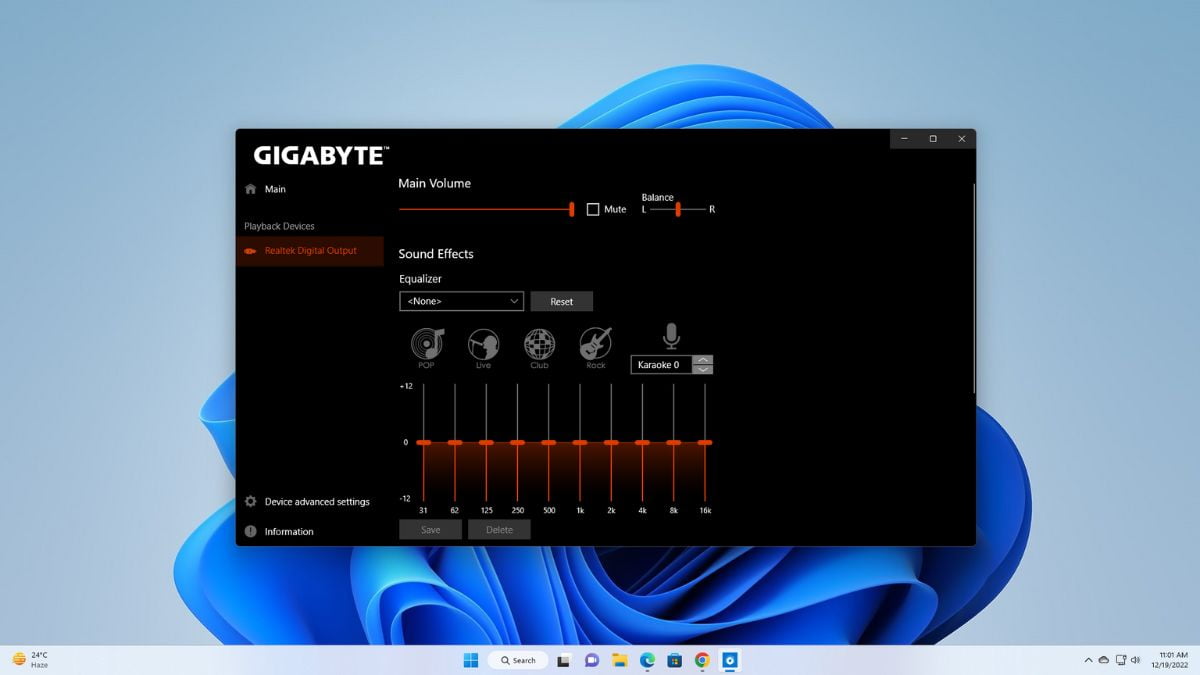
Realtek HD Audio Manager is a software tool that manages high-definition audio on Windows 11 desktops or laptops. It is usually pre-installed on most Windows computers. However, some users have reported that the audio manager icon is missing from their taskbar, and they are unable to control the sound system.
In this article, we’ll discuss effective methods to make the Realtek HD Audio Manager available on your system. After following these methods, you will be able to control your Windows sound system effectively.
How to Fix Realtek HD Audio Manager Missing
There may be many reasons for missing Realtek HD Audio Manager. Follow the guide till the end to fix all the issues related to Realtek.
1. Enable Realtek HD Audio Manager on Startup
If you have disabled the Realtek HD Audio Manager from automatically starting every time you reboot your system, you may encounter the issue of missing Realtek HD. However, you can easily enable it. To do so, follow the steps below:
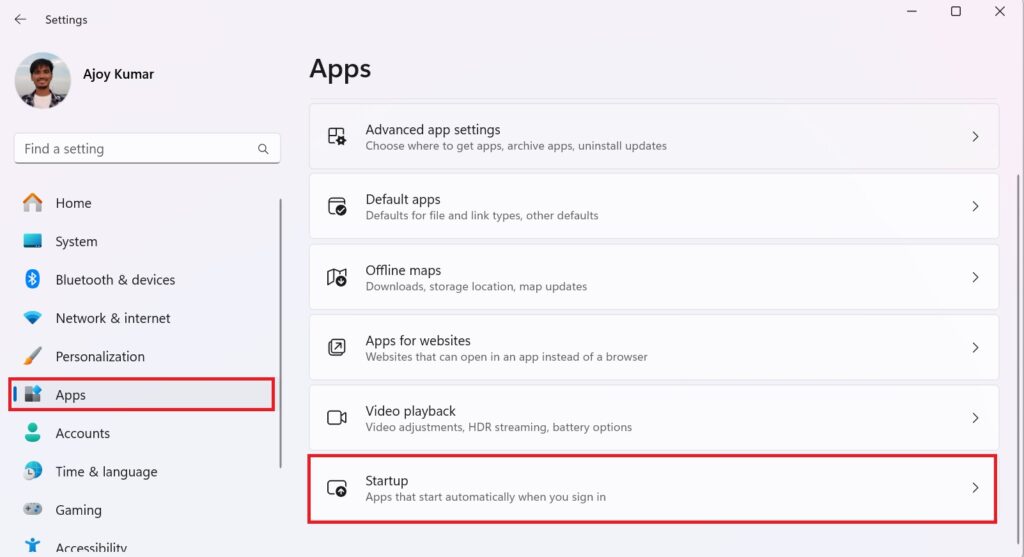
1. Press Win + I to open Settings.
2. Click on the Apps tab and select the Startup option.
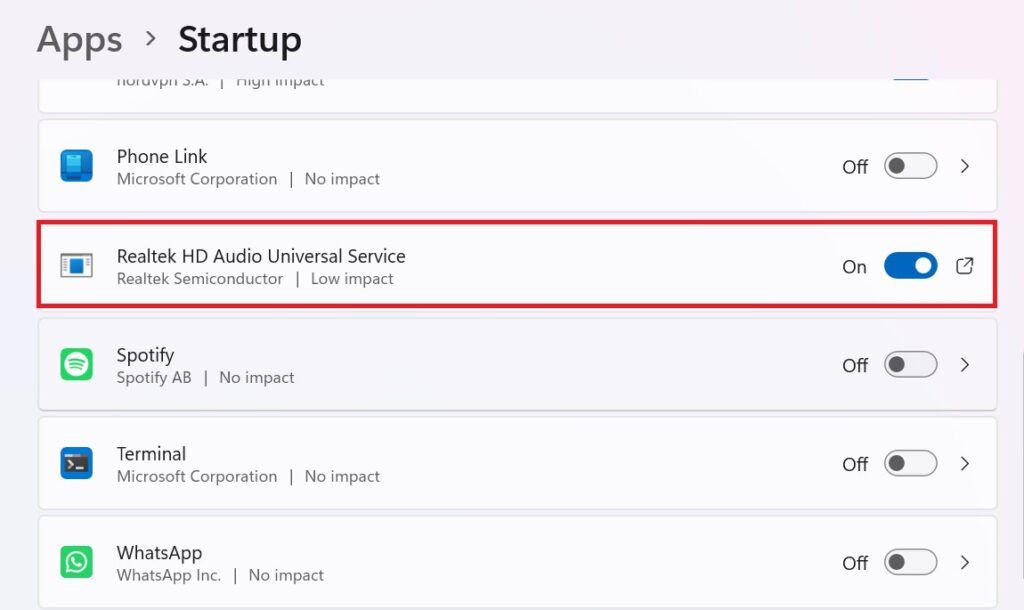
3. Here, look for Realtek HD Audio and turn on the toggle to enable it during the startup.
4. After that, restart your device to apply the changes.
2. Update Sound Driver
If enabling Realtek HD Audio Service on startup did not fix the missing Realtek Audio Manager issues, you can install and update the audio driver from the device manager.
For that, follow the below steps:
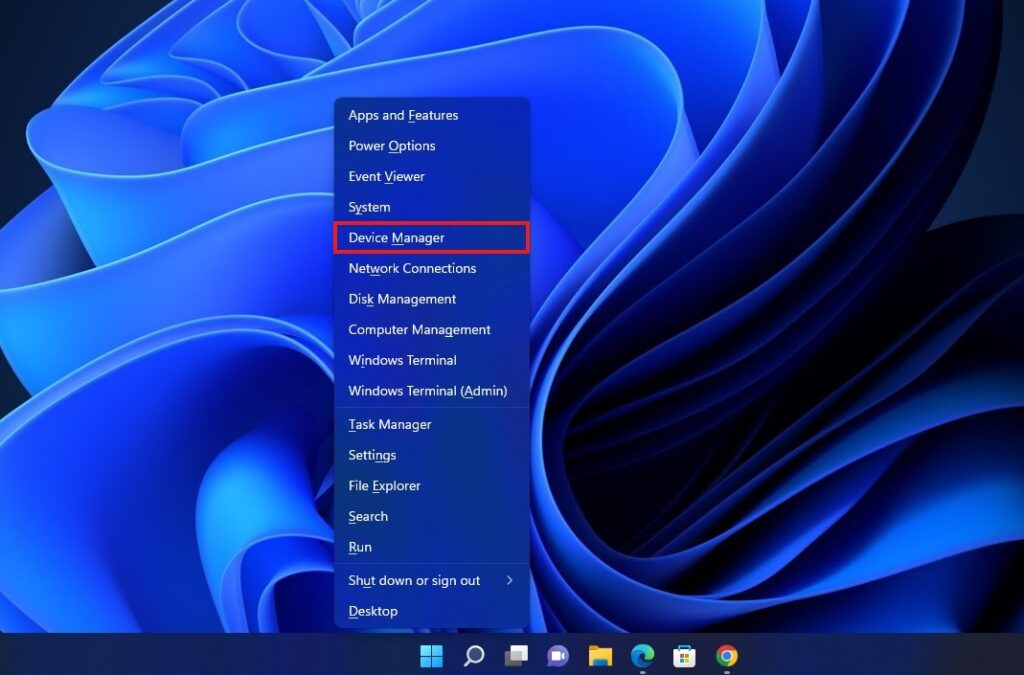
1. Press the Win + X together on your keyboard to open a context menu. Alternatively, right-click on the Start Menu icon.
2. In that context menu, select the Device Manager option.
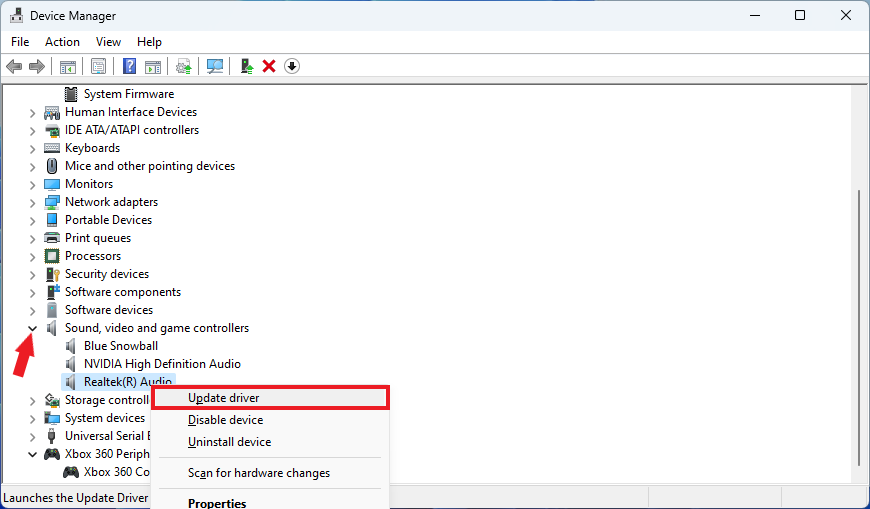
3. Here, you will get a list of all the devices installed on your Windows 11. Select the Sound, Video and Game Controllers option.
4. Now, right-click on the Realtek Audio driver and select the Update Driver option.
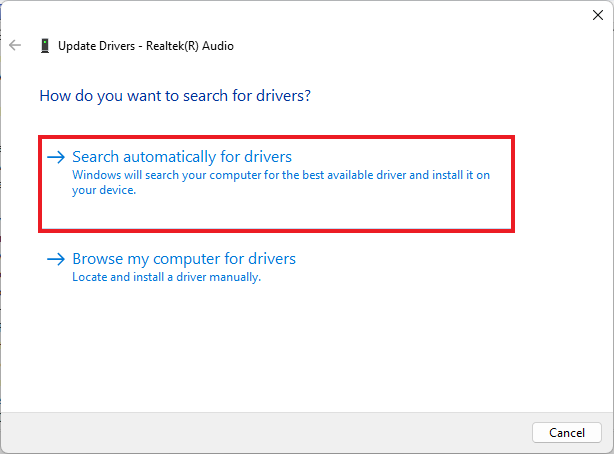
5. On the next window, click on Search automatically for drivers. It will check for the latest driver from the internet and install it on your Windows 11 system.
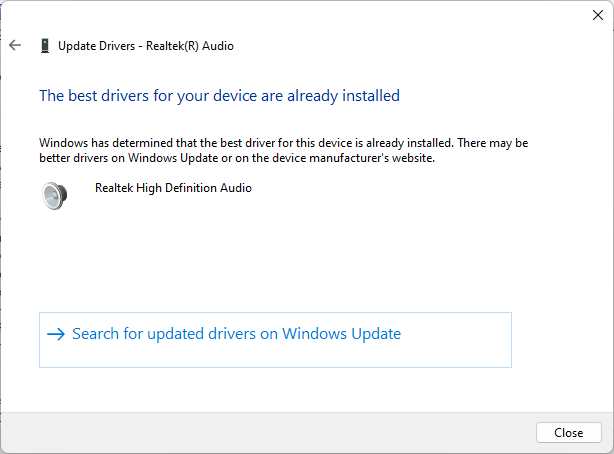
6. Once the installation is complete, click Close and restart your device.
Note
If you are having a problem updating the Realtek Audio driver, you can search for updated drives on the Windows Updates.
3. Check for Audio Driver Update
If you have reinstalled your Windows 11 or upgraded to the latest version, there may be a chance of missing Realtek Audio Manager. You can simply fix it by checking for audio driver updates on the Windows update section.
For that, follow the following steps:
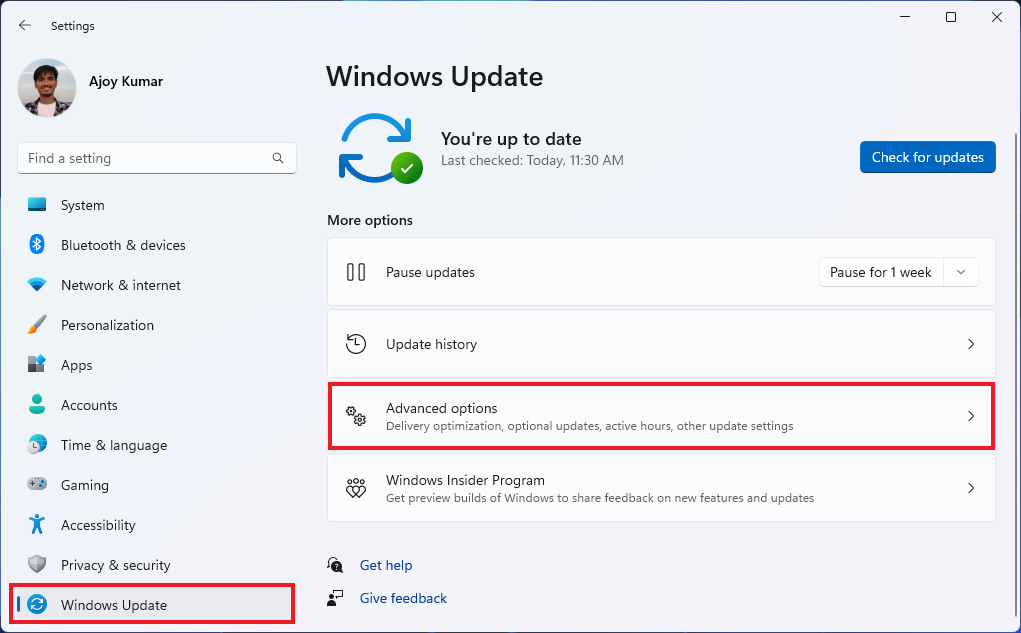
1. Open the settings application. For that, you can use Win + I shortcut key.
2. It will bring up the settings window. Click on the Windows Update tab and select Advanced Options to check if there is any driver update.
3. In the Advanced Options section, scroll down and click the Optional Updates option to check for updates.
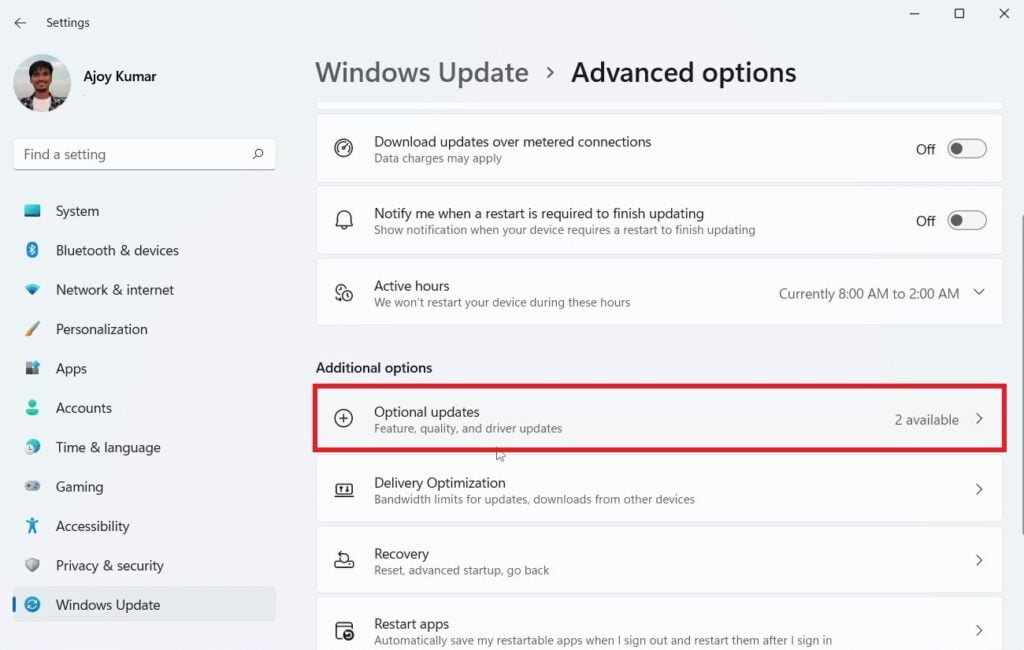
4. You should get a Driver Updates section if you have any pending driver updates. Select the driver and click on the Install button to install it.
5. Once you have installed the update, you need to restart your Windows device.
6. Now search the Realtek Audio Manager on the Windows search bar and open it to manage audio on your system.
Note
You will see Realtek Audio Console on AMD systems and Realtek HD Audio Manager on Intel systems.
4. Reinstall Realtek HD Audio Manager
After following all the methods, if you still have the same issues, then there might be corrupted Realtek HD Audio files.
To fix it, you can reinstall the driver. To do so, follow these steps:
1. Open Device Manager.
2. Expend the Sound, Video and Game Controllers option.
3. Now, right-click on Realtek HD Audio driver and select Uninstall option
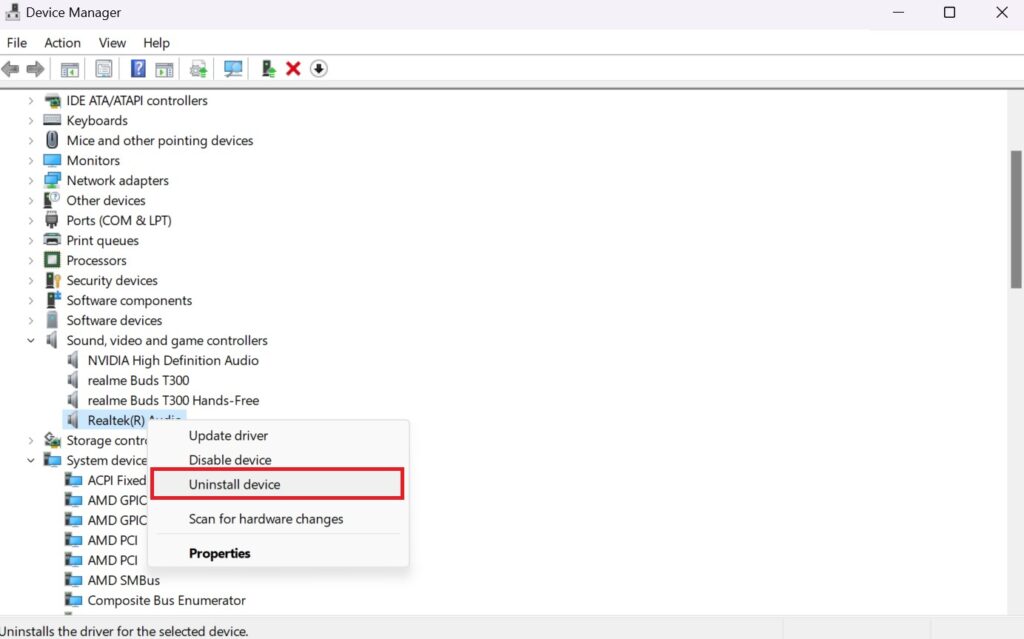
4. After that, you will get a confirmation window. Here, click on Uninstall button to delete the driver software for this device.
5. Finally, restart your device, and the Windows system will automatically reinstall the driver. However, if the driver is not installed, you can download the latest version of Realtek HD Audio from the official website and install it on your device.
Conclusion
That’s it; this is how you can fix Realtek HD Audio Manager missing on Windows 11. However, if the Realtek HD Audio driver is missing from your system, then you will not get the option to fix the manager missing issues, as you don’t have the driver installed on your system.
In this case, you can check our guide on how to download Realtek Audio Driver for Windows 11. I hope you found this guide helpful. However, if you have any doubts or suggestions, please leave them in the comments section.