You might be one of those who have just come across SSD read-only mode issues when trying to install new applications or run software on your SSD partition. In such a situation, SSD might refuse to let you perform any operations that are required to write data to the drive displaying the error message that SSD is write-protected.
In general, when SSD read-only mode occurs, you will be unable to modify contents or save new files on this device. If you want to edit or write new data to a read-only SSD drive, you must remove the read-only attribute on it and make the SSD writable. So, here we are going to discuss how to fix the SSD Read-Only error in Windows 11.
How to Fix Read-Only Error in SSD on Windows 11
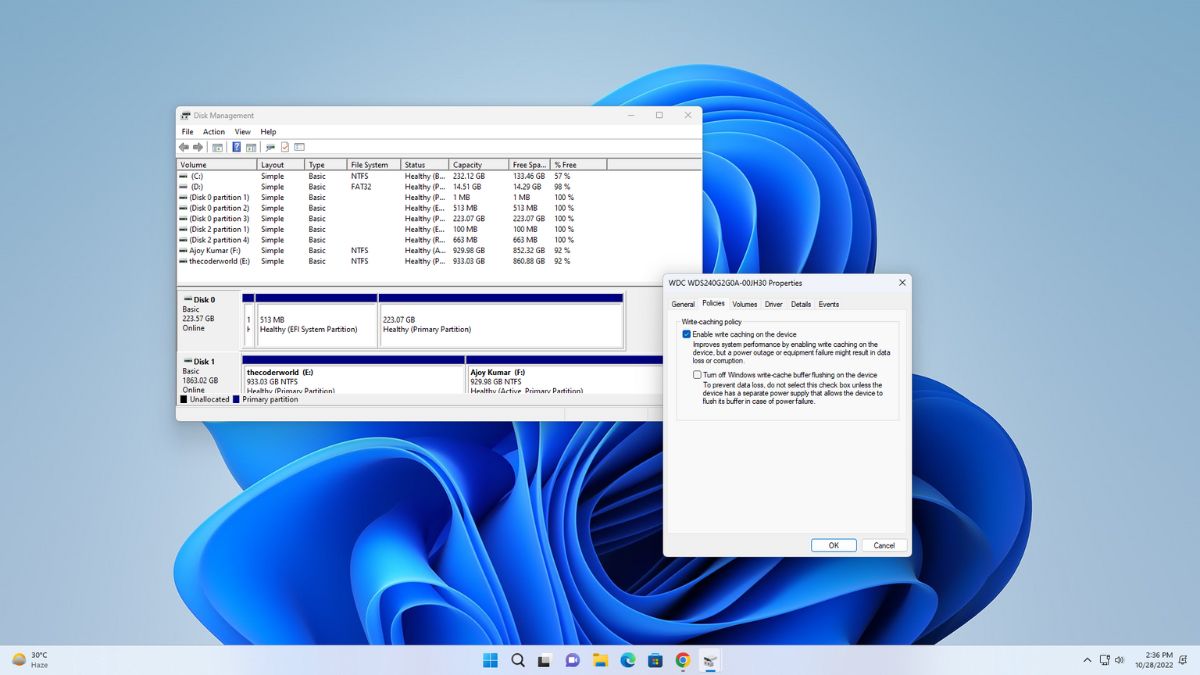
First, let us see why SSD is showing write-protected or SSD works in read-only mode. The storage space of over-provisioned SSD drains and leads to the SSD read-only mode problem. When SSD exceeds its lifetime writes, it creates trouble.
If you are also bothered by the SSD read-only issue, don’t worry, here are some methods by which you can fix read-only errors in SSD.
1. Modify Registry Key
An effective way to remove the SSD read-only issue is to edit the registry key. You can follow the step-by-step guide to solve the problem.
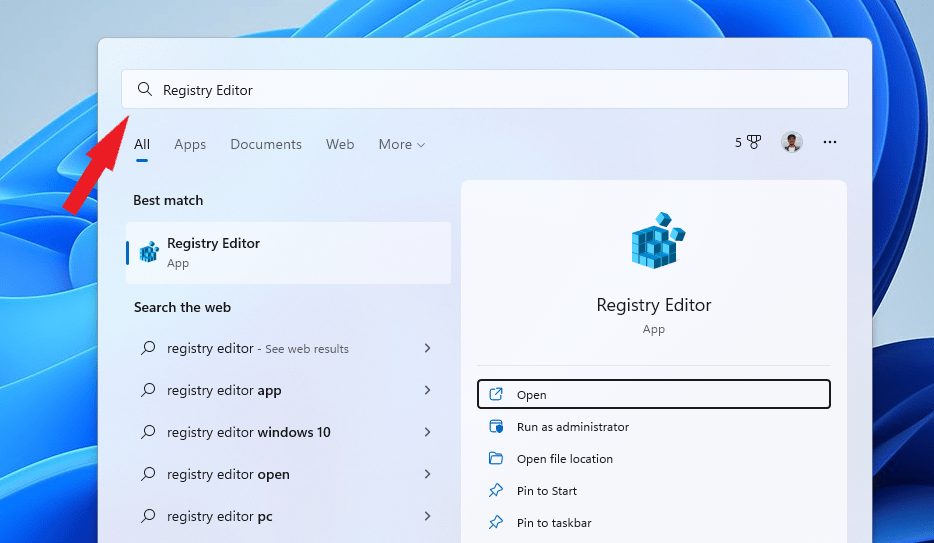
1. Press Win + S to open Search. Then type Registry Editor in the box and select the app.
2. A pop-up window will appear. Now copy the following path and paste it to the address bar.
Computer\HKEY_LOCAL_MACHINE\SYSTEM\CurrentControlSet\Control\StorageDevicePolicies
3. Double-click the WriteProtect Key from the right pane to open its properties.
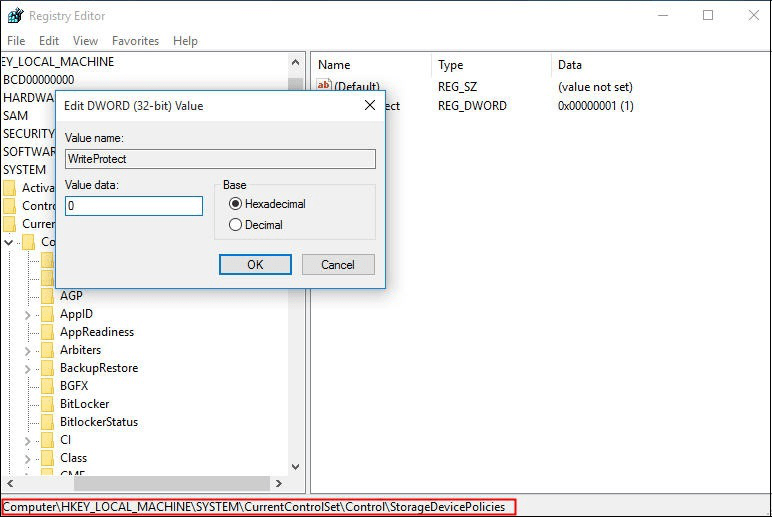
4. After that, change the Value data from 1 to 0.
Note
If you don’t find StorageDevicePolicies under Control. Right-click Control and select New> Key. Now name the folder as StorageDevicePolicies. Next, right-click on the right blank space and go to New> DWORD (32-bit) value. Name it with Write Protect, then right-click on it and select Modify to change the Value data to 0.
2. Run CHDSK to Fix Read Only Error
If there are bad sectors on your SSD, you may also encounter problems related to SSD is read-only.
In this case, you can run CHDSK (check disk), a built-in utility in Windows, to check and repair disk errors.
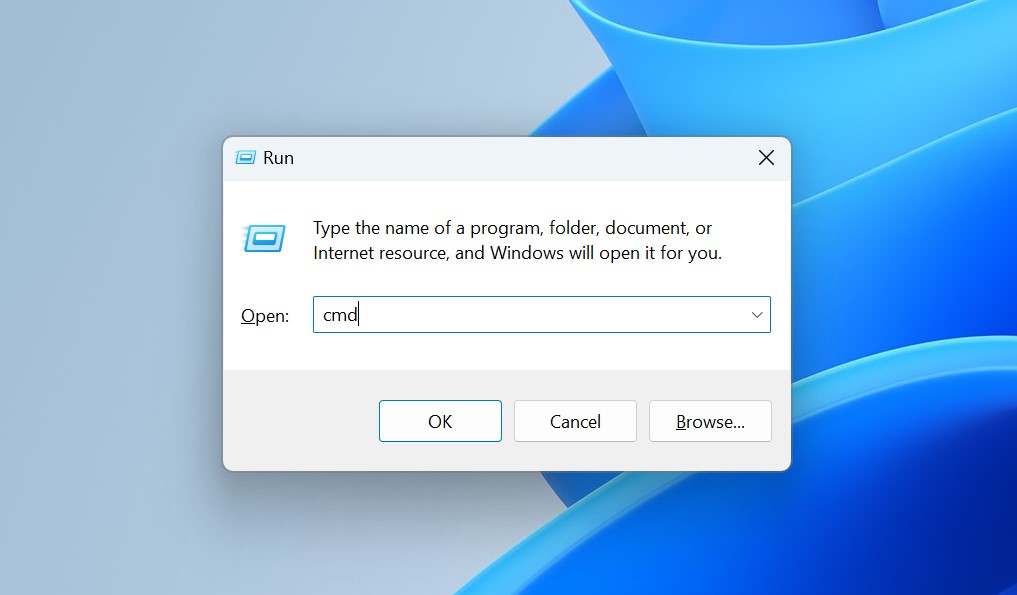
1. Press Win + R to invoke the Run window.
2. Then input cmd and press Shift + Ctrl + Enter to run Command Prompt as administrator.
3 Type the command
chkdsk #: /f
Note
# is the drive letter of your problematic disk.
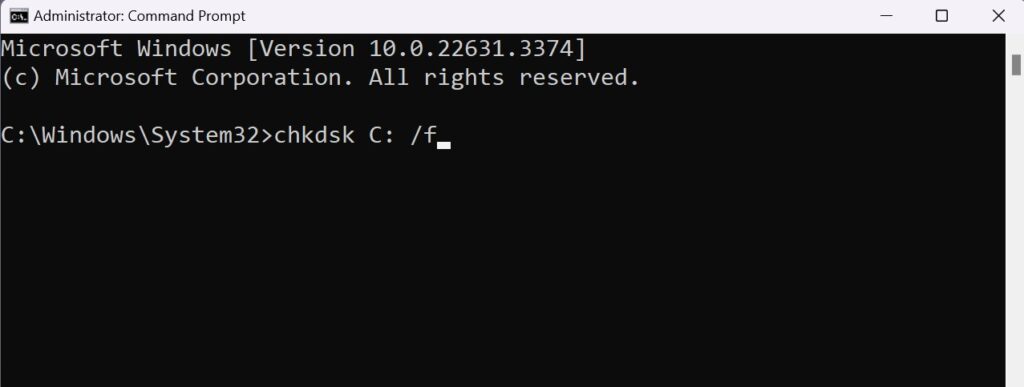
4. After that, restart the computer and then you can check if your SSD runs without any problems.
3. Remove SSD Read-Only Issue
If your SSD is read-only, you can use Diskpart to solve the problem. You should be careful when you perform the operation because any mistakes may bring damage to your disk.
Here is how to remove the SSD read-only issue:
1. Open Command Prompt and run it as administrator. To open the command prompt click on the windows search icon and search for the command prompt.
2. In Command Prompt, type the following command and press Enter.
diskpart
3. Input the following commands and remember to press Enter after each command:
List disk
Select disk *
Note
* refers to the drive number of your read-only SSD
attributes disk clear readonly
By performing the above-given methods you can easily solve SSD read-only mode problems.
Conclusion
That’s it; this is how you can fix SSD is read only mode error in Windows 11. However, it is recommended to back up your important data from the drive before you move on to fixing the SSD read-only mode error.


I am truly thankful to the owner of this web site who has shared this fantastic piece of writing at at this place.
It’s kind to know that this guide helped you.