Does your Windows 11 machine fail to show the dual boot menu during startup? Here’s how to fix it. Due to incorrectly configuration, your system might not show the operating system selection menu or the Windows Boot Manager while booting up.
You can fix this issue by tweaking a few Windows settings. So, here are a few ways to fix the missing dual boot menu on your Windows system. You can also check our detailed guide on; how to create a bootable Ubuntu 22.04 LTS USB Drive.
How to Fix the Dual Boot Option Not Showing in Windows 11
There are several reasons why the dual boot option is not showing during the startup. Maybe the boot menu is not activated, or you have enabled fast startup directly to the default operating system without offering any boot options. Here is how you can fix it.
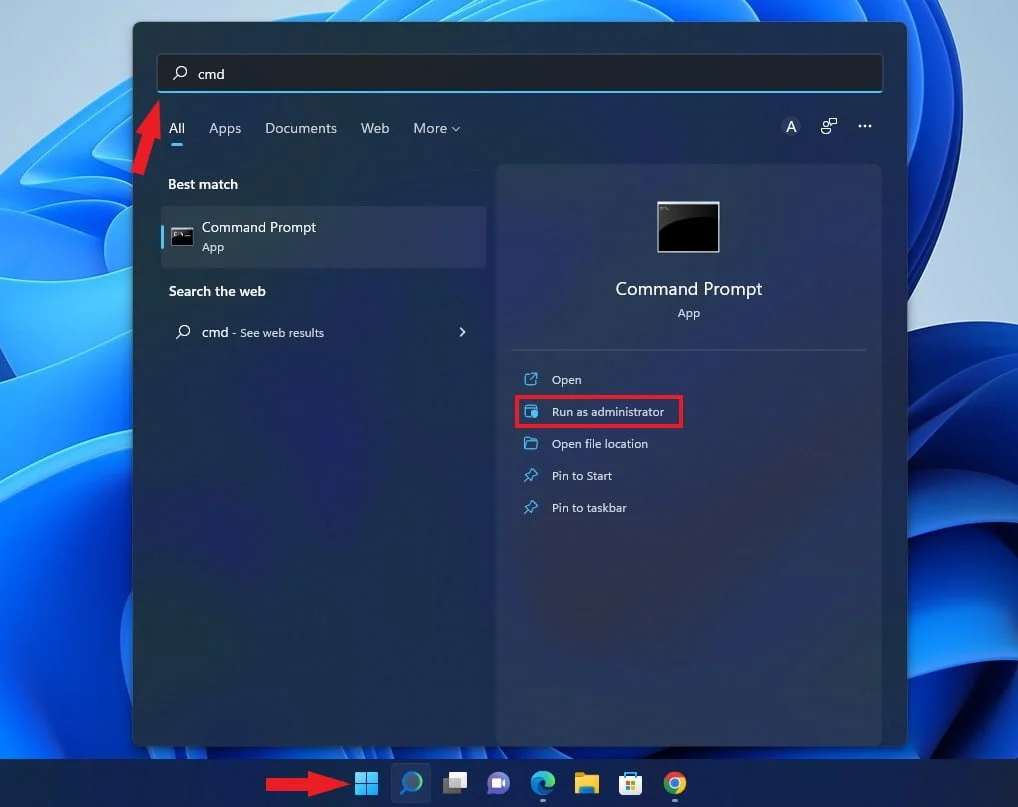
Step 1: Firstly, enable dual boot on your Windows 11 system. For that, open “Command Prompt” as Administrator.
Step 2: Here, in the Command Prompt window. Type the command listed below and hit the [Enter] key.
bcdedit /set {bootmgr} displaybootmenu yes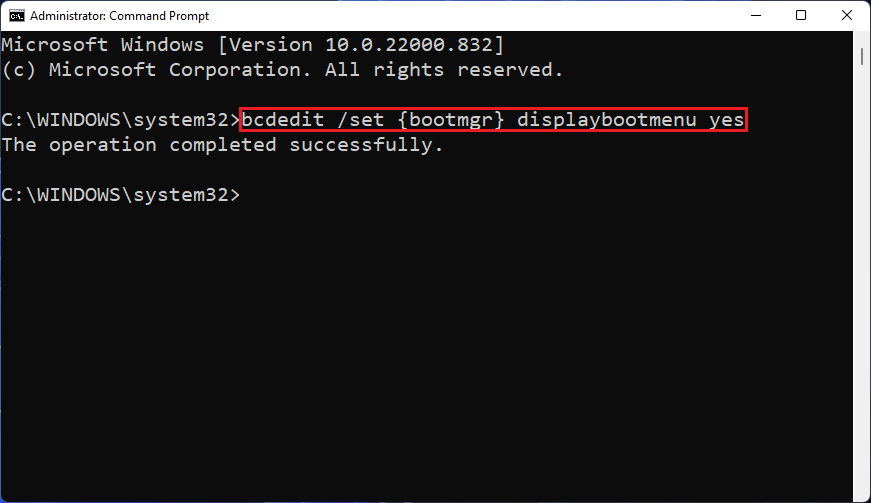
Step 3: Upon successful execution, you will see the “The operation completed successfully“ message in the command prompt. That means you have enabled dual boot on your Windows 11 system.
Note:- If you want to deactivate or hide the boot menu, open the Command Prompt as administrator and run this command: bcdedit /set {bootmgr} displaybootmenu no
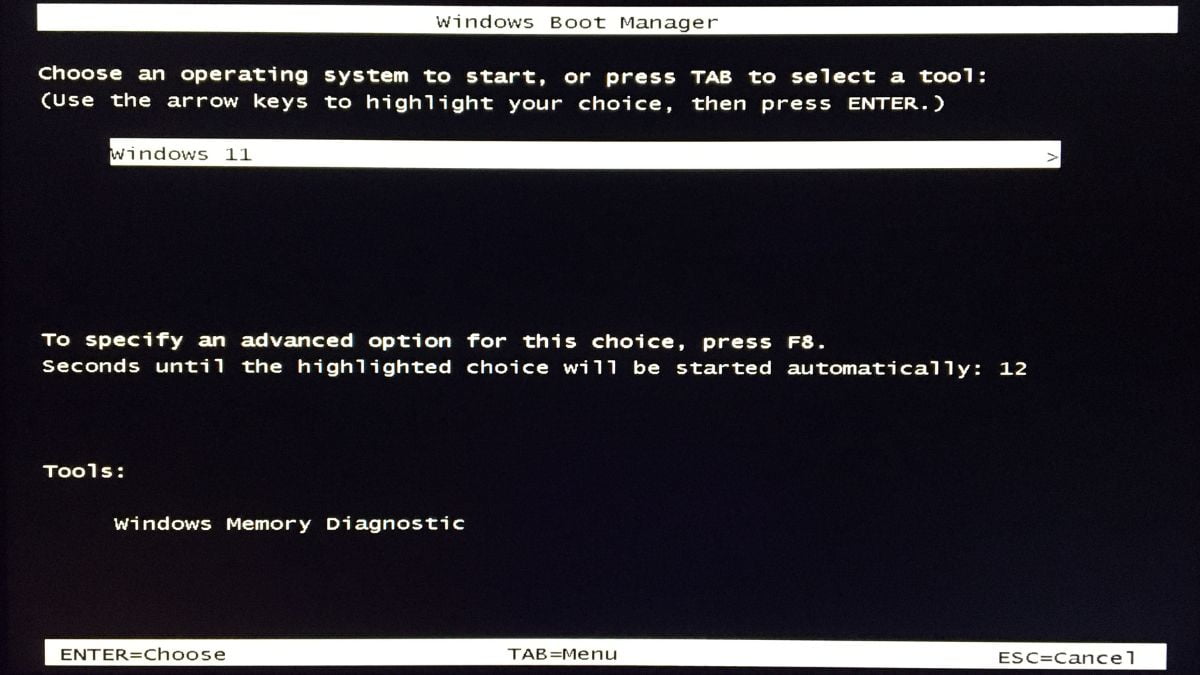
Now you should see and dual boot menu to select your prefered operating system to start. If you want, you can also set a default operating system; if non of the options are selected.
How to Configure the Default Operating System
Windows 11 also allow you to select the default operating system to boot. If none of the operating systems are chosen at a specific time, your system will automatically boot into the default operating system.
Here is how you can configure the default operating system. For that, follow the following steps:
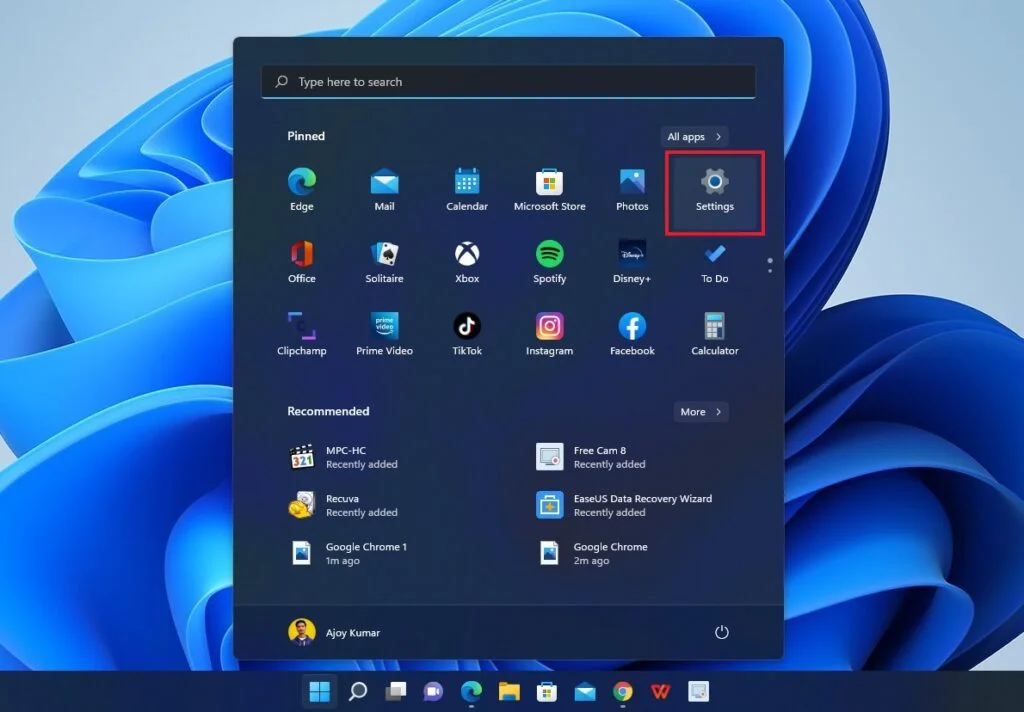
Step 1: On Windows 11, we get a centred taskbar. Here, click on the windows icon to open the “Start Menu” and click on “Settings.”
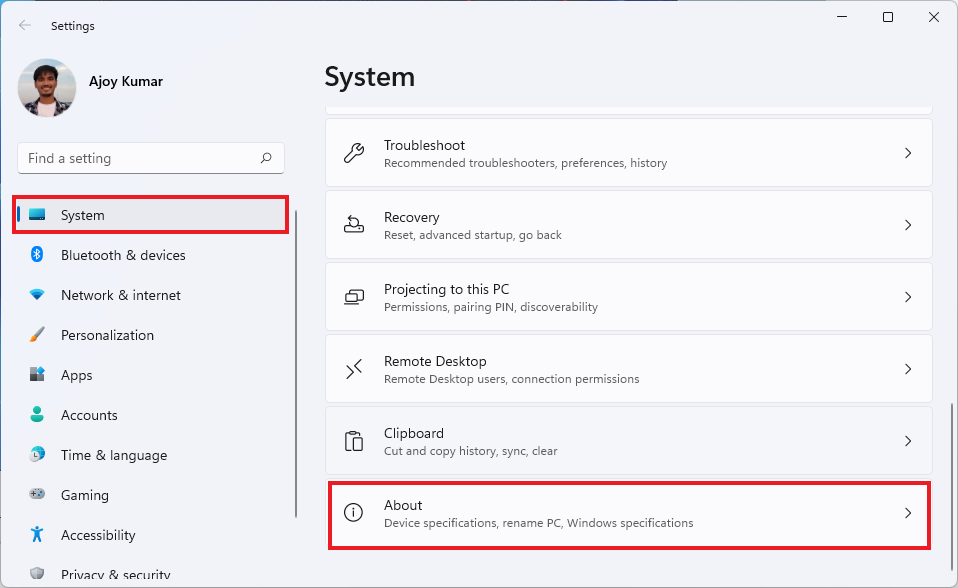
Step 2: Next, click on the “System” tab from the left panel of the Settings window. Then, look for an option called “About” and click on that option present to the right of your screen.
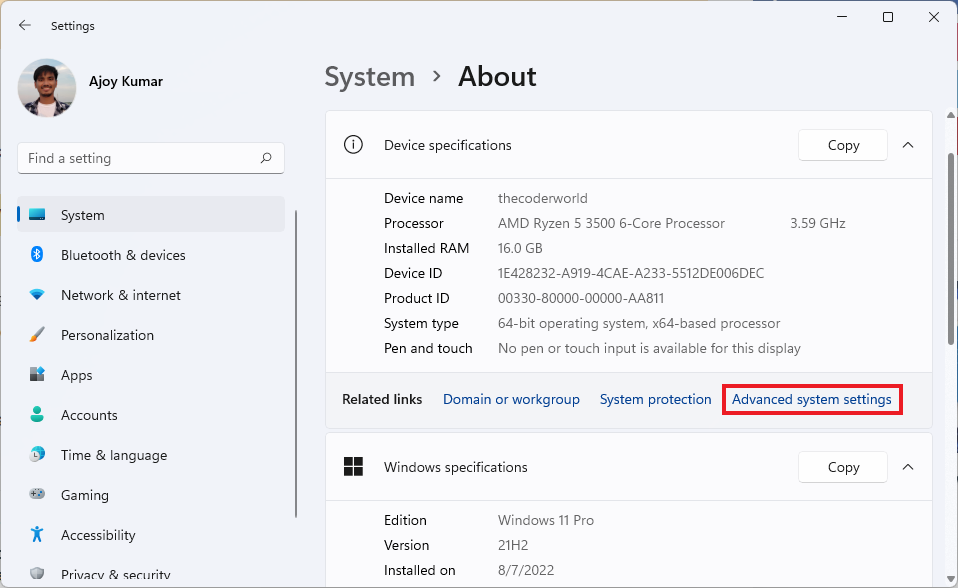
Step 3: Now, you will get all your device specifications. Click on the “Advanced system settings” option; to access the “System Properties.”
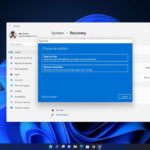
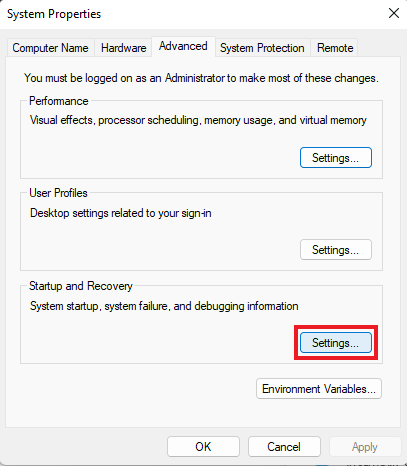
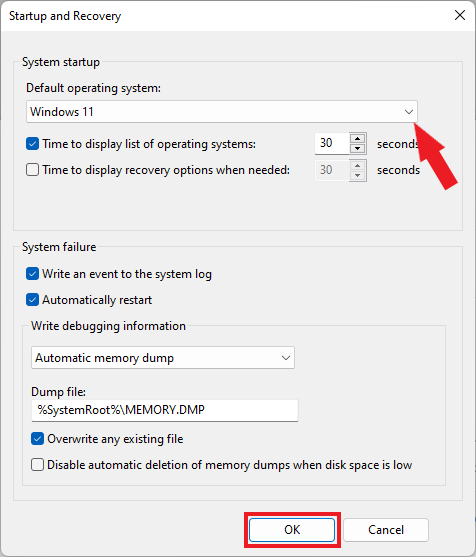
Step 4: On the system properties window, you will get the “Startup and Recovery” section; click on the “Settings” option to change the default operating system.
Step 5: Here, from the drop-down menu, select the default operating system. After that, set the time to display the list of operating systems to 30 seconds. Then click on “OK” to confirm. This setting means your computer will show the boot menu for 30 seconds. Once this time elapses, it will load the operating system you selected as default.
To check, “Restart” your computer and wait for the boot menu to appear. Next, choose your preferred OS using the arrow key and hit the [Enter] key.
Conclusion
That’s it; this is how you can fix the dual boot option not showing in Windows 11. You can also check our detailed guide on; how to reset Windows 11 without losing data.
I hope this article was helpful to you. If you liked the article, share it with your friends and family. If you have some suggestions, do not hesitate to leave them in the comments section below. We will add that to the guide.