Here in this article, we are going to discuss how to increase RAM frequency on a Gigabyte motherboard. If you have a Gigabyte motherboard installed in your Windows system, you can easily increase or overclock your RAM frequency.
Even if you have 3200 MHz frequency RAM, it will still be limited to 2133 MHz by default in Windows for various reasons. However, we are going to overclock it without damaging our system. If you are looking to overclock the CPU on a Gigabyte motherboard, you can follow the linked guide.
How to Increase RAM Frequency on Gigabyte Motherboard
Before you increase the RAM frequency on your Gigabyte motherboard, make sure to check the base RAM frequency supported by your RAM module.
To check your RAM frequency, open Task Manager and navigate to the Memory section under the Performance tab. Here, you will find your base RAM frequency. Alternatively, you can check out our guide on how to check RAM speed on Windows 11.
Once you know the highest frequency that your RAM module supports, you need to download some utility tools for the Gigabyte motherboard to increase the RAM frequency.
For that, follow the following steps:
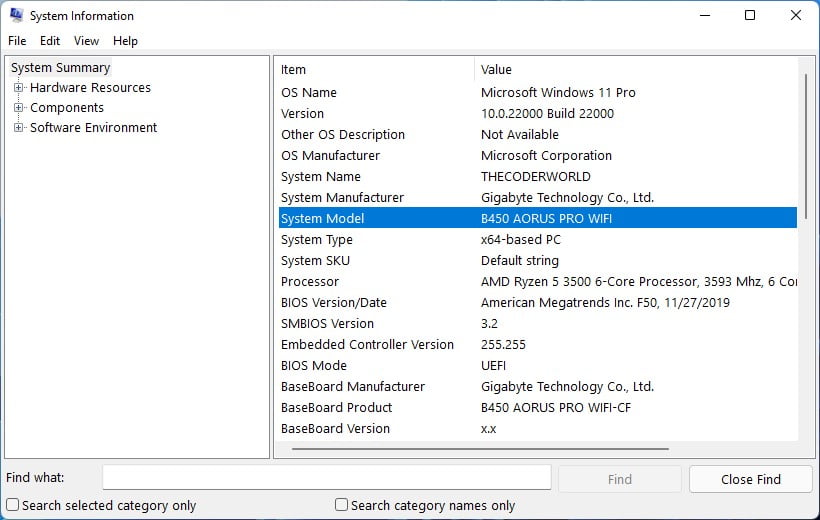
1. First of all, you have to know your gigabyte motherboard model number. For that, search for System Information on the search options and open it.
2. Click on the System Summary option and look for the motherboard’s model number.
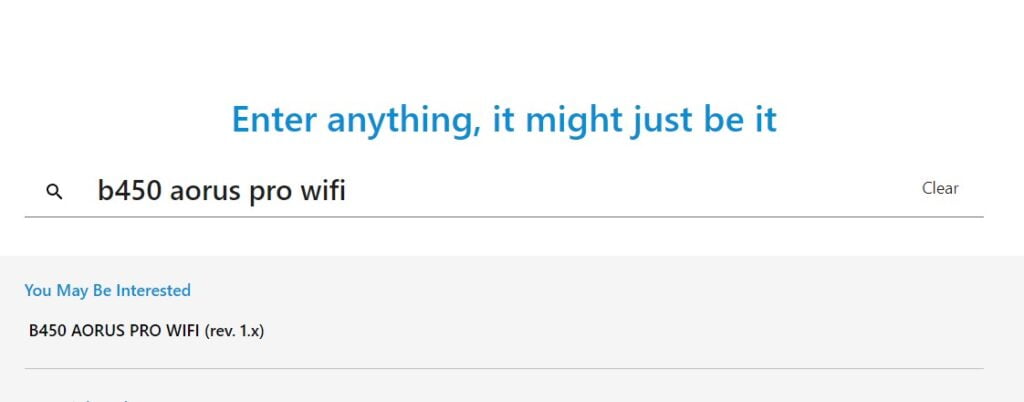
3. Now, search for the gigabyte motherboard model number on the Gigabyte website.
4. From the search result, select the Motherboard and click on the Support option for the download page. Here, you will find all the drives and the utility tools for that Gigabyte motherboard.
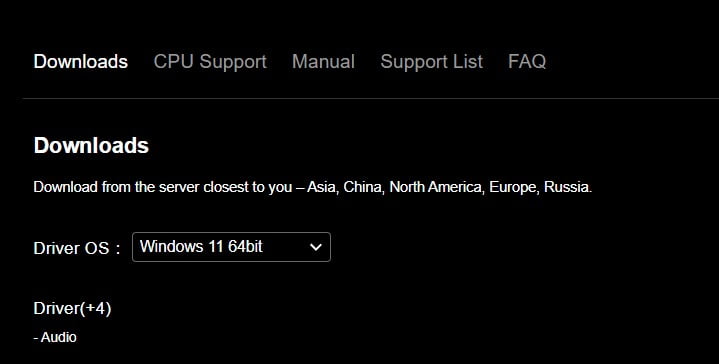
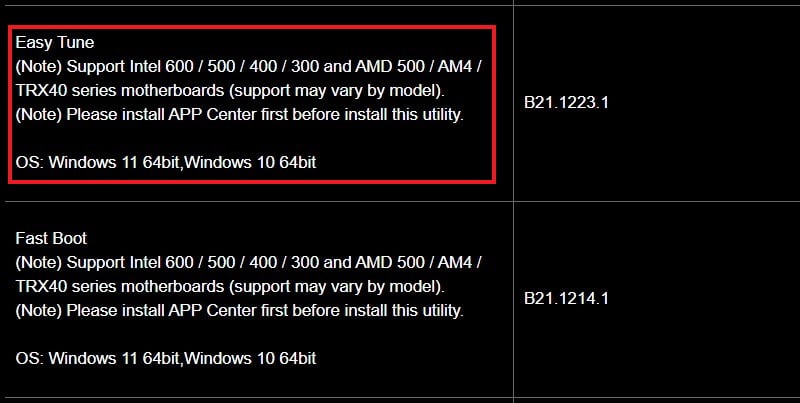
5. Now, click on Utilities and download the Easy Tune utility tool. Once, the download is complete, install it on your Windows 11 system.
6. After that. restart your computer and open the Easy Tune application.
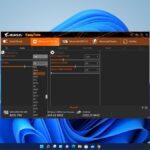
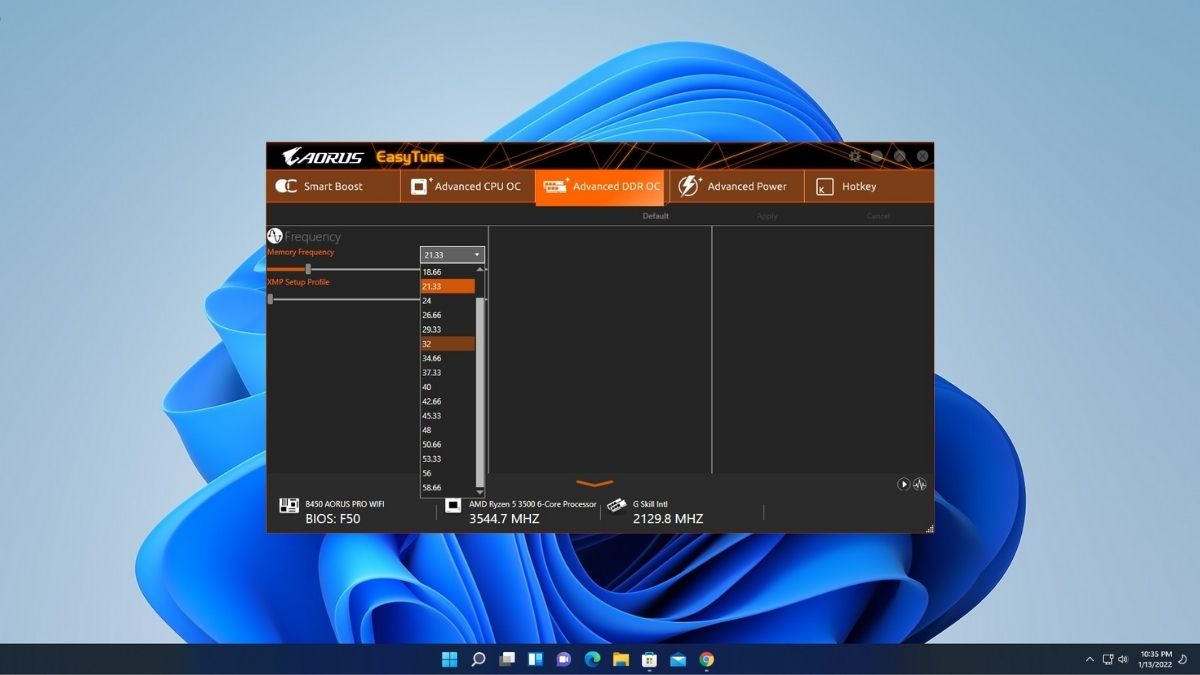
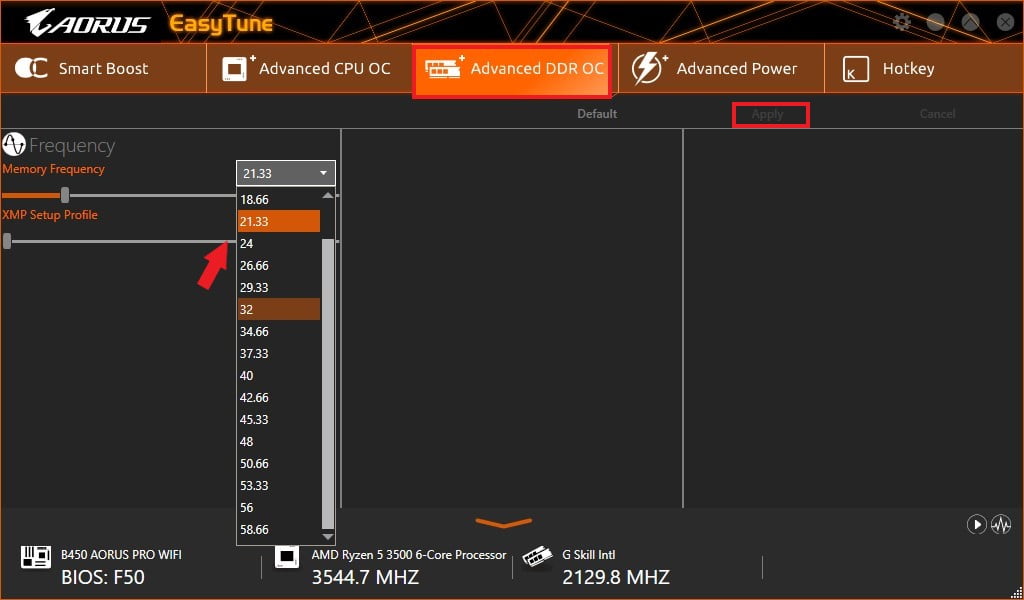
7. Now, to increase/overclock your RAM, click on Advanced DDR OC, and from the drop-down menu next to memory frequency, select the highest frequency that your RAM module can support.
8. Finally, click on the Apply button to save the changes.
Conclusion
That’s it, this is how you can increase RAM frequency on Gigabyte motherboards without any complicated steps. However, if you are unable to do this on your Windows 11 operating system running on a Gigabyte motherboard, you might need to enable TPM 2.0. To do so, check out our guide on how to enable TPM 2.0 on Gigabyte Motherboards.