Have you recently purchased your first Arduino board and are eager to begin creating your own digital gadgets? Then you require some software to assist you in programming your Arduino board for that.
If you have a Windows 11 PC and the tools to connect your Arduino board to it, half of the battle is already won. Now, you need to install an IDE. Here, we will discuss; how to install and set up Arduino IDE on Windows 11 to control the Arduino board.
What is Arduino?
Arduino is an open-source electronics platform based on easy-to-use hardware and software. Arduino boards can read inputs – a light on a sensor, a finger on a button, or a Twitter message – and turn them into an output – activating a motor, turning on an LED, or publishing something online.
You can tell your board what to do by sending a set of instructions to the microcontroller on the board. You can use the Arduino programming language and the Arduino Software (IDE) based on Processing.
Arduino IDE (Integrated Development Environment) is a software application that is used to write, compile, and upload code to the Arduino board. The Arduino IDE supports languages like C and C++ using special rules of code structuring.
How to Install and Setup Arduino IDE on Windows 11
Now let’s discuss; how to download and install Arduino IDE on Windows 11. Also, we will discuss how to set up and use Arduino IDE. For that, you can follow these simple steps:
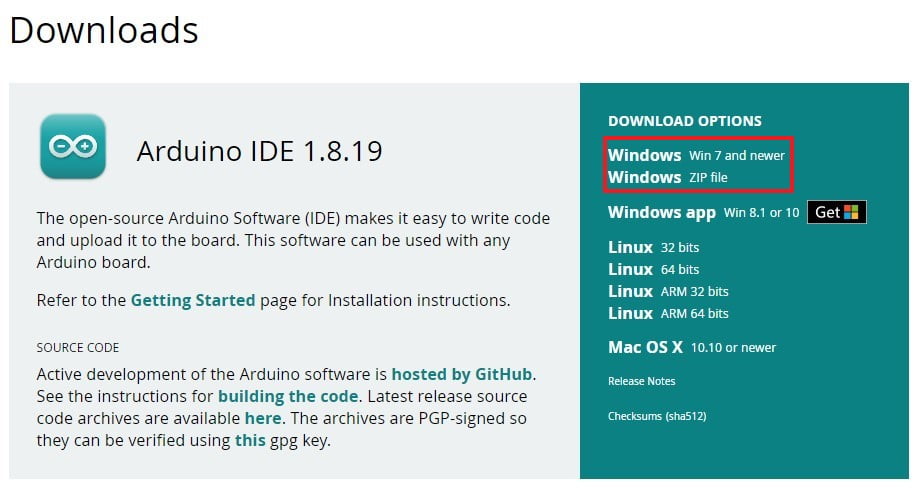
1. Visit the official website of Arduino to download the Arduino IDE.
2. Arduino IDE is available for all the major operating systems. Here from the download option, download the Windows installer file.
Note
You will also find the download link for the Arduino IDE Beta version. If you want to explore the latest version, you can download the beta version of Arduino IDE.
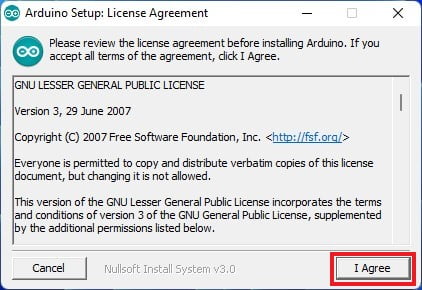
3. Now, after the download is complete. Open the installer file and read the license agreement before installing Arduino IDE.
4. Then click on the I Agree button.
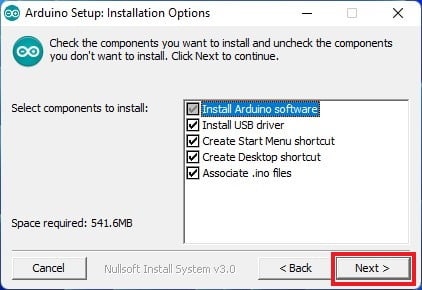
5. In the next window, you will find options to select the components you want to install. Select all the components you want to install.
6. Then click on the Next button to continue.
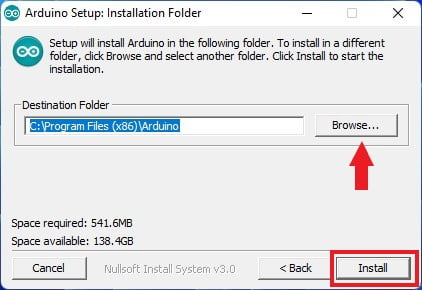
7. Now select the location where you want to install Arduino IDE by clicking the Browse option.
8. Or else; you can also install it on the default installation location and click the Install button.
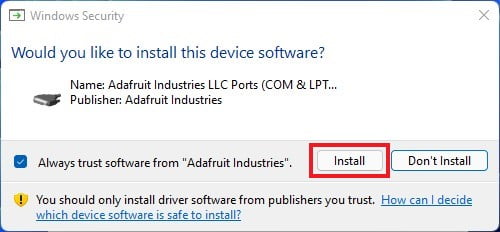
9. If you get a Windows Security window, click on Install to install the device software or device driver. After that, wait for the installation to complete.
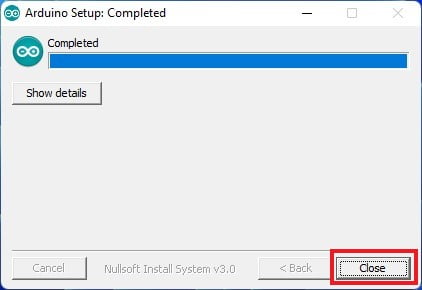
10. Once the installation is complete, click the Close button to close the Arduino IDE setup window.
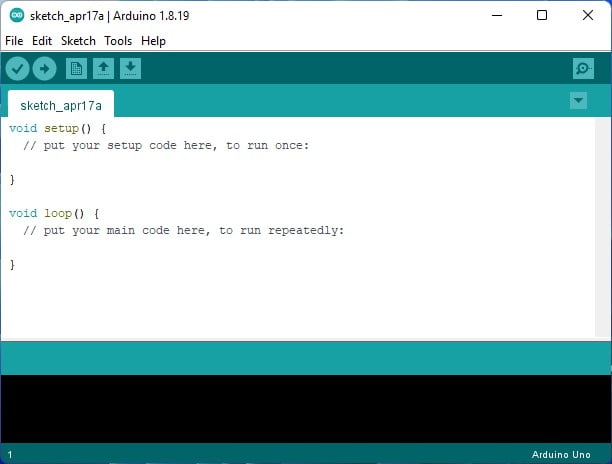
11. Now, you are ready to use Arduino IDE on Windows 11. For that, open the Arduino IDE.
That’s it; this is how you can download and install Arduino IDE. You can also install Arduino IDE from the Microsoft Store. For that, you can check our guide on how to install programs from Microsoft Store.
How to Setup and Use Arduino IDE?
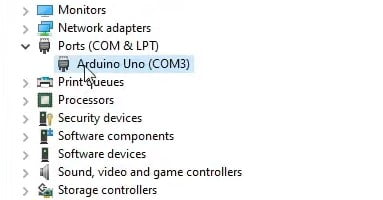
Once you have installed the Arduino IDE on your Windows system. You are ready to use it. Before that, you need to connect your Arduino Board to your Windows system and locate the Arduino UNO port in Device Manager to use Arduino IDE.
To do so follow the following steps:
1. To locate the Arduino UNO port. Go to Start > type ‘device manager’ > Ports > locate the Arduino UNO port.
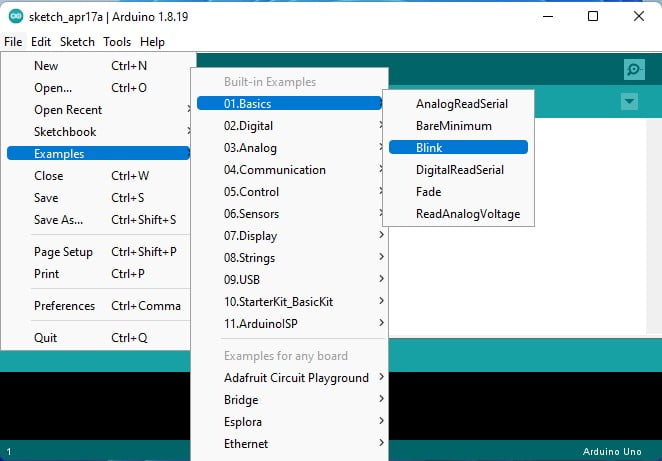
2. Now, check whether your Arduino UNO Board is working or not. For that, open your Arduino IDE and try to run a built-in example. To do so, go to Files > Examples > Basics > Blink. It is the built-in program to blink the LED on the board.
Note
Besides this, there are many built-in Arduino programs; you can try.
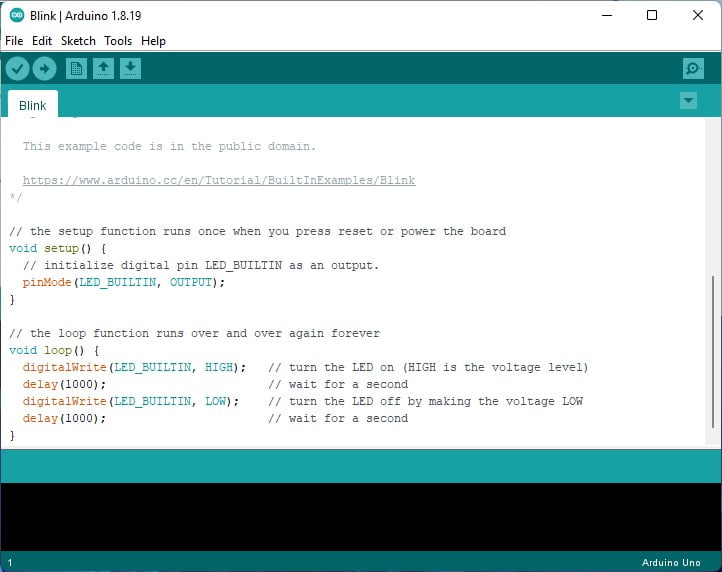
3. It will open the built-in Arduino Blink program. You have to upload the program to Arduino Board to blink the LED on the board. If your Arduino is not working, then make sure that you have selected the proper Arduino board and port on the Tools tab.
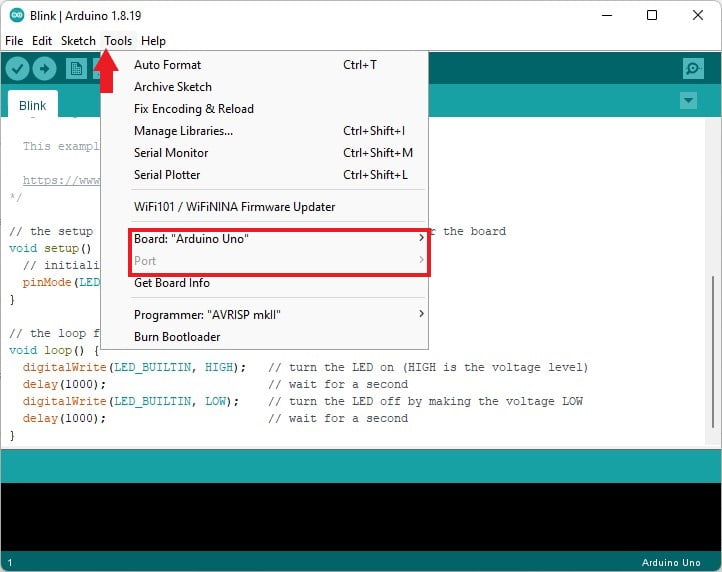
4. To select the proper Arduino board, click on Tools > Board > Arduino UNO. For the Arduino port, click on Tools > Port > and select the Arduino UNO Serials Ports. Under Device Management, you can locate the name of your Arduino port.
Conclusion
That’s it; this is how you can set up and use Arduino IDE on Windows 11. If you are having issues with your Arduino, you can also check our guide on; how to fix the Arduino problem on Windows 11.
We hope the listed methods resolve the issue. If you liked the article, share it with your friends. If you have any questions regarding the installation and setup process or have some suggestions, do not hesitate to leave them in the comments section. We are always there to assist you.