The Java Development Kit (JDK) is a representation of the Java Platform, whether it’s Standard Edition, Enterprise Edition, or Micro Edition, released by Oracle Corporation as a result of a binary product designed for Java developers on Solaris, Linux, macOS, or Windows.
Here, we will discuss how to install and set up Java JDK on Windows 11. Java JDK 22 is the latest version of the Java SE Development Kit. If you want to install Java JRE, you can also refer to our guide on how to install Java JRE on Windows 11.
How to Download Java JDK on Windows 11
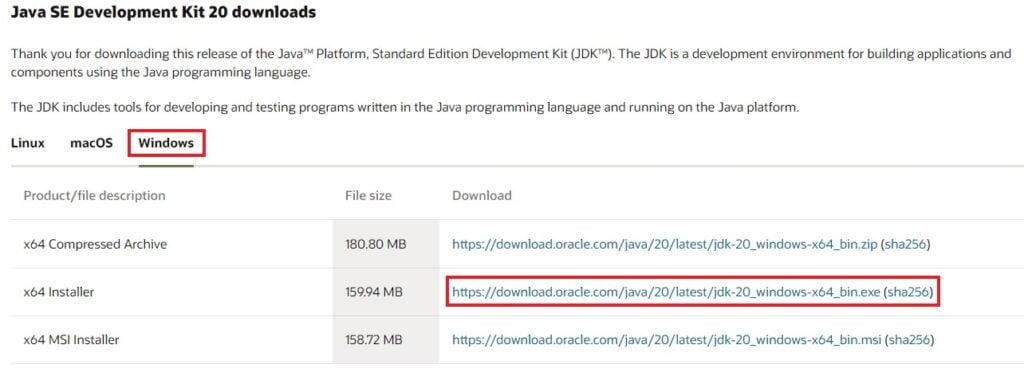
Open any browser, search for download Java JDK, and visit the link from oracle.com to download it. The link will open the download page. Here, select your operating system.
To download Java SE Development Kit 22 for the Windows operating system, click on the x64 Installer file link. After that, Accept the License Agreement to download the Java JDK 22 Installer file.
How to Install Java JDK on Windows 11
Once the download process is complete, let’s discuss how we can install Java JDK on Windows 11. For that, you can follow the steps mentioned below to install and set up Java on Windows 11:
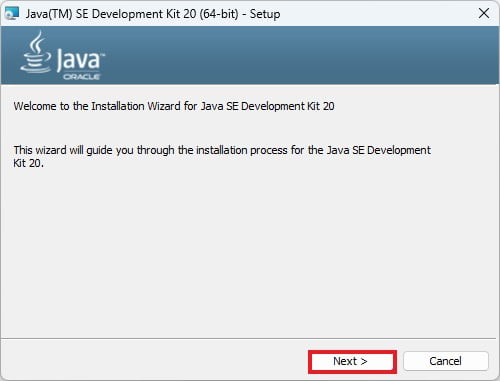
1. Open the Java JDK installer file. It will open the installation wizard. Here, click on the Next button.
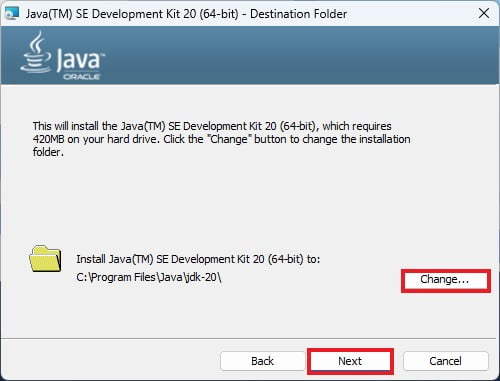
2. On the next window, you will get the option to change the installation location. You can change your installation location. Or else, you can continue with the default location and click on Next to continue.
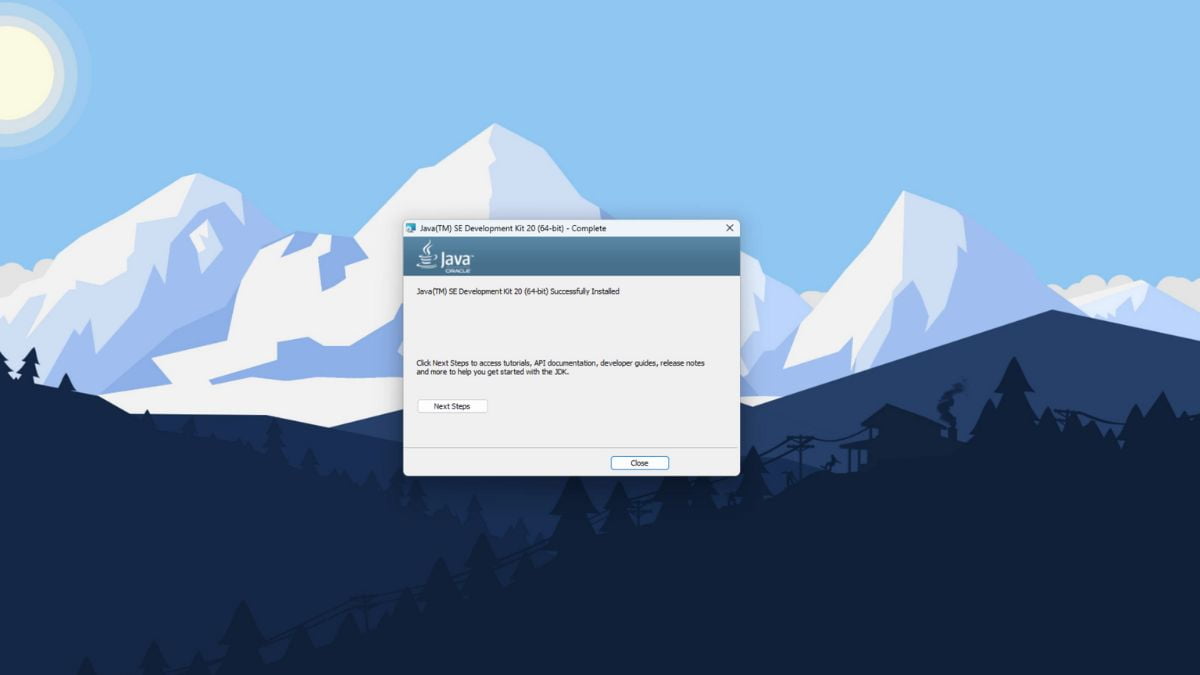
3. After that, Java JDK will start installing on your Windows 11.
4. The installation process will take some time, so wait until the installation process is complete.
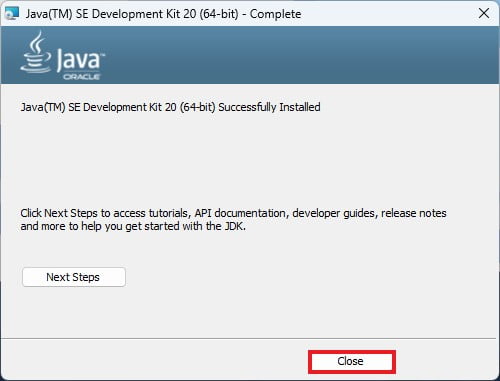
5. Click the Close button once the installation is complete.
How to Setup Java JDK on Windows 11
By just downloading and installing Java JDK, Java will not work. To run and compile Java code on Windows 11, we need to set the environment variable for the Java bin folder path.
To set up the Java JDK environment variable, follow these steps:
1. Open C Drive > Program Files folder, look for the Java folder and open it.
2. Inside the Java folder, you will find a JDK folder, open it and open the bin folder. Now copy the path of the bin folder.
3. After that, you must add this path to the environment variable settings.

4. For that, go to Control Panel > System and Security > System > Advanced System Setting > Environment Variables.
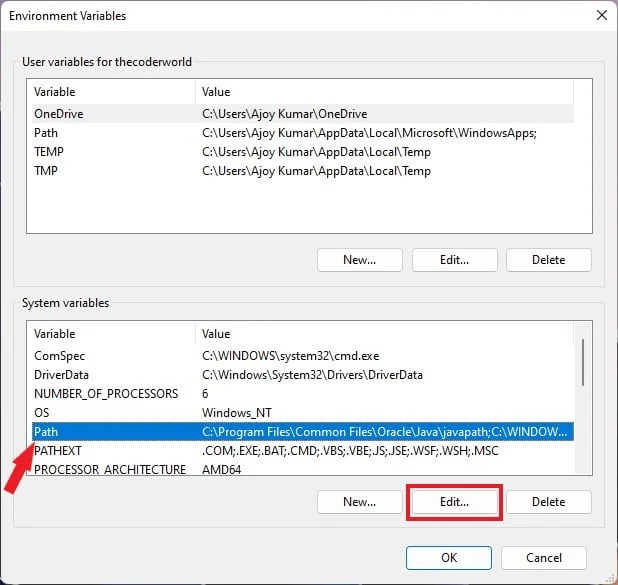
5. Under the System variable, you will find PATH, just select it and click on edit.
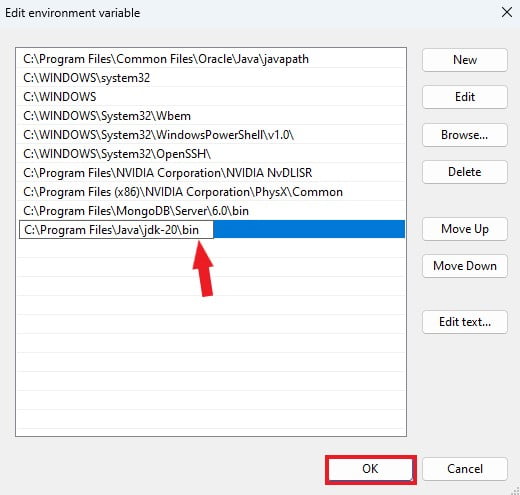
6. Now click on New and add the bin folder location.
7. After that, click on the OK button to save the changes.
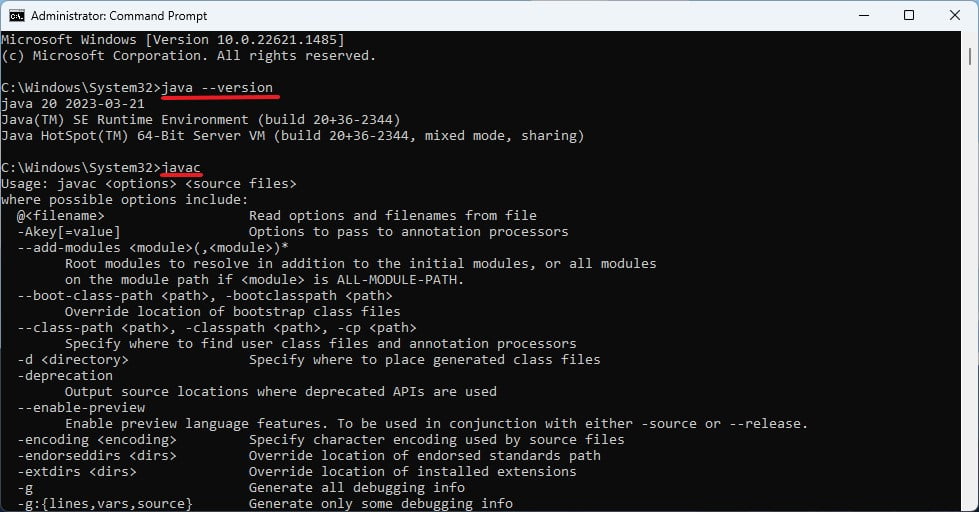
How to Verify Java Installation on Windows 11
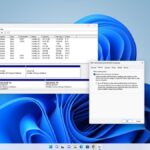
Now, to check whether Java is successfully set up or not. Open Command Prompt and type these two commands java -version and javac.
You can check the Java JDK version using the java -version command. The javac command will help you to understand whether the Java compiler is set up or not.
javac is a compiler that allows you to compile your Java file. If you find a bunch of statements in the command prompt, Java JDK is fully set up on your Windows operating system.
Conclusion
That’s it; this is how you can install and set up Java JDK on Windows 11. To start with Java development, you have to use Eclipse IDE. Eclipse IDE will help you to write and run the Java program. However, you have to add Java Support for Eclipse. Or, you can check our guide on how to set up Eclipse IDE for Java on Windows 11.
We hope this article was helpful to you. However, if you’ve some suggestions or queries related to Java JDK, do not hesitate to leave them in the comments section below.