You will only find the Java JDK folder when you install Java JDK on Windows 11. On the latest version of the Java SE Development Kit, you will not find the Java JRE (Java Runtime Environment).
You can install the Java SE Runtime Environment separately if you need Java JRE on your project. You will find it on Java 8. It is a set of software tools for the development of Java applications. Here is the guide on how to install Java JRE on Windows 11.
How to Install Java JRE on Windows 11
If you don’t know how to download and install Java JRE on Windows 11, you can follow this article to find out. Before installing Java JRE on a Windows system, first of all, you need to install Java JDK.
After successfully installing Java JDK, you can follow these steps to download and install Java JRE on Windows 11.
1. Open any browser and search for Java JRE. Or simply, visit this link to Downloads Java JRE.

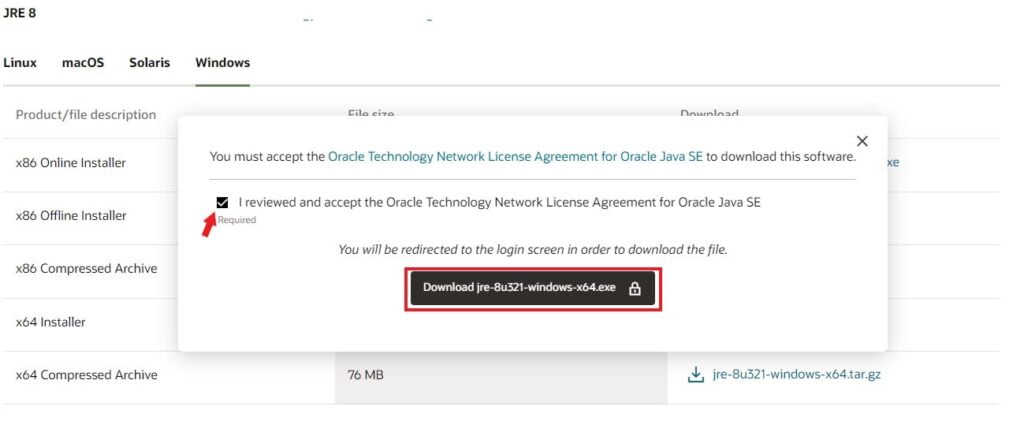
2. Look for JRE 8 on the download page and select your operating system.
3. Now to download, click on the download link and accept the license agreement. If your operating system is 32-bit, you need to download the x86 version of the software. For 64-bit, you need to download the x64 version of the software (*** download the .exe file). Here you can check your system type on Windows Computer.
Note
It will be redirected to the login screen. To download the file, you have to have an Oracle account. For that, you can create a free Oracle account.
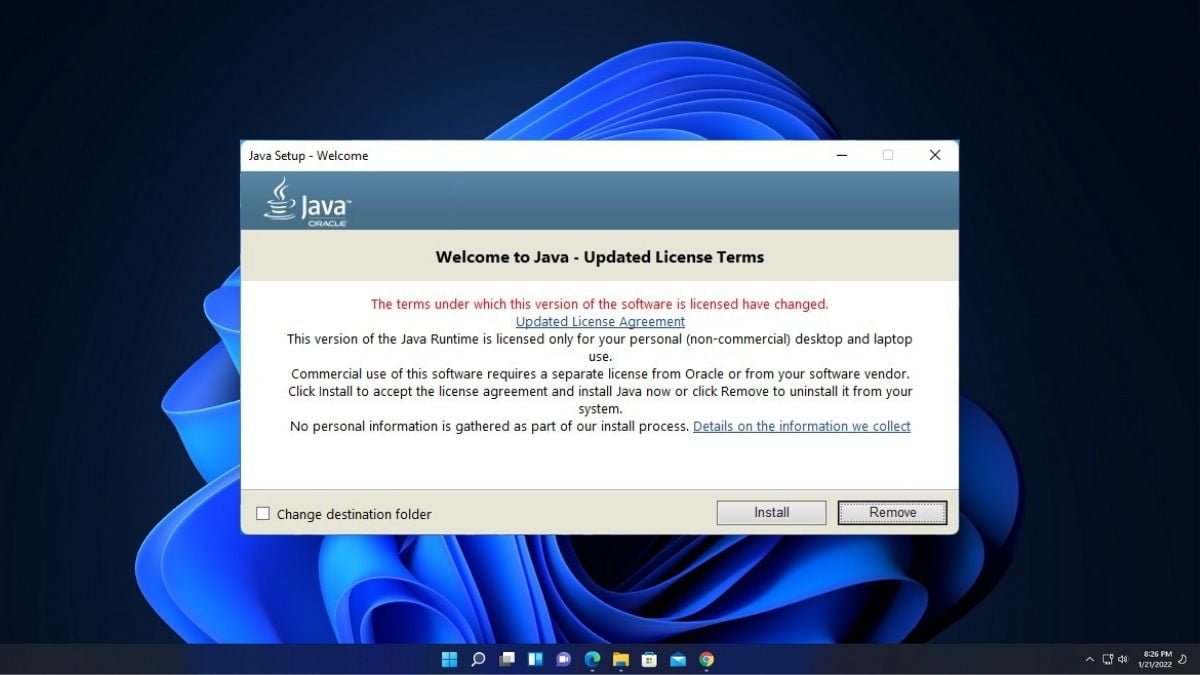
4. After completing the download, open the downloaded file to install Java JRE on Windows 11.
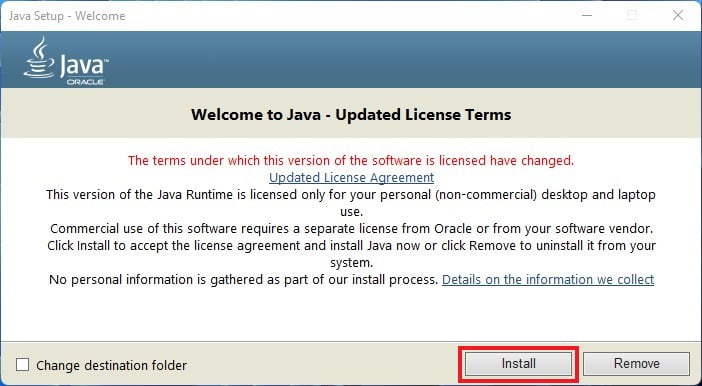
5. Here, you will get the Java setup page. To install it, click on the Install button.
How to Setup Java JRE on Windows 11
By just downloading and installing Java JRE, Java JRE will not work. You need to set the environment path variable for the Java JRE bin folder.
To set up the Java JRE environment variable, you can follow the below-mentions steps:
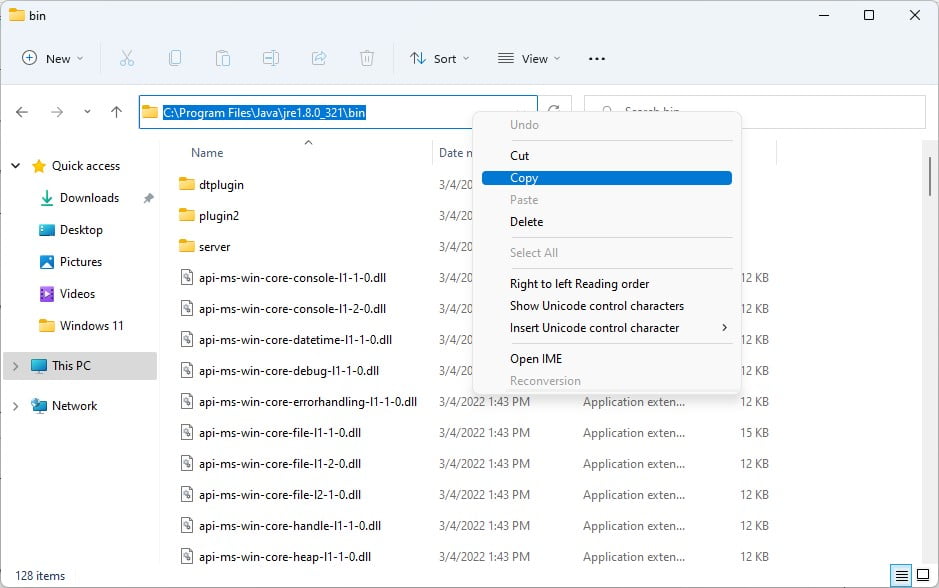
1. Open C Drive > Program Files folder, look for the Java folder and open it.
2. Inside the Java folder, you will find a jre1.8.0_291 folder. Open it and open the bin folder.
3. After that, copy the path of the bin folder.
4. Now you must add this path to the environment variable settings. For that, Go to Control Panel > System and Security > System > Advanced System Setting > Environment Variables

5. Under the System variable, you will find PATH. Just select it and click on edit.
6. Now click on New and add the bin folder location.
7. After that, click on the OK button to save the changes.

How to Verify Java JRE Installation
After you have added the Java JRE bin path to the environment variable, you can verify the Java JRE installation. To check whether Java JRE is successfully set up or not, follow these steps:
1. Click on the Window Search bar.
2. Search for Command Prompt and open it.
3. Run the following command:
java -version
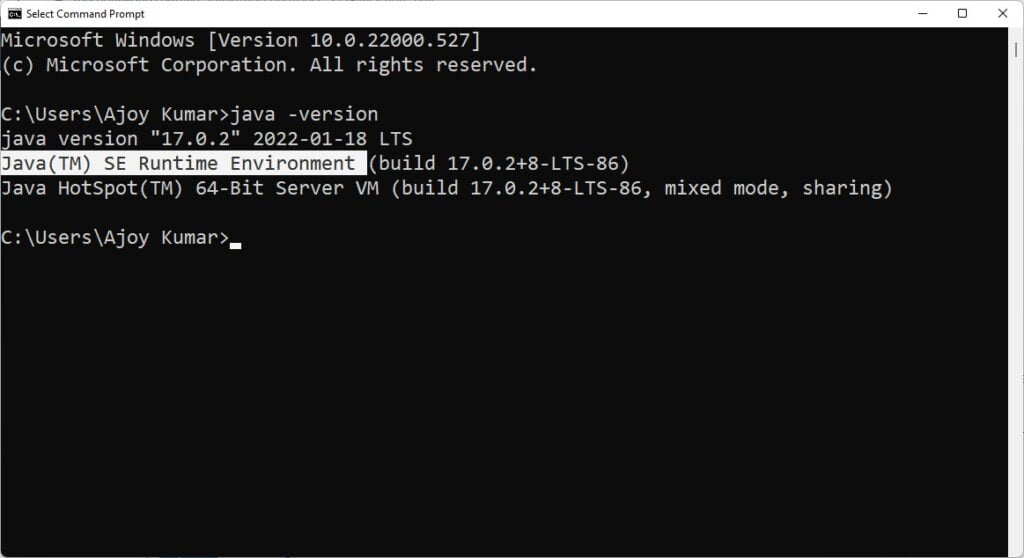
4. Check the Java (TM) SE Runtime Environment build number. If it’s displayed in the command prompt, that means you have successfully installed Java JRE on Windows 11.
By using the ‘java -version‘ command, you can check the Java JDK version and Java SE Runtime Environment build number. Now you are ready to use Java JRE on Windows 11.
Conclusion
That’s it; this is how you can download and install Java JRE on Windows 11. This will help fix the issues you are having with JRE on your Java project. However, to write and run Java code, you need to install an IDE (Integrated Development Environment). You can use Eclipse IDE for that. Check out our detailed guide on how to set up Eclipse IDE for Java on Windows 11.