Are you thinking of using Linux software on your Windows 11 without installing any virtual machines but are unable to figure out how to install Linux apps on Windows 11? If yes, you are in the right place. Don’t worry if you are facing difficulties due to the complex installation process and the requirement of a Linux operating system.
Here is a guide to quickly installing Windows Subsystem for Linux (WSL) on Windows 11. WSL allows you to install Linux distros and software without the need for a virtual machine and complex setup process.
What is the Windows Subsystem for Linux?
The Windows Subsystem for Linux (WSL) is a compatibility layer in Windows operating systems that allows users to run Linux binary executables natively on Windows.
It provides a way to run a full-fledged Linux environment, including command-line tools and utilities, directly on Windows without the need for a virtual machine or dual booting.
WSL enables developers and users to seamlessly integrate Linux tools and software into their Windows workflows, making it easier to develop and run cross-platform applications.
How to Install WSL on Windows 11
If you are excited to know the steps to install WSL on Windows 11, then you can follow the guide till the end.
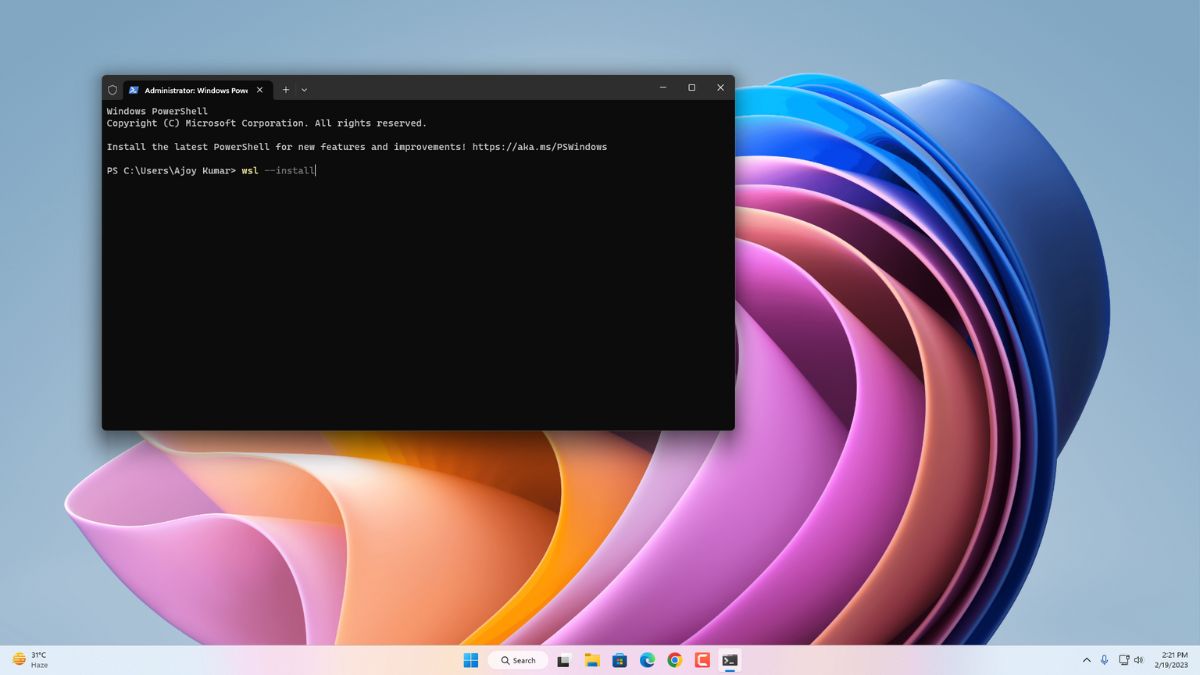
1. Right-click on the Start Menu and open the Terminal with Admin authority on your system from the context menu that appears. Alternatively, you can also use the Command Prompt.
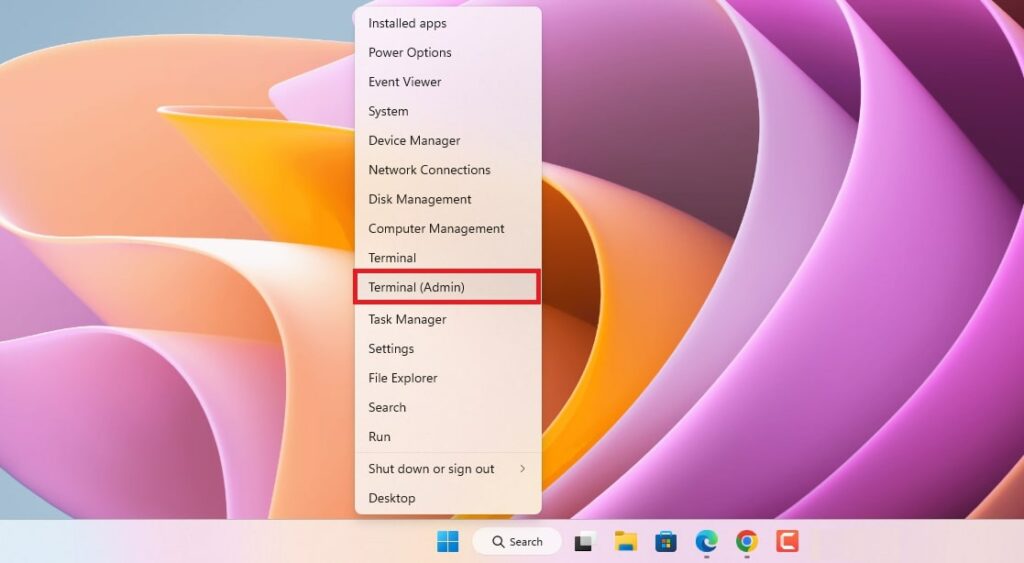
2. Now, run the following command to download and install all the required components for Windows Subsystem for Linux, which include the virtual machine platform and Linux GUI apps. Additionally, the command also installs the latest Ubuntu distro by default.
wsl --install
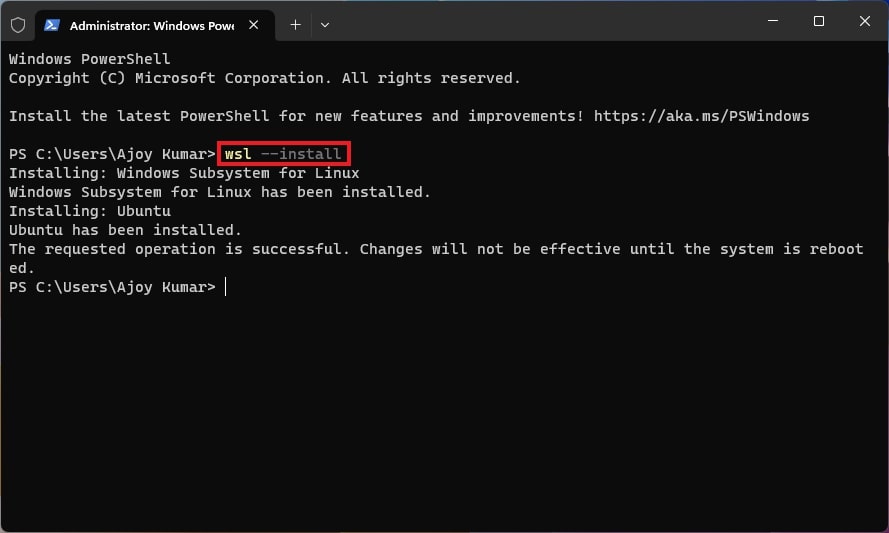
3. Wait for the process to be completed. It will take some time, and after that, you will need to Restart the PC.
4. After the Restart process is completed, a new screen will appear. As necessary, continue setting up the Linux distro. To set it up, you must create a username and password for your Linux distro here.
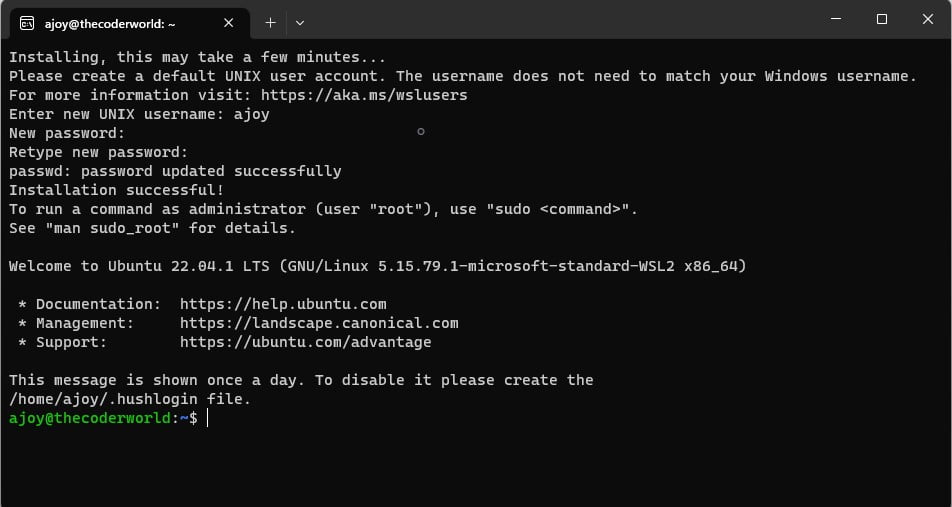
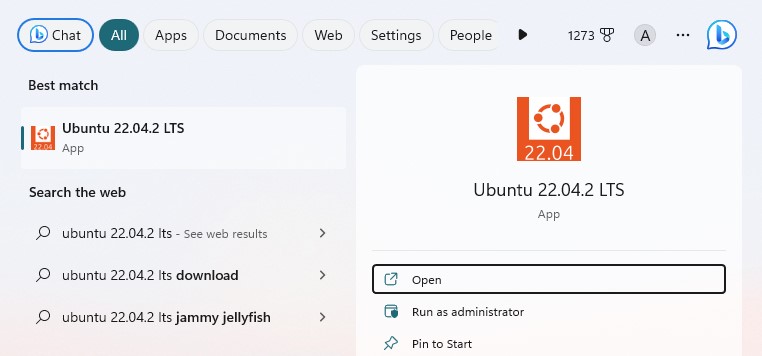
5. After that, you can launch the Linux distro that you installed from your Start Menu.
Now, you are ready to install Linux software and applications on your Windows 11 without using any virtual machines or third-party tools.
How to Install WSL with a Specific Distro on Windows 11
By default, Ubuntu will get installed on your system. However, if you prefer to install another distribution of Linux on your Windows operating system, then you can follow these steps:
1. Open the Terminal as Admin.
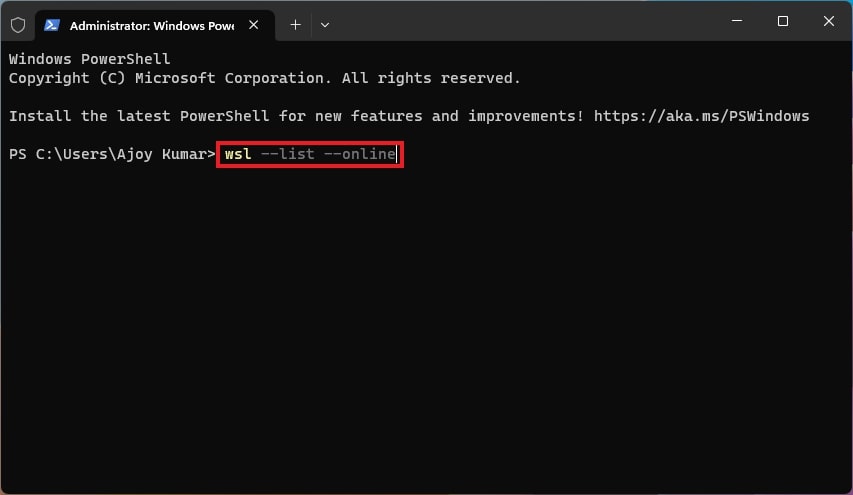
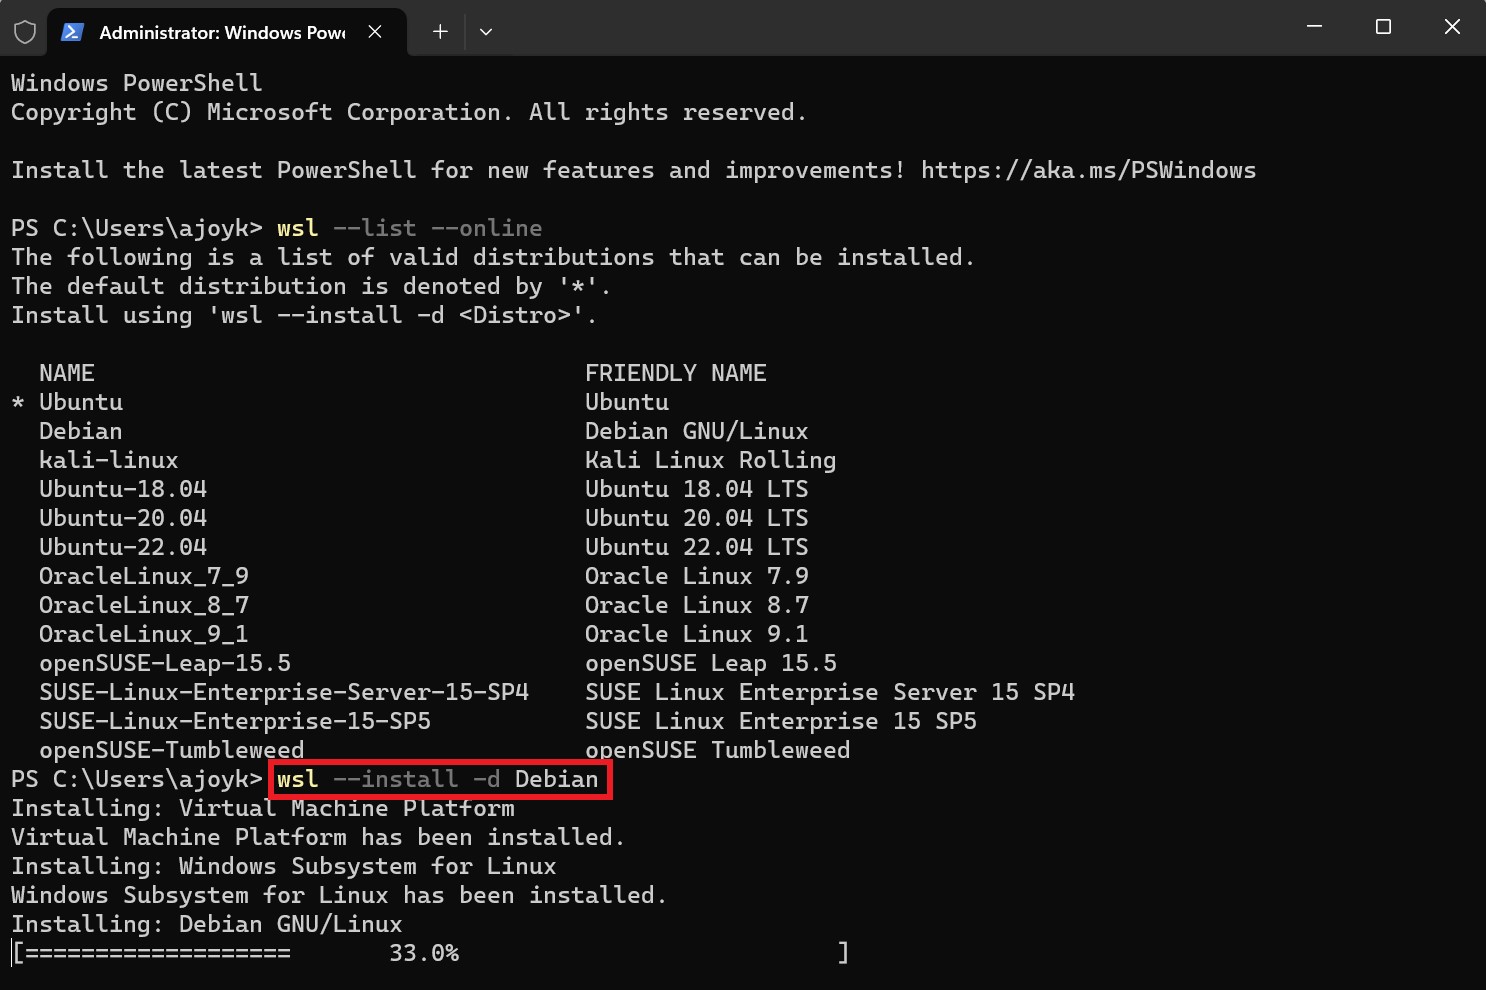
2. Run the following command to view a list of available WSL distros you can install on Windows 11. You will get a list of available WSL distros.
wsl --list --online
3. Now, you can install your favourite Linux distro by running the following command:
wsl --install -d <Distro>
4. For instance, if you want to install the Debian distro, then you have to run this command:
wsl --install -d Debian
5. Once the installation is complete, restart your computer to finish the WSL installation on Windows 11 and continue with the Linux distro setup as necessary.
How to Update WSL Kernel on Windows 11
If you encounter any errors, you can update the WSL kernel on Windows 11 using the Command Prompt (or Windows Terminal).
Here are the steps you can follow:
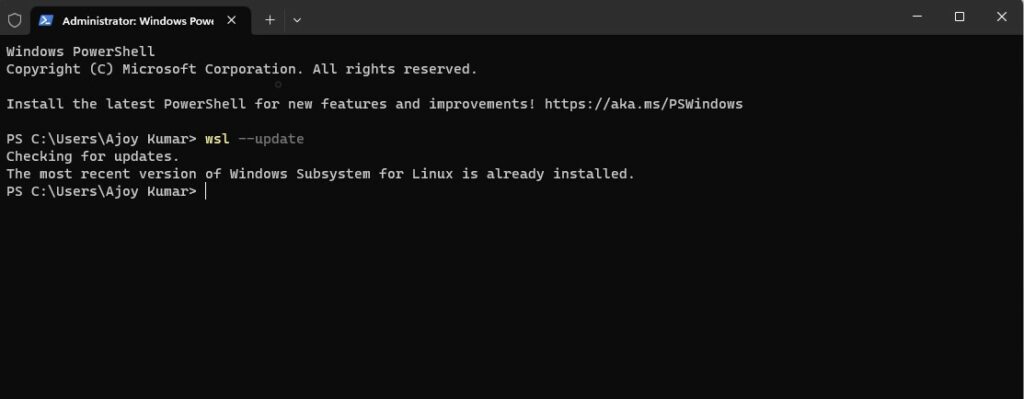
1. Open the Command Prompt (or Windows Terminal) as an administrator.
2. Type the following command to update the WSL kernel on Windows 11 and press Enter:
wsl --update
3. If an update is available, it will download and install the latest version of the WSL kernel on your computer.
How to Install WSL from the Microsoft Store
You can also download and install Windows Subsystem for Linux (WSL) from the Microsoft Store. However, the updates will be available through the Microsoft Store.
To install WSL from the Microsoft Store, follow these steps:
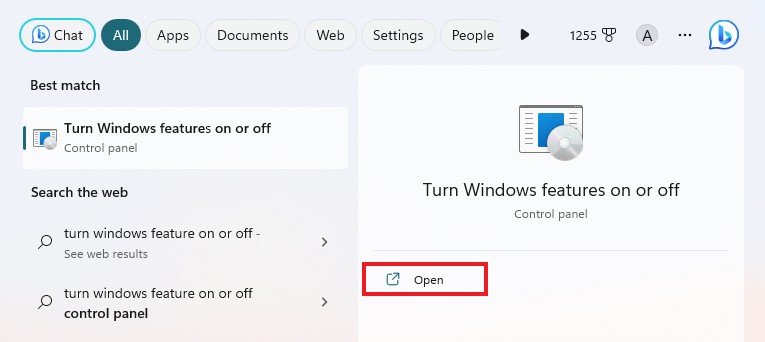
1. Click on the Search icon on the taskbar, search for the Turn Windows feature on or off and open it.
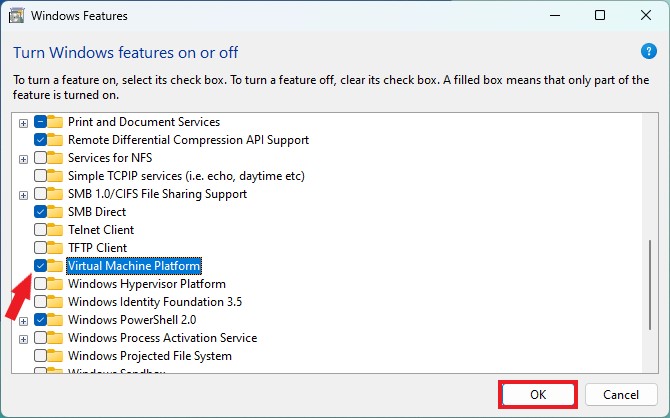
2. Now, Turn ON the Virtual Machine Platform option and click on the OK button.
3. After that, it will apply the changes to your system; you have to restart your device to complete the process.
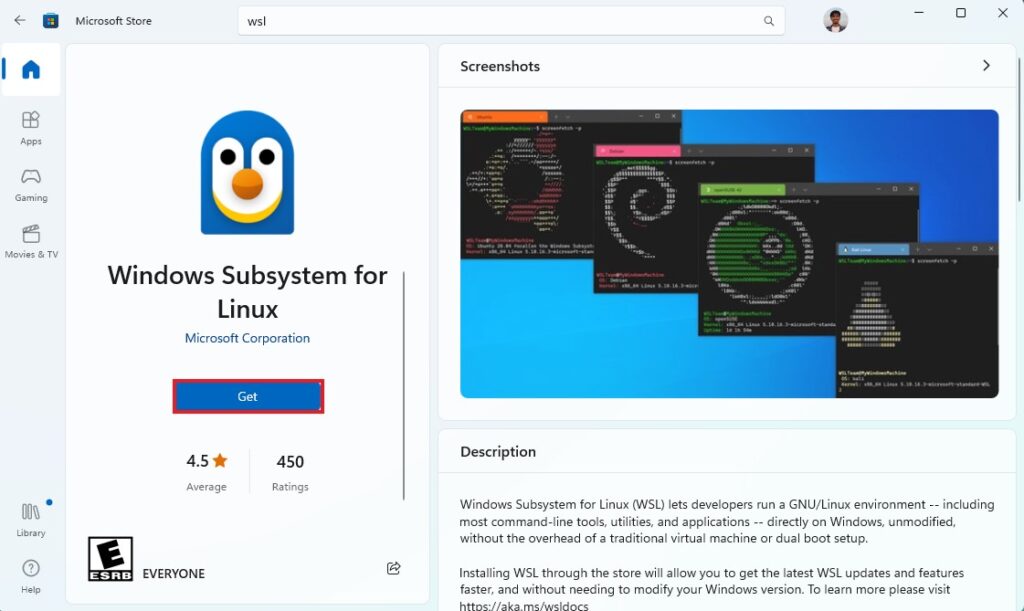
4. Once you have enabled the feature, you can install Windows Subsystem for Linux from the Microsoft Store. To do so, open the Microsoft Store and search for it. Now, to install it, click on the Get button.
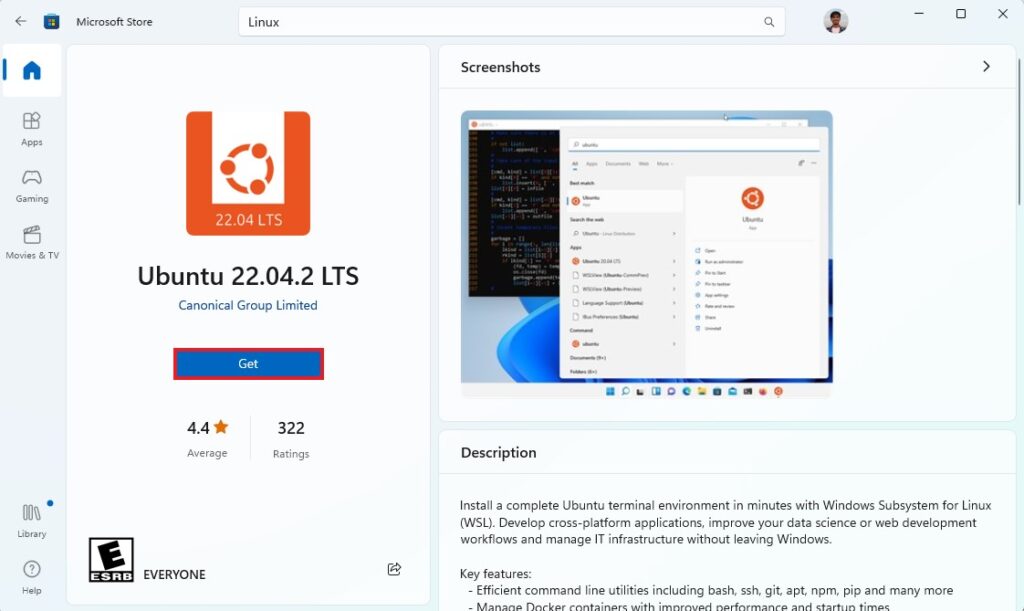
5. After installing WSL on Windows, you can search for the Linux distro you want to install on Windows 11 from the Microsoft Store. For example, I want to install Ubuntu. I will search for it and click Get to install it.
After the installation is complete, you can launch it from your Start menu, just as if it were installed using the Terminal command above. Now, you can install Linux apps on your Windows system using the Linux terminal.
Conclusion
That’s it! By following the methods mentioned above, you can install the Windows Subsystem for Linux on Windows 11. Now, to install Linux applications, you can follow our guide to run Linux GUI apps on Windows 11.
Did you know that you can also install Android apps on Windows 11? You can check out our linked guide on installing Android apps on the Windows operating system. However, if you have any doubts regarding the WSL 2 installation process, you can leave them in the comments section.