The Terminal on the Chromebook is a productivity-focused tool. It is the access point to the Linux Development Environment on your ChromeOS. If you want to install Linux applications and other development tools, you can use the Linux Terminal.
But to use or open the Linux terminal on your Chromebook, you have to install Linux and enable the Terminal on your device. Here is a complete guide on; how to open the Linux Terminal on a Chromebook. You’ll also discuss how to customize the Terminal’s appearance and behavior.
How to Install the Linux Development Environment
As we have discussed to open and use the Terminal app, we need to install the Linux development environment on your Chromebook.
For that, you can follow the following steps:
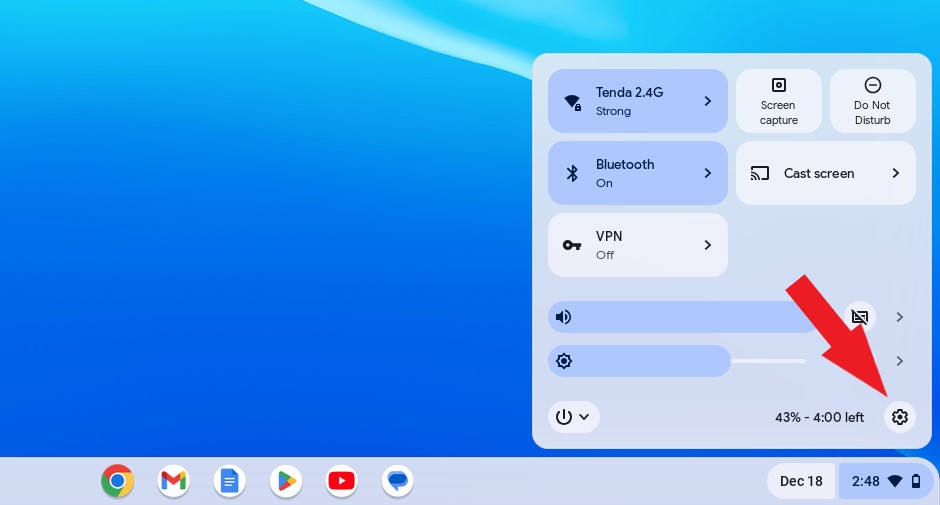
1. On your Chromebook, open the Settings applications. Open the App Drawer and choose Settings to do so. Alternatively, you can access Settings directly from the notification panel.
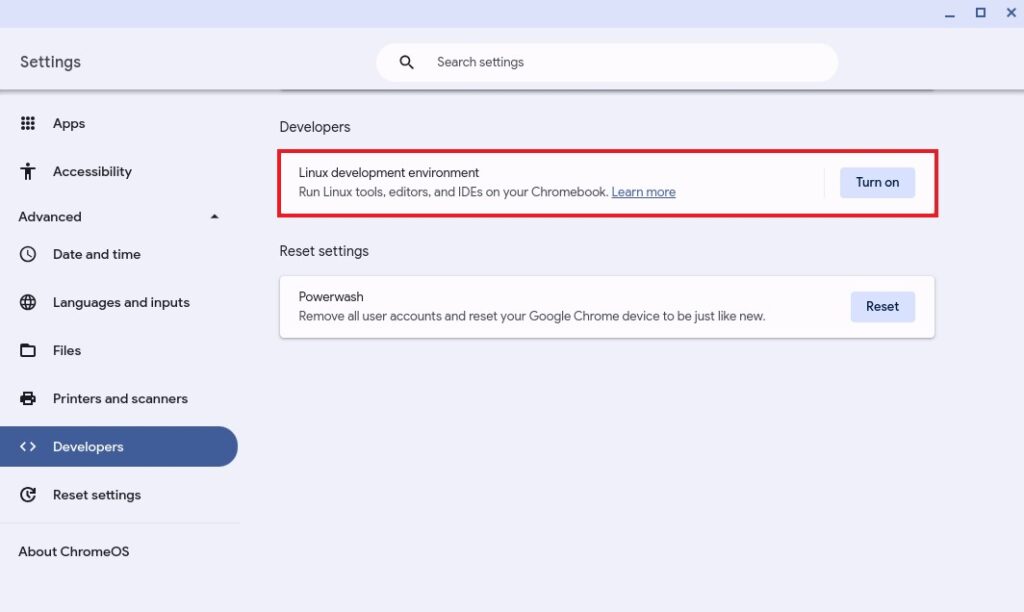
2. The settings window will appear. Select the Advanced option and click on the Developers option.

3. Here, you will find an option to install the Linux development environment on your Chromebook. To install it, click on the Turn On option.
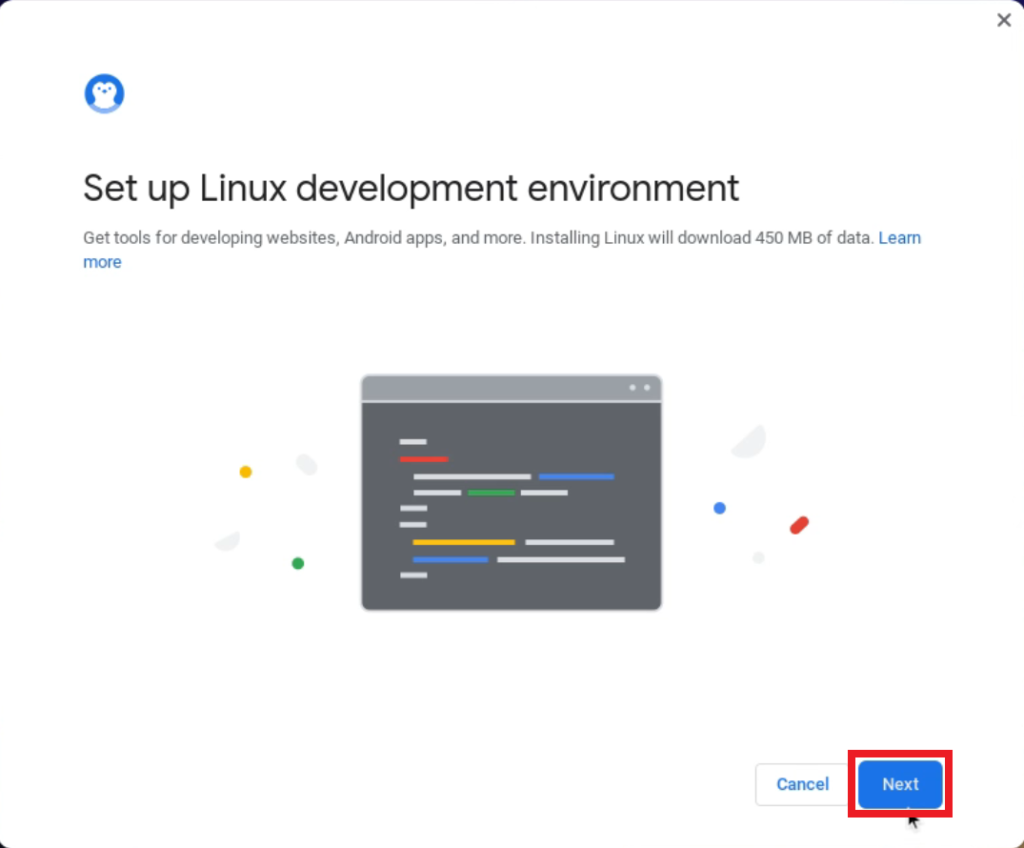
4. You have to set up the Linux development environment. For that, click on Next to continue.
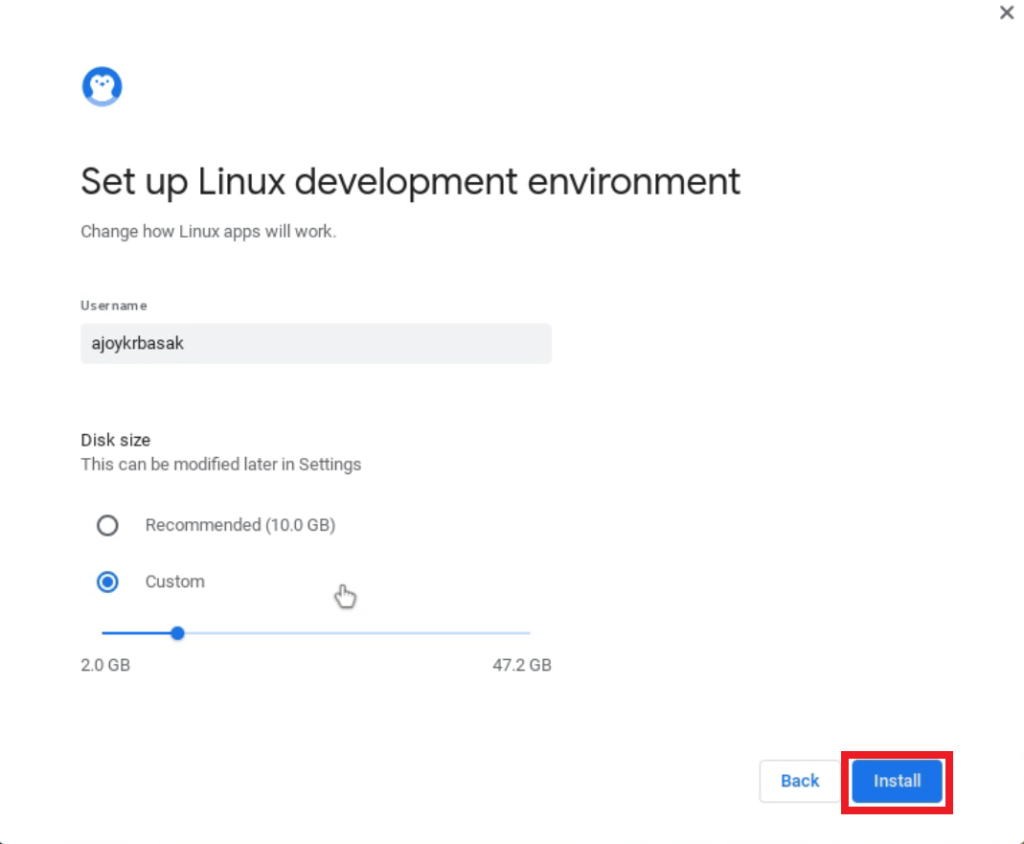
5. Create your Linux username and select disk size. The recommended disk size is 10 GB, but you can also specify a custom disk size.
7. Then click on the Install button.
7. After that, Linux will be installed on your system. This process may take a few minutes. Wait for the process to complete. Now you are ready to use the Linux Terminal app on your Chromebook.
How to Open the Linux Terminal on a Chromebook
Once the Linux development environment is successfully installed on your Chromebook, you can follow the below-mentioned steps to open and use the Linux Terminal app:
1. Click on the App Launcher icon.
2. Now look for the Linux app folder and click on the Terminal icon to open it.

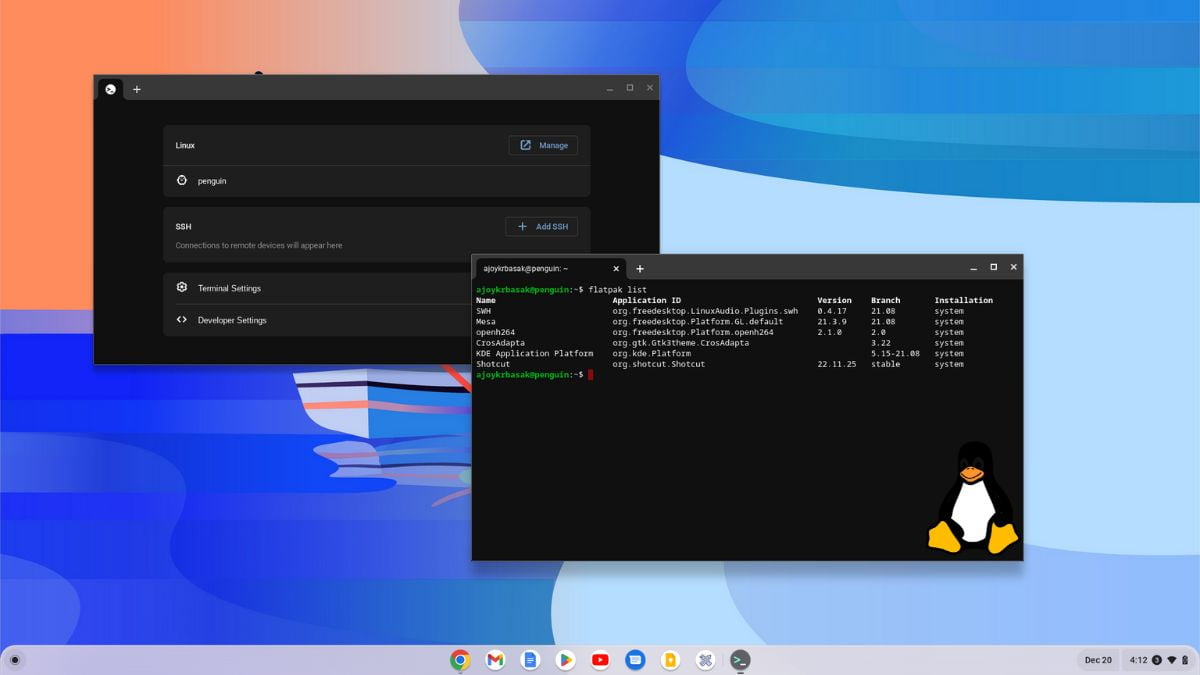
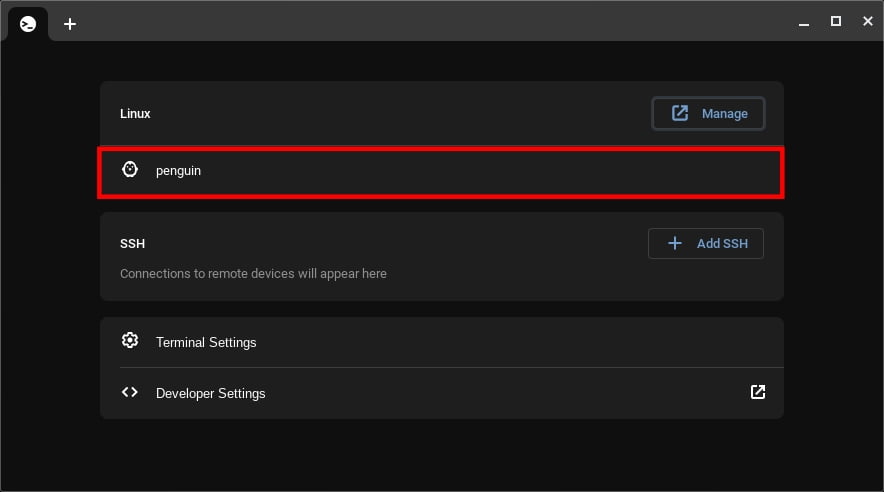
3. It will open the Linux Terminal app. To open the terminal command, click on the Penguin option.
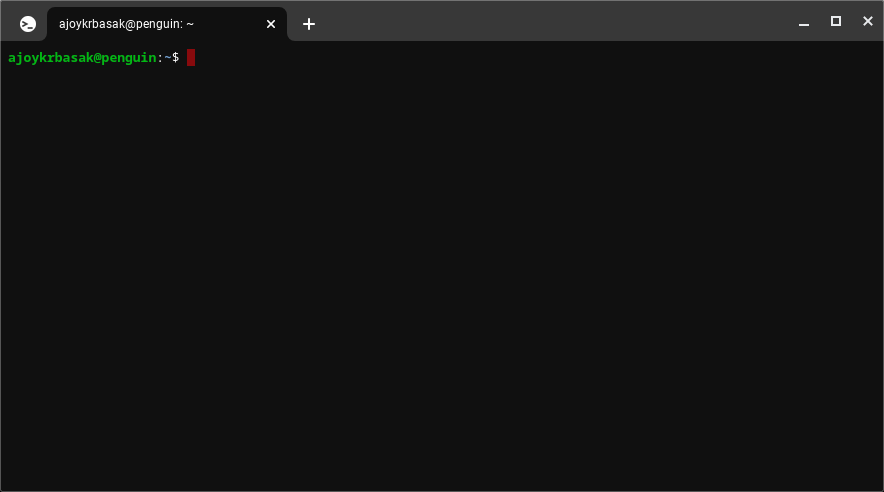
4. After that, you are ready to run the Linux Terminal command on your Chromebook.
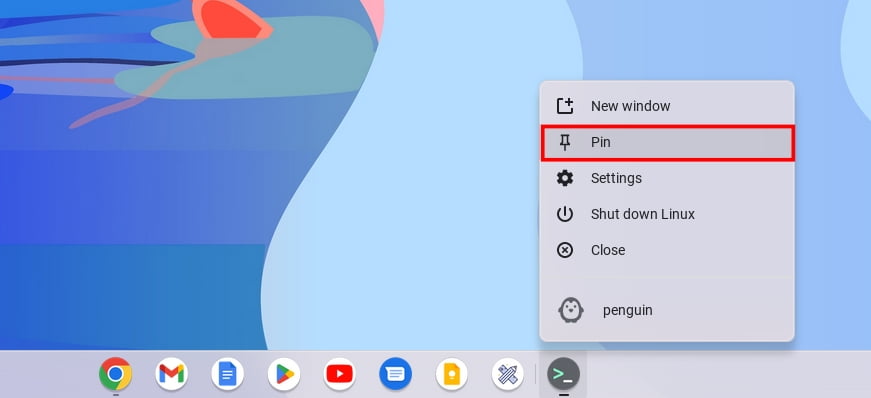
5. If you want to pin the terminal on the Chromebook shelf, right-click on the terminal icon and select the Pin option from the context menu. You can use the shortcut to access the terminal.
How to Customize the Linux Terminal
Now, if you want to customize the appearance and behavior of the Terminal, then follow the following steps:
1. Open the Terminal app.
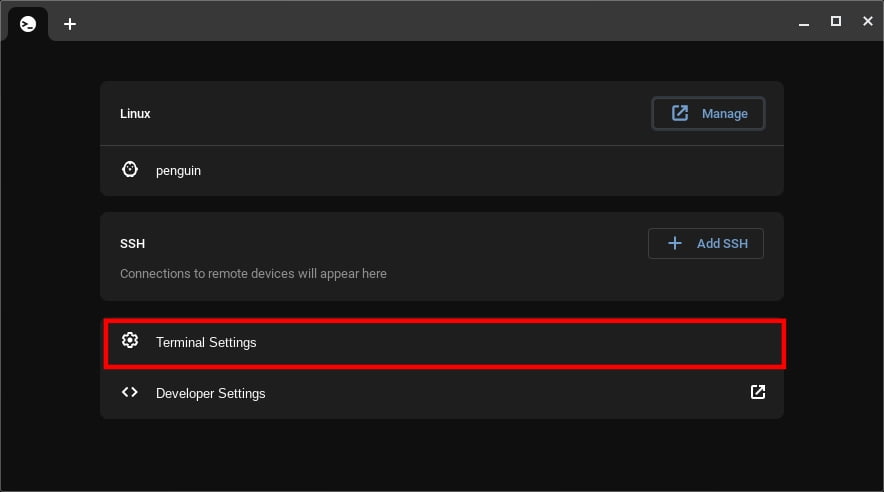
2. After that, click on Terminal Settings to access the customization option.
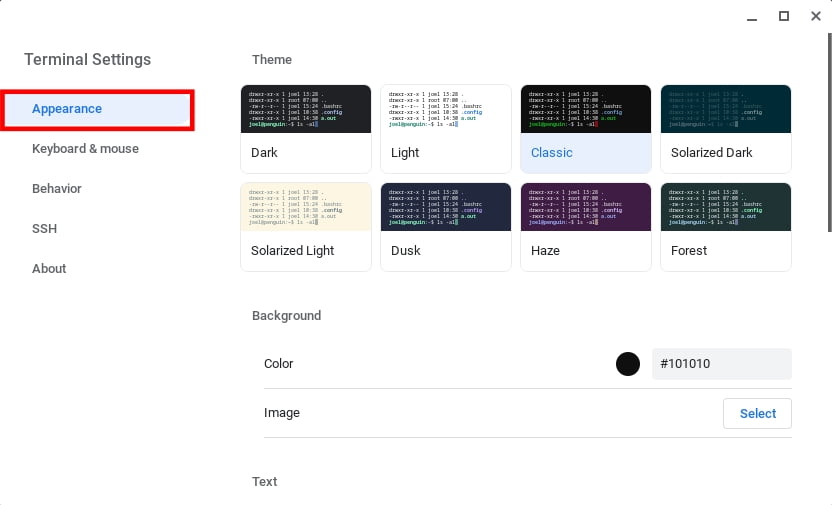
3. A new window will appear. Click on the Appearance option to change the terminal theme, background color, text color and style, and more.
Note
Play with the terminal settings option to customize the terminal to your liking on your Chromebook.
Conclusion
That’s it; this is how you can open the Linux Terminal on your Chromebook. Also, you can remove the Linux development environment from your Chromebook. From the developer settings page, if you don’t want to use Linux. Also, if you are interested in Chromebook topics, you can check our detailed guides on; Chromebook troubleshooting.
I hope this article was helpful to you. However, if you have some suggestions regarding the Linux Development Environment, do not hesitate to leave them in the comments section. We are always there to assist you.