
Minecraft is, without a doubt, one of the world’s most popular games. Minecraft created a new form of; gaming genre called sandbox games after its release, where players could build, change, or even destroy their world. Here we will discuss how to install and play Minecraft on Chromebook.
Minecraft is available on major operating systems such as Windows, Linux, MacOS, Android, and iOS. However, many years have passed; the game has still not been released for Chrome OS. But there is nothing to worry about since the latest release of Chrome OS has received support for Google Play Store and Linux. You can install Minecraft and play on a Chromebook.
How to Install and Play Minecraft on a Chromebook
Here, let us discuss how you can install and play the Android version of Minecraft on a Chromebook. Minecraft has introduced an Education Edition for Chromebook users to promote creativity, collaboration, and problem-solving skills for the student. To play the Android version of Minecraft on your Chromebook, you need to use your school account to log in to Minecraft.
However, you need to enable the Google Play Store support on your Chromebook. It will allow you to use the Play Store on your Chromebook and install Android apps. For that, you can check the linked guide.
Once it is enabled, you can follow the following steps to install Minecraft on a Chromebook:
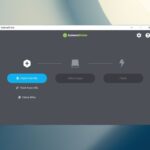
1. Open the Google Play Store and search for Minecraft: Education Edition (Free).
2. Now, select it from the search results and click on the Install button.
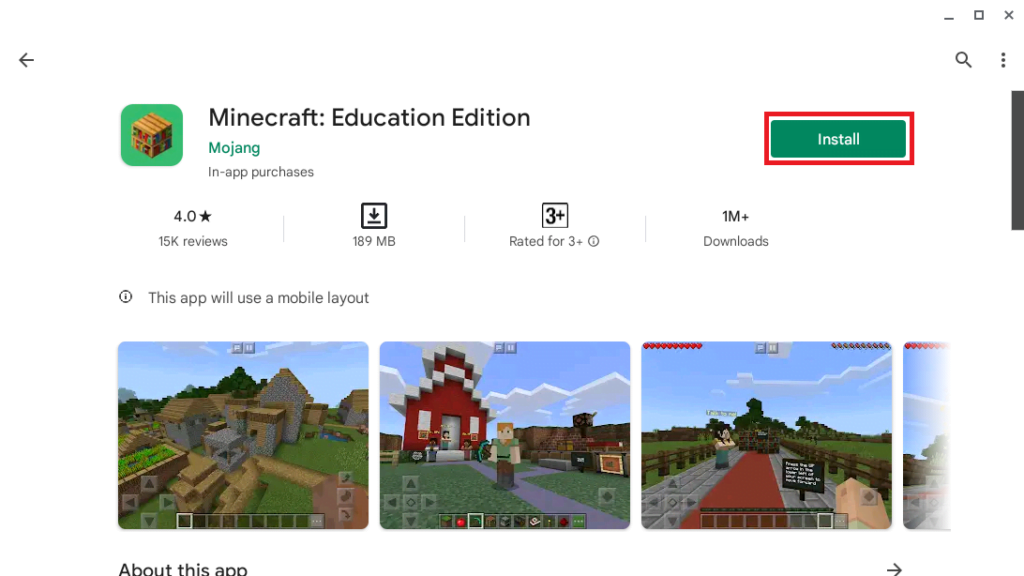
3. Once it gets installed, click on Open. Or else, you can open it from the app drawer.
Note
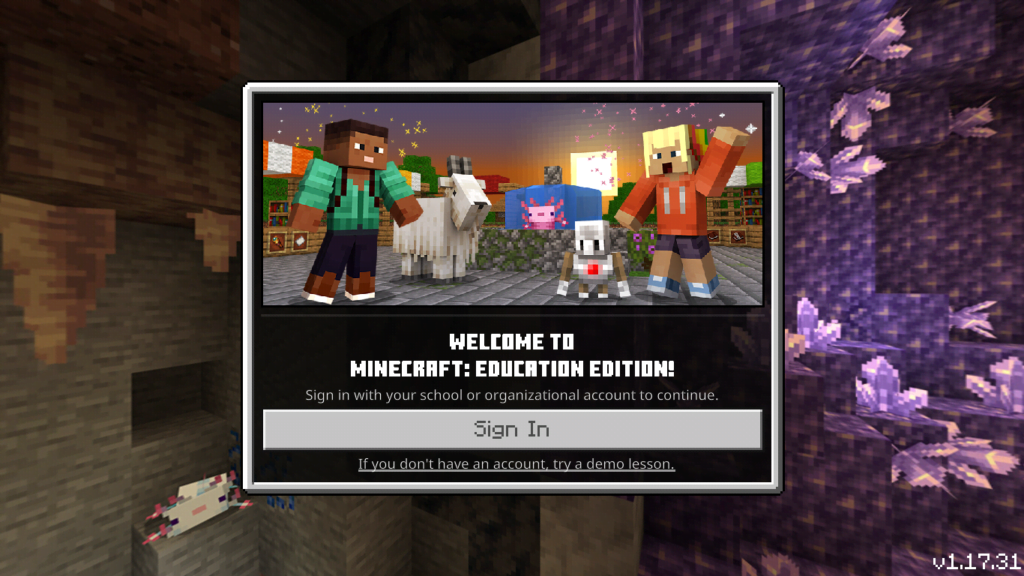
To play Minecraft Education Edition for free, you need to use your school or organization account to sign in. If you don’t have an account, try free demo lessons. Or else, buy a subscription starting at $5/year.
Install Minecraft: Java Edition on a Chromebook
If you want to install Minecraft: Java Edition on your Chromebook. Then you have to install and set up Linux on your Chromebook. For that, you can check our linked guide. Or else, Go to Settings > Advanced > Developers and turn on the Linux development environment.
Once done, you can follow the following steps:
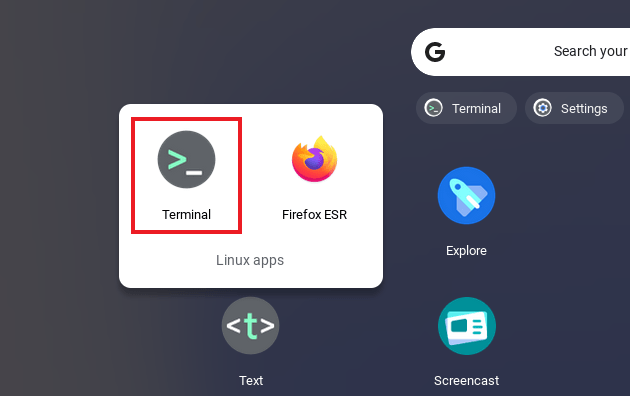
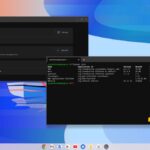
1. Open the Terminal. For that, press the search key on the keyboard, type terminal, and open it. Alternatively, you can also open the App Drawer and look for Linux apps. There, you will find the Terminal.
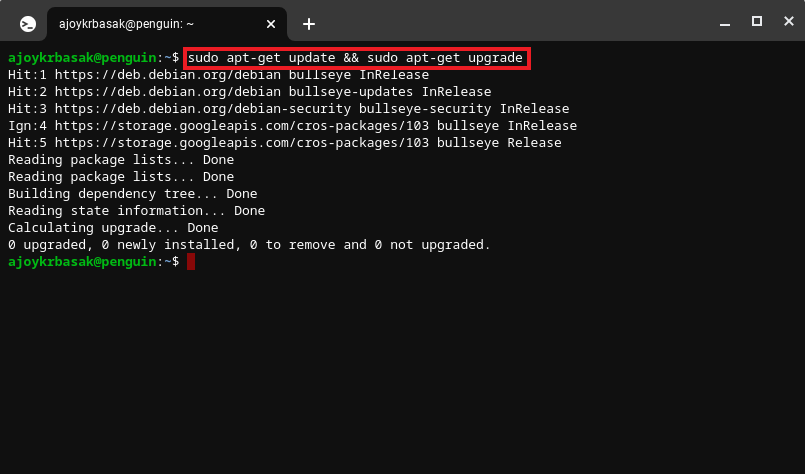
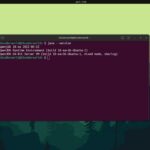
2. Now, you need to update and upgrade the Linux system on your Chromebook. For that, you can use these commands:
sudo apt-get update && sudo apt-get upgrade -y
3. Also, you need to install some of the dependencies; that are missing from the Linux system on your Chromebook. For that, run these few commands on the terminal.
sudo apt-get install default-jdk
sudo apt-get install libsecret-1-0 -y
4. After updating and upgrading the Linux to the latest build, download the Minecraft.deb file for Debian/Ubuntu from the official website.
5. Once the download is complete, move the downloaded file to the Linux files section; inside the Files app.
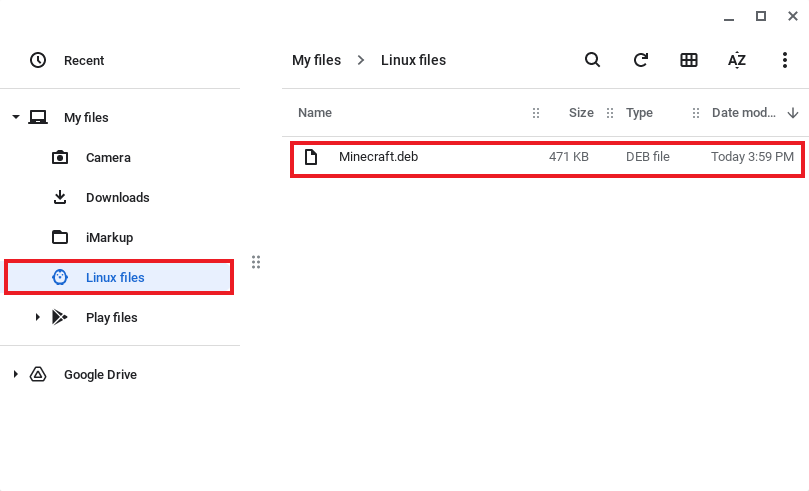
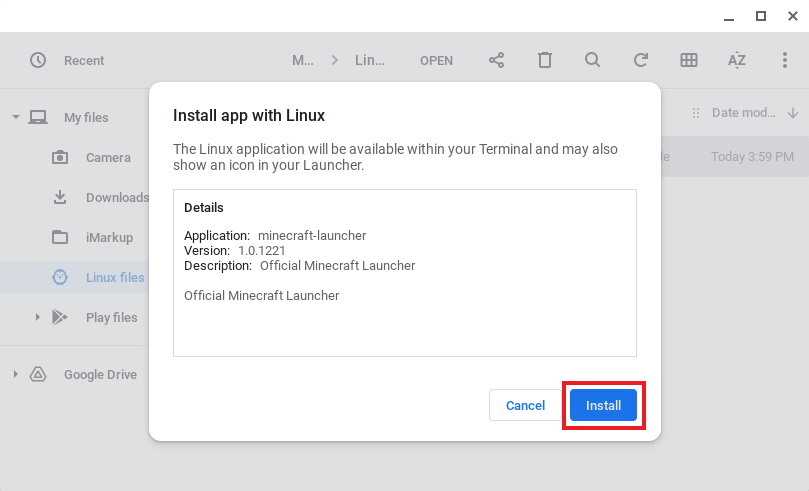
6. Double-click the Minecraft.deb file. Here, you will get a Linux application installation window. Click on the Install button to install Minecraft on your Chromebook.
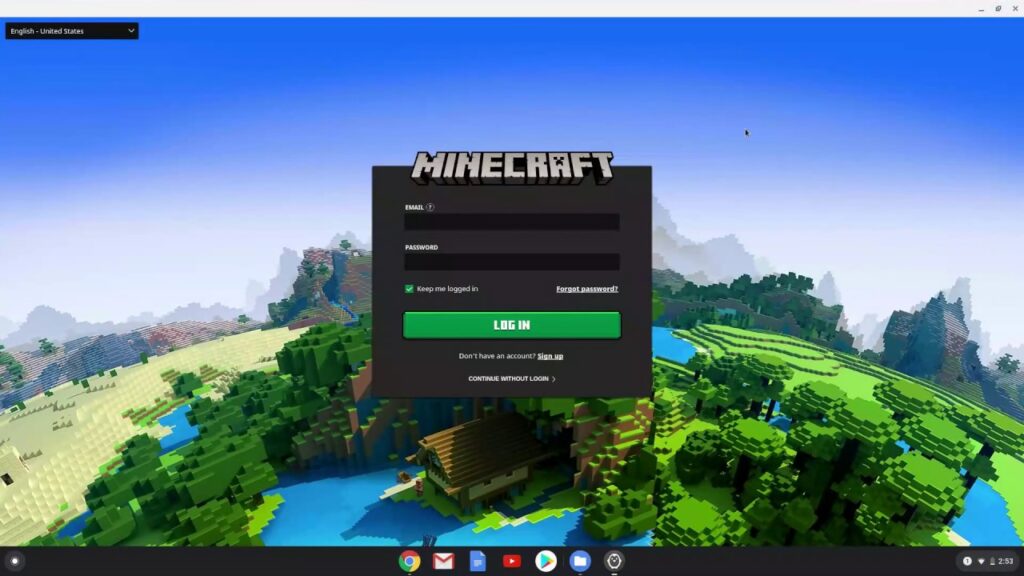
7. Now, open the Minecraft Launcher. You will get it in the Linux apps folder in the App drawer.
8. Once you launch the game, the app will automatically download the latest release to your Linux container and install the update. Next, log in with your Mojang or Microsoft account to play Minecraft.
Conclusion
That’s it; this is how you can install and play Minecraft on your Chromebook. If you are facing an error, you can check our troubleshooting guide on; how to fix Minecraft errors on a Chromebook.
I hope this article was helpful to you. However, if you have some doubts regarding the installation, do not hesitate to leave them in the comments section below. We will come up with a solution.


This is a great tutorial for installing and playing Minecraft on a Chromebook! I’m looking forward to trying it out!