
Do you want to install Ubuntu on Windows 11 without affecting your Windows operating system? If your answer is yes, then you are at the right place. Here is a beginner’s guide on; how to install Ubuntu 22.04 LTS on VirtualBox on your Windows PC. Here, we have provided you with the step-by-step processes with proper screenshots.
Ubuntu is a free and open-source operating system based on Linux. Before installing Ubuntu 22.04 LTS, you have to download and install VirtualBox on the Windows 11 operating system. For that, you can check out our linked guide. Once you have installed VirtualBox, you can follow the guide.
How to Install Ubuntu 22.04 LTS on VirtualBox
We are going to use VirtualBox to install Ubuntu on our Windows computer. First, let me clarify that VirtualBox is free and open-source software. With the help of this software, we can install multiple operating systems within a single host operating system.
1. Download Ubuntu ISO File
So before discussing how we can install Ubuntu on Windows 11. You have to download the Ubuntu ISO file on Windows 11. For that, visit ubuntu.com, click on the download option from the menu select Ubuntu Desktop, and download the LTS version for the Windows operating system.
Here are the recommended system requirements to install Ubuntu to your system:
- 2 GHz dual-core processor
- 4 GB system memory
- 25 GB of free hard drive space
- Internet access is helpful
2. Creating a Virtual Machine for Ubuntu
Now, to install Ubuntu on Windows 11 using VirtualBox, we have to create a virtual machine for that. To create a virtual machine, you can follow the steps mentioned below:
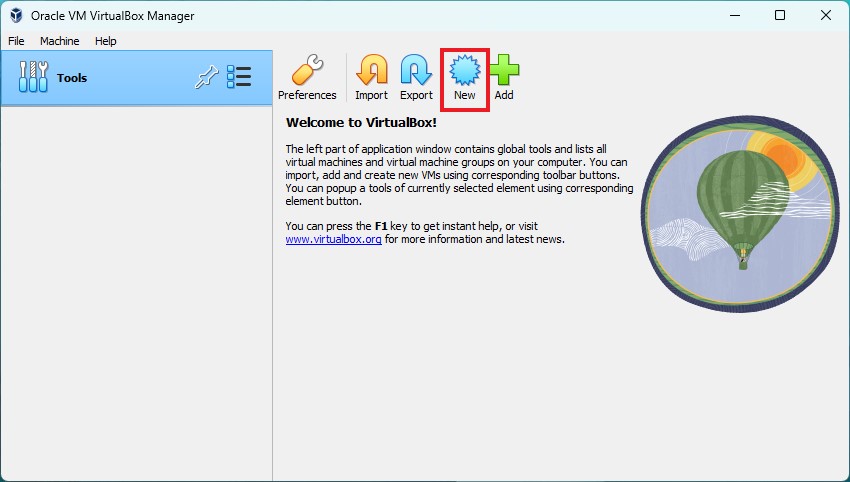
1. Open the VirtualBox software and click on the New icon to create a virtual machine for Ubuntu.
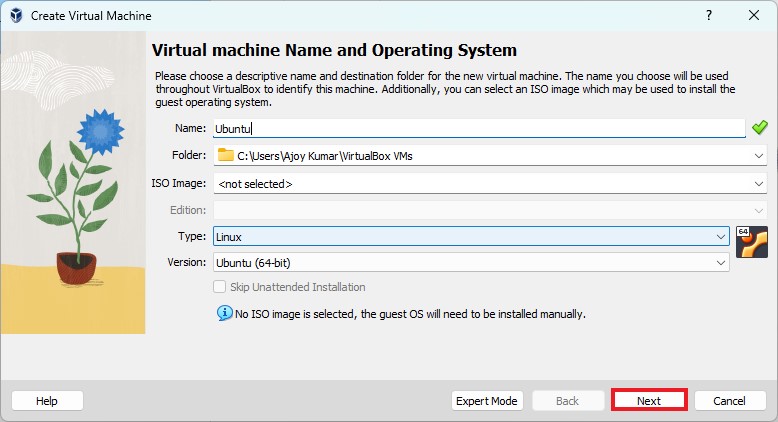
2. After that, name your machine, and select the type of Operating System as Linux and the version that you had downloaded (32-bit or 64-bit).
3. After selecting all this just click the Next button. Don’t worry we will select the ISO file later on.
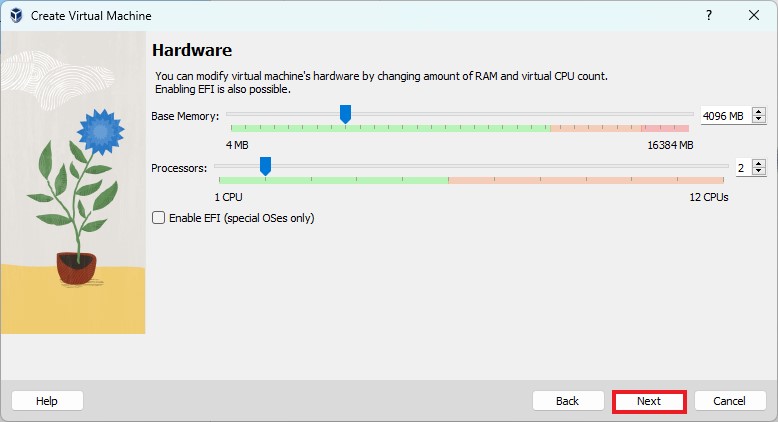
4. Assign the amount of RAM you want to give to your Ubuntu Virtual Machine. 4GB is the recommended one, however, for better performance you can allow more if your host system (Windows 11) has enough spare memory block. From here, you can also assign a CPU core.
5. Then click on the Next button.
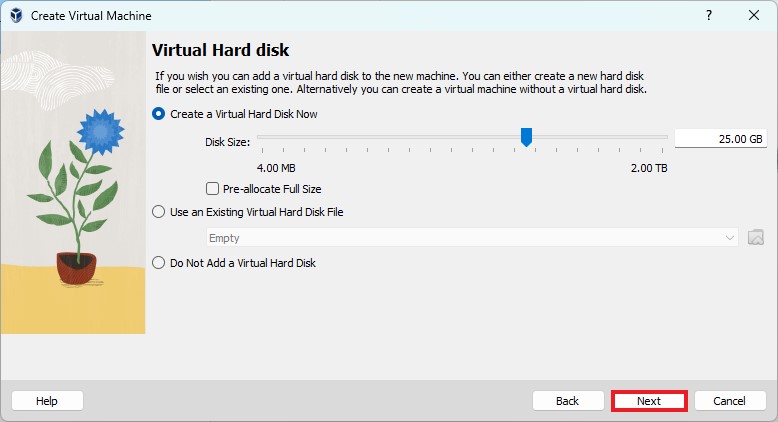
6. After that, you also need to allocate hard disk space. For that, click on the Create a Virtual Hard Disk Now option, let the default option be selected, and just click on the Next button.
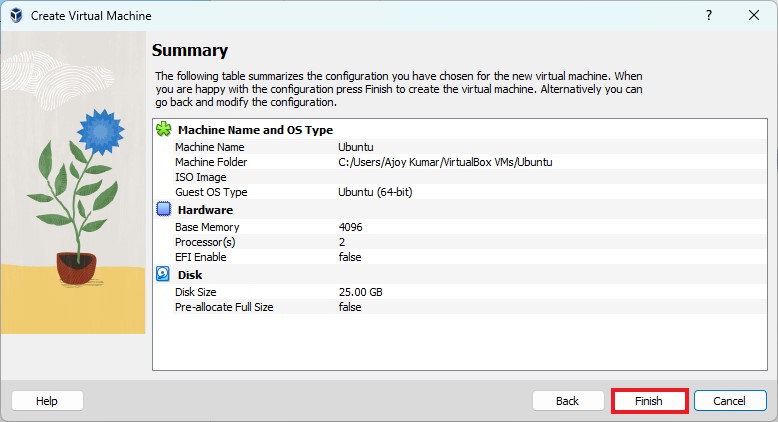
7. Now, review the virtual machine setup and click on the Finish button.
8. Now, you have to select the Ubuntu ISO file. For that, select the operating system name in VirtualBox, then click Settings > Storage > Controller ID > Empty > Optical Drive.
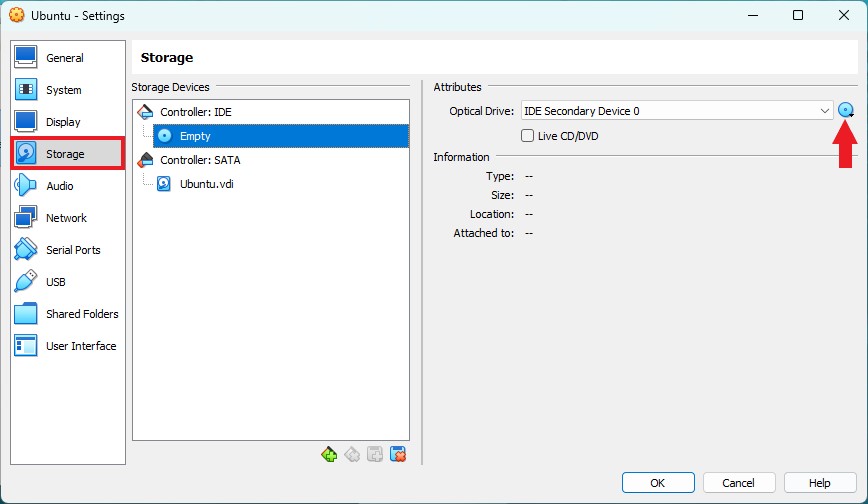
8. After that, click on the optical drive drop-down menu and select the Choose disk file option. Select the Ubuntu ISO image file from your downloaded location, then click the OK button.

Note
If the OK button does not work, then you have to enable Virtualization settings on your system BIOS. For that, you can check out our guide on; how to enable virtualization on Windows 11.
That’s it! This is how you can create a virtual machine for the Ubuntu operating system. Once the virtual machine is created, you can proceed to the next step.
3. Installing Ubuntu on VirtualBox
Now, our virtual machine is ready for the installation process. You can proceed with the installation and setup process of Ubuntu 22.04 LTS.
To do so, you can follow the steps mentioned below:
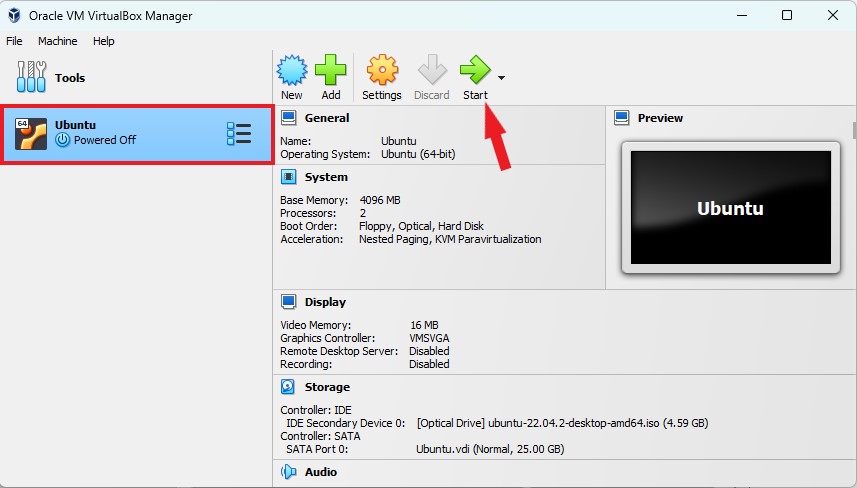
1. To install Ubuntu 22.04 LTS on a Virtual Machine, select your virtual machine name and click the Start button.
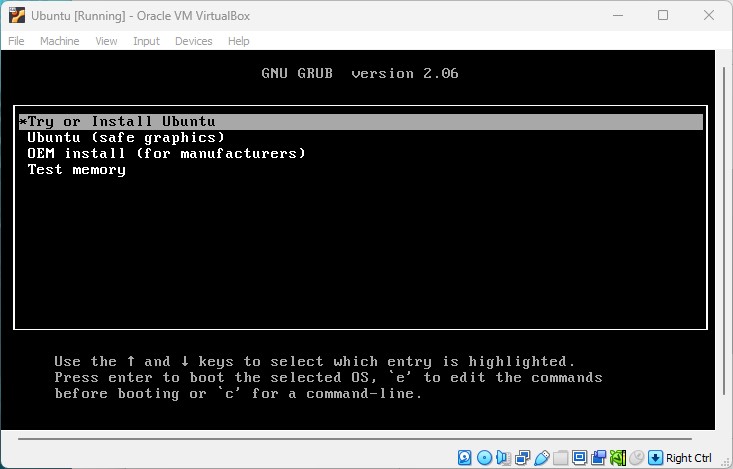
2. After that, you will get the GUN GRUB window. Here, select Try or Install Ubuntu and hit the [Enter] key.
3. After that, it will open the Ubuntu installation window.
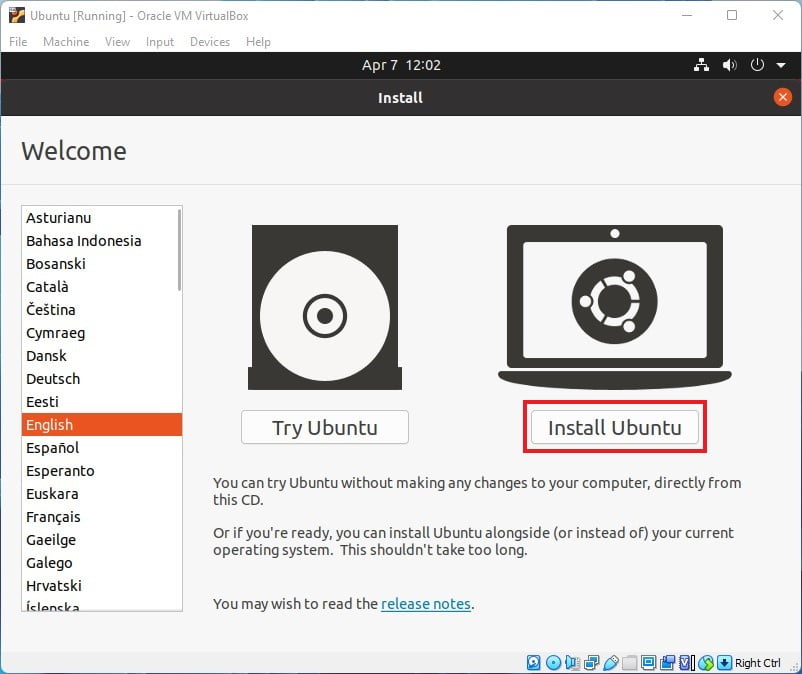
4. Here, you have to set up your Ubuntu installation. For that, select your language, and click on the Install Ubuntu button.
5. After that, select the Keyboard language and layout and then click on the Continue button.
6. On the Updates and other software window. You have to select the normal installation, download updates while installing Ubuntu, and Install third-party software of graphics and Wi-Fi hardware and additional media formats.
7. Then click on the Continue button.

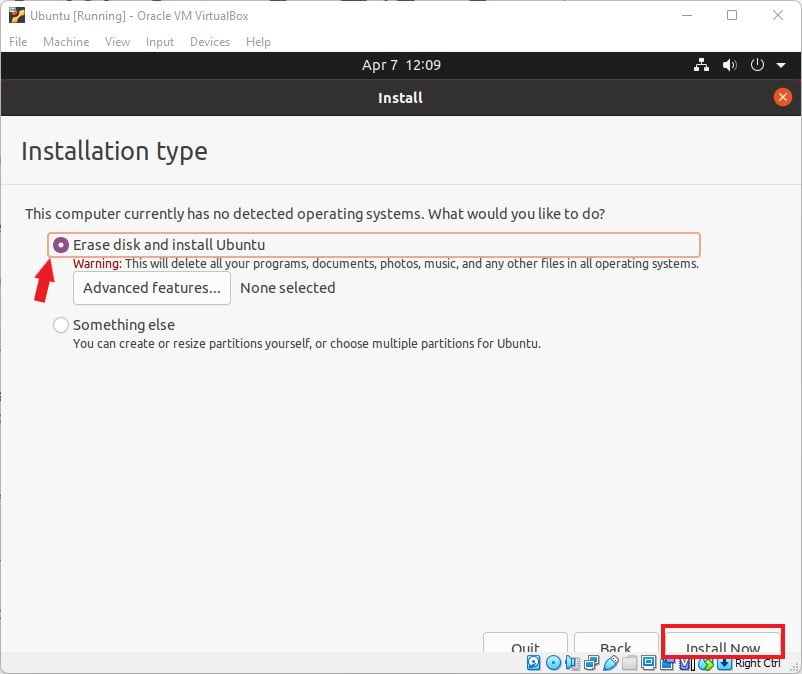
8. After that, select the installation type as the Erase disk and install the Ubuntu option. Don’t worry, it will not erase any of the data because we are installing it on a virtual machine.
9. Finally, click on the Install Now button to continue.
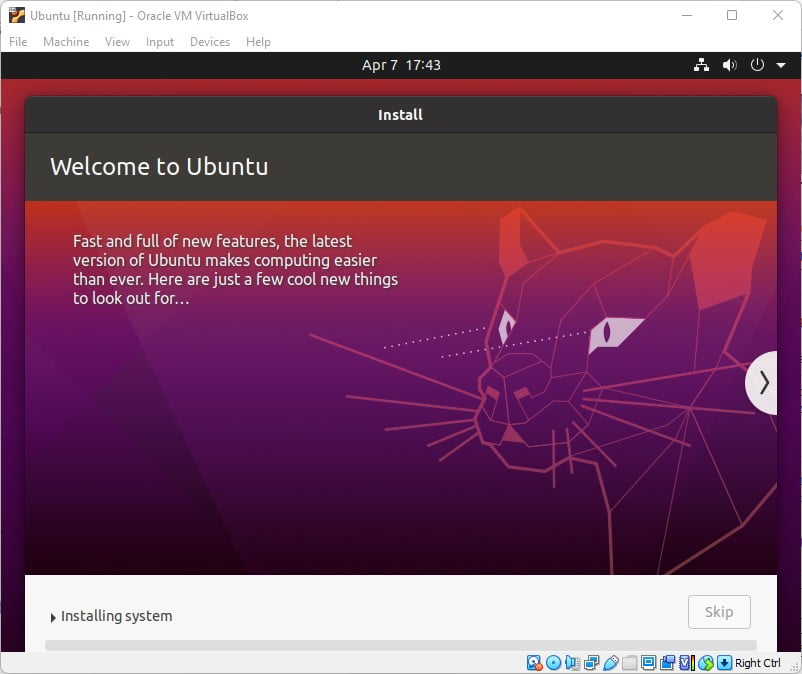
10. After that, click on the Continue button, select a location, register a user, and click on Continue. It will take approximately 30 minutes to install the Ubuntu operating system on VirtualBox.
11. After the installation is completed restart the virtual machine, on the booting windows press the [Enter] to reboot.
Now, you are ready to use Ubuntu 22.04 LTS on Windows 11. If you are getting a screen resolution problem, then you can check out our guide on; how to change the Ubuntu screen resolution in VirtualBox; to fix it.
Conclusion
By following the above-mentioned methods, you can install Ubuntu 22.04 LTS on the Windows operating system using the VirtualBox. However, if you want to install the non-LTS version of Ubuntu then the process will be the same instead of Ubuntu 22.04 LTS you need to download the iso file of Ubuntu 23.04.
That’s it! We hope this guide was helpful to you. However, if you have any doubts regarding the installation process you can ask them in the comments section below. We are always there to assist you.


Thank you So much, very systematic ways forward to learn and do. You are awesome teacher.
Thank you So much, very systematic ways forward to learn and do. You are awesome teacher.
More you do More we Learn. Cheers Linux.
Thank You!