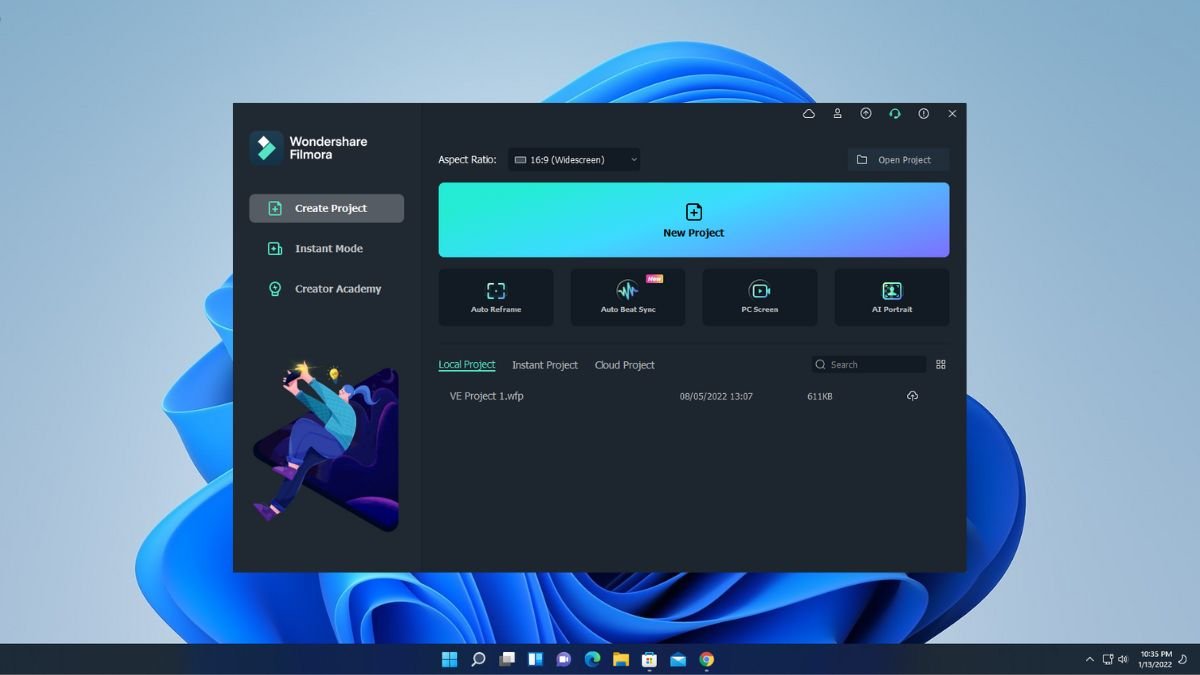
If you are a content creator or video editor and have selected to go with the Wondershare Filmora, then this guide is for you. Wondershare launched its new video editing software for the Windows operating system – Filmora 13. It comes with many features that will smooth the performance and efficiency. Additionally, Filmora 13 provides AI tools that enhance the video editing experience.
Filmora 13 is beginner-friendly video editing software for beginners, who are new to video editing. It is also suitable for YouTube content creators and to do basic video editing. If you are a pro at video editing, you can check out the list of best video editing software.
How to Install Wondershare Filmora on Windows 11
If you’re having trouble updating to Filmora 13 or want to download and install it on your Windows device, follow this method to install and activate Wondershare Filmora 13 on your Windows computer.
To do so, follow the steps mentioned below:
1. Open any web browser and visit the official website of Wondershare Filmora. Or visit this link: filmora.wondershare.com.
2. Now, to download the latest version of Wondershare Filmora, click on Products and select the Filmora – Viding software for Windows option.
3. Here click on Free Download to download it.

Note
You do not need a Wondershare account to download Wondershare Filmora. You can download and try it for free with a watermark, but you must have a Wondershare account and purchase the product to activate it. Check this link to get a discount on Filmora 13.
4. After the download is complete, open the installer file.
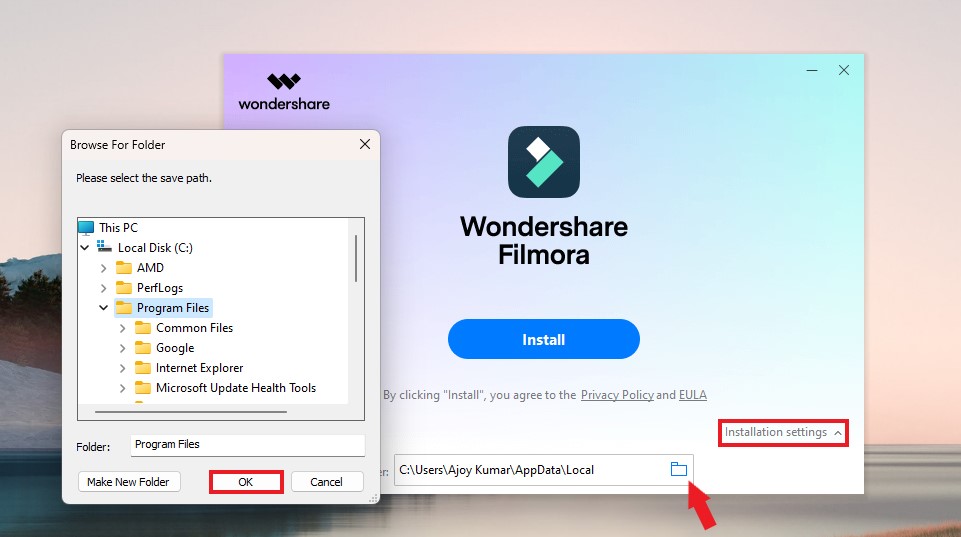
5. Now, you will get the setup windows. Here, click on the Installation Settings option and click on the folder icon to choose the installation folder for Wondershare Filmora 13.
6. After you have selected the location, click on the OK button and click on the Install button.
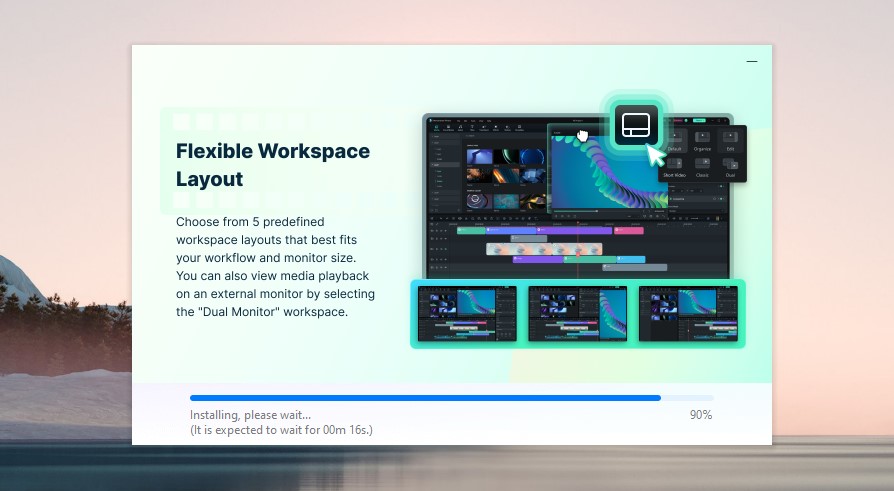
7. It will automatically download and install the software. Just wait for the installation process to complete.
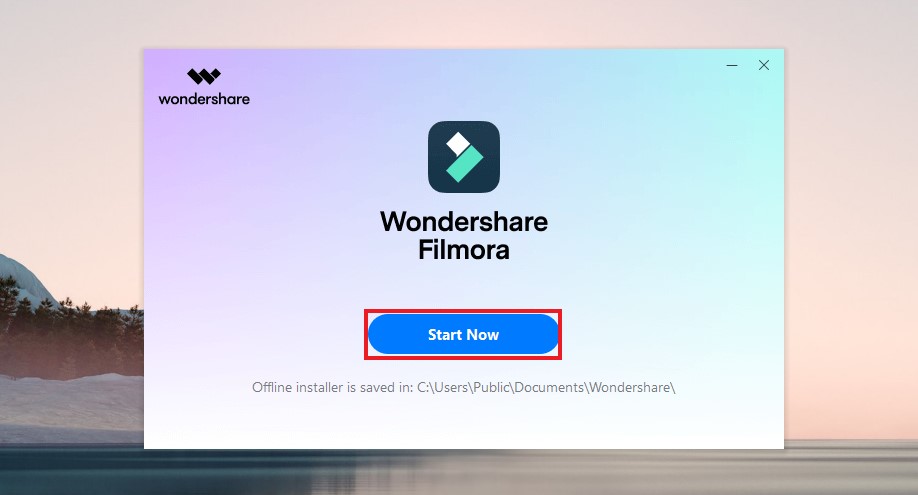
8. After the successful installation of Wondershare Filmora 13, a start-up window will appear.
9. Here, click on the Start Now button to use the software.
That’s it! This is how you can download and install Filmora 13 on your Windows operating system. However, if you already have an older version of Filmora installed, you can check for the latest update. Follow the steps below to do so.
How to Check for Wondershare Filmora Update
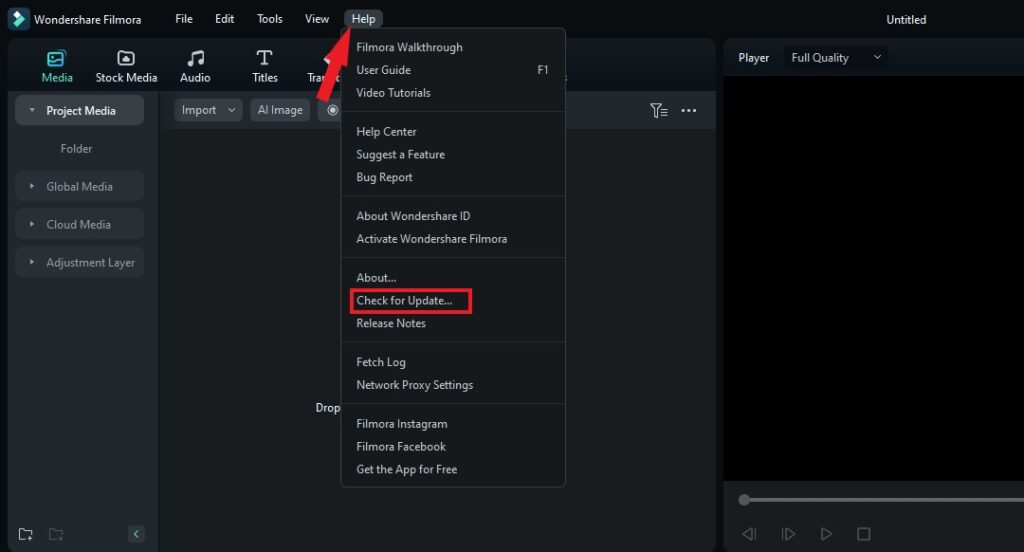
We will explore how to check for updates for Wondershare Filmora, ensuring you have the latest version of this powerful video editing software. Stay up-to-date with new features and enhancements for an enhanced editing experience.
If you don’t want to manually download and install the latest version of Wondershare Filmora, you can directly check for updates from the software itself. To do this, open the video editor and click on the Help tab in the menu. Then, select the Check for Updates option. If there is a new update available for Filmora, it will be downloaded and installed automatically.
How to Activate Wondershare Filmora 13
Now, let’s discuss how we can activate the Wondershare Filmora 13 in just a few simple steps and unlock all the powerful features of Filmora 13. If you don’t activate it, you will get a watermark on your video.
To activate the Filmora 13, you have to buy the software. After that, you need to create a Wondershare account. You can use it to activate any Wondershare products.
Now, to activate Filmora 13, follow the steps mentioned below:
1. Open Wondershare Filmora and click on the login icon located at the top right corner of the software interface.
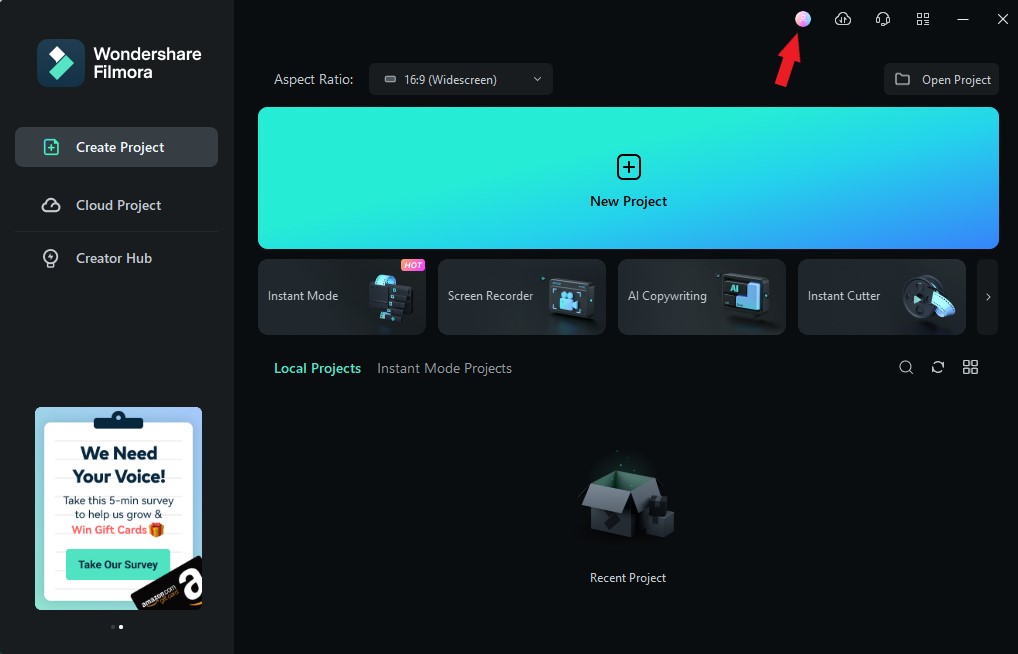
2. Now, to activate, enter your Wondershare account details such as email and password, then click on the Log In button.
Note
From here, you can also create a new Wondershare ID and reset your account password if you happen to forget it.

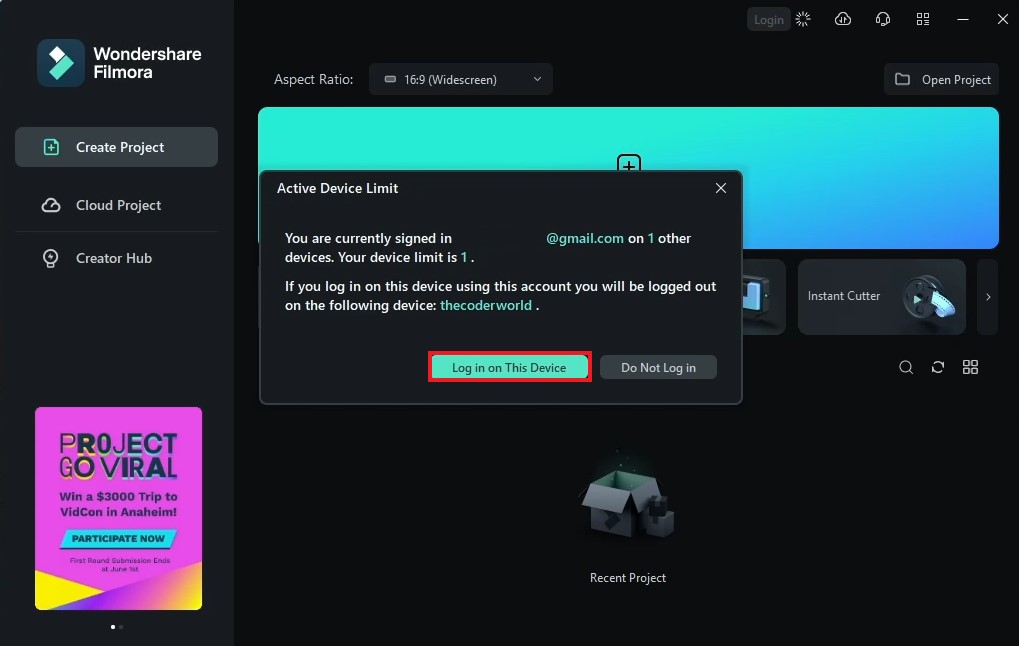
3. Sometimes, you may encounter an error related to the active device limit because you can only use the account on one device. To fix it, click on the Log in on this device” button.
4. After that, you are ready to use Filmora for your video editing work.
Conclusion
Installing Wondershare Filmora on Windows 11 is a straightforward process. Run the installer and follow the on-screen instructions. Activate the software using a Wondershare ID/Account. Once installed, you can unleash the powerful features of Filmora and embark on your video editing journey on Windows 11. You can also check our list of the 10 best video editing software.
We hope this article was helpful to you. However, if you have any more questions regarding the installation and activation, don’t hesitate to leave them in the comments section below. We are always here to help you.