If you’re using Ubuntu Linux for daily work, you’ve probably installed Java on your machine. Currently, I am using Java 18 on Ubuntu. However, sometimes I need to install different Java versions, such as Java 8 and Java 11, based on project requirements or personal preferences. Therefore, I have multiple Java versions installed on my system.
When I need Java 11, I switch from Java 18 to Java 11 and vice versa. In this guide, I will show you how to switch between Java versions on Ubuntu Linux. If you haven’t installed Java on your Ubuntu system, you can also check out our guide on installing Java on Ubuntu.
How to Switch Between Java Version on Ubuntu Linux
Let’s discuss how to switch the Java version on Ubuntu. To do that, you need to install Java JDK if you don’t have it. You can follow the steps below:
1. Press Ctrl + Alt + T to open the Terminal.
2. After that, run this terminal command to install Java the default version of Java:
sudo apt-get install default-jre
3. To install a specific version of Java run the following command:
sudo apt-get install openjdk-11-jdk
4. By following the above steps, we can ensure that you have multiple Java versions installed on Ubuntu. To check the currently selected Java version, run the following command in the Terminal.
java --version
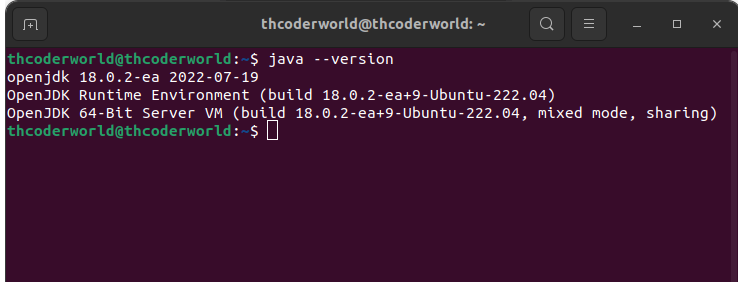
5. Here, you can see that I am currently using Java 18. However, I want to switch to Java 11. For that, run this command to check the list of installed Java JDKs and JREs.
sudo update-alternatives --config java
6. Here, the number mark with an asterisk(*) is the current choice on your system.
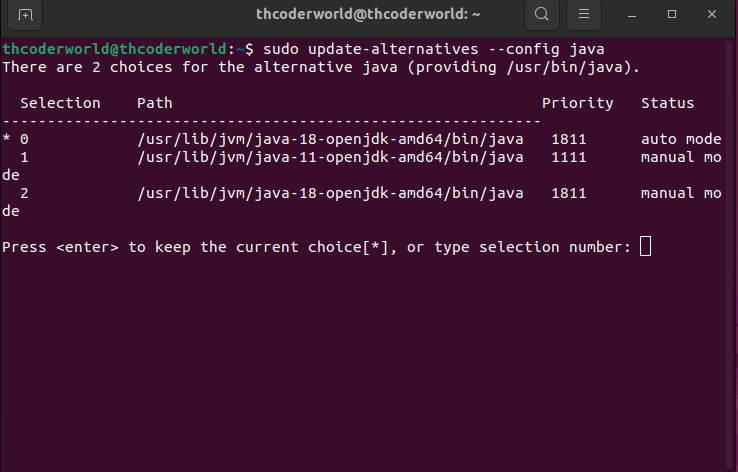
Note
Sometimes, you need to enter your password to authenticate the process.
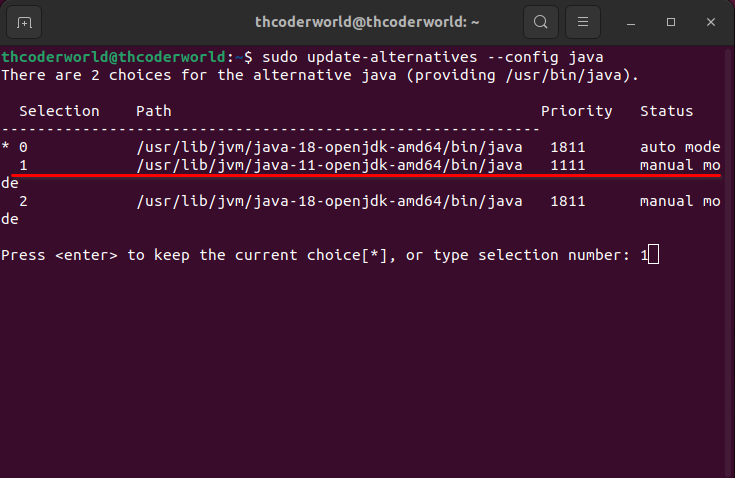
6. To change the default Java version, you can type the selection number where it says Press <enter> to keep the current choice[*], or type the selection number. For instance, to switch to Java 11, I will type 1. Because selection “1” is associated with Java 11.
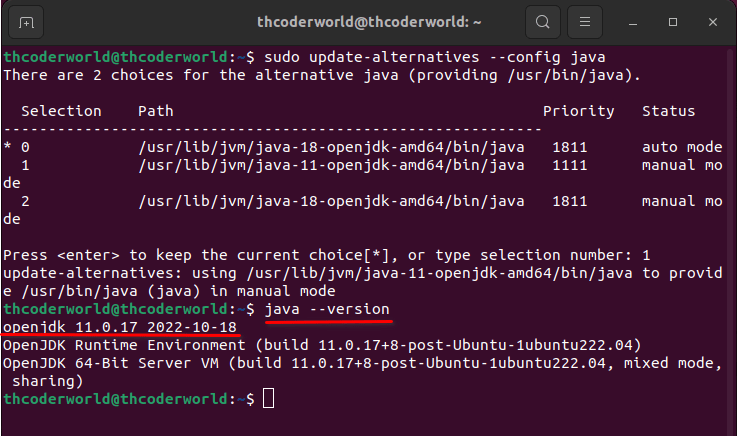
7. Once you have selected the Java version you want to use, you can check the currently selected default Java version by running the following terminal command:
java --version
Conclusion
You can see from the above steps that the default Java version has been changed to Java JDK 11. You can easily switch between different Java versions on Ubuntu by following these steps. I hope that you find it effortless to change your Java version. This is how you can switch between Java versions on Ubuntu Linux.
However, if you have any queries, please do not hesitate to write them in the comment section below. We will surely reply to you.