7-Zip is open-source free software used for extracting zip files on Windows 11, and it is one of the most popular zip extractors as it supports a wide range of formats. Its simple interface and robust features have earned it a loyal user base over the years. If you use Windows 11 and want to install 7-Zip, this guide is for you.
In this article, we will discuss how to download and install 7-Zip on your Windows 11 system and show you how to make the best use of its features. So, without further ado, let’s get started.
How to Download and Install 7-Zip on Windows 11
Installing 7-Zip on Windows 11 is a straightforward process. Here, we’ll discuss how to download and install 7-Zip on Windows 11. Follow these steps:
1. Open any browser on your system.
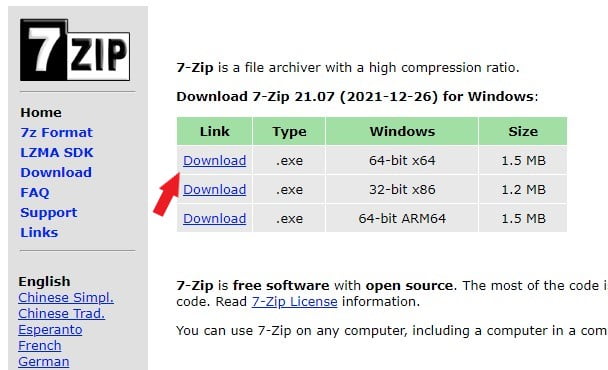
2. After that, search for 7-Zip and open this link 7-zip.org. It will redirect you to the 7-Zip download page.
3. On the download page, you will find two download options: 32-bit and 64-bit versions. Depending on your system type, download the appropriate file type.
4. Once the download has been completed, open the 7-zip.exe file.
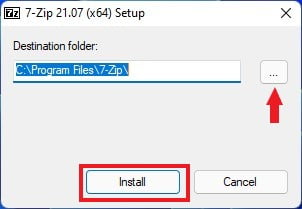
5. Here, if you want to change the installation location, you can do so by clicking on Browse. Select the location where you want to install the software, and then click OK.
6. Click on the Install button and wait for the installation to complete.
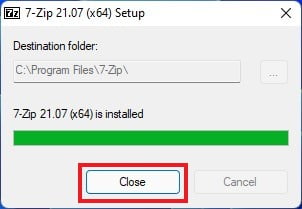
7. After that, click on the Close button.
How to Setup 7-Zip on Windows 11
Once you have successfully installed 7-Zip on your Windows 11 computer, you have to set it up. For that, follow these steps:
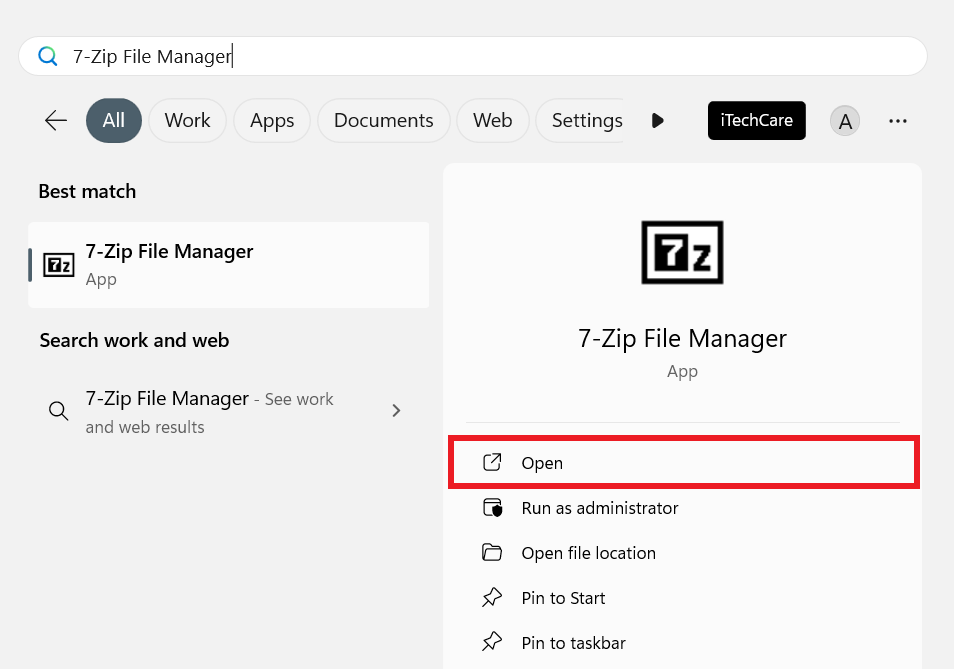
1. Press the Windows key on your keyboard to open the Start Menu.
2. In the Windows search box, type 7-Zip File Manager and click Open.
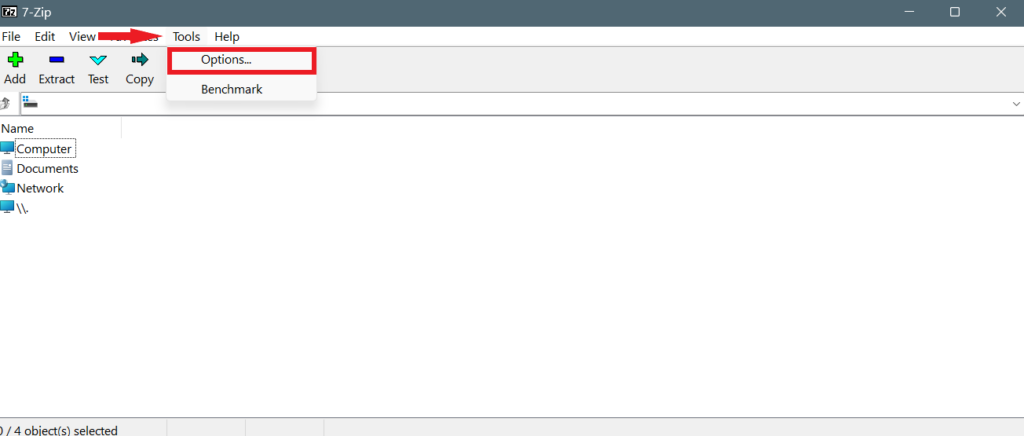
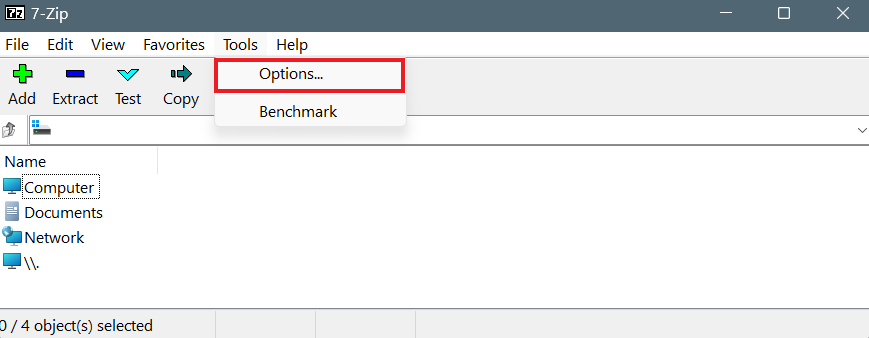
3. Click on the Tools option in the top menu bar and choose Options… from the drop-down menu.
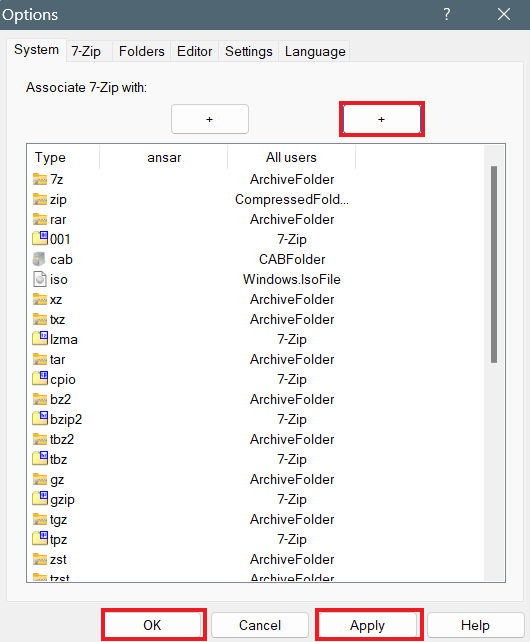
4. Under the Options window, click on the second + button or Plus icon to make 7-Zip the default app to access archive files.
5. Lastly, click on the OK and Apply buttons at the bottom of the window to save the changes.
How to Add 7-Zip in the Right-Click Menu
If you quickly want to access 7-Zip features, you can add it to the right-click context menu. By doing so whenever you right-click on any file you will see the 7-Zip in the menu.
To add 7-Zip to the right-click menu, follow these steps:
1. Launch the 7-Zip File Manager.
2. Click on Tools in the top menu bar.
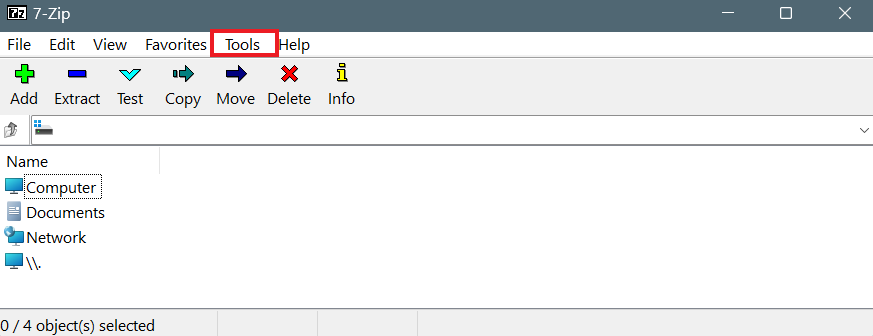
3. From the drop-down menu, choose Options…
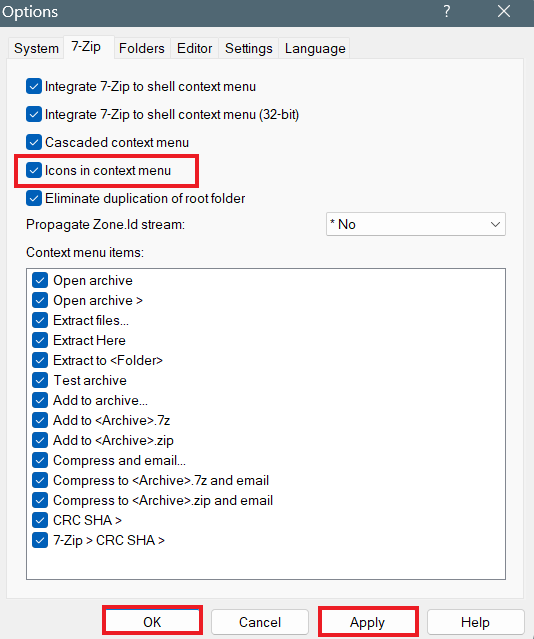
4. Under the Options window, click on the 7-Zip tab and enable the Icons in context menu option.
5. Then click on the Apply and OK button to confirm the changes.
6. Finally, close the window.
How to Extract 7-Zip in Windows 11
We are mainly going to use 7-Zip to extract our archive files. Here are the steps you can follow to do so:
1. Locate the compressed archive file (e.g., ZIP, 7z) that you’d like to extract.
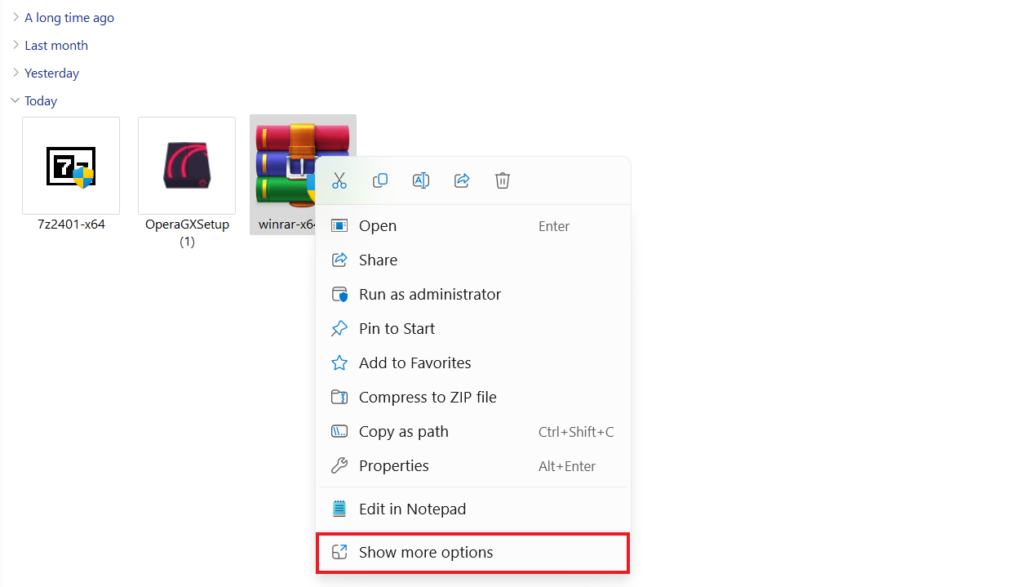
2. Right-click on the archive file and then click Show more options from the context menu.
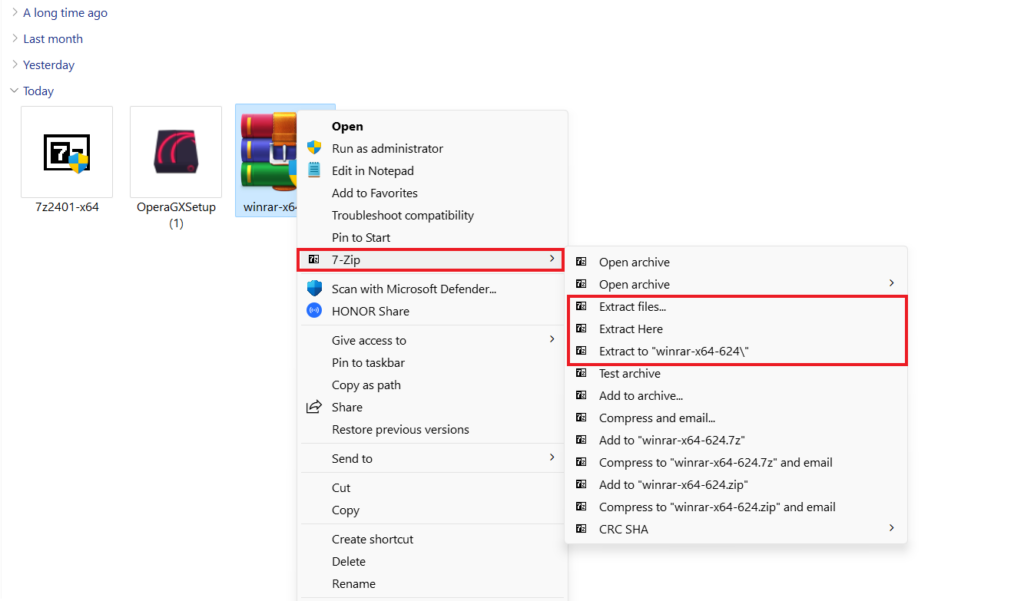
3. Click on the 7-Zip and then you will get three options in the submenu: Extract files, Extract Here, Extract to [Folder Name].
4. You can select Extract Here to extract the files to the current folder where the archive file is currently located. However, if you prefer to extract the files to an individual folder then select the Extract files option. But if you want to extract the files to a new folder then select Extract to [Folder Name] from the menu.
5. After that, a new window will appear that allows you to browse and select the folder to extract the files. Choose the folder and click OK to proceed.
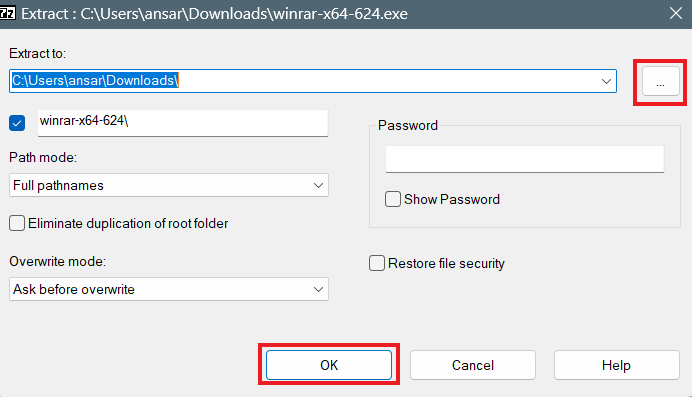
6. In case the archive file is protected with a password, then ensure to enter the correct password and click OK to proceed.
7. Now, the 7-Zip will start extracting the files to the specified location. Once the process is finished, you may find the extracted files in the designated folder.
How to Compress Files using 7-Zip on Windows 11
Using 7-Zip, you can also compress files effectively in various formats such as ZIP, TAR, GZIP, and more. Whether you need to save space on your disk, arrange your files, or transfer them quickly over the Internet.
To compress files with 7-Zip, follow the steps below.
1. Press the Windows + E keys to open File Explorer and select the files you want to compress.
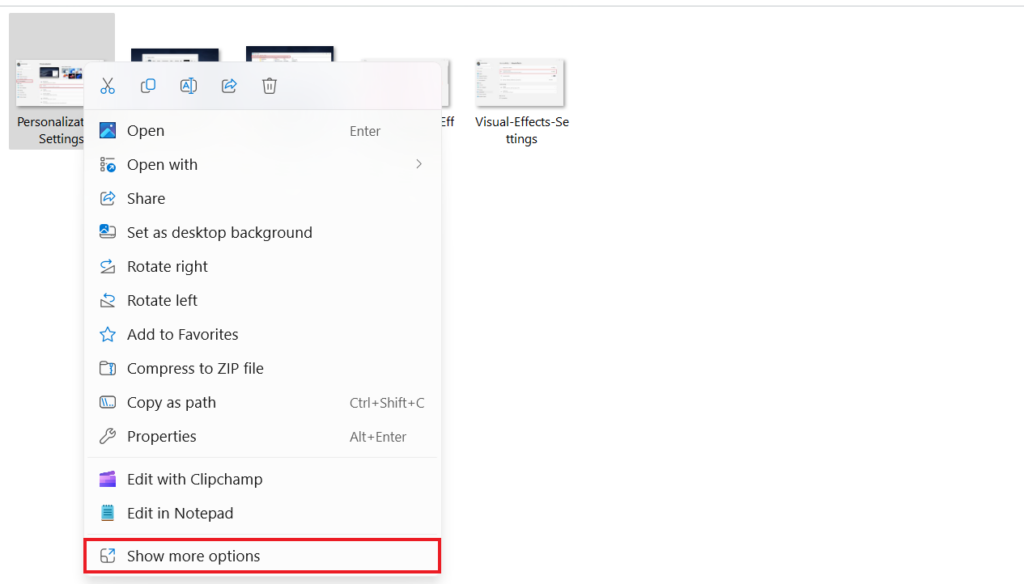
2. Right-click on the file and select Show more options from the pop-up menu.
3. From the context menu, click on the 7-Zip option.
4. Here, you will see the various options to compress the file using 7-Zip. For instance, if you want to compress the file using the .zip or .7z formats then you should select Add to Filename.7z or Add to Filename.zip option.
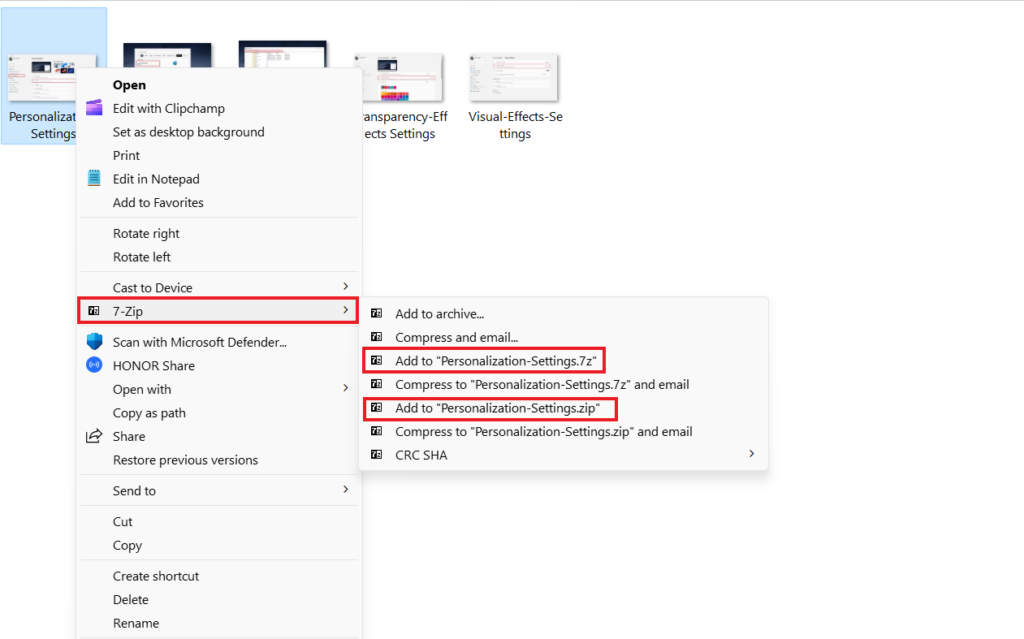
5. If you want to compress the file to any other format, then select the Add to Archive option from the menu. Plus, you can also choose to Compress to [Folder Name] and mail option from the menu.
6. Also, if you select the Add to Archive option then you get various options that you can change accordingly. It allows you to rename the file in the Archive field. You can also be able to change the file location by clicking the square dots button next to the Archive field.
7. To change the Archive format, choose the file type by clicking the down arrow next to the Archive format.

8. After that, you can select the compression level to increase or decrease the compression time (from Store to Ultra) from the drop-down menu.
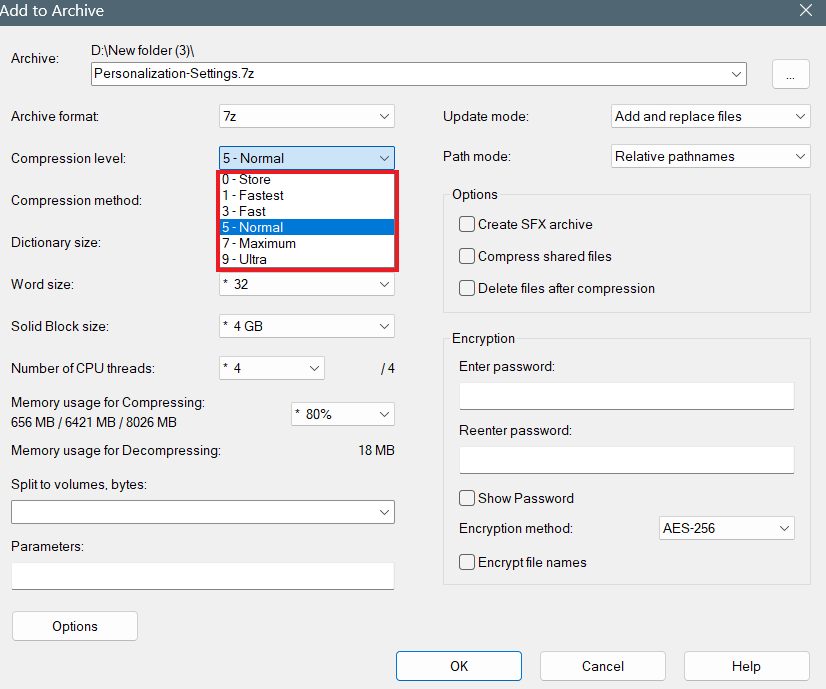
9. While compressing the file, you can change the compression ratio with individual algorithms using the Compression method option.
10. Once you finish with the compression option, click on the OK button to begin the compression process.
How to Encrypt a File with Password Protection using 7-Zip
7-Zip not only allows you to archive files but also enables you to encrypt your files with password protection. This is an excellent way to keep your folders and files protected from unauthorized access.
Follow the steps below to encrypt a file with password protection using 7-Zip:
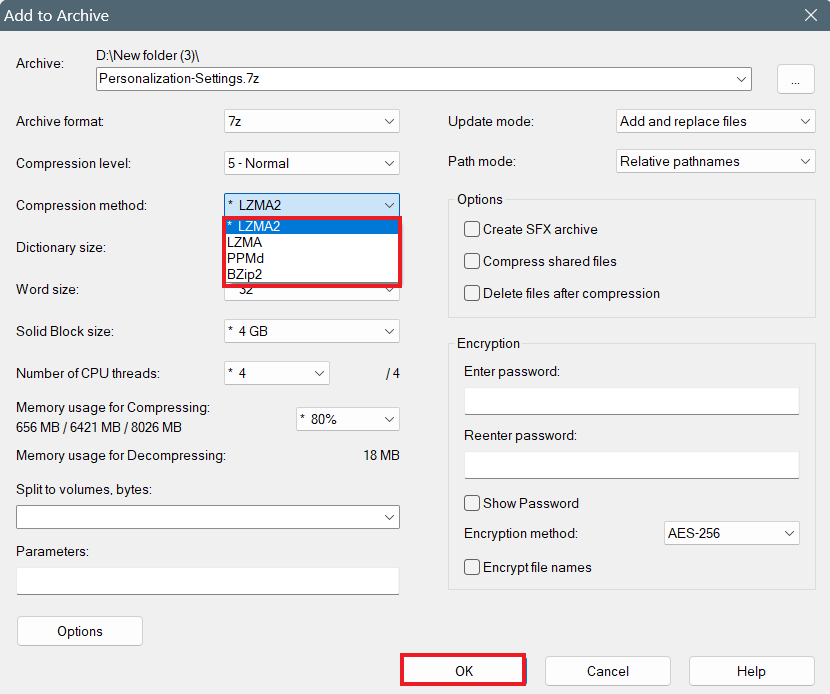
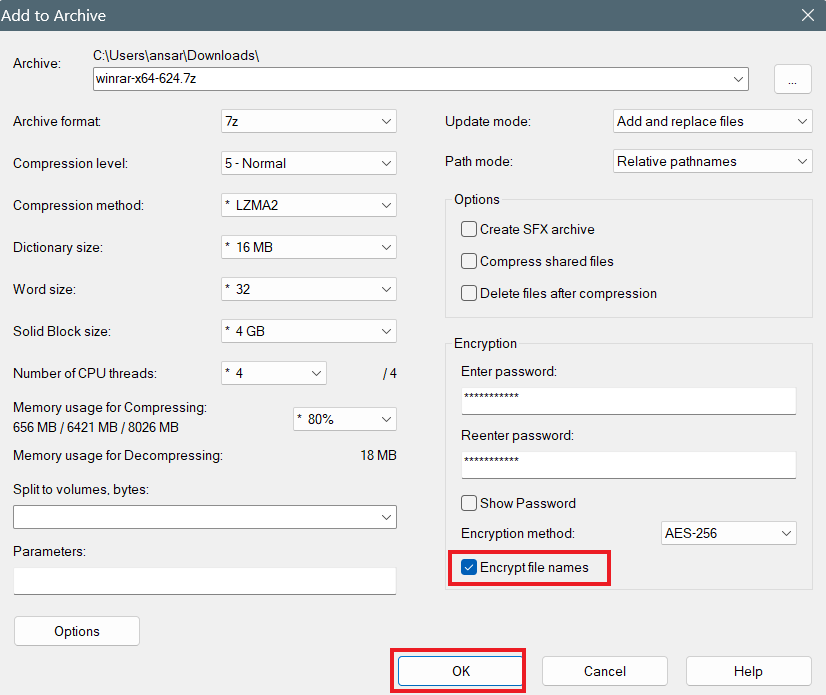
1. When you are compressing your files in the Add to the Archive dialog box, under the Encryption section, you will find the Enter password field and type a strong password.
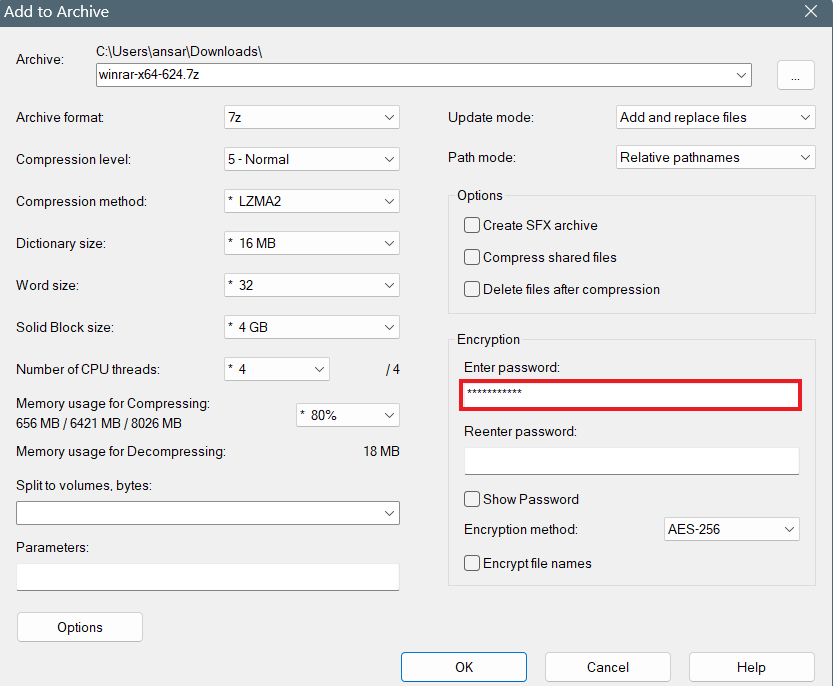
2 . Once you have entered the password, confirm it by filling in the password again in the Re-enter password field.
3. If you want to view the password you have entered, click on the Show Password option.
4. If you are using the 7z archive format for compression, then select the encryption method as AES-256
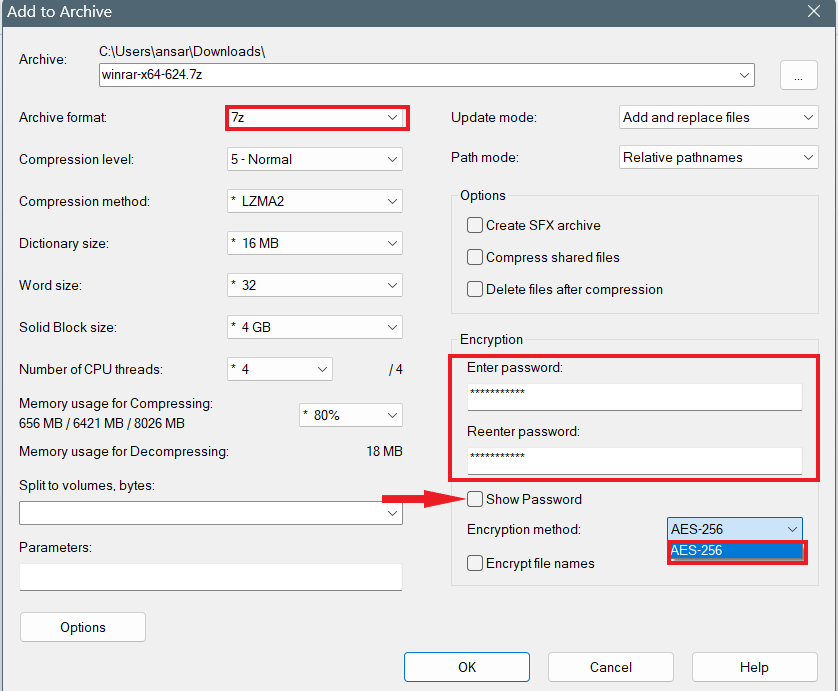
5. Also, if you want to encrypt the file names, check the Encrypt file names option.
6. Once you are done with all the steps, click on the OK button to begin the encryption process.
Conclusion
That’s it! This is how you can install and use 7-Zip on your Windows 11 computer to extract zip, compress files, and protest your archives. However, if you are looking for instructions on how to install and use WinRAR, you can follow the linked guide.