Nowadays, there is no trend of using CD flash drives to install the Windows operating system on your PC. Instead, we have to use a USB flash drive. In this guide, we will discuss how to create a Windows 11 bootable USB drive.
To create a bootable drive, we are going to use Etcher. There are a few free software options that allow you to create a bootable USB drive using the image file or the ISO file of the operating system. No doubt, there are many tools to create a bootable drive, but with Etcher, you can create it in no time.
Things Required for Windows 11 Bootable USB
To get started with it, you need to acquire some things first. The following is a list of those items; check carefully before proceeding.
- A USB drive with at least 8GB of Storage.
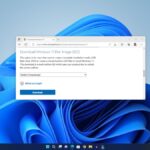
- Windows 11 ISO File (Download Windows 11 ISO)
- Etcher Image Writer. (Download it here – Etcher.io) Or else, check our detailed guide on; how to download and Install Etcher.
- And, Of course, a computer or laptop and an internet connection.
Minimum System Requirements for Windows 11
Also note that to run Windows 11 on your system, you need to meet certain minimum system requirements. Here is the list:
- Processor: 1 gigahertz (GHz) or faster with 2 or more cores on a compatible 64-bit processor or System on a Chip (SoC).
- Memory: 4 GB RAM.
- Storage: 64 GB or larger storage device.
- System firmware: UEFI, Secure Boot capable.
- TPM: Trusted Platform Module (TPM) version 2.0.
- Graphics card: DirectX 12 compatible graphics/WDDM 2.x.
- Display: Greater than 9 inches with HD resolution (720p).
- Internet connection: Microsoft account and internet connectivity are required for the setup of Windows 11.
If TPM is not enabled, try to enable TPM on your PC BIOS. Here, check Intel and AMD-supported processors that can run Windows 11. You can also check if your PC can run Windows 11 or not.
How to Create Windows 11 Bootable USB Using Etcher
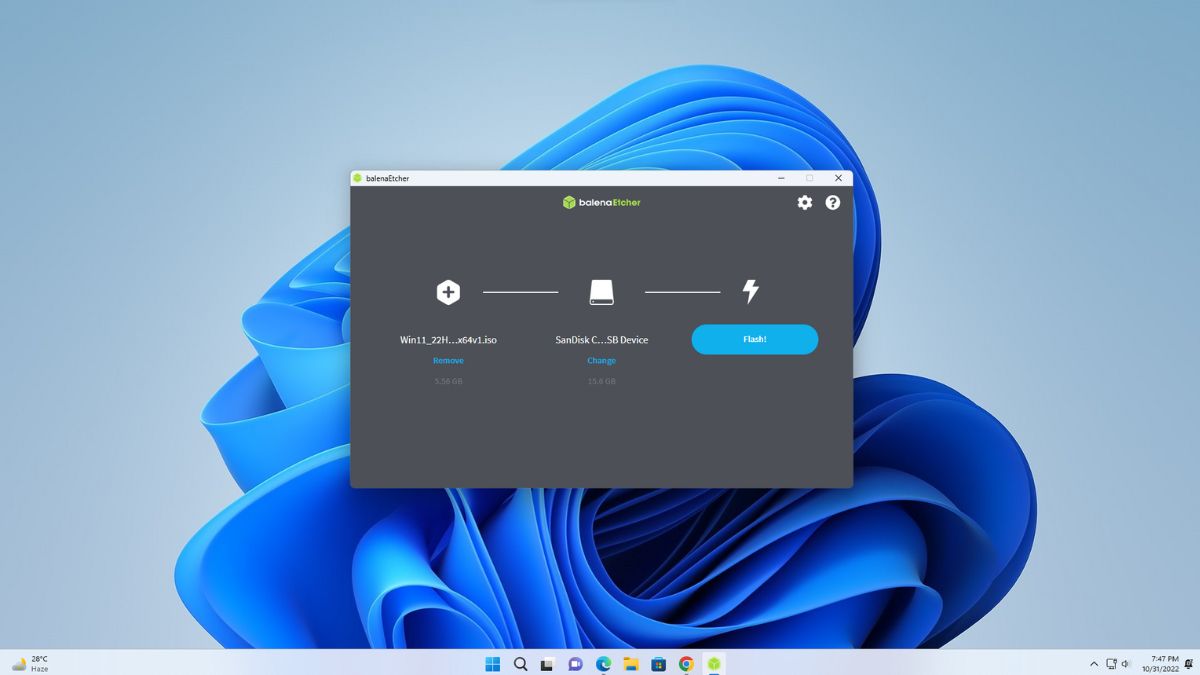
Etcher is an open-source utility software developed by balenaEtcher. With the help of Etcher, we can write image files such as .iso and .img files. You can also use it to create a USB flash drive. Here is a step-by-step guide to creating a Windows 11 bootable USB flash drive.
Once you have installed Etcher and downloaded the Windows 11 ISO file, you can follow the following steps to create a bootable Windows 11 USB drive.
Note
The steps will be the same for other Windows operating systems versions.
1. You must first connect your USB pendrive to your computer. Once it’s connected, you can proceed to the second step.
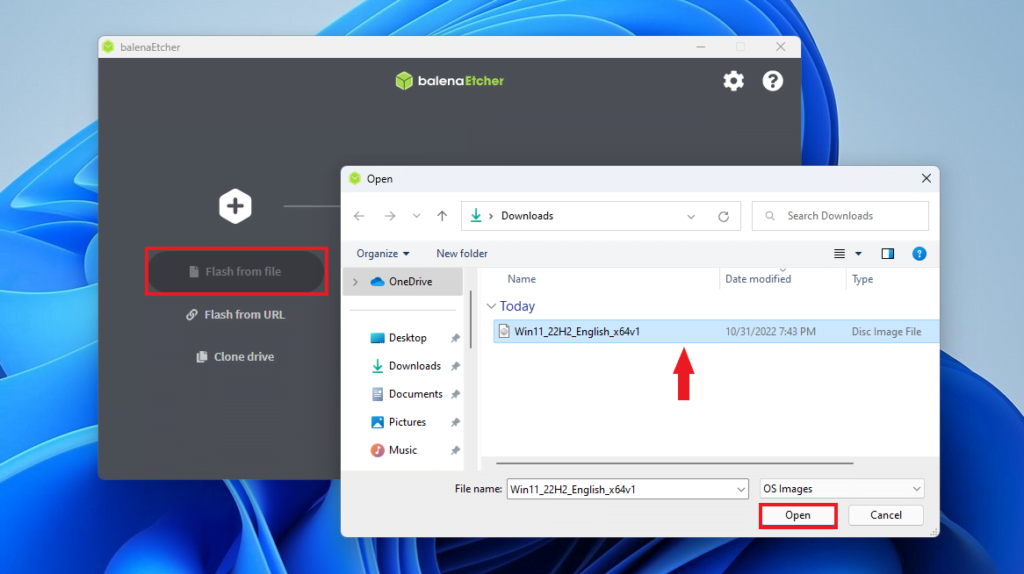
2. Now, you need to select the image file. To do that, click on the Flash From File option and browse for the Windows 11 ISO file with which you want to create a bootable flash drive.
3. Then, click on Open to select the file.
Note
BalenaEtcher supports several image formats such as ISO, BIN, DMG, IMG, ETCH, and many more. The chances of encountering an image with a format not supported by BalenaEtcher are very slim. However, if you receive a pop-up message stating missing partition table, click on the Continue button to create it.
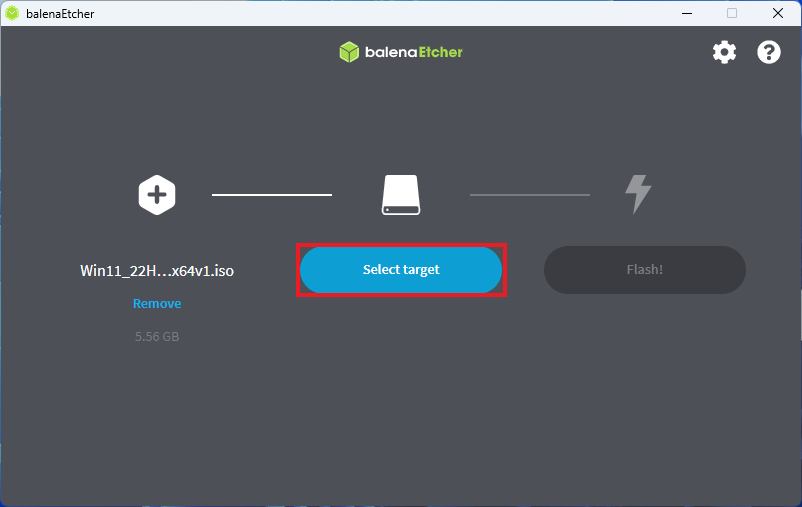
4. Now, the next option that you will see there is to select a drive. This option will allow you to connect your USB drive to the Etcher image writer so that you can write an image file to that drive. To do so, click on the Select Target option.
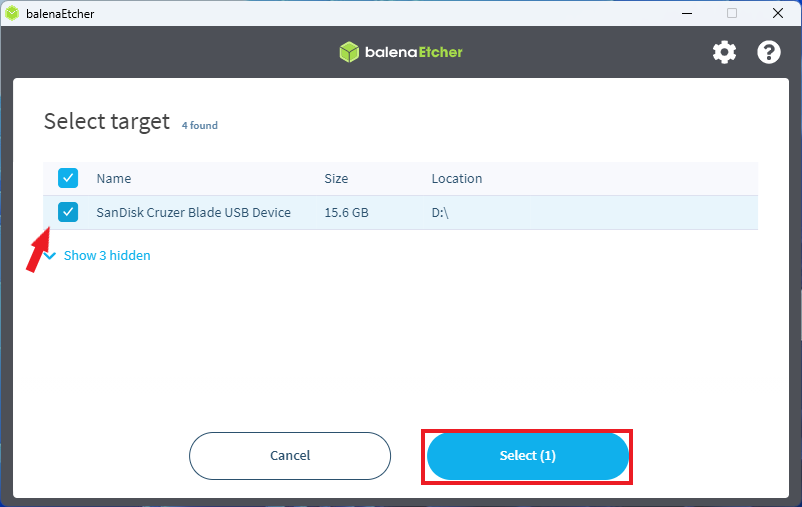
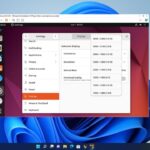
5. Here, you will get a list of USB drives connected to your computer. Choose the USB drive you want to flash and click the Select option.
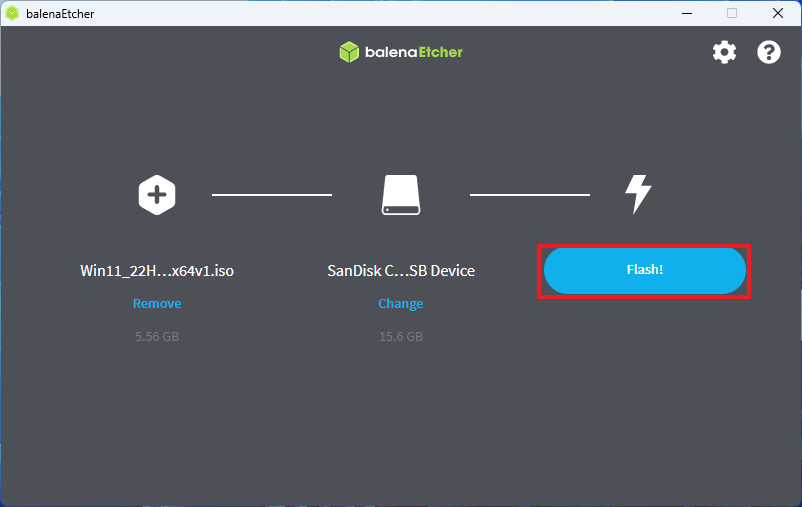
6. Click the Flash button to create a Windows 11 bootable USB drive. The process will take some time, depending on the size of the ISO file and the USB stick speed.
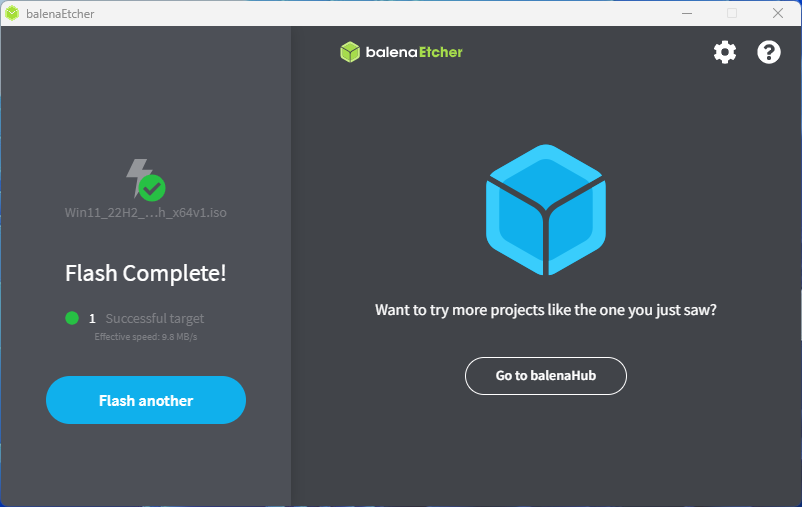
7. The following screen will appear once the process is complete, informing you that – “Flash Completed!”
8. Now you can use the Windows 11 bootable USB drive to install Windows operating system on any system.
You have seen that it is a lot easier to create a bootable drive using Etcher. It is specially made for people who are not tech-savvy. There are not so many options in Etcher. So you don’t have to mess with all the unnecessary options as you would with Rufus or some other image writers.
Conclusion
That’s it; this is how you can create a bootable USB flash drive using Etcher. Now, if you want to create a Ubuntu Bootable USB, then check our detailed guide on; how to create a bootable Ubuntu USB Drive.
I hope this article was helpful to you. If you liked the article, share it with your friends. If you have some suggestions, do not hesitate to leave them in the comments section below.


it doesnt appear on my MACS boot screen
Can I know what you are getting?