If you have installed BlueStacks 5 on Windows 11 and not working or not opening, then you are in the right place. Here we are going to troubleshoot BlueStacks’ problem. BlueStacks is an Android emulator that helps you to install Android apps and games. But to use it on Windows 11, you need to enable Hyper-V and virtualization settings on your system BIOS.
Also, you might have heard that starting with Windows 11, the operating system will support Android apps natively using the Amazon AppStore. However, the app is not available to all users. It is only officially available to US-based users for the time being. But still, if you want to install Android apps and games, you can use BlueStacks.
System Requirements for BlueStacks
If you have installed BlueStacks and your system does not meet the minimum system requirements, you will also have a problem. Therefore, ensure that the system you want to use BlueStacks on meets the listed system requirements.
Minimum Requirements
Here is the list of minimum system requirements to run BlueStacks on the Windows operating system:
- OS: Windows 7 and above
- Processor: Intel or AMD Processor
- RAM: At least 4 GB
- Storage: 5 GB Free Disk Space
- Either an Administrator account or access to Admin credentials
- The most recent stable release of graphics driver update from Microsoft or OEM.
If your PC; fulfills these minimum system requirements, BlueStacks 5 will work on your PC. However, do not expect blazing-fast performance.
Now that you understand the requirements to run BlueStacks 5 on your PC; let’s discuss why not working or opening.
How to Fix BlueStacks 5 Not Opening on Windows 11
Here, we will discuss all the possible ways to fix the BlueStacks problem that Windows users can face while using BlueStacks.
1. Enable Virtualization
In order to use any Android emulator, you have to enable virtualization settings on your system. If this feature is disabled, then you will not be able to use BlueStacks. Here are the steps you can follow to check whether virtualization is enabled.
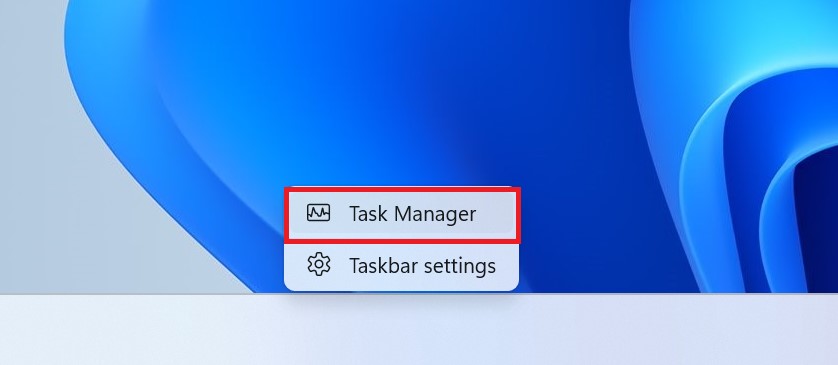
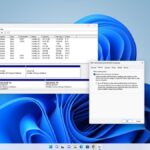
1. Right-click on the taskbar, and from the prompt menu select Task Manager to launch it.
2. Click on the Performance tab and click on CPU.
3. Then look for the virtualization option to check the current state.
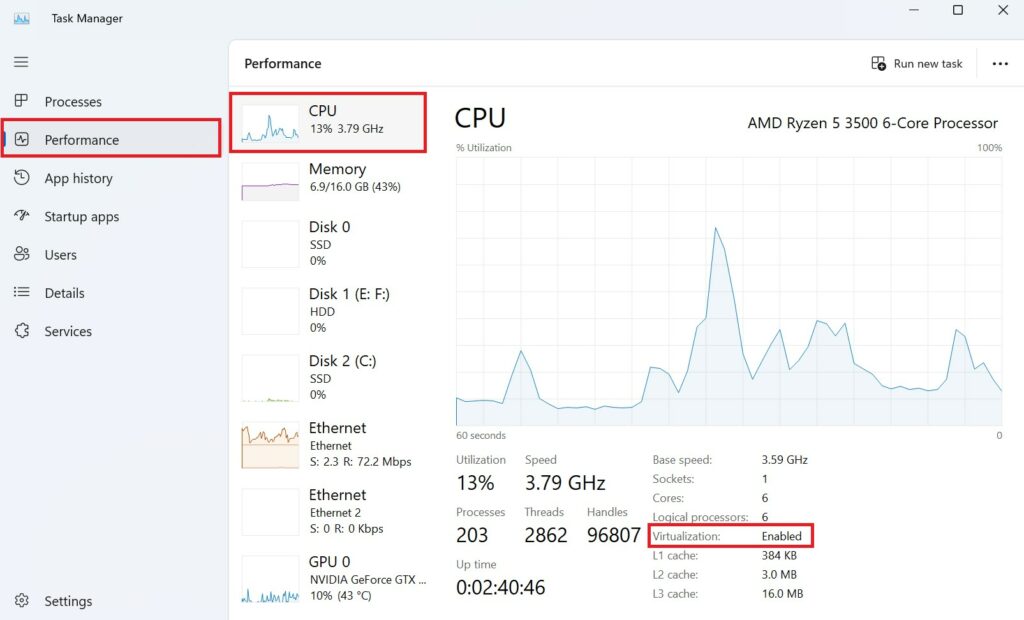
If enabled, you can follow the next methods to fix the issues. If not, you can check out our guide on enabling Virtualization on Windows 11.
2. Turn Windows feature
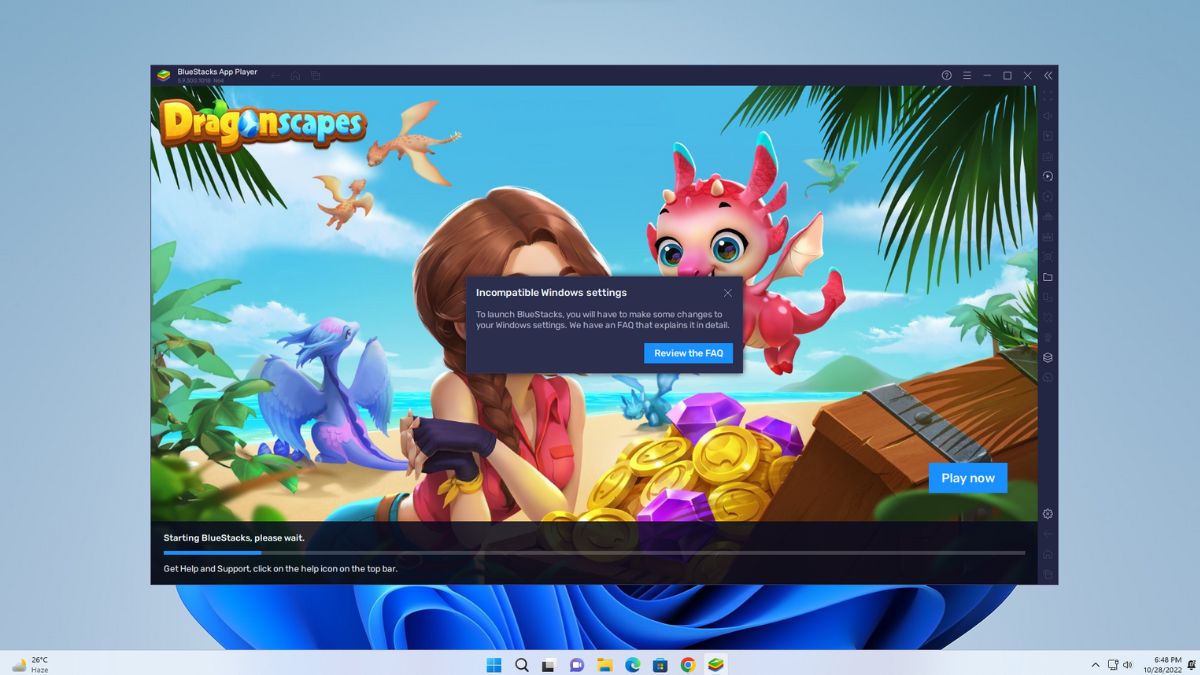
When you open BlueStacks, if you get an error that says- Incompatible Windows Settings or Hyper-V inaccessible, then you have to enable some of the Windows features.
Here are steps to fix these issues:
1. Click on the Search icon on the taskbar, search for the Turn Windows feature on or off, and open it.
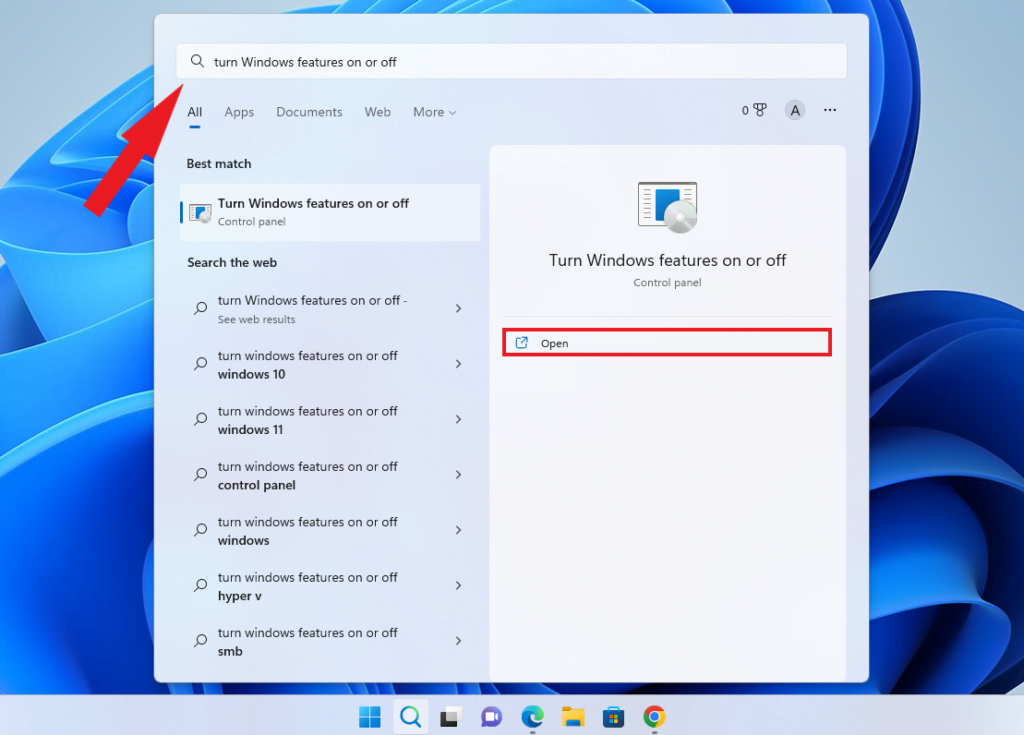
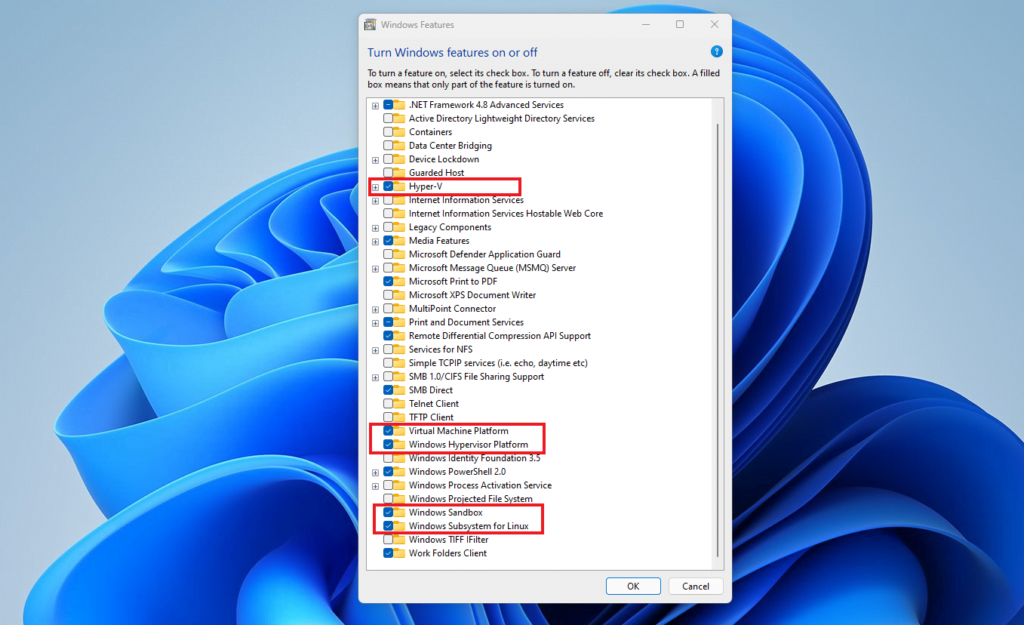
2. It will open the Windows feature window. Here, you need to turn on:
- Hyper-V
- Virtual Machine Platform
- Windows Hypervisor Platform
- Windows Sandbox
- Windows Subsystem for Linux
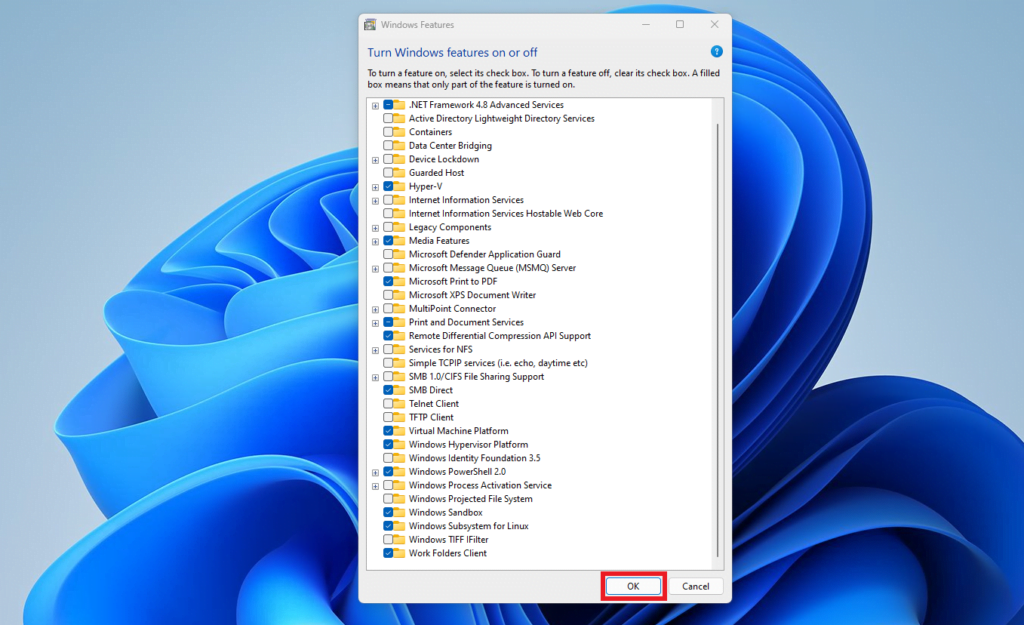
3. After you have enabled all these Windows features on your system. Click on OK to continue.
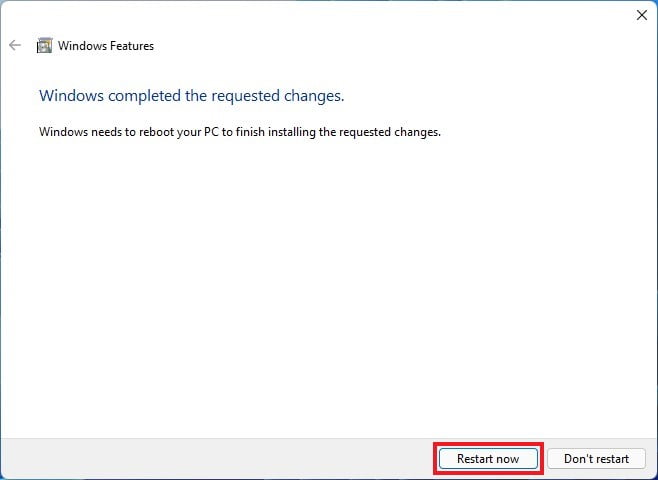
4. Now, it will change all the settings to Windows 11. Now to apply the changes, you have to restart your Windows PC. For that, click on the Restart Now button.
Now BlueStacks 5 should work fine on your Windows 11 if you are still experiencing any issues after enabling all the Windows features. Try to run BlueStacks 5 as an administrator.
3. Update Graphics Driver
Sometimes, if you are using the older graphic driver on your system then also BlueStack will not work. To fix it, you have to update the graphics driver to the latest version. Here’s how.
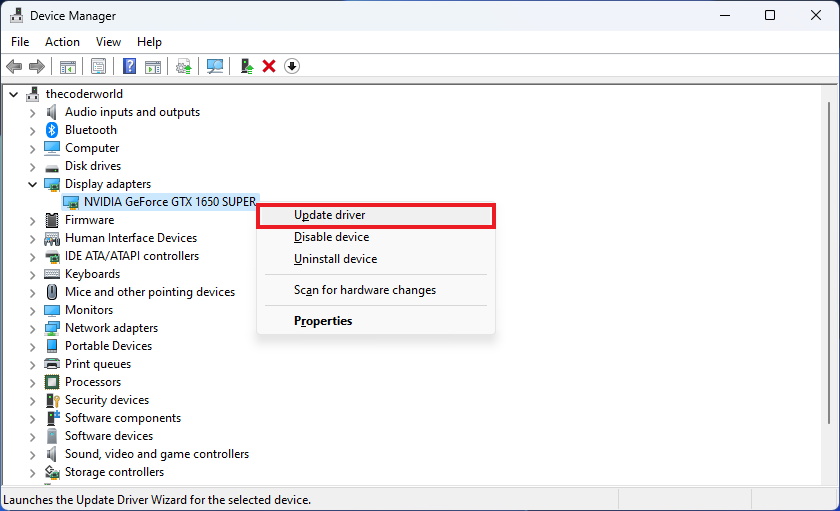
1. Open the Device Manager.
2. Here, expand the Display adapter option and select the current graphic driver.
3. Now, right-click on it and select the Update Driver option to check for updates.
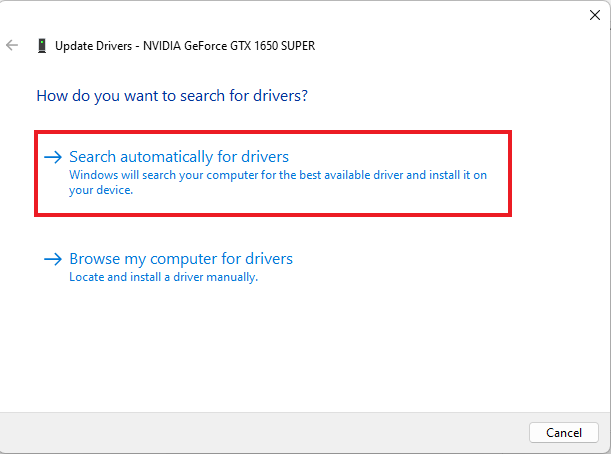
4. On the next window, click on the Search automatically for drivers. It will check for the latest driver from the internet.
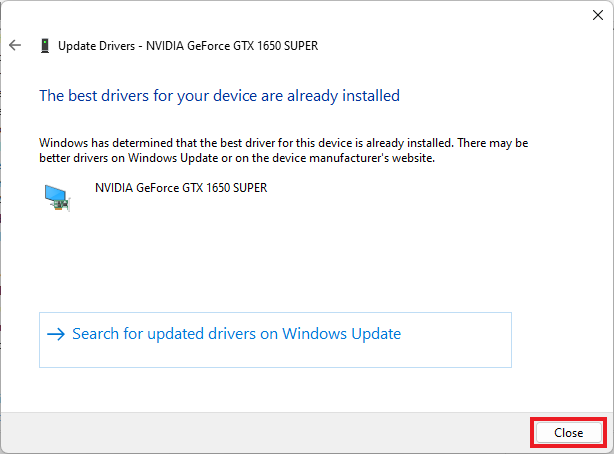
5. Once done, click on Close and restart your system to apply the changes.
Conclusion
That’s it; this is how you can fix BlueStacks 5 not working and opening on Windows 11. If you still face the same problem, you can try using BlueStacks 10. It runs on the cloud, so it doesn’t depend on your system configuration.
Additionally, you can try reinstalling BlueStacks 5. I hope this article was helpful to you. However, if you have any suggestions, do not hesitate to leave them in the comments section.


this doesnt work. My pc doesnt have Hyper-V in those files. i followed every step but i miss this Hyper-V file.
Which operating system you are using?