Are you interested in developing Android apps but unsure where to start? Then let me tell you, for that, you have to set up your system for Android Development. To do so, you need to install and set up Android Studio.
Android Studio is the go-to tool for Android app development, providing all the necessary tools for Android development. Here’s a complete guide from checking system requirements to downloading and installing Android Studio.
System Requirements to Run Android Studio
Before downloading and installing Android Studio on our Windows PC, let’s ensure the system meets at least the minimum requirements below.
- OS: 64-bit Microsoft Windows 8 or later
- RAM: 8 GB or more
- CPU: 2nd generation Intel Core or newer, or AMD CPU with support for a Windows Hypervisor Framework
- Free Storage: at least 8 GB
- Screen Resolution: 1280 x 800 or higher
If your Windows PC meets these requirements, you can expect a smooth experience while using Android Studio.
How to Download and Install Android Studio on Windows 11
Before you install Android Studio on your system, you need to install and set up Java JDK. To do that, you can follow our linked guide. After that, you can proceed to download and install Android Studio on Windows 11.
Here are the steps you can follow to install Android Studio:
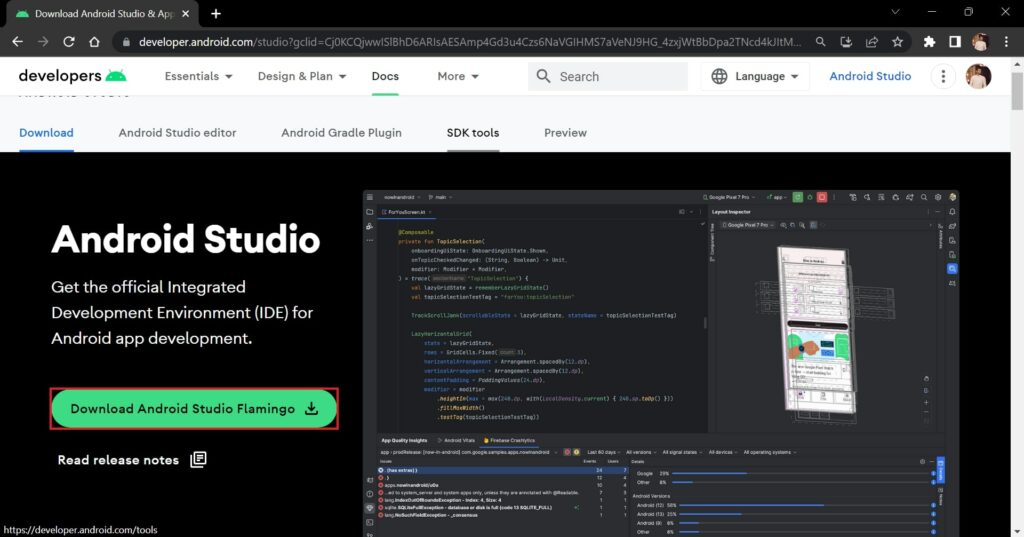
1. Open any web browser you like and head over to the Android Studio download page.
2. Once the website is loaded, click on the Download Android Studio button.
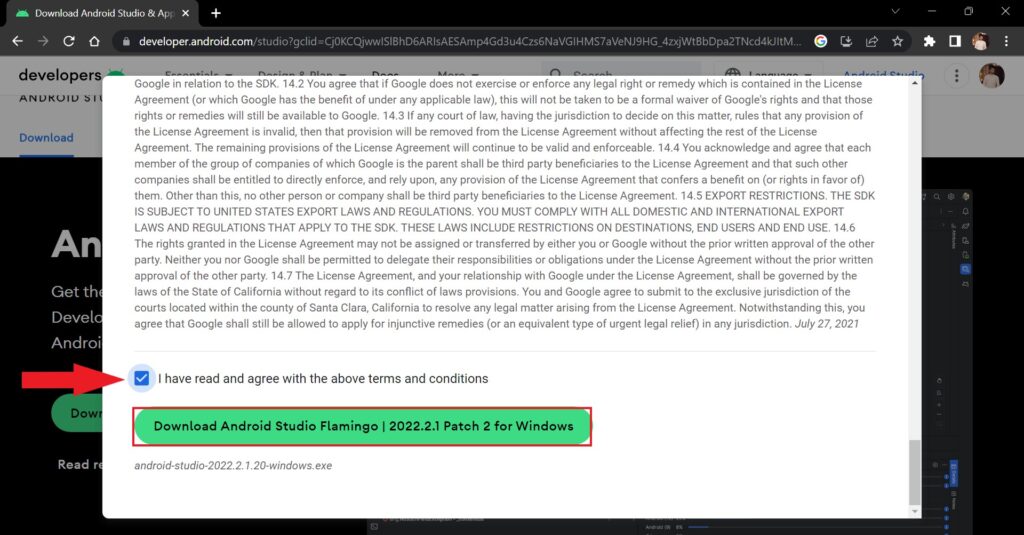
3. Once you click on the download button a pop-up will appear asking you to agree to the terms and conditions.
4. Carefully read them, scroll to the bottom of the list, and check the box that says; I have read and agree with the above terms and conditions button.
5. Now, you need to click on Download Android Studio and your download will begin.
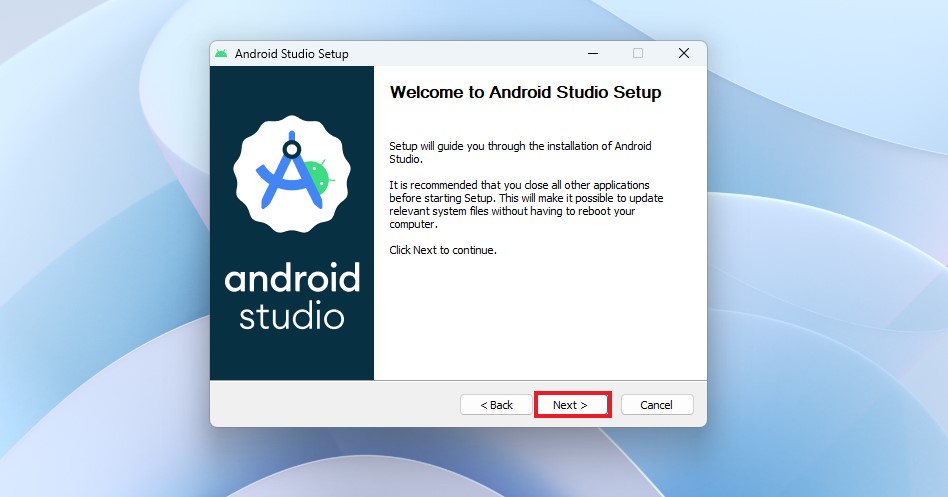
6. Once downloaded, open the executable file by double-clicking on it and follow the on-screen instructions for a hassle-free installation. Here, click on the Next button to continue with the installation.
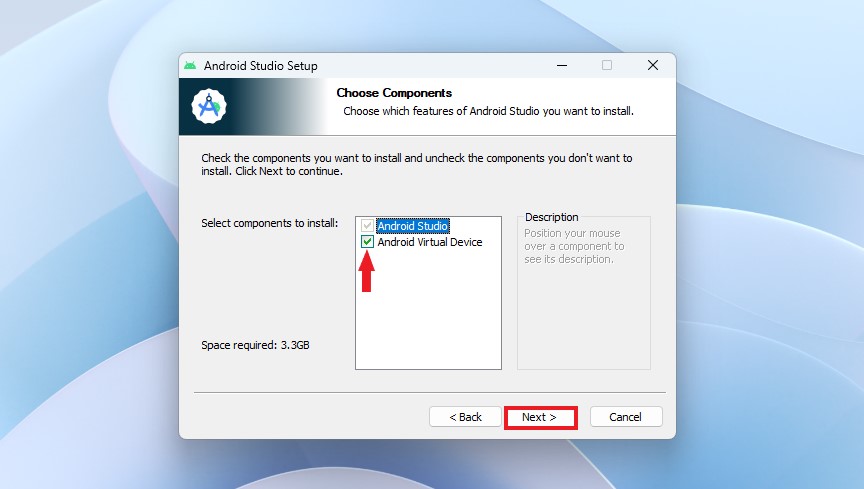
7. It is recommended to install the Android Virtual Device as it provides app testing using an Android virtual device within the Android Studio emulator.
8. Now, click on the Next button to continue.
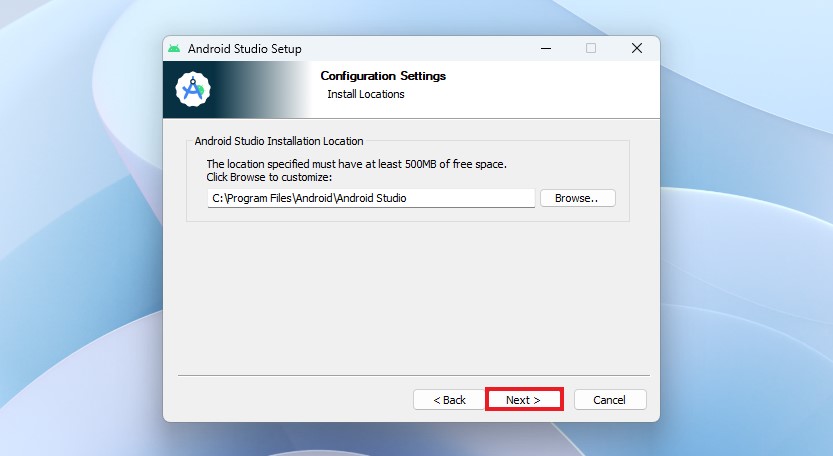
9. After that, select the installation location for Android Studio on your Windows 11 PC. Alternatively, you can keep it as the default and then click on the Next button.
10. Next, name the start menu folder for Android Studio. Now, the installation process will begin and take some time to complete.
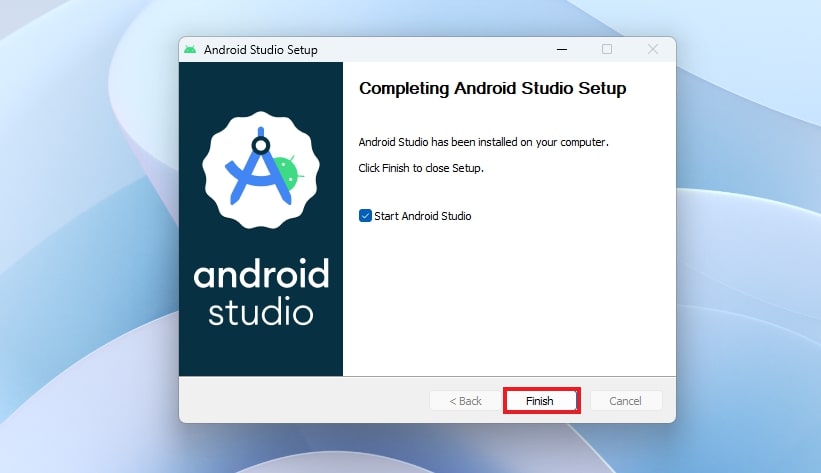
11. Once the Android Studio is successfully installed, click on the Next button and the following display will appear on your screen. Here, you need to click on the Finish button to exit the setup wizard and you can also check the Start Android Studio box if you want to launch the application instantly.
Congratulation! you have now downloaded and installed the Android Studio on your Windows 11 system. Now, let’s set it up before you can start building apps on it.
How to Set Up Android Studio on Windows 11
Once you have installed Android Studio, you need to set it up. To do that, follow the below-mentioned steps carefully to set up Android Studio on your Windows PC:
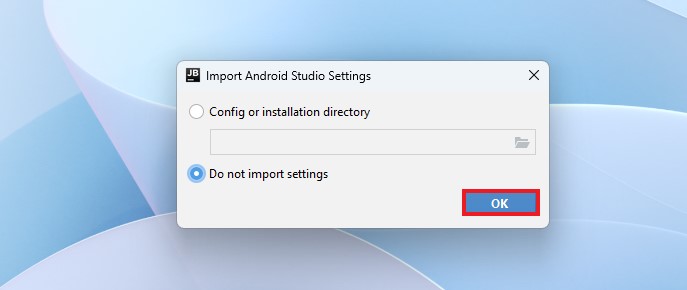
1. Straight after the Android Studio launches, you will be asked whether you want to import any previous settings or not. If this is your first time select the second option and click on the OK button.
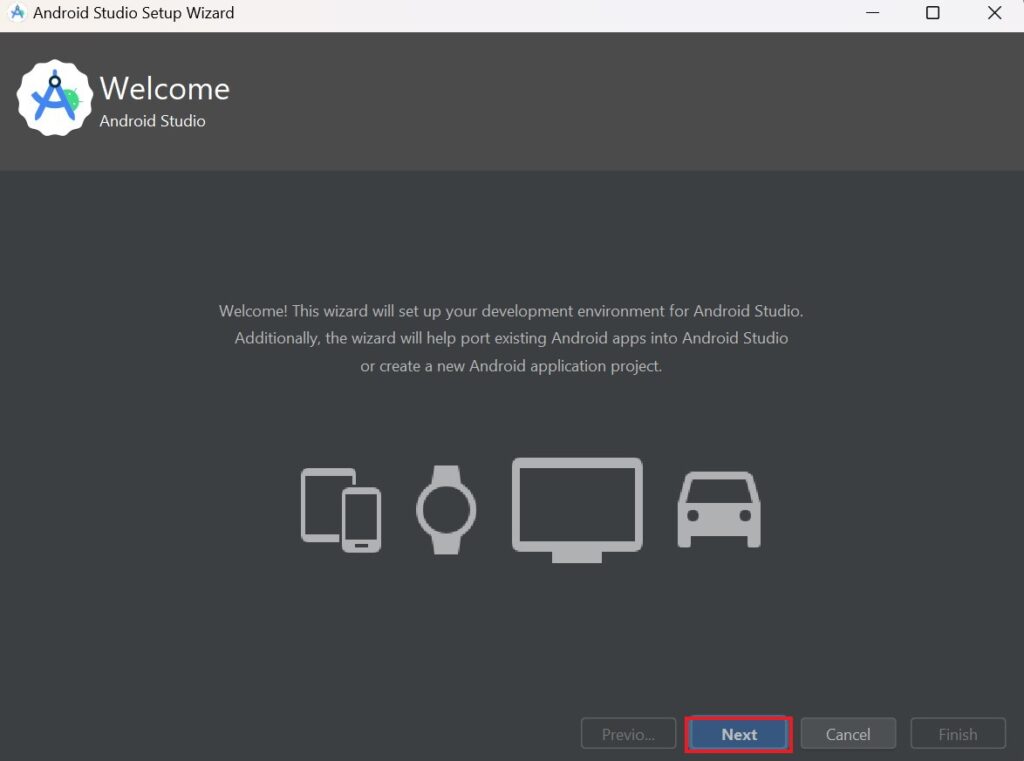
2. You will now see the Welcome screen, click Next to move further.
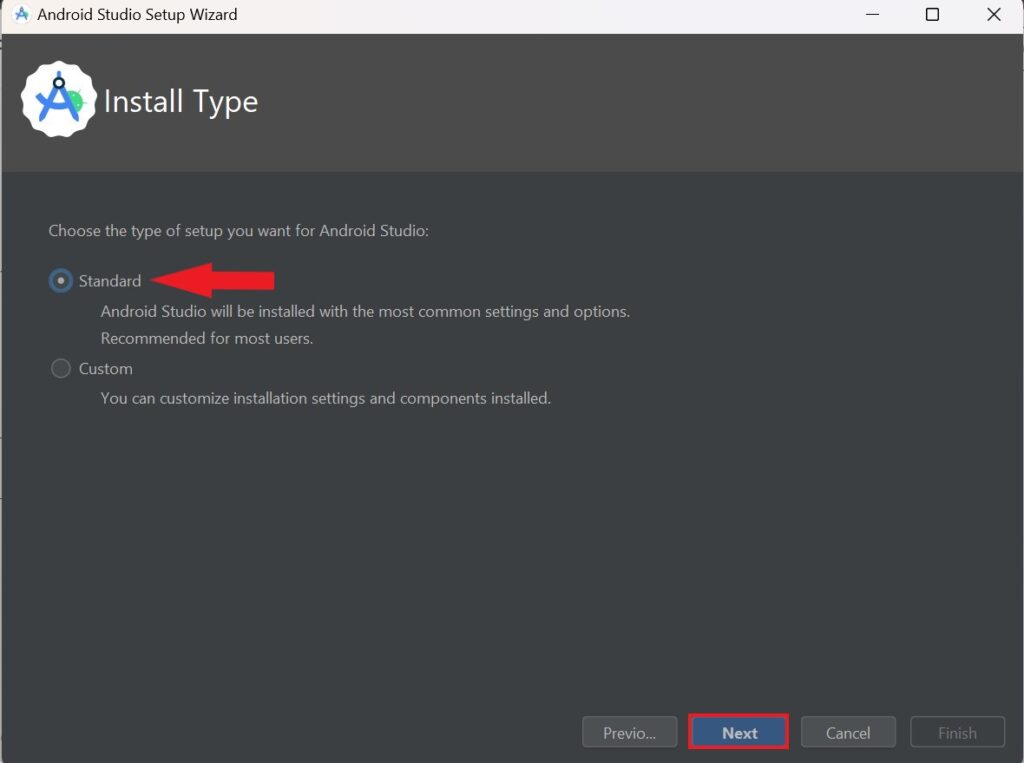
3. Now, you will be asked to select the Install Type. You can choose the custom settings to modify your installation, but it is suggested to go with standard settings for most users.
4. Once selected, click the Next button.
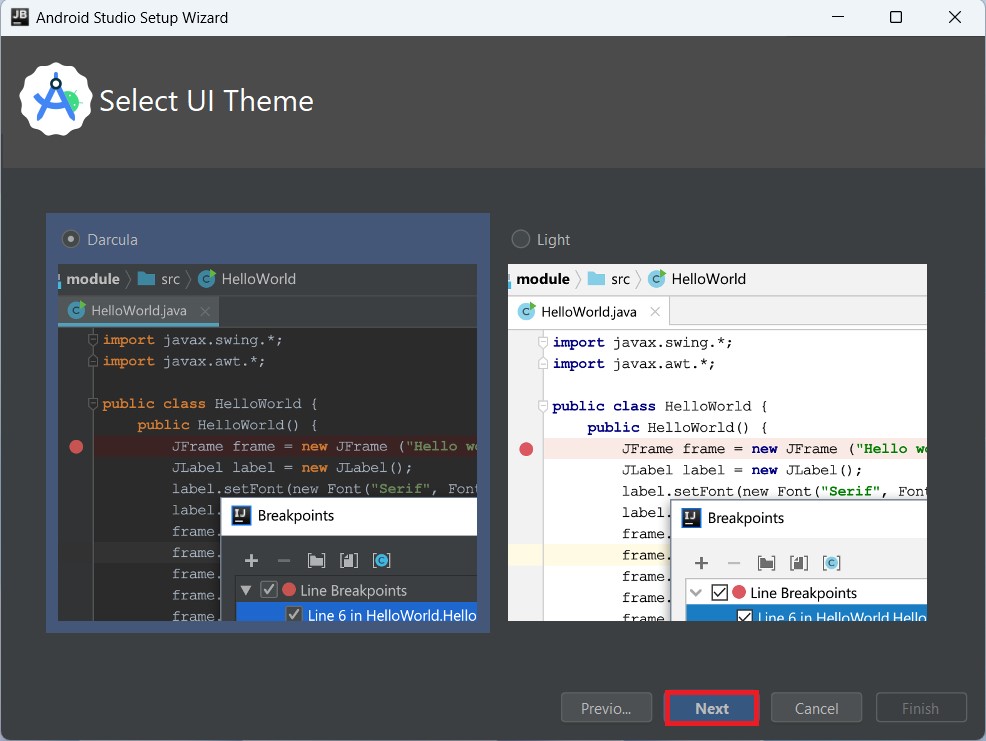
5. You can now choose the UI theme for your interface, you can select from Light or Darcula theme based on your preferences and click on the Next button to continue.
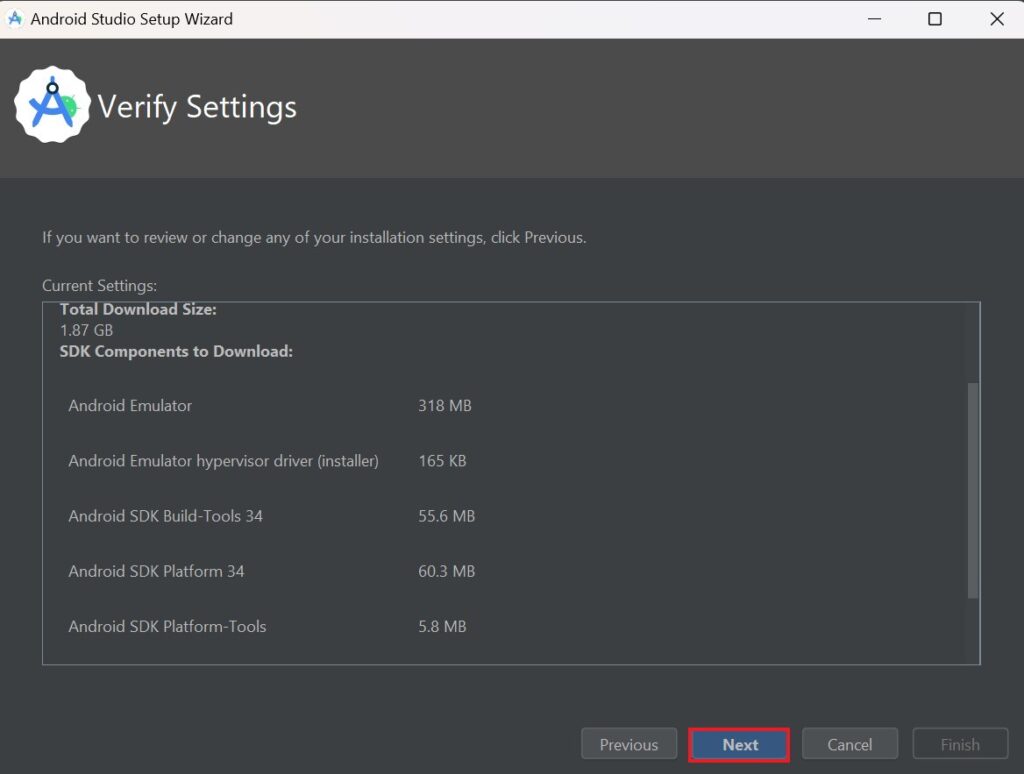
6. After selecting the theme you will get an overview of the selected settings and components which will be downloaded.
7. If you are satisfied with your selection, click on the Next button else click on the Previous button to go back to previous screens and modify settings. Once you have verified the settings, click on the Next button.
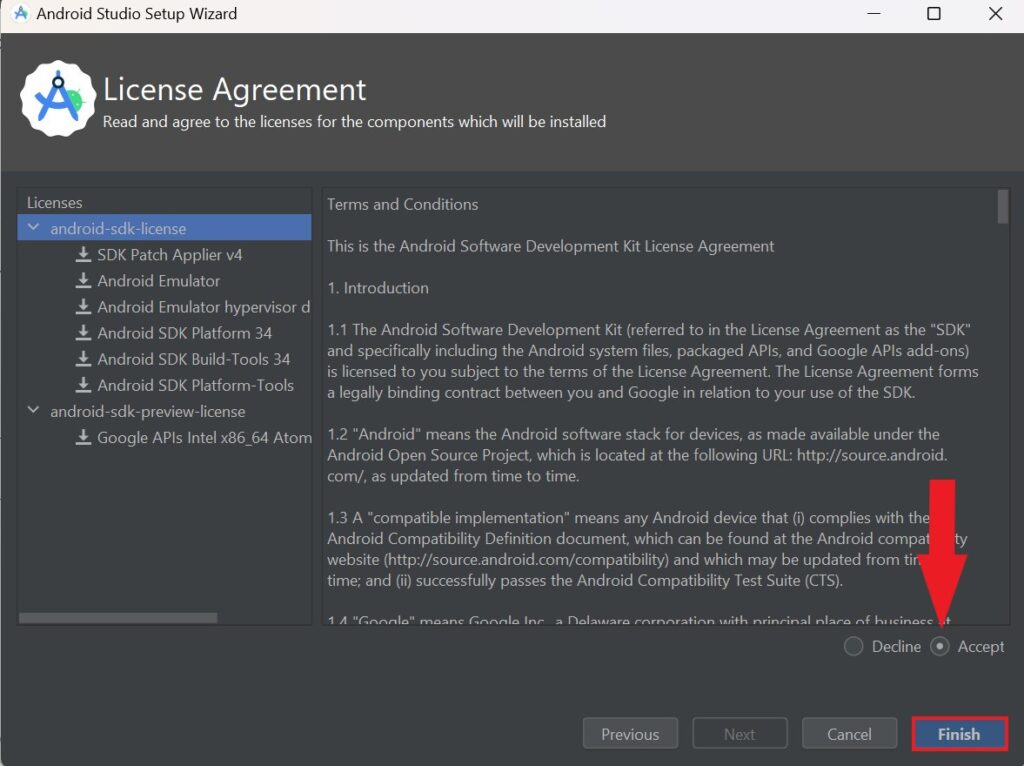
8. Now, carefully review the Terms and Conditions, and select Accept for both the android-sdk-license and android-sdk-preview-license.
9. Then, click the Finish button to proceed with the Android Studio configuration.
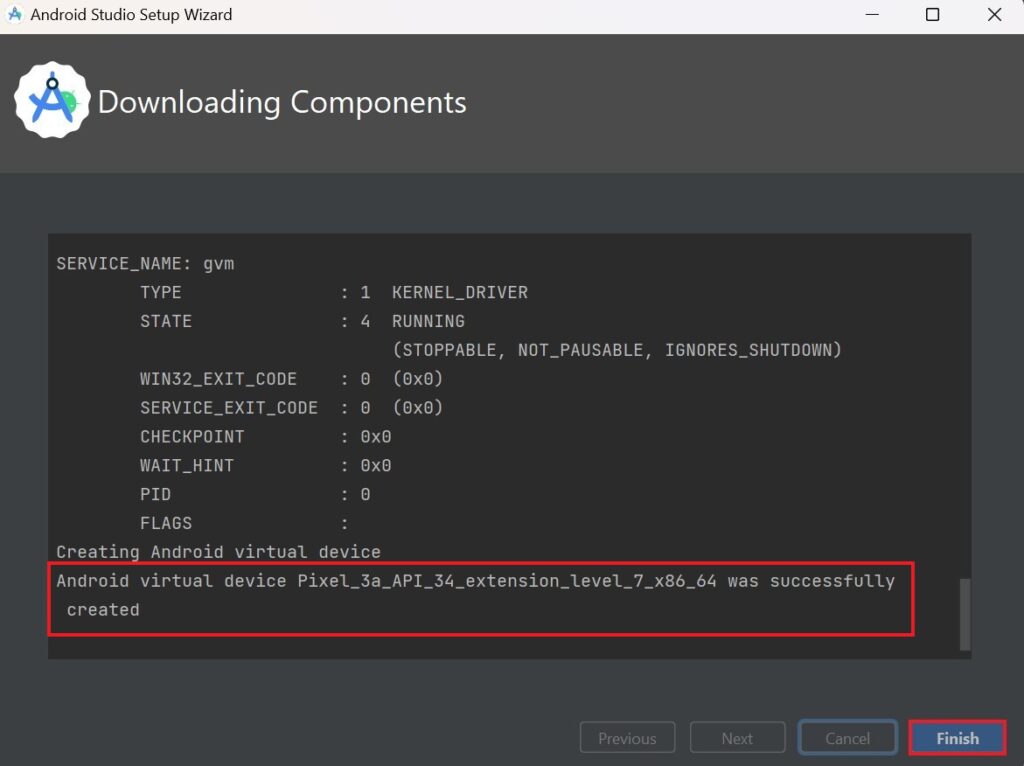
10. After that, Android Studio will download all the necessary files into your system, this will take some time depending on your network speed and PC configuration.
11. Once all the components are downloaded the following screen will appear with the message that the Android Virtual device is successfully created. Click on the Finish button.
Android Studio is now finally installed and configured on your Windows 11 system. Wasn’t that easy!
How to Create a New Test Project in Android Studio
Now, it’s time to create our first sample test project in Android Studio. To do that, you can follow the below-mentioned steps:
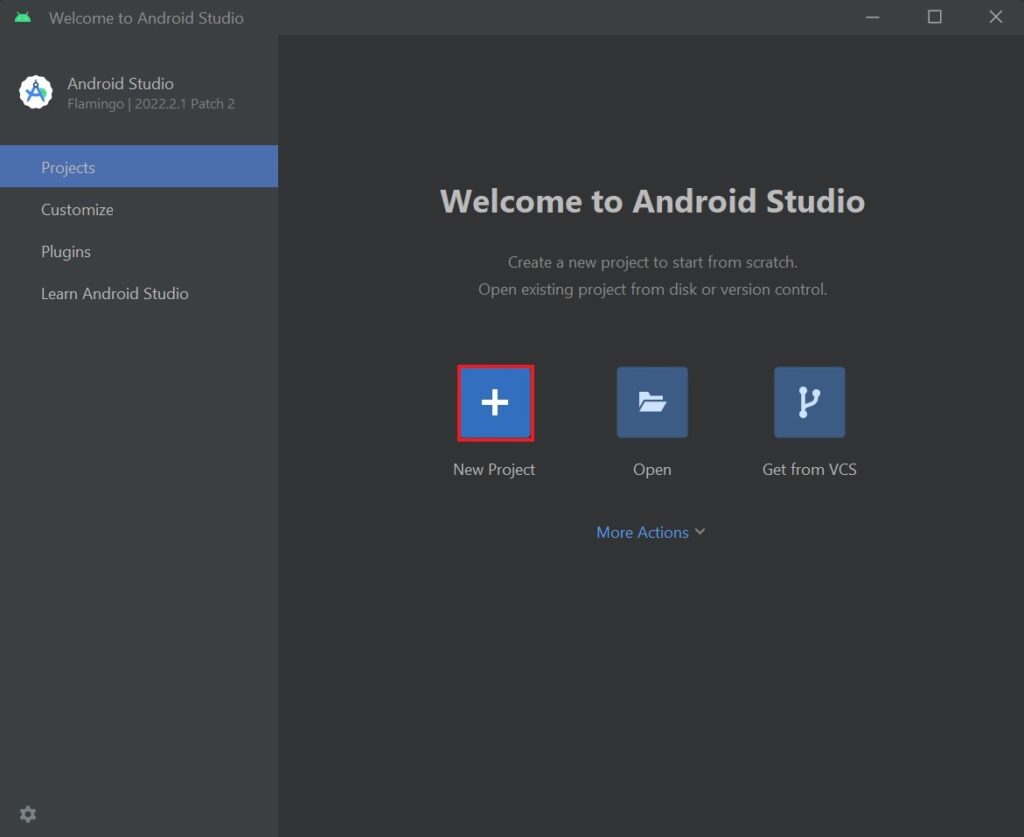
1. Once the Welcome screen appears, click on New Project to start building your first project.
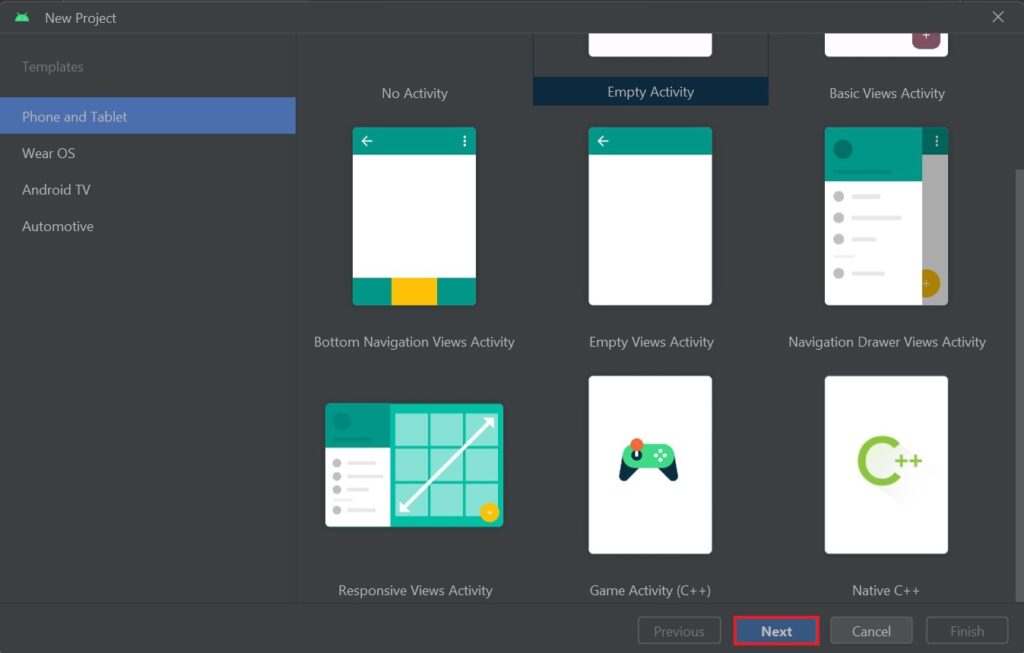
2. From here, you can choose a template for your Android app. You can select from multiple presets present depending on your requirements. Click Next once selected.
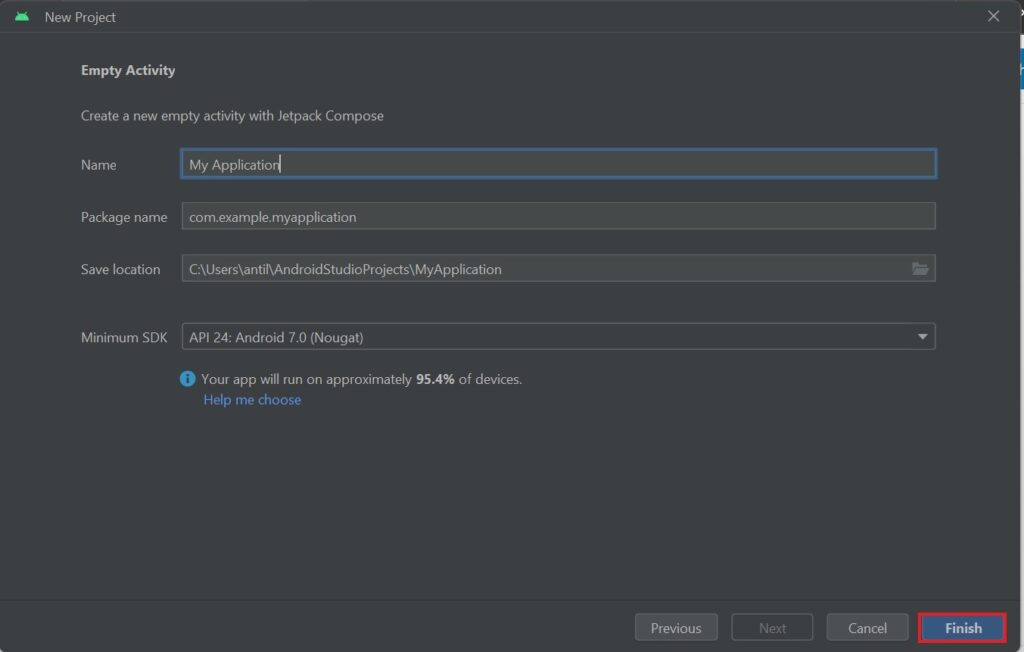
3. Now, select a Name, Package Name, and Save location for your project, along with a minimum SDK level.
4. Then click on the Finish button to continue.
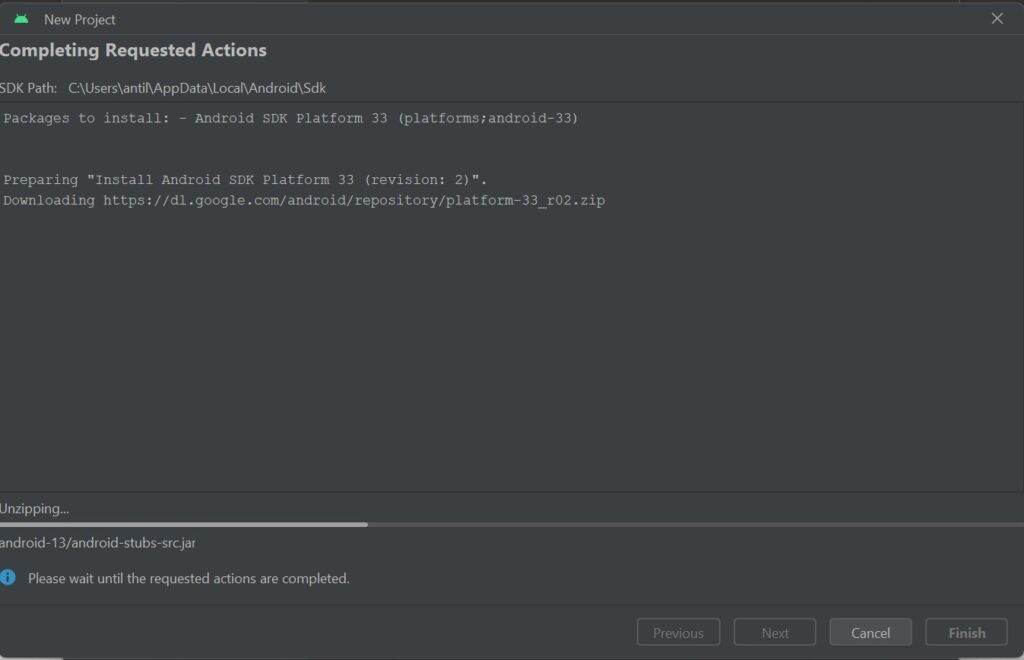
5. After that, wait for some time while Android Studio prepares the required files for your project.
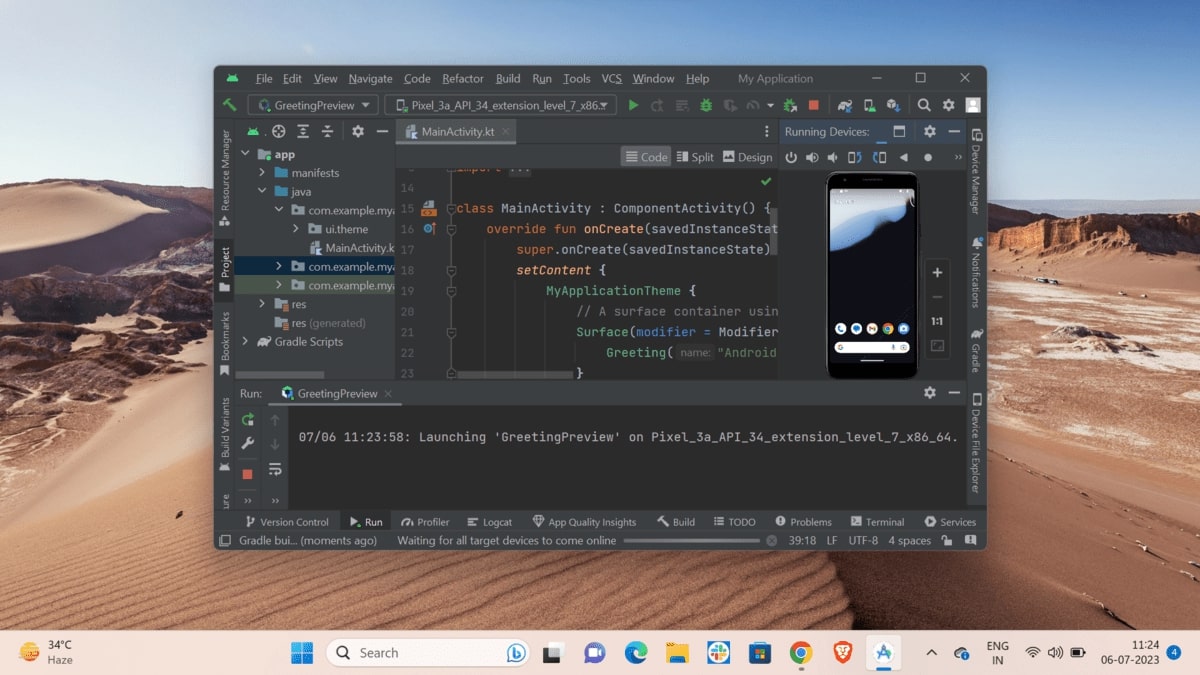
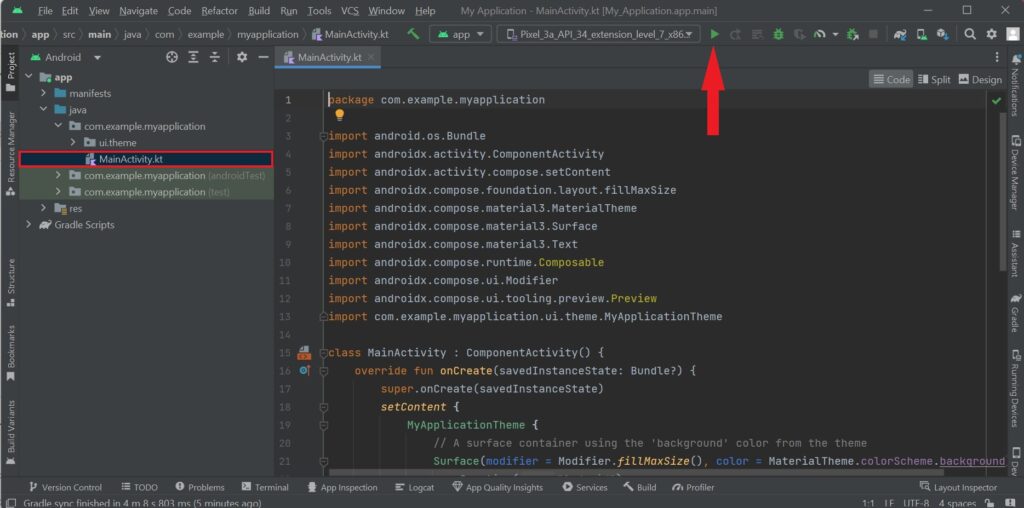
6. Open the MainActivity.java file under app > java > main. This is where you write the logic of your app.
7. To execute the code, click on the green play button or press Shift + F10.
Conclusion
That’s it, this is how you can install and set up Android Studio on Windows 11. If you need some help with your Android Development process, you can visit the official Android Developer site.
However, if you are not able to use Android Studio on your system or facing some issues, then you can check out our guide on fixing Android Studio not working on Windows 11.