If you want to improve your audio experience on your Windows 11 computer, you can use a feature called Spatial Audio. This feature offers a three-dimensional soundscape that goes beyond traditional stereo or mono sound.
Here, in this guide, we will discuss how you can enable and use Spatial Audio in Windows 11 without the need for intricate multi-speaker setups.
What is Spatial Sound in Windows 11?
Spatial sound is a feature of Windows 11 that delivers a three-dimensional audio experience. It utilizes head tracking to precisely position sounds around you, creating the sensation that they originate from various directions, even when you’re wearing headphones. This capability enhances the immersion and engagement factor when enjoying games, movies, or music.
Spatial Sound in Windows 11 comes in two formats: Windows Sonic for Headphones and Dolby Atmos for Headphones. Windows Sonic is a cost-free option that is bundled with Windows 11. On the other hand, Dolby Atmos for Headphones is a more advanced format requiring a Dolby Atmos-enabled device.
How to Enable Spatial Audio in Windows 11
There are several methods to do it. You can enable spatial audio using Windows settings, the control panel, and more. Below, we will discuss some common ways to do it.
1. Using Windows Settings
The easiest way to enable spatial sound is through the Windows Settings panel. Here are the steps you can follow to enable Spatial Audio.
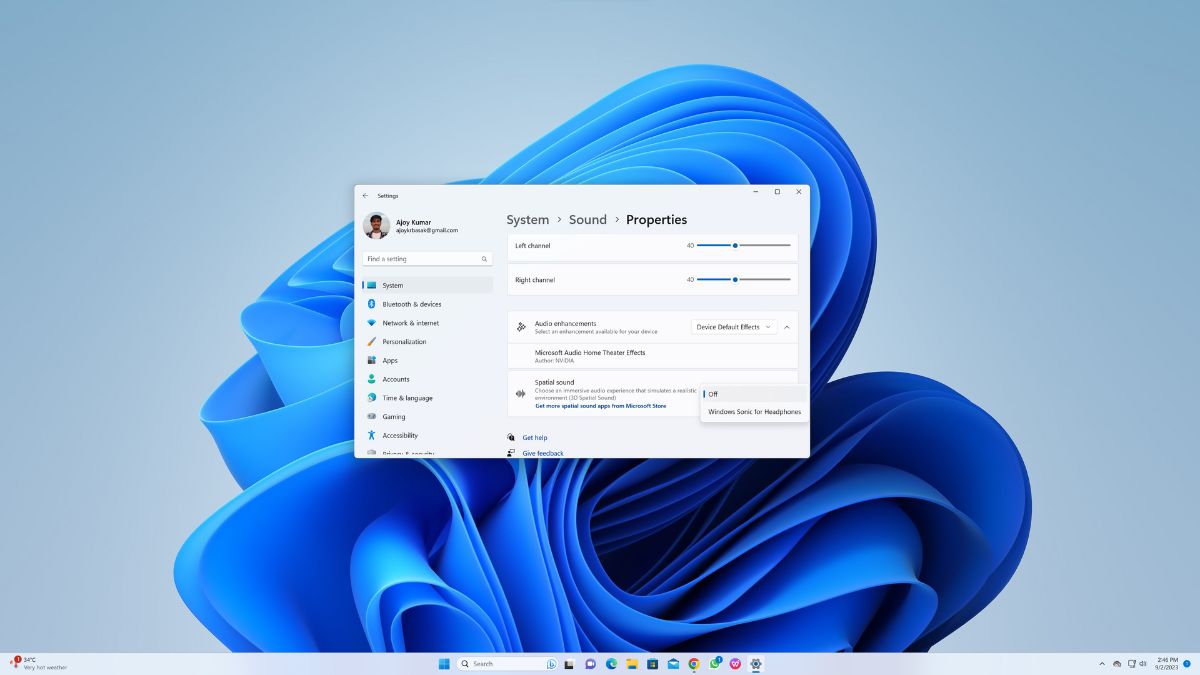
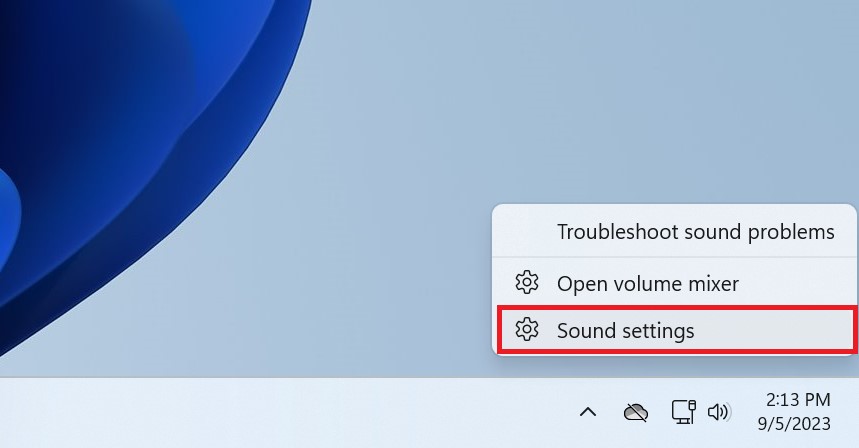
1. Right-click the speaker icon in your taskbar and select Open Sound settings from the menu that appears.
2. It will open the Windows settings for sound. Here, under the Output section, click on the name of your audio output device (e.g., Headphones).
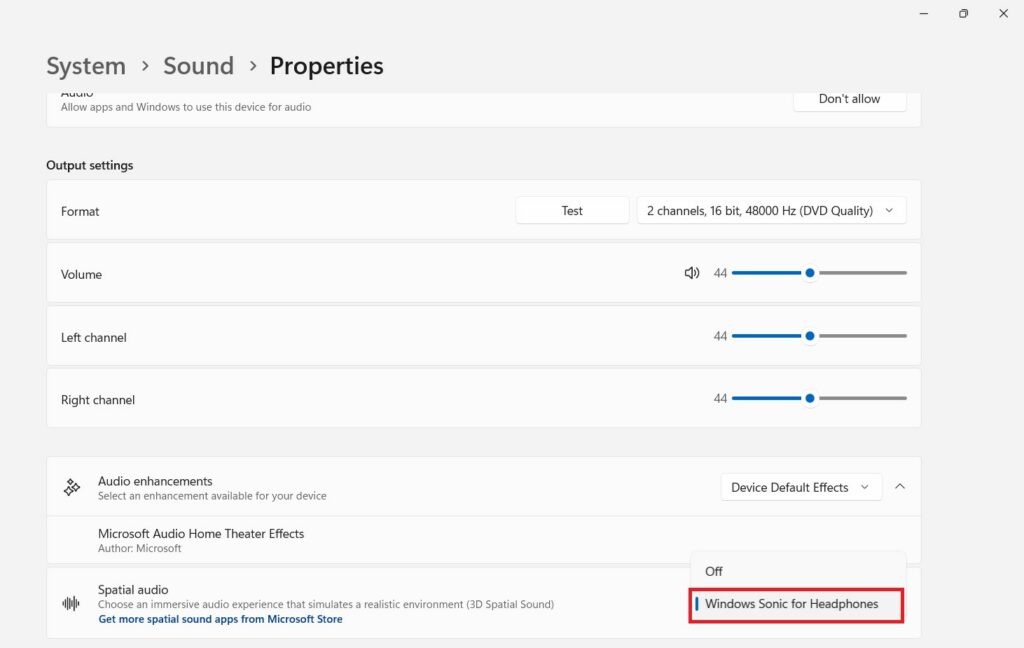
3. You will get the Properties window. Here, in the Spatial Sound dropdown menu, select Windows Sonic for Headphones or Dolby Atmos for Headphones option.
This is it! This is how you can enable Spatial Audio using Windows Settings. You can also adjust volume, balance, and other sound settings from this menu. To do that, you have to install the Spatial Sound apps from the Microsoft Store. For that, click on the option.
2. Using System Tray
There is another fastest way to access spatial sound settings by using the System Tray. Here’s how:
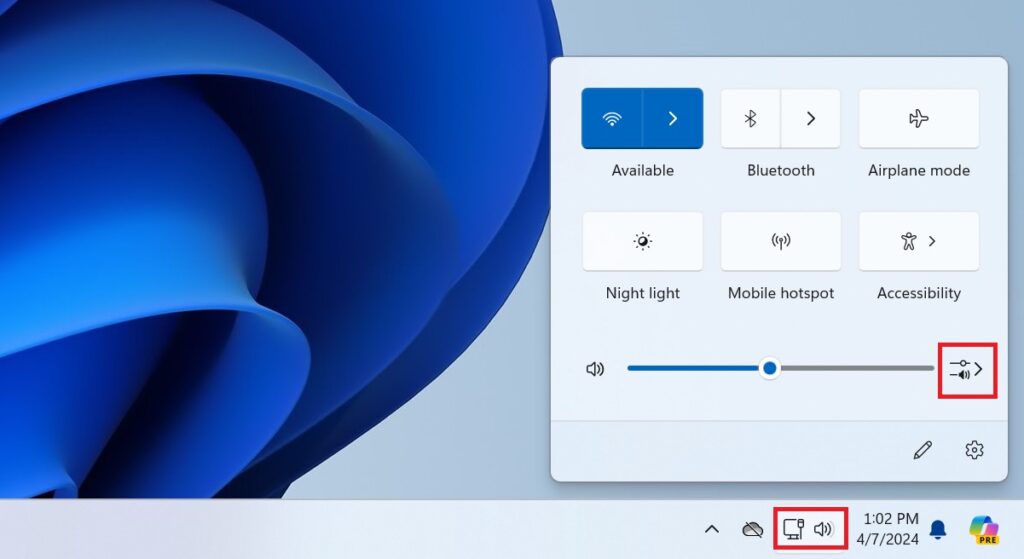
1. Click the speaker icon in the taskbar.
2. Click the sound output button next to the volume slider.
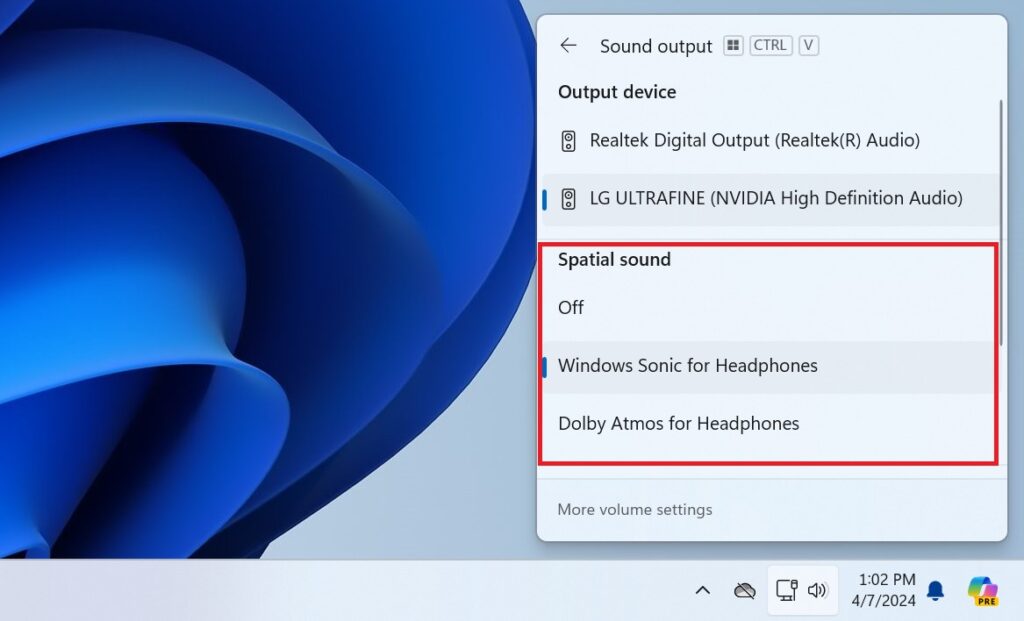
3. From the Sound Output settings, select your output device where you want to enable Spatial Sound and choose the technology you want to use.
3. Using Control Panel
You can enable spatial sound through the Control Panel, which offers additional customization options for your sound experience. Here’s a step-by-step guide on how to do it:
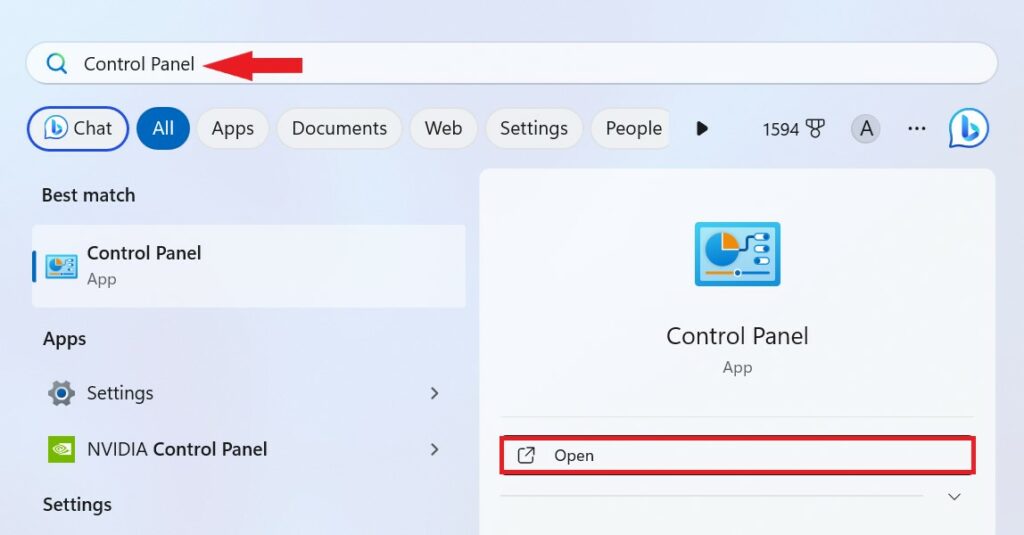
1. Click on the Start button.
2. Type Control Panel in the Windows search bar and click Open to launch the Control Panel.
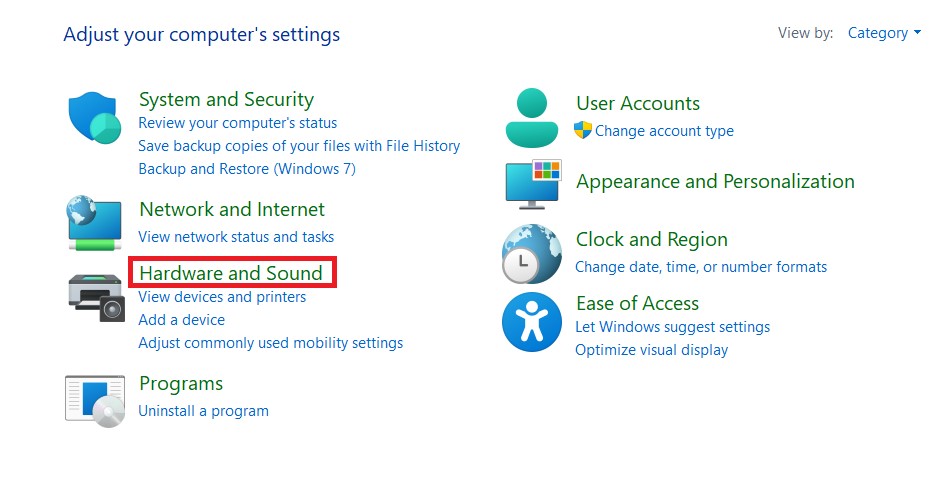
3. Here, you will get the control panel settings to adjust your computer’s settings. Click on the Hardware and Sound settings option.
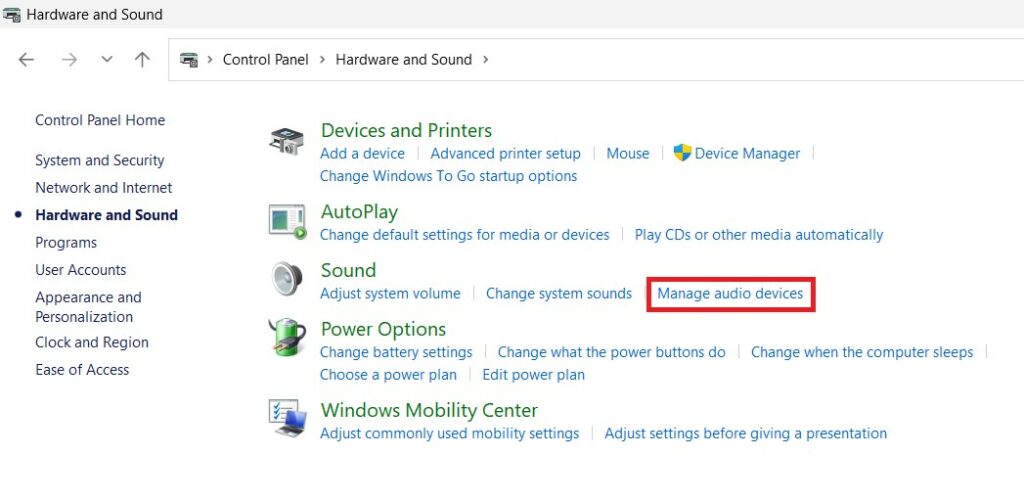
4. Now, click on the Manage Audio Devices option under Sound Settings.
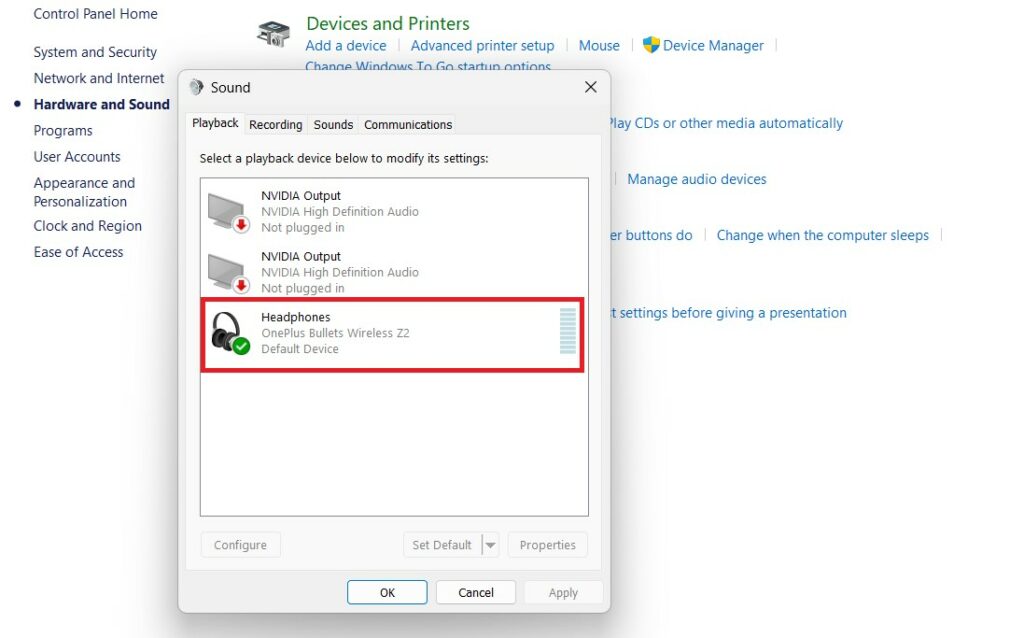
5. You will get a screen to select the playback device. Here, choose the device where you want to enable Spatial Sound. For instance, we will go with the Headphones. You can select your preferred audio output device.
6. Then click on the Properties button.
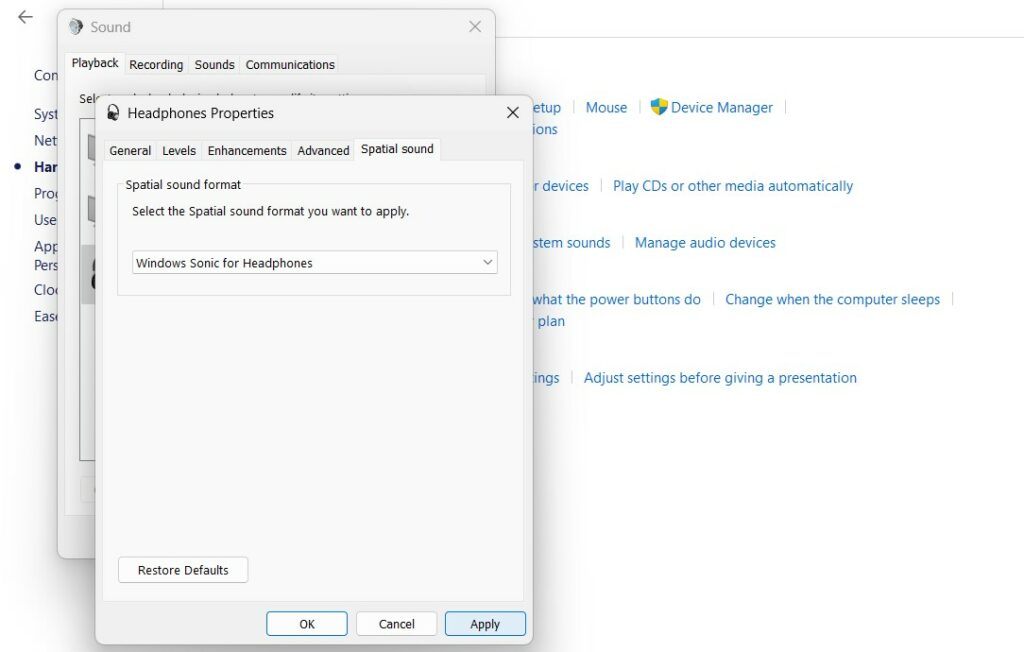
7. Here, you will get the Headphones Properties window. Click on the Spatial Sound tab and choose Windows Sonic for Headphones or another supported format from the dropdown menu.
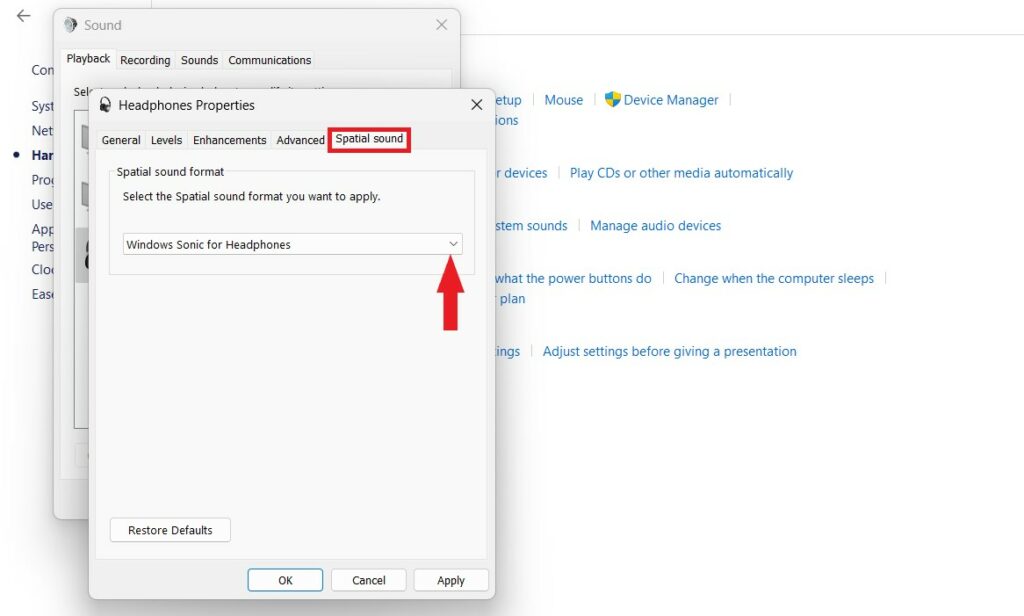
8. Click on the Apply button to confirm your changes.
9. Finally, click OK to close the Window.
4. Using Volume Mixer
If you want more control over individual application volumes and spatial sound settings, you can use the Volume Mixer. To enable Spatial Sound using the Volume Mixer, follow these steps:
1. Press the Windows key + E on your keyboard to open File Explorer.
2. In the address bar, type sndvol.exe and hit Enter to open the Volume Mixer window.
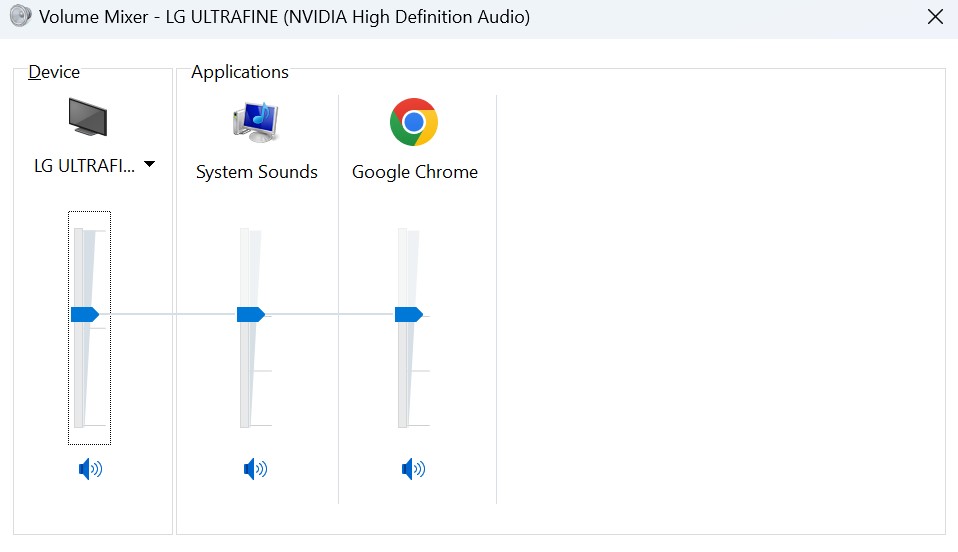
3. Here, you will find the device speaker and application volume settings. Double-click on the speaker icon of the device you want to change settings for to open the Speaker Properties window.
4. In the Speaker Properties window, switch to the Spatial Sound tab. Click on the drop-down menu and select your desired spatial sound format.
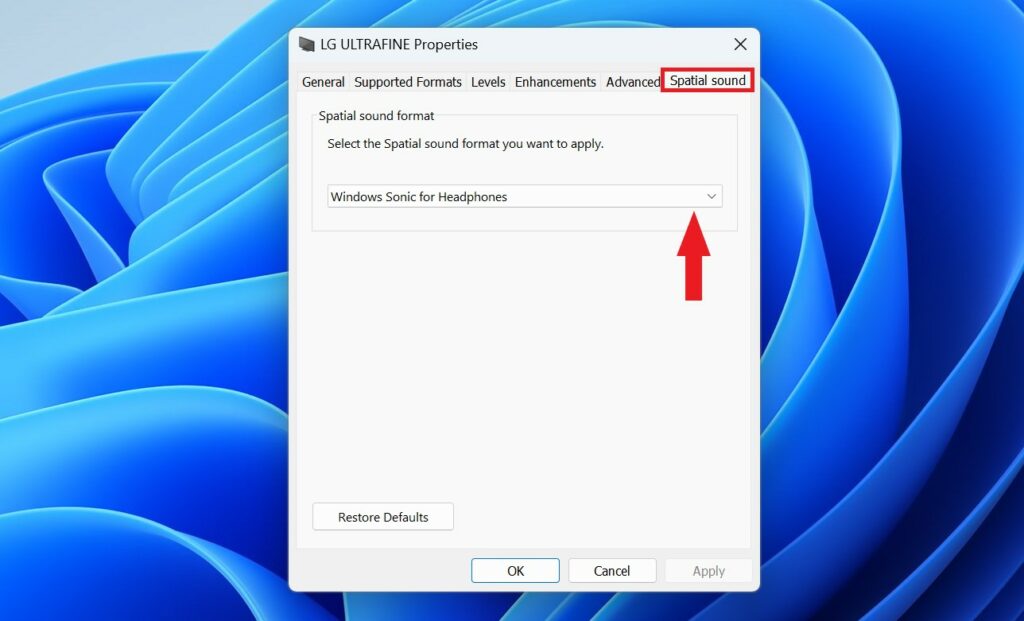
5. After that, click Apply and then the OK button to save the changes.
Your default playback device will now use spatial sound. That’s it! This is how you can enable Spatial Sound on Windows 11 using Volume Mixer.
Conclusion
That’s it; this is how you can enable and use Spatial Sound. However, if you don’t have a sound device that supports spatial audio, you can try out Dolby Atmos. For that, you have to install Dolby Atmos on your Windows device.
If you want to experience 3D sound, you’ll need to use headphones or speakers that are designed for this technology. This will give you the best possible experience and make the most of this feature.