The iPhone has a built-in feature called iCloud Keychain that helps you remember and manage passwords. However, if you own other devices such as Android phones and Windows computers in addition to your iPhone, you may face difficulties managing passwords.
This is where Google Password Manager comes in handy. With this feature, you can easily save and autofill passwords across various apps and websites, making it easier to manage your passwords across different platforms. In this article, we will guide you on how to enable Google Password Manager within other apps on your iPhone for enhanced convenience and security.
Download Google Chrome on iPhone and iPad
Password Manager is a feature of the Google Chrome browser that allows you to manage your passwords. To access your passwords on your iPhone or iPad, you need to install the Google Chrome browser and sign in to your Google account.
Here are the steps to install it:
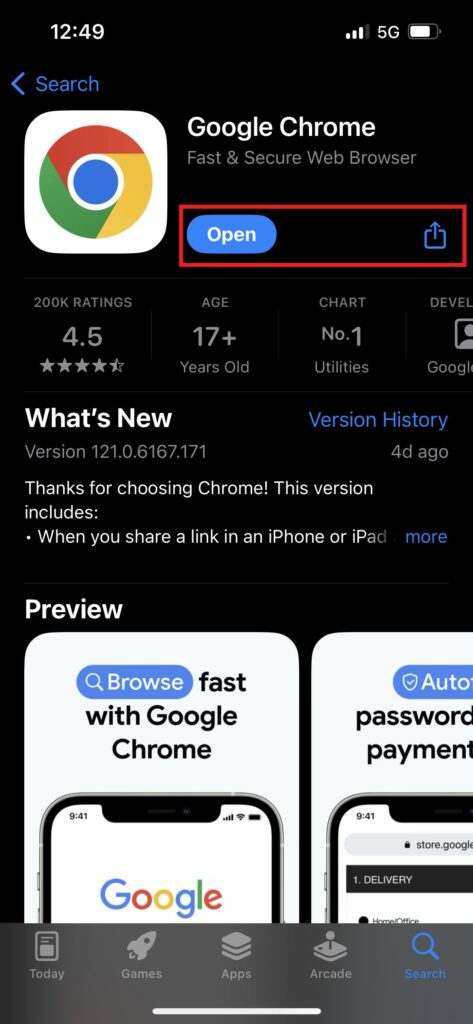
1. Open the App Store on your iPhone.
2. Tap on the Search icon located in the bottom right corner and search for Google Chrome.
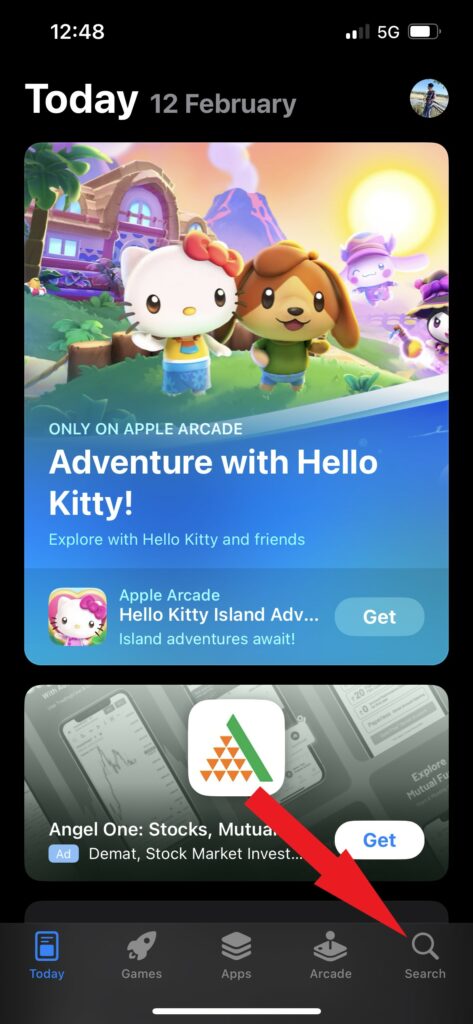
3. Tap the Get button or the Cloud icon to install the app.
4. After that, you need to authenticate the installation with your Face/Touch ID or your Apple ID password.
5. Once the installation is complete, open the app and sign in with your Google account.
6. After that, tap Yes, I’m in to sync your passwords and other data on your iPhone and iPad.
The passwords saved in your Google Password Manager will now be automatically filled in Google Chrome, making it easier for you to access your accounts and improving your browsing experience. Now, you can effortlessly navigate various websites and services without entering your credentials repeatedly.
How to Get Google Chrome Passwords on iPhone and iPad
Google Password Manager has a handy integration with Google Chrome that makes password management easier across all your devices, giving you peace of mind and increased efficiency in your online activities.
If you would like to enjoy this convenience on Safari and other apps installed on your iPhone and iPad, you can enable Google Password Manager from the Settings app on your iPhone.
Here’s how you can do it:
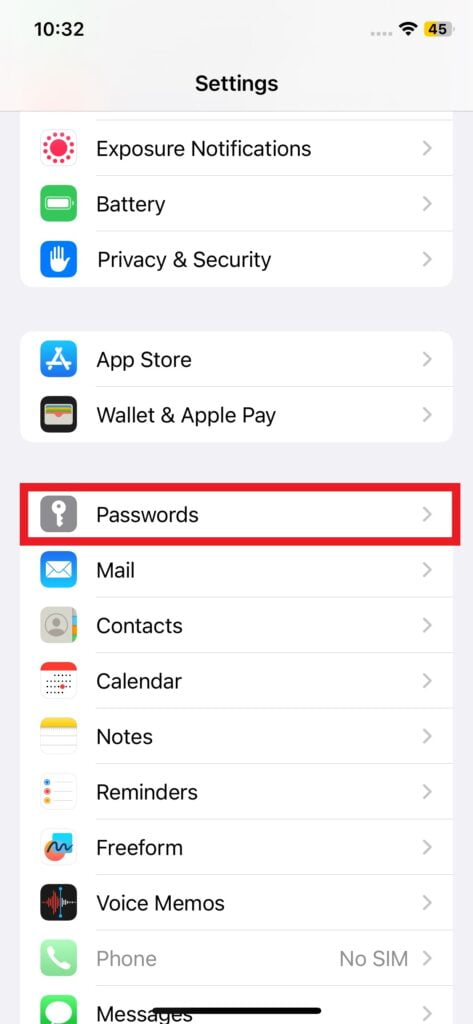
1. Open the Settings app.
2. Tap on the Passwords option. Afterward, verify your Face ID and password to access the password settings.
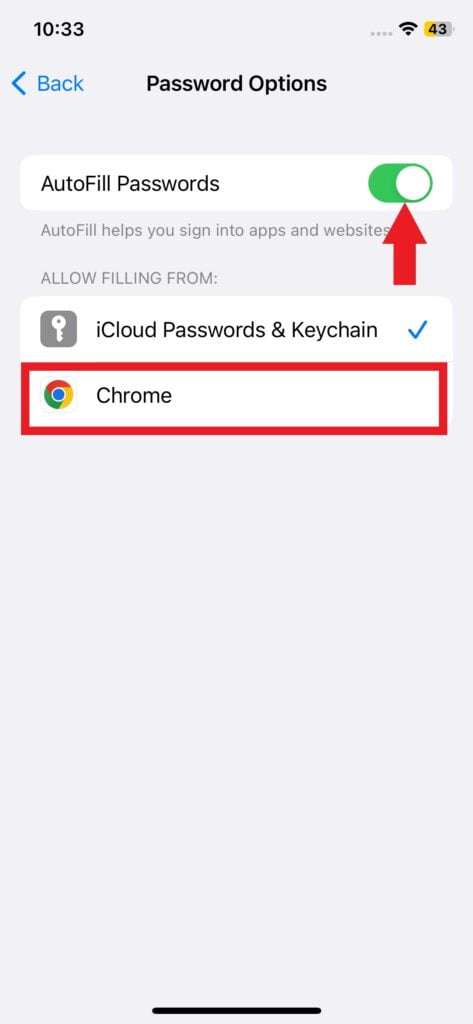
3. Then, tap the Password Options tile at the top.
4. Here, toggle on the AutoFill Passwords option if it isn’t enabled, then choose Chrome.
Note
If you only want to use Google Password Manager to manage your credentials, untick iCloud Keychains.
5. Now, Auto-fill from the Google Password Manager will be enabled. Here, tap on the OK button to close the prompt.
6. Now, tap the username or password entry box whenever you need to log in to a website or app. Then, choose Passwords from the keyboard and authenticate with your Face ID or Password.
7. After that, select the saved password from the Google Password Manager to log in.
Conclusion
If Google doesn’t suggest a saved password, you can manually search for the website on Google Password Manager. This is particularly useful if you’ve recently updated your password and want to ensure it’s saved securely.
Enabling Google Password Manager in other apps on your iPhone can save you time and make logging into your favorite apps and websites much easier. By following the steps mentioned above, you can easily enable password autofill for many apps on your iPhone. However, if you’re looking to add a Google Account to your iPhone, you can check the linked guide.