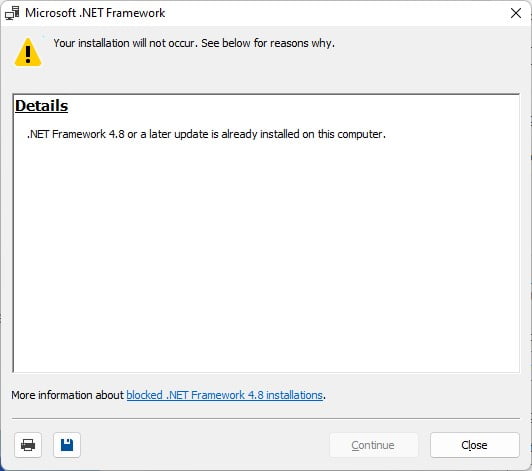
If you want to develop a Windows app or some Windows apps are not working. That means you are missing the .NET Framework on your system. Microsoft .NET Framework is important to run certain apps and services on the Windows 11 operating system. dotNET Framework 4.8 is the latest version of the framework.
Here, we will learn how you can install and enable .NET Framework 4.8 on Windows 11. By default, .NET Framework 4.8 is enabled on your system. Sometimes due to an error, it may not work. Or it is uninstalled from your system. However, you can easily download and enable it on your system again.
How to Install .NET Framework 4.8 on Windows 11
Firstly, let us discuss how to install the .NET Framework on Windows 11 if it has been uninstalled from your system. Here is how you can do it:
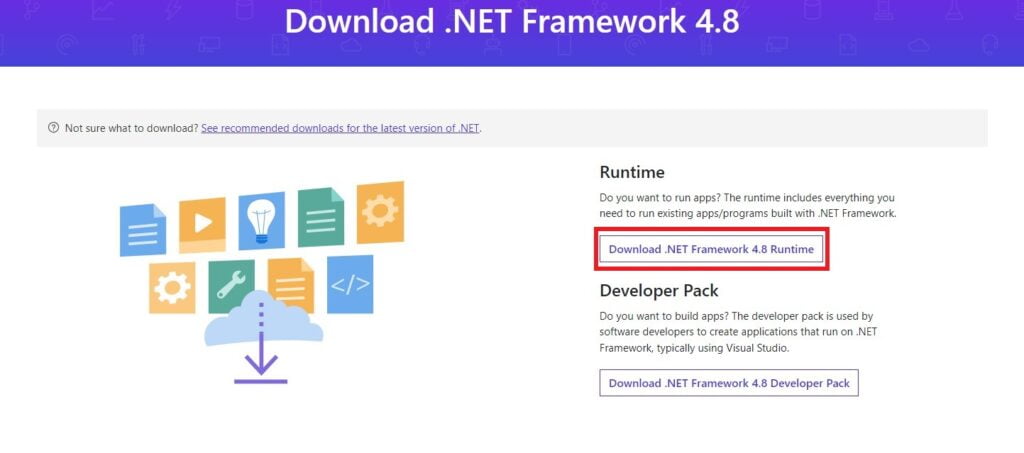
1. Open any browser and visit dotnet.microsoft.com. Here, you will find a list of all the supported .NET frameworks.
2. Now select the .NET Framework 4.8 link. Then click on the Download .NET Framework 4.8 Runtime button to download it.
3. After that, open the installer file and install it on your device.
4. Once the installation is done, restart your system to apply the changes.
How to Enable .NET Framework 4.8 on Windows 11
After you have installed it on your system, the .NET Framework will be added to your Windows Features list. Now, you have to enable the .NET Framework 4.8 through the Windows Control Panel.
For that, you can follow the following steps. However, this option requires an Internet connection to enable it.
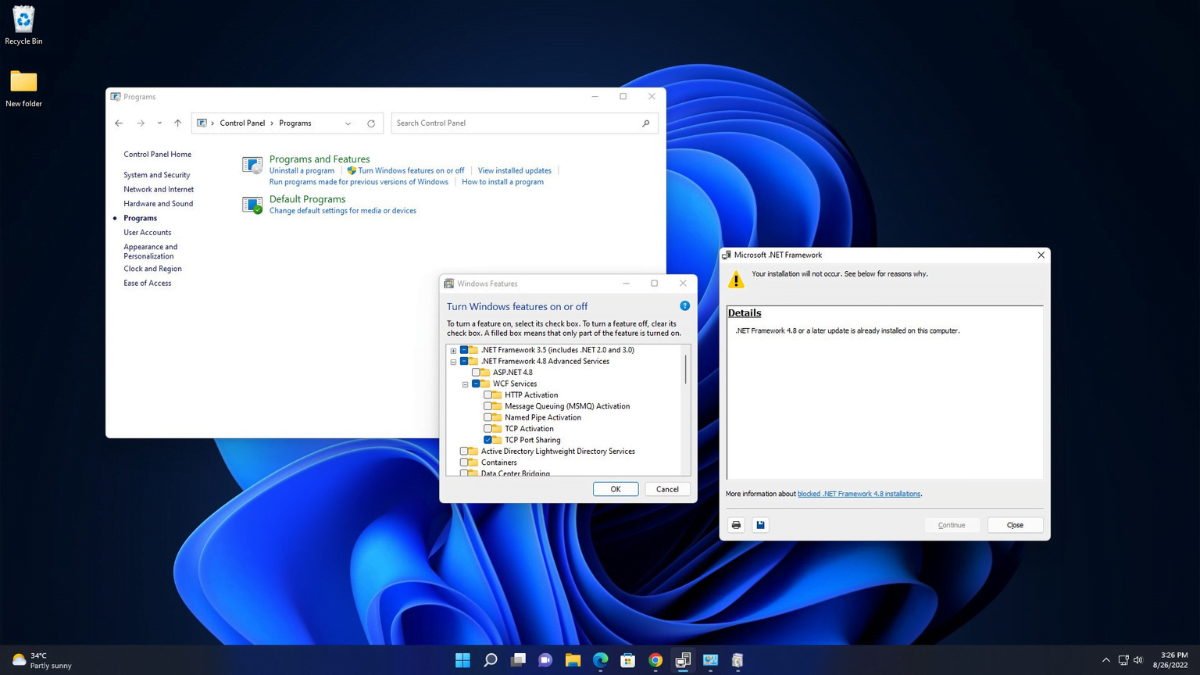
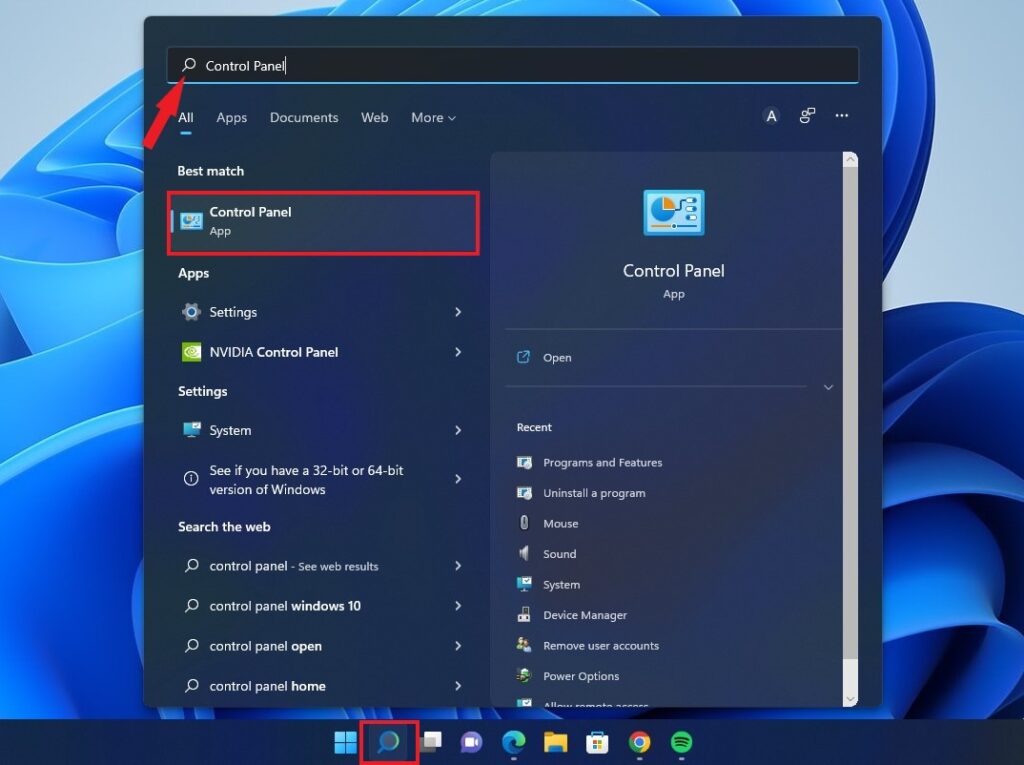
1. Click on the Search icon on the taskbar. Search for the Control Panel and open it.
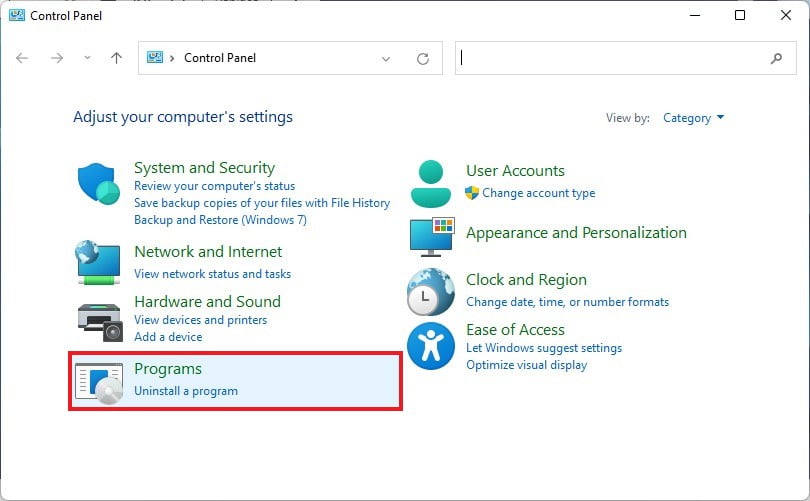
2. Here, you will find all the Control Panel settings, you can use these settings panel to adjust your Windows computer’s settings. To enable .NET Framework 4.8 on Windows, click on the Programs option.
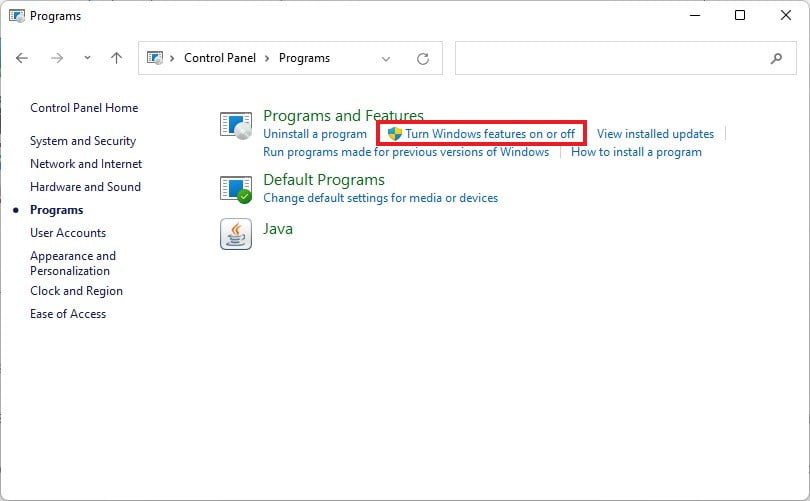
3. In the next window, you will find the Programs and Features option. Here click on the Turn Windows features on or off option.
Note
You can directly search for the Turn Windows features on or off option on the search option.
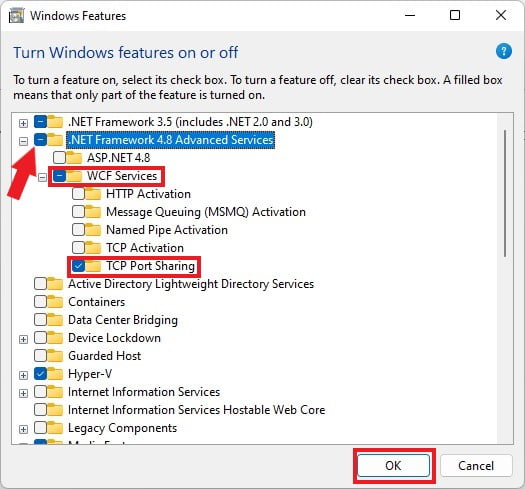
4. Here you will get the Windows Feature window; look for .NET Framework 4.8 Advanced Services and select it.
5. Now click on the check box, it will also select the WCF Services and TCP Port Sharing options.
5. Then click on the OK button.
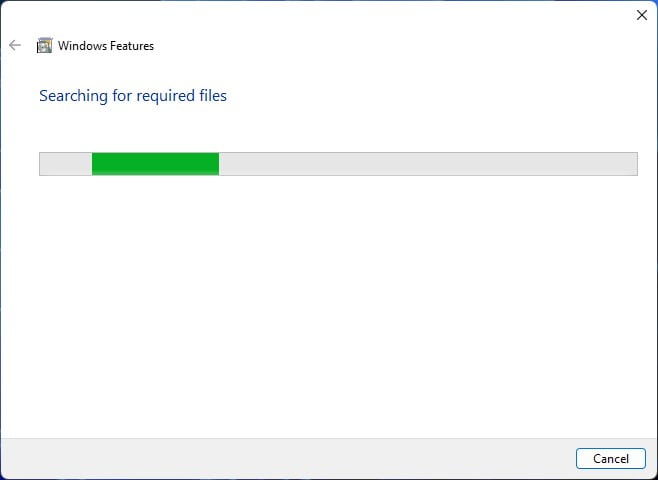
6. Now, it will search for all the required files and apply the changes on your device. To perform this task, you need to have an active internet connection.
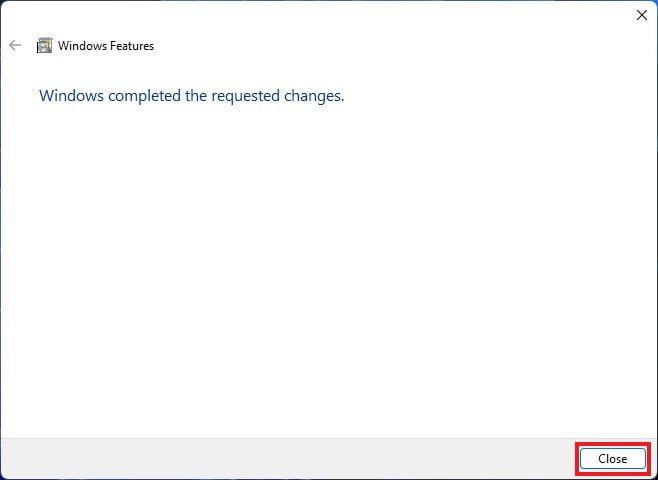
7. Once done, click on the Close button. Now to apply the changes, you have to restart your Windows PC.
Conclusion
That’s it; this is how you can install .NET Framework 4.8 on Windows 11. However, some older applications still need the .NET Framework 3.5. If you are getting any errors related to .NET Framework 3.5 then you can check out our guide on enabling .NET Framework 3.5 on Windows 11.
I hope this article was helpful to you. If you liked the article, share it with your friends and family. If you have some suggestions, do not hesitate to leave them in the comments section below. We will add that to the guide.