If you want to develop a Windows app or some Windows apps are not working. That means you are missing the .NET Framework on your system. The latest .NET Framework is version 4.8, but sometimes you need an older version of the .NET Framework (like .NET 3.5, 3.0, and 2.0) to run some apps.
Here, we will learn how you can enable .NET Framework 3.5 on Windows 11. If you need the latest version of the .NET Framework, check out our detailed guide on; how to install .NET Framework 4.8 on Windows 11.
How to Enable .NET Framework 3.5 on Windows 11
You can enable the .NET Framework 3.5 through the Windows Control Panel. This option requires an Internet connection. Here are the steps to enable .NET Framework 3.5 on Windows 11:
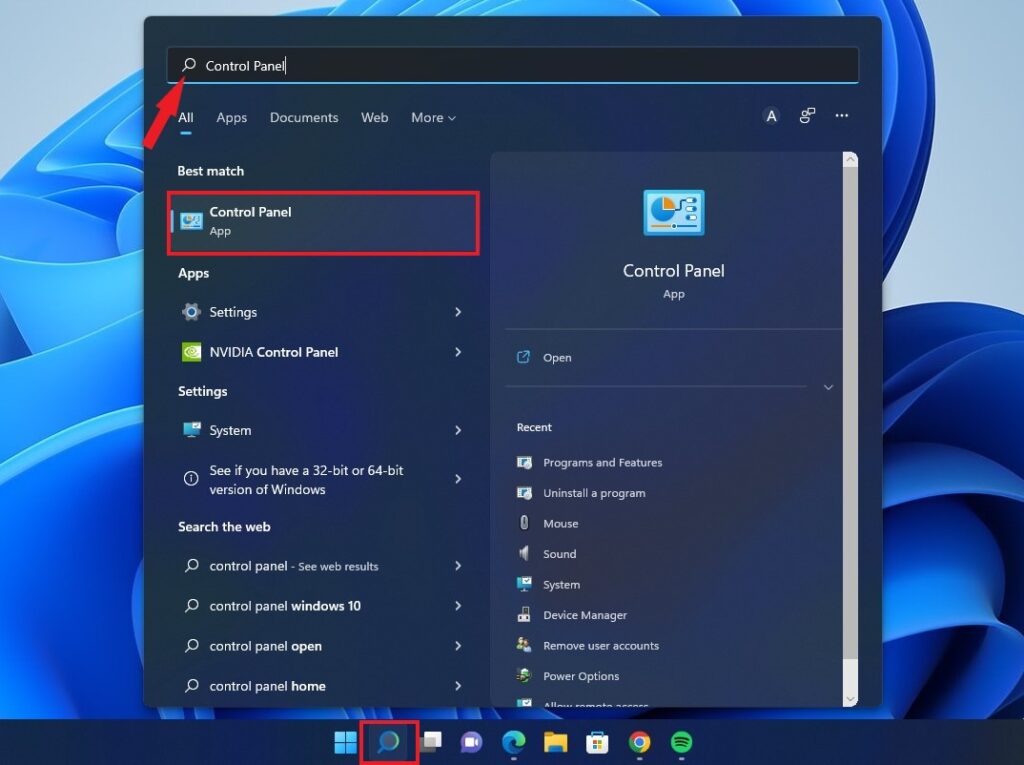
1. Click on the Search icon on the taskbar, search for the Control Panel, and open it.
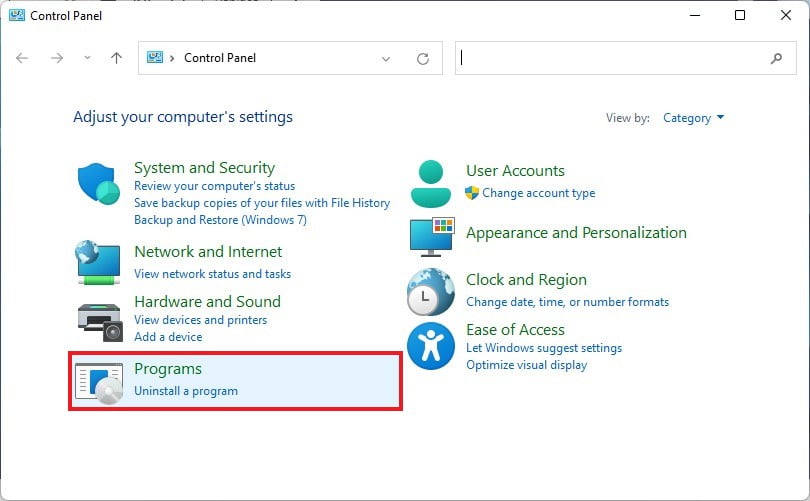
2. Here you will find all the Control Panel settings, you can use these settings panel to adjust your Windows computer’s settings. To enable .NET Framework 3.5 on Windows, click on the Programs option.
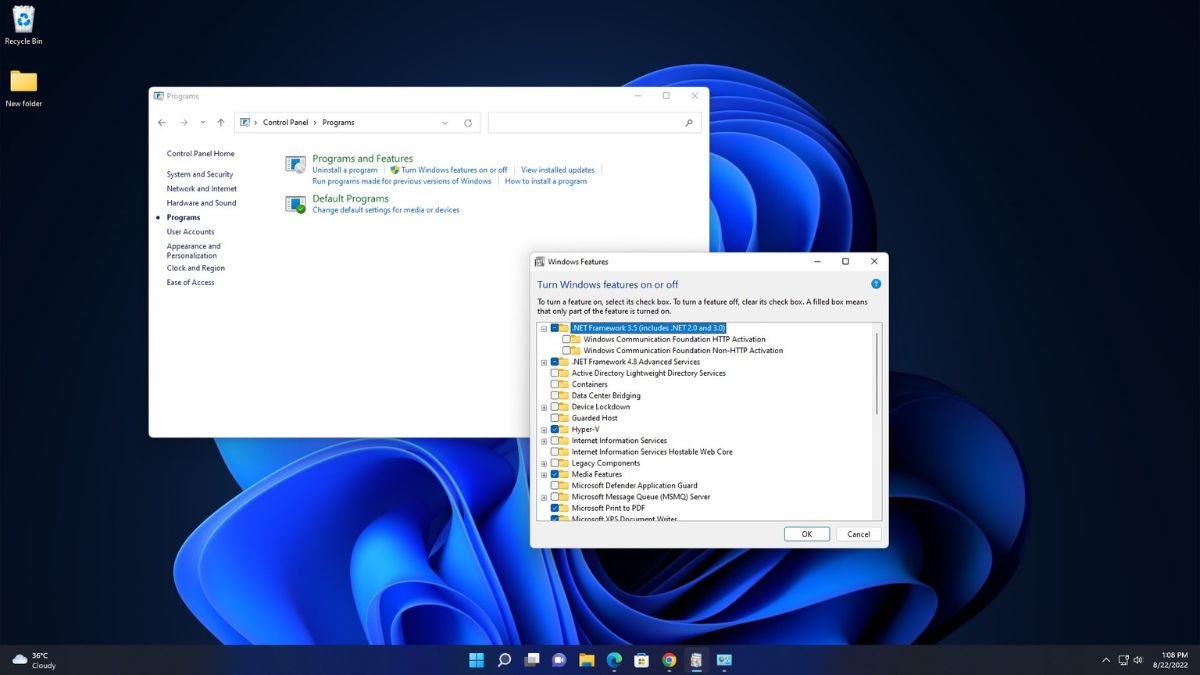
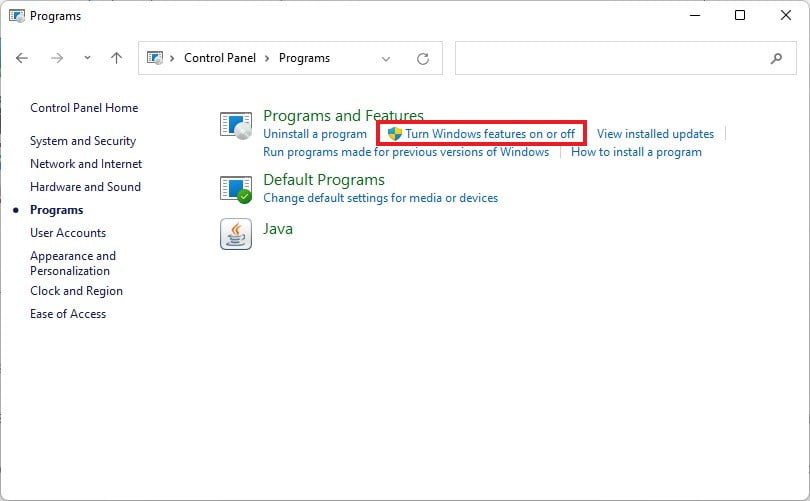
3. In the next window, you will find the Programs and Features option. Here, click on the Turn Windows features on or off option.
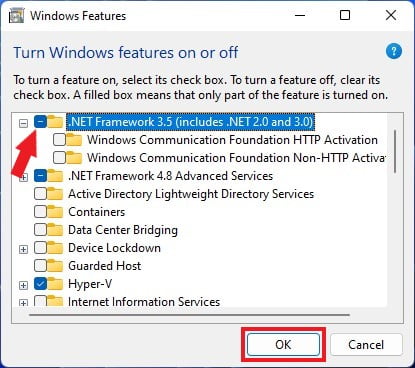
4. Here you will get the Windows feature; look for .NET Framework 3.5 (includes .NET 2.0 and 3.0) and select it.
5. Now click on the check box and then click on the OK button.
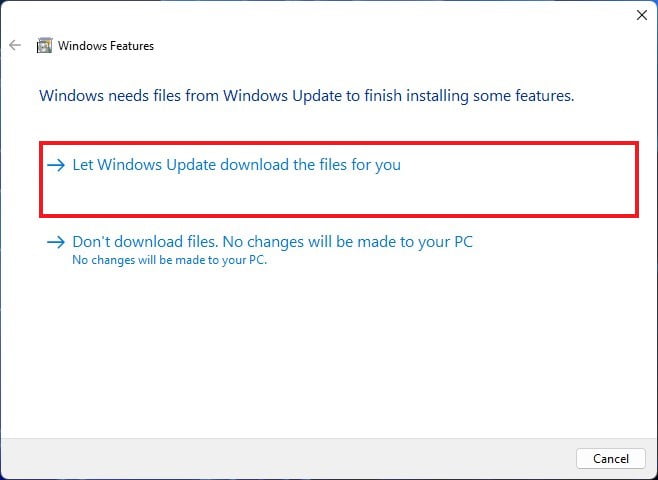
6. To enable it, you have to download some required files. For that, click on Let Windows Update download the files for you. It will download all the required files and apply the changes.
Note
If you are not able to download the .NET Framework, then you can download the offline installer from the dotnet website.
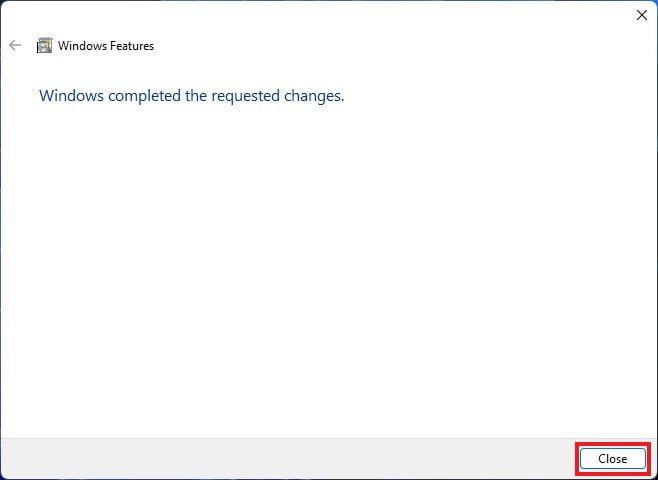
7. Once the files are downloaded, click on the Close button.
8. After that, to apply the changes, you have to restart your Windows PC.
Conclusion
That’s it; this is how you can enable .NET Framework 3.5, .NET 3.0, and .NET 2.0 on Windows 11. You can also check our detailed guide on; how to install Windows Essentials on Windows 11.
I hope this article was helpful to you. However, if you have some suggestions, do not hesitate to leave them in the comments section below. We will add that to the guide.