If File Explorer search is not working on Windows 11, then you’re in the right place. The Windows File Explorer search box is a substantial tool to locate files and folders on your PC. It can save you plenty of time when you’re seeking particular documents or media files. However, it may be annoying when the File Explorer search box isn’t functioning properly. It wastes a lot of time and makes it difficult for you to prompt the particular media you want in minutes, which is stressful. Although the exact root of this problem is unknown, there are several potential fixes.
This guide will show you how to fix the File Explorer search that is not working on Windows 11. We’ll also go through the typical causes of this problem and offer working solutions so you can stop having trouble finding your files. So, with ado, let’s get started.
How to Fix File Explorer Search Not Working on Windows 11
If you’re encountering problems with the functionality of File Explorer Search on your Windows 11 system, there’s no need for concern.
In the following sections, we’ll explore some practical approaches to resolve the issue of File Explorer search not functioning as expected. So, let’s discuss them one by one.
1. Restart your PC
To resolve this issue, the simplest and most effective solution is to restart your PC. Sometimes, minor glitches and bugs like the same can be resolved by a simple restart of your PC, allowing it to refresh and potentially address any temporary problem in the search feature.
To do so, follow the below steps.
1. Press the Windows + X key on your PC’s keyboard. Or, right-click on the Start Button icon.
2. A menu will prompt on the screen as soon as you press the key combination.
3. Select Shut down or sign out from the options and click on Restart from the small popup menu.

After the reboot completes, check if the search function has resumed its normal functionality. If the problem persists, you can try the next troubleshooting steps.
2. Restart File Explorer
Restarting the File Explorer process may resolve the problem with the search function. You will have to simply restart the process through the Task Manager, which can often resolve minor glitches affecting the search function.
For that, follow the steps below to restart File Explorer:
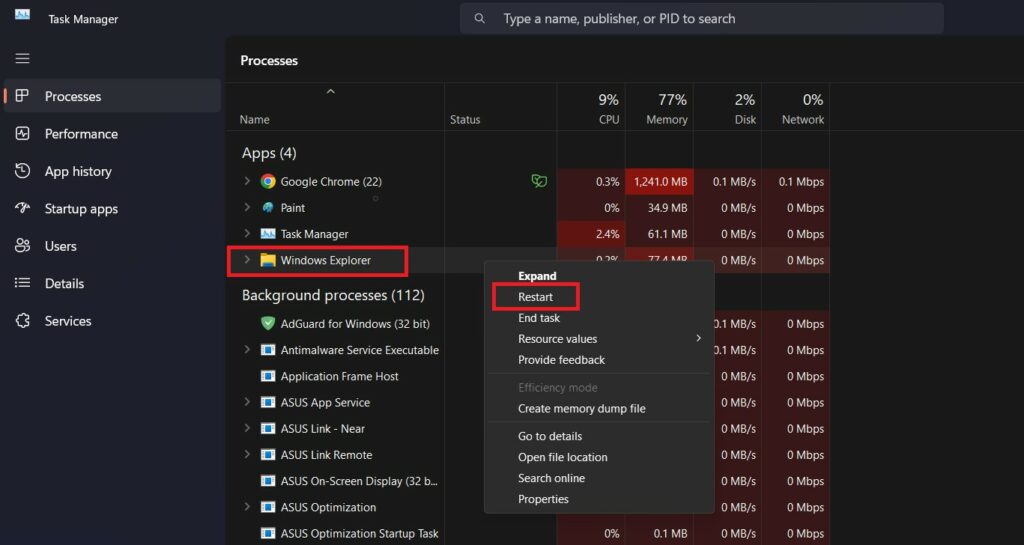
1. Right-click on the taskbar and select Task Manager from the menu. Alternatively, you can open Task Manager using the Ctrl + Shift + Esc keys.

2. Under the Processes menu, carefully look for Windows Explorer.
3. Right-click on Windows Explorer in the menu prompt and select the Restart option from the context menu.
After restarting Windows Explorer, try opening File Explorer and utilizing its search feature. If you still encounter the issue of File Explorer Search not working on Windows 11, attempt the following methods.
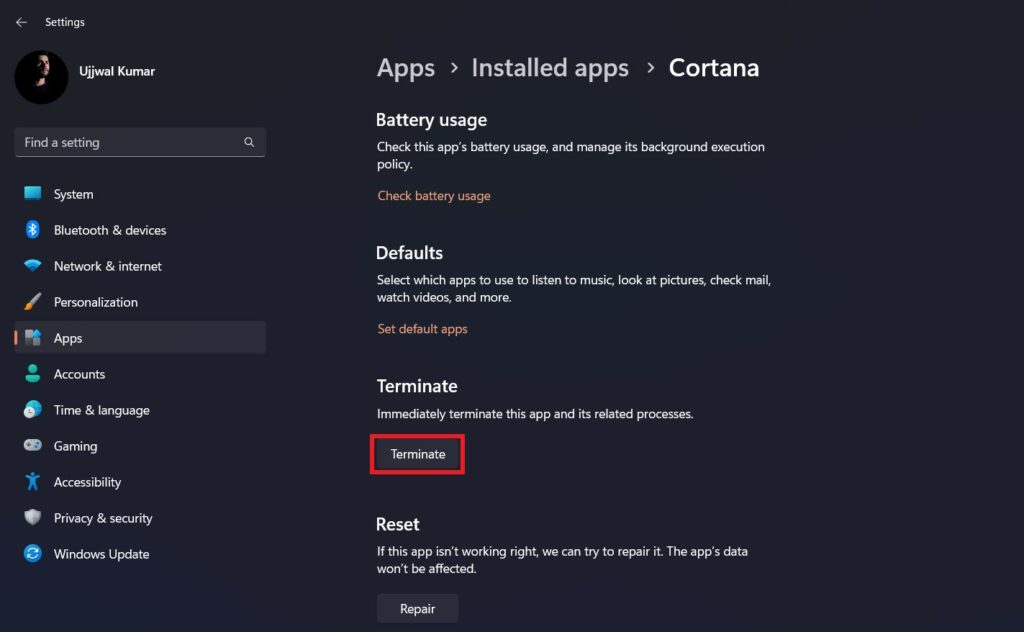
3. Stop Cortana
Sometimes, Cortana can interfere with the File Explorer search function. Microsoft offers Cortana as a virtual assistant. However, it can cause many problems in your system, including the search feature not working.
You might consider stopping Cortana to potentially reset the search functionality. Once you’ve done this, try using the search function in File Explorer again to see if the issue is resolved.
Here’s how you can do so:
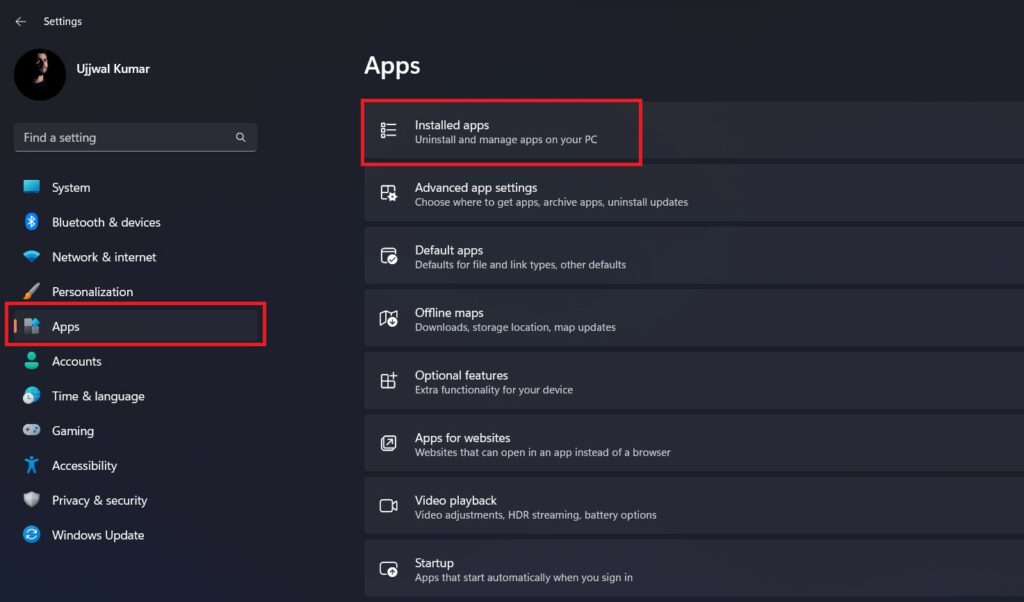
1. Press the Windows + I keys to open the Windows Settings.
2. Select the Apps option from the left sidebar and click Installed Apps from the right sidebar.
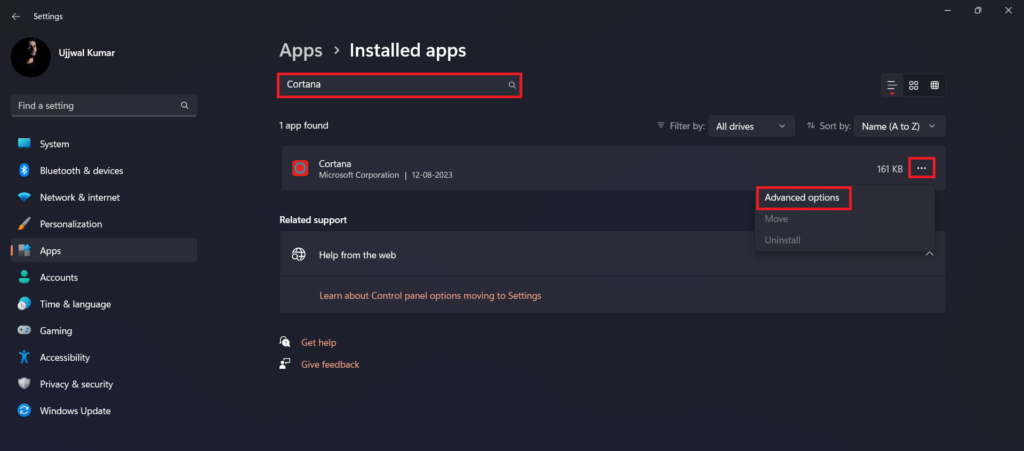
3. Search Cortana in the search box.
4. Once you spot the listing for the Cortana app, click the vertical three dots right next to it. From there, proceed to select Advanced Options.
5. To stop the Cortana feature, click the Terminate button. This will immediately terminate the process related to Cortana.
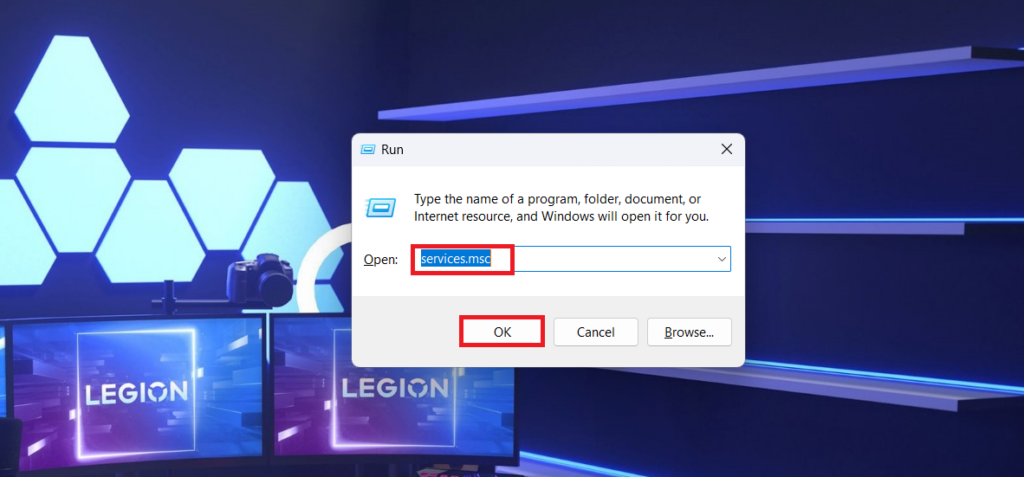
4. Restart the Windows Search Service
A solution worth considering is restarting the Windows Search service. By refreshing the Windows Search service, you stand a chance to resolve any search-related problems within File Explorer. Upon completing this step, it’s advisable to test the search functionality to confirm if it’s been successfully restored.
To proceed, follow these steps.
1. Press the Windows key + R to open Run Dilog.
2. Type services.msc into the search box, and click the OK button.
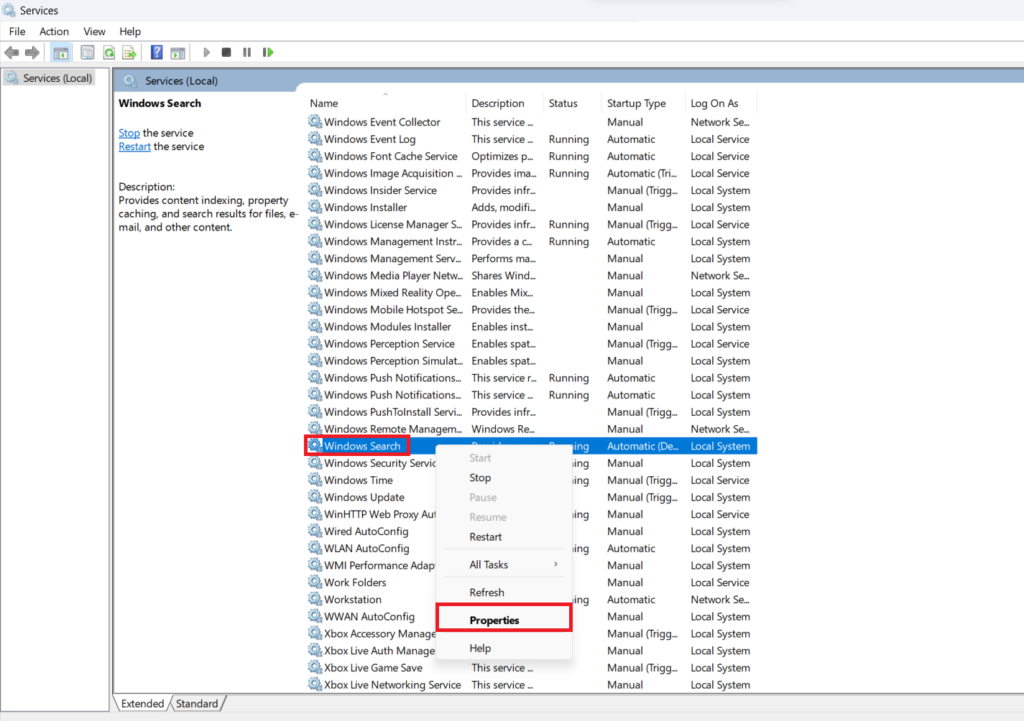
3. As soon as you hit OK, a new Services screen will prompt. Within the Services (Local) window, navigate to Windows Search from the list of services.
4. Right-click on Windows Search and click on Properties from the small popup menu.
5. It will open the Properties window. Here, click on the General category, and select the drop-down menu right next to the Startup type. Choose the Automatic option from the menu.
6. Finally, click on OK to save the changes.

5. Check File Explorer Search Options
You could potentially address search-related concerns by reviewing your File Explorer search preferences. This action might assist in pinpointing any configurations accountable for the problem. The outlined steps are provided under this. You can adhere to the subsequent instructions to examine File Explorer Search Options.
1. Press Windows + E to open File Explorer.
2. Click on the three-dot icon at the top of the File Explorer menu bar and click Options from the menu prompts.
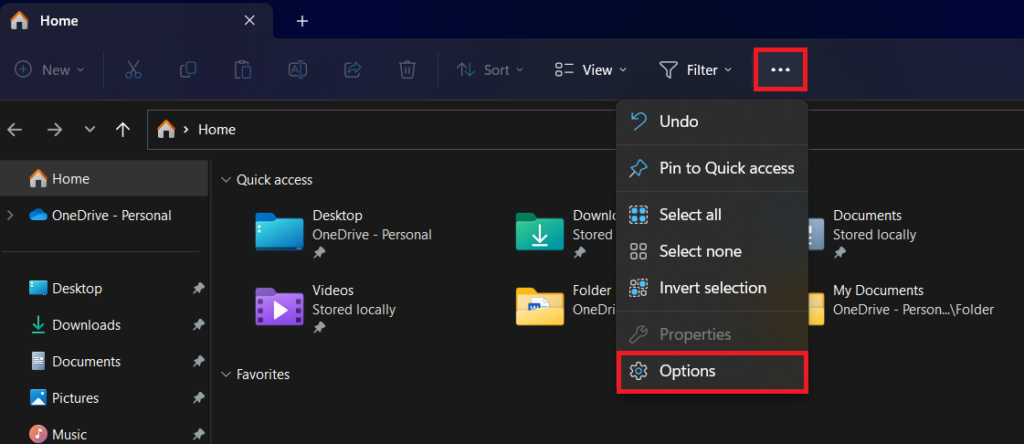
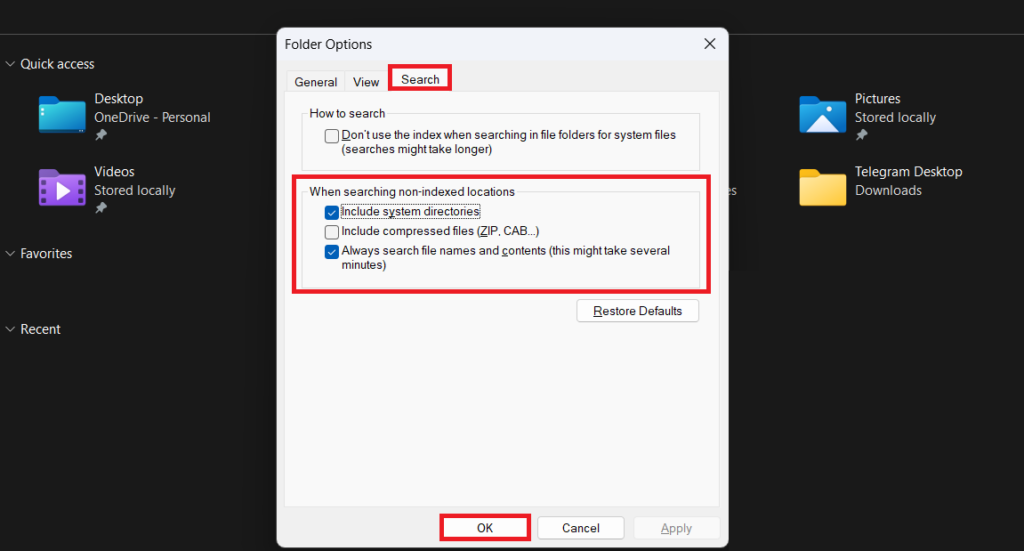
3. As soon as you click on Options, a new window will prompt, click on the Search tab.
4. Under When searching non-indexed locations, check the box left to the Always search file name and contents option
5. Click on the Apply button to save the changes. Then click on the OK button to close the window.
6. Enable File Indexing
File Indexing is a useful feature of Windows that allows you to speed up searches by indexing the files on your system. Its absence may make the File Explorer search box useless. Enabling this function is critical for a smooth file search experience.
Enabling File Indexing not only improves the effectiveness of the File Explorer search box but also solves the problem of empty search results. These steps also refresh your search experience.
You can follow the below steps to enable File Indexing.
1. Open the File Explorer by pressing the Windows + E key.
2. Navigate to the location or folder where you want to enable file indexing. After that, click the three dots at the ribbon menu and select Properties from the drop-down menu.

4. It will open the Properties windows. Here, click on the General tab and click on the Advanced button.
5. Under, Archive and Index attributes, check the box next to Allow files in this folder to have contents indexed in addition to file properties.
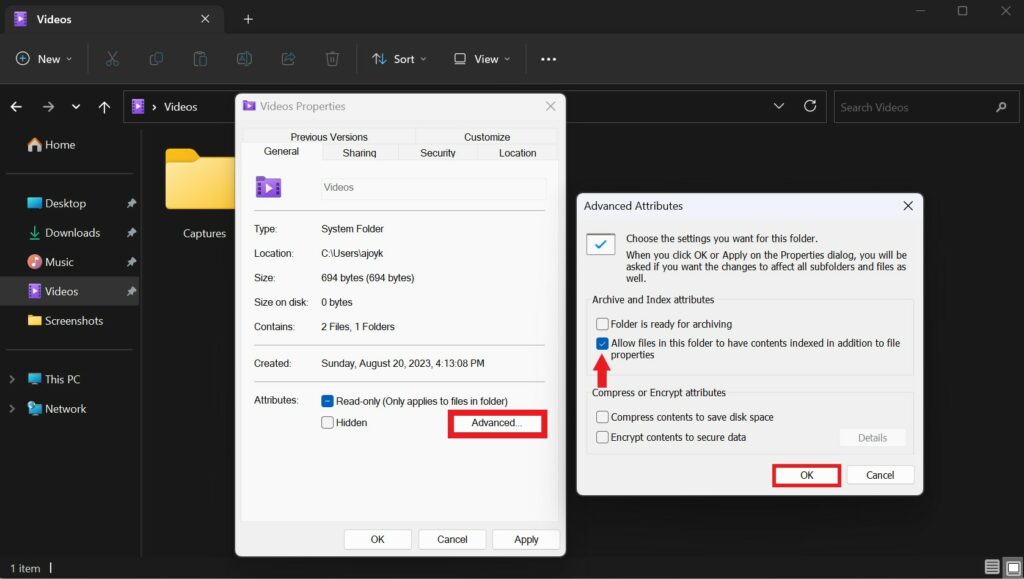
6. Finally, Click on OK and then Apply button to finish the process.
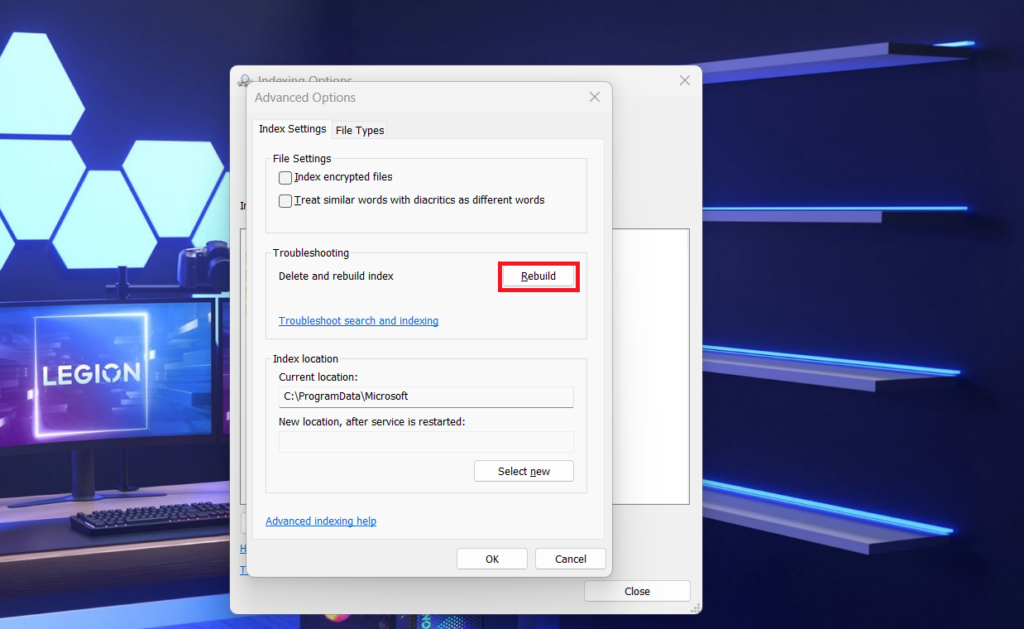
7. Rebuild Search Index
The search index functions as a crucial database, powering the search feature within File Explorer. When the search index becomes corrupted or incomplete, the results of your searches might lack reliability.
Regenerating the search index has the potential to restore the functionality of the File Explorer search. These steps are expected to result in a notably improved and precise search encounter.
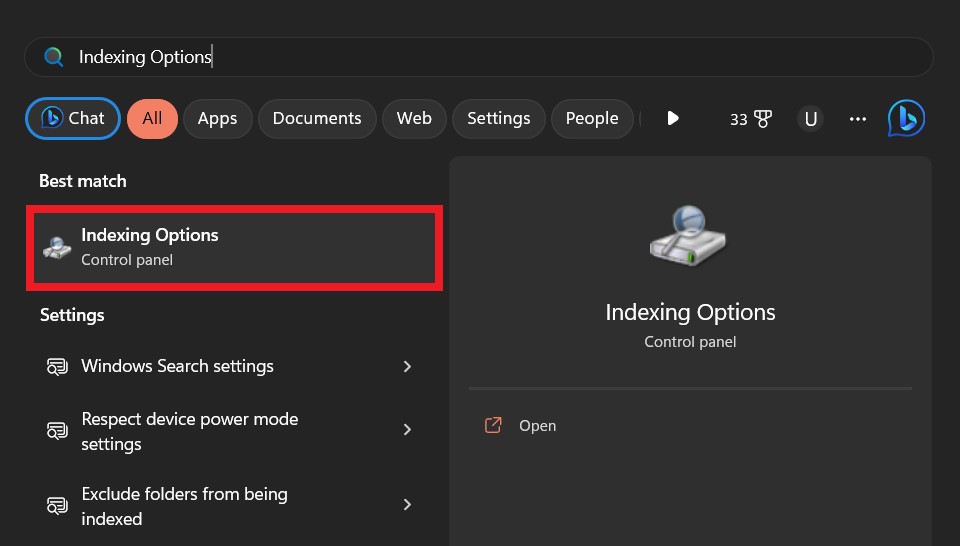
1. Begin by pressing the Windows key, then type Indexing Options, and proceed to open the relevant result from the search outcomes.
2. You will get the Indexing Options window. Here, click on the Advanced option.
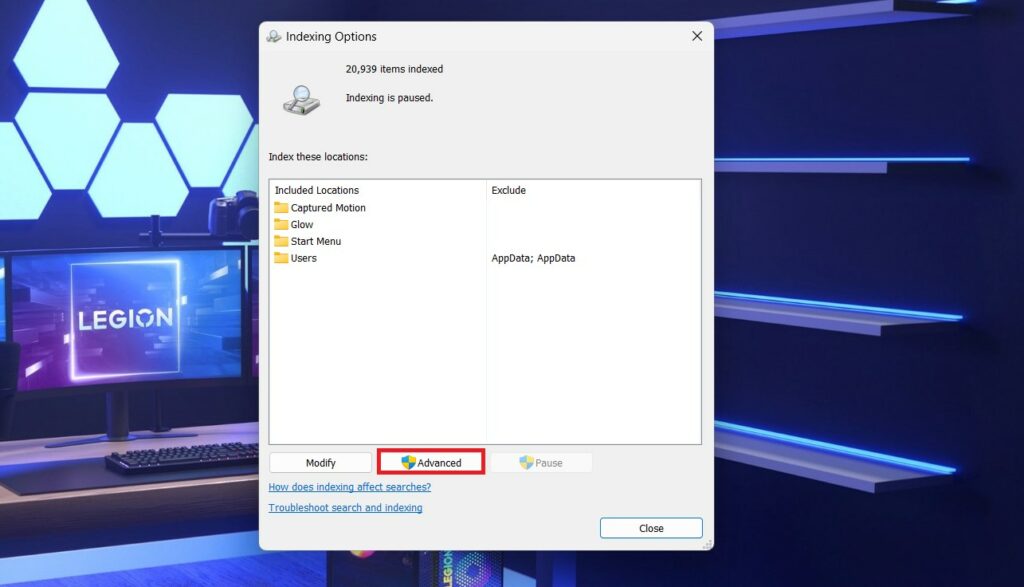
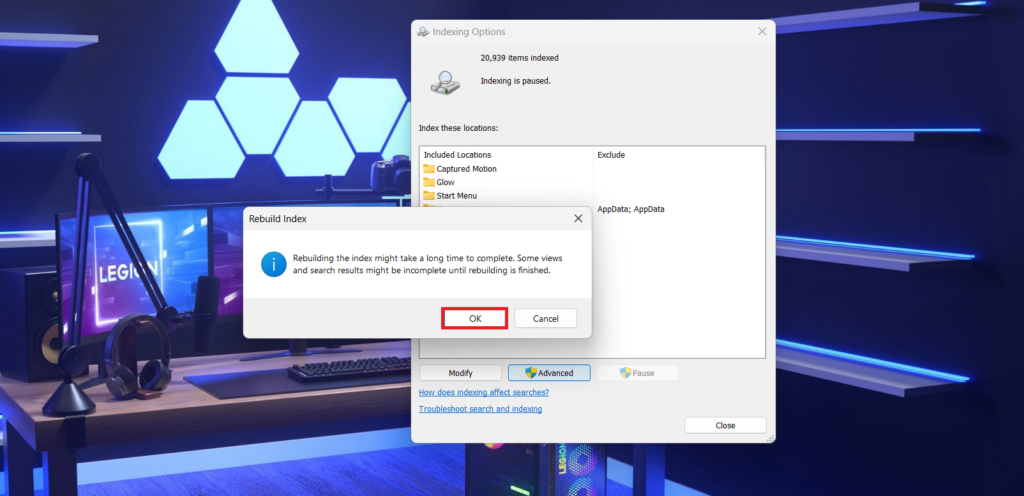
3. As soon as you click on Advanced, a popup appears called Advanced Options. Here, click the Rebuild button under the Troubleshooting section.
4. A confirmation prompt will appear. Click OK to proceed. This will trigger the rebuilding process of the search index.
8. Assign System Permissions to a Folder
The search capabilities of File Explorer may be affected by improper permissions, especially within certain folders. If the search problem is limited to a certain folder, changing the folder’s system rights can be the answer.
Follow the below steps to Assign System Permission to a Folder.
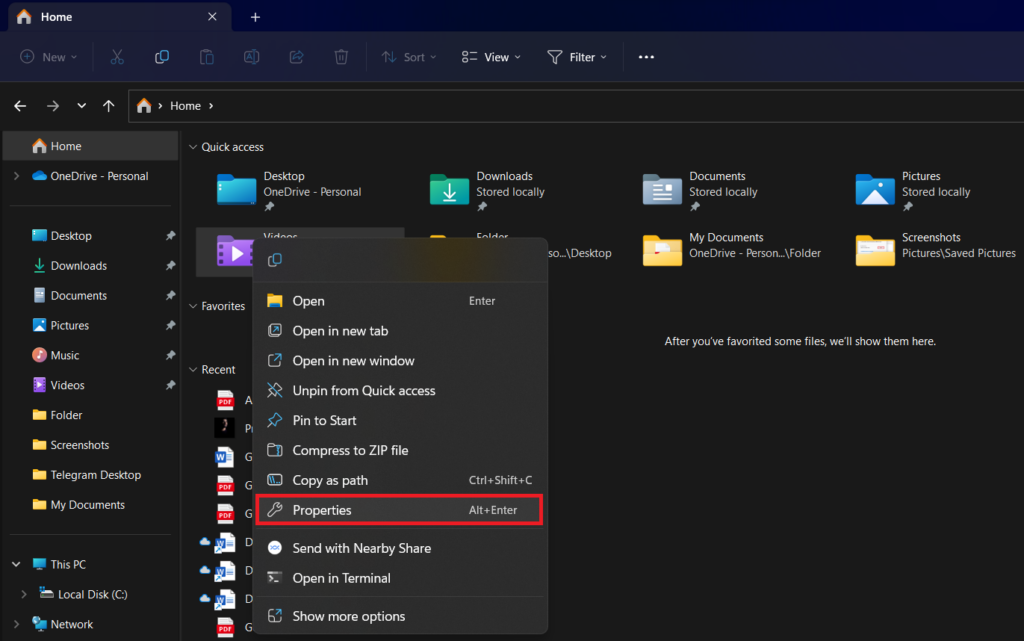
1. Open File Explorer on your PC.
2. Right-click on the problematic folder and choose Properties from the context menu.
4. Navigate to the Security tab in the Properties window. Confirm that the System is selected by default under Group or user names:
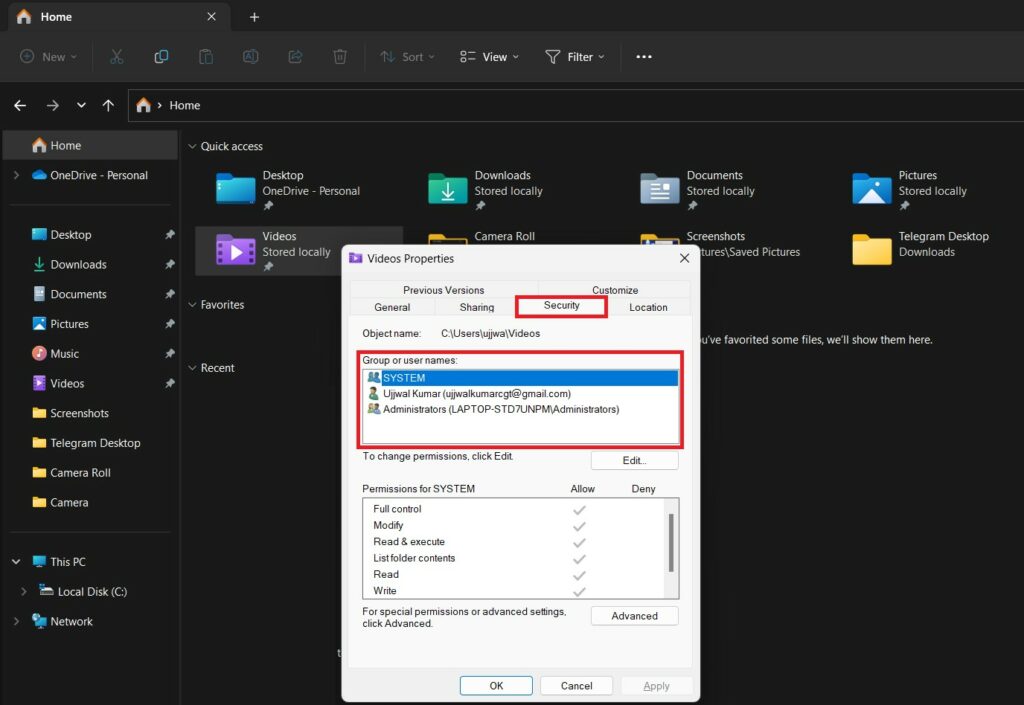
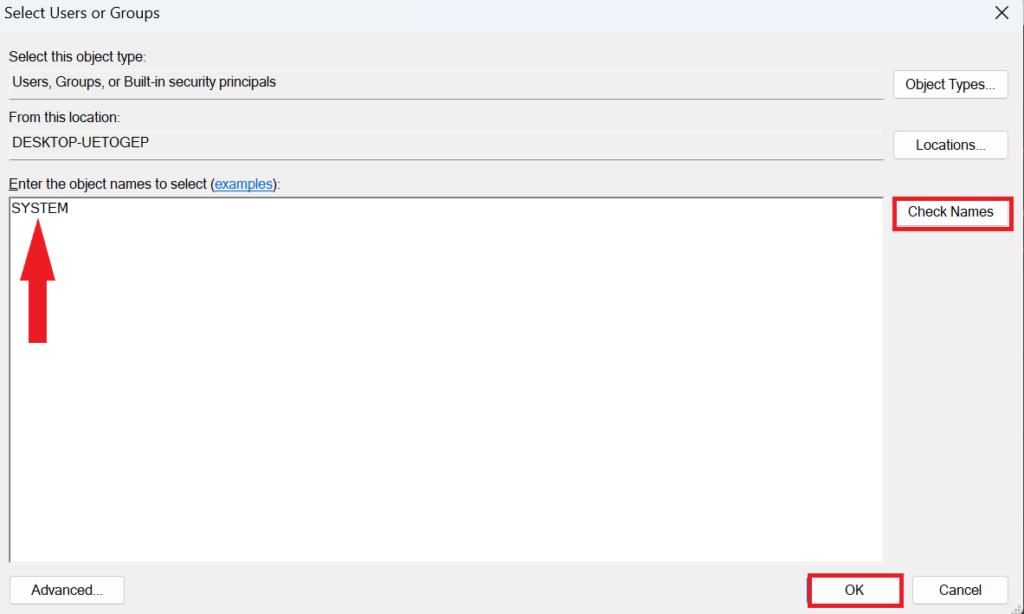
5. If not, click the Edit button. Then Add and input SYSTEM.
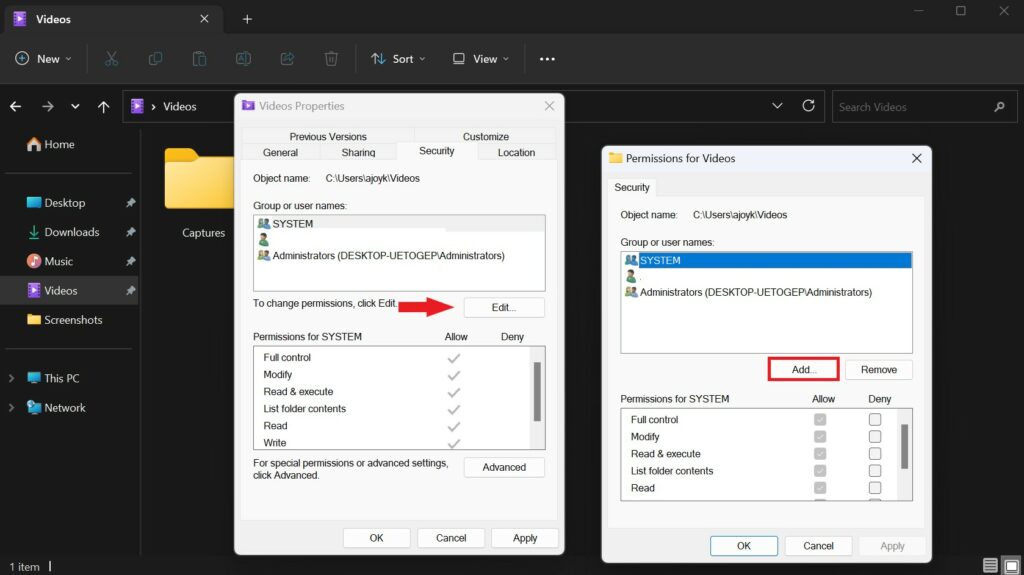
6. Click on the Check Names button and the OK button to save the changes.
If you changed the folder’s system, use the File Explorer search feature once again. Without any limitations, you should notice improved search performance.
9. Clean File Explorer Cache
When you use File Explorer on your system, it collects cache in the background to improve File Explorer’s performance, allowing it to provide results quickly. However, sometimes this cache can become corrupted, causing the File Explorer search feature to not work properly.
To resolve these cache-related issues, you should clear the cache. To do so, follow these steps:
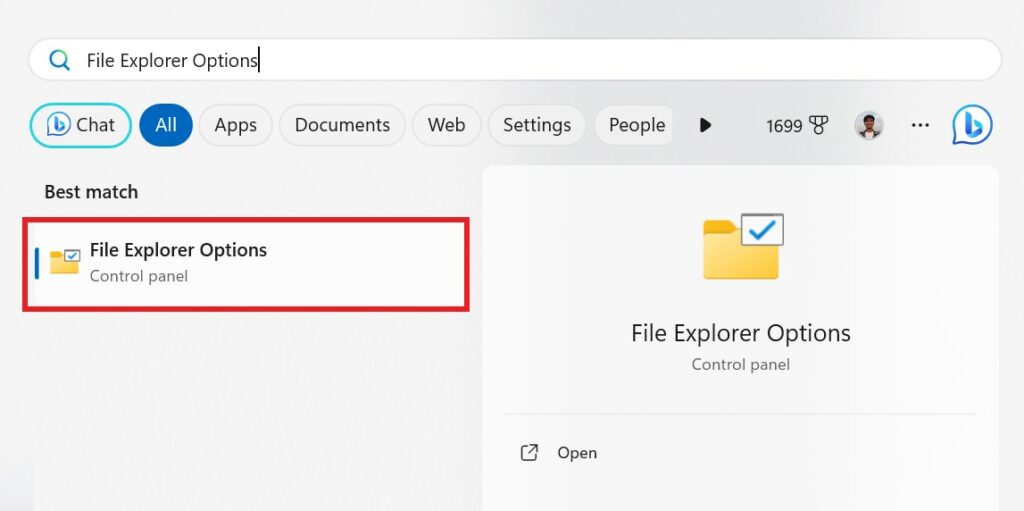
1. Click on the Start button, type File Explorer Options, and open it.
2. Under the Privacy section, click on the Clear button to delete all the cache files.
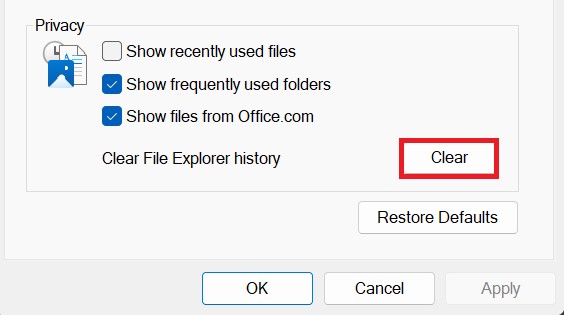
3. Once you’re done, click on the Apply and OK buttons to close the window.
10. Update Windows
On occasion, issues can emerge because of software glitches that Microsoft later resolves through updates. Keeping your Windows 11 system up to date guarantees that you’ve access to the most recent enhancements, bug resolutions, and improvements, which also encompass enhancements in search functionality.
To perform a Windows 11 update, adhere to the steps provided below.
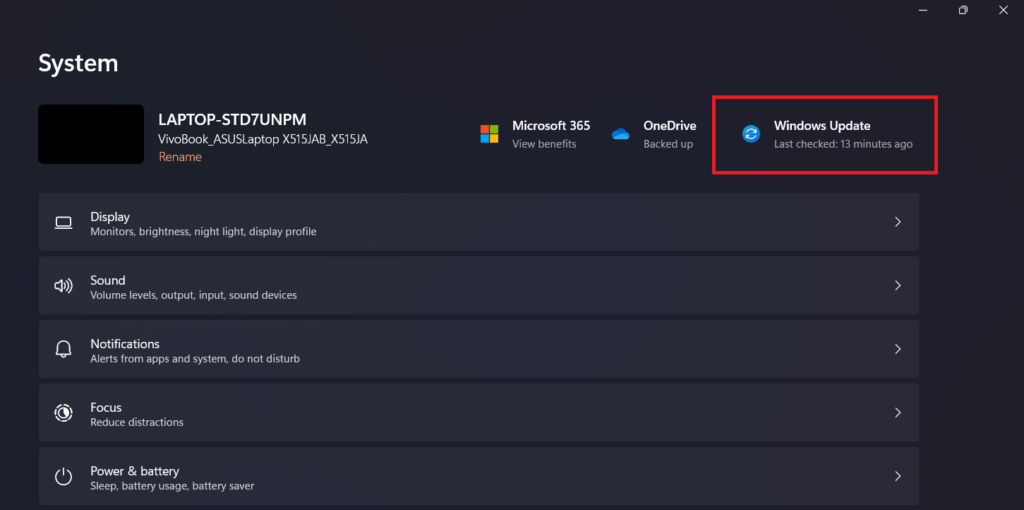
1. Open Settings by pressing the Windows + I key.
2. Click Windows Update on the top right corner of the screen.
3. Check for any pending updates by clicking on the Check for Updates button.
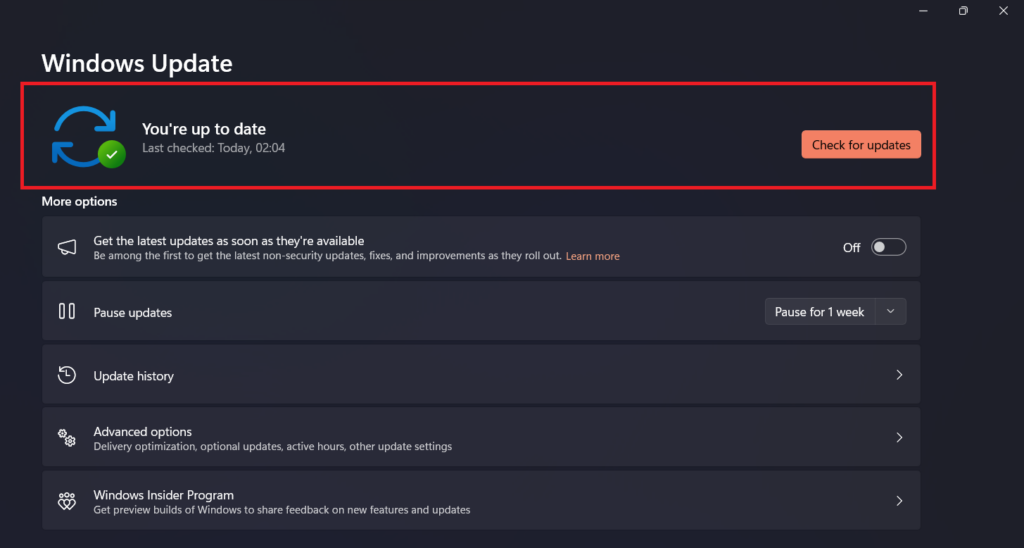
4. If there are any updates available, proceed to download and install the pending update to fix the File Explore search not working issues.
5. After that, Restart your system and check if the File Explorer search is working.
Conclusion
We’ve delved into several solutions to resolve the File Explorer search problems in Windows 11. By diligently following these guidelines, you can reinstate the search functionality and streamline your file navigation experience.
Select the method that aligns most accurately with the specific underlying causes, tailoring your choice to your requirements. Your dedication to troubleshooting will undoubtedly yield a more productive and efficient search capability within File Explorer.