Windows 11, which is the latest version of the Microsoft operating system for personal computers, offers refined and cross-functional technologies that enhance productivity, gaming, and security, and provides visually appealing and user-friendly interfaces for both desktop and touch-screen devices. This version provides a more clear and intuitive experience for all users worldwide. Searching for a file path on a Windows 11 PC has become much easier and quicker than in its previous versions.
Do you need to open an important file but forget about its location? Open a file location is a Windows feature that helps you navigate the exact path of the app or file. There are various quick tips and steps you can choose to search for any file or folder on your system, and Windows 11 has introduced different ways to open a file location even when you do not actually know its exact path.
How to Open File Location on Windows 11
Searching for a forgotten file on your laptop or PC can be stressful. Windows 11 offers multiple ways to open a file location, providing relief from the anxiety of not knowing where an important document is saved.
Whether through File Explorer, Start Menu search, Task Manager, Command Prompt, or the context menu, you can quickly navigate to the folder containing the desired file. So let’s find out what the various steps are.
1. Using the Windows Search Bar
This is one of the easiest ways to search for a file location. You just need to search for the file or app name, and you’ll get the file location.
To do that, follow the steps mentioned below:
1. Click on the Search bar present on the taskbar and type the name of the app, file, or folder in the Windows Search bar.
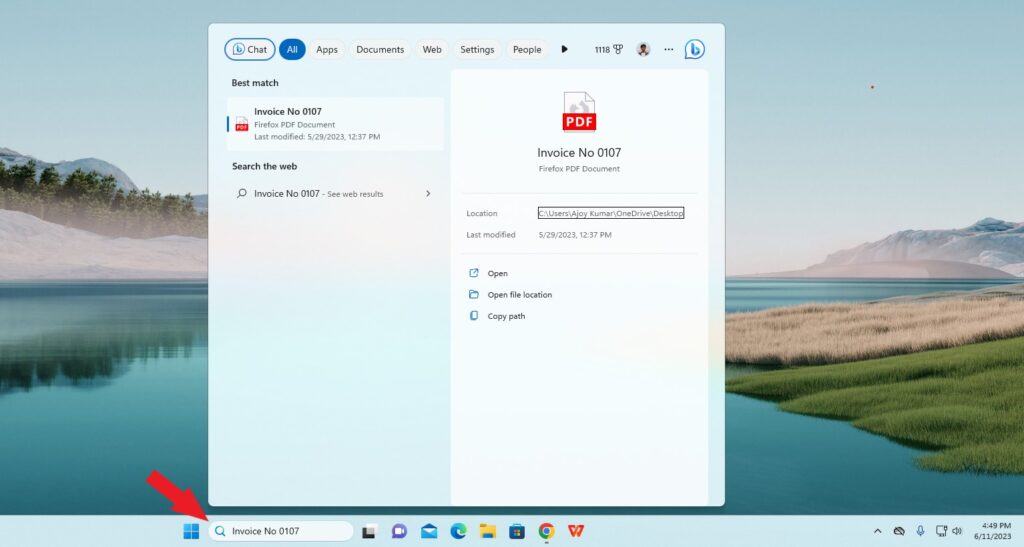
2. Your search will be listed below in the Best Match section.
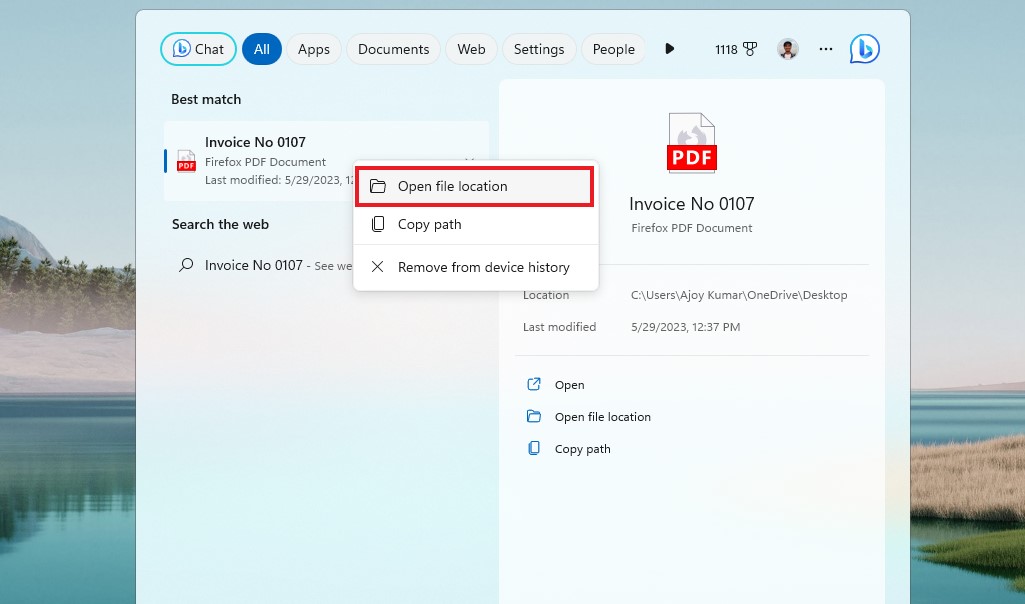
3. Now, to open the file location, right-click on the file name and select the Open file location option from the context menu.
4. After that, it will take you to the location of the file.
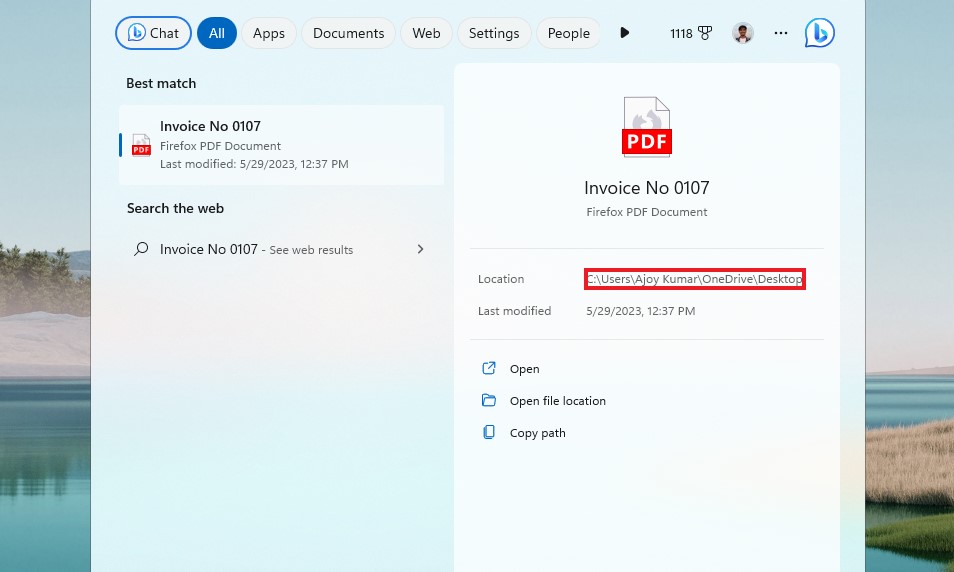
5. You can also click on the right side of the results where the location is mentioned. Click on the path next to it, and it will also take you to the location of the file.
2. Using the File Explorer
File Explorer is one of the most commonly used methods to search for files, folders, and their paths in Windows. You can easily open, create, delete, move, and copy files and folders through File Explorer.
Here are the steps you can follow to open the file location of any file:
1. Press the Windows + E keys together to open the File Explorer or open it from the taskbar.
2. Type the name of your file in the search bar.
3. It will search for it on your Windows storage device and display the file along with the file location.
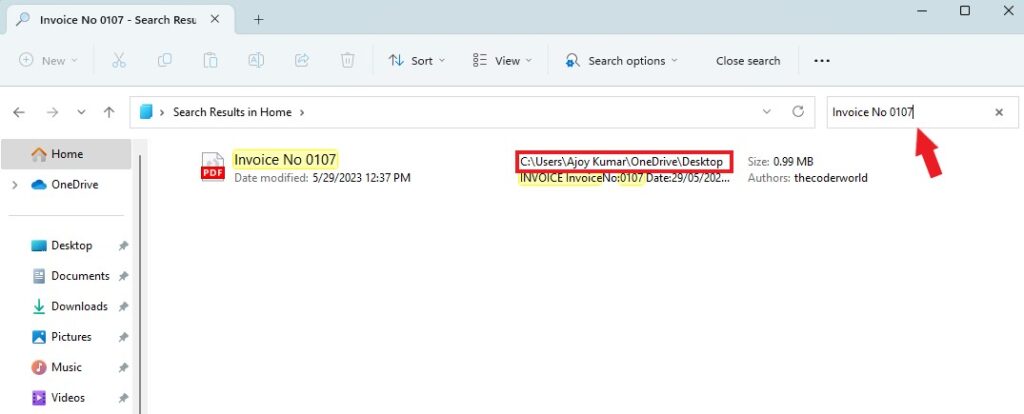
4. If you want to directly open the file location, you can right-click on the file name and select the option Open file location from the context menu.
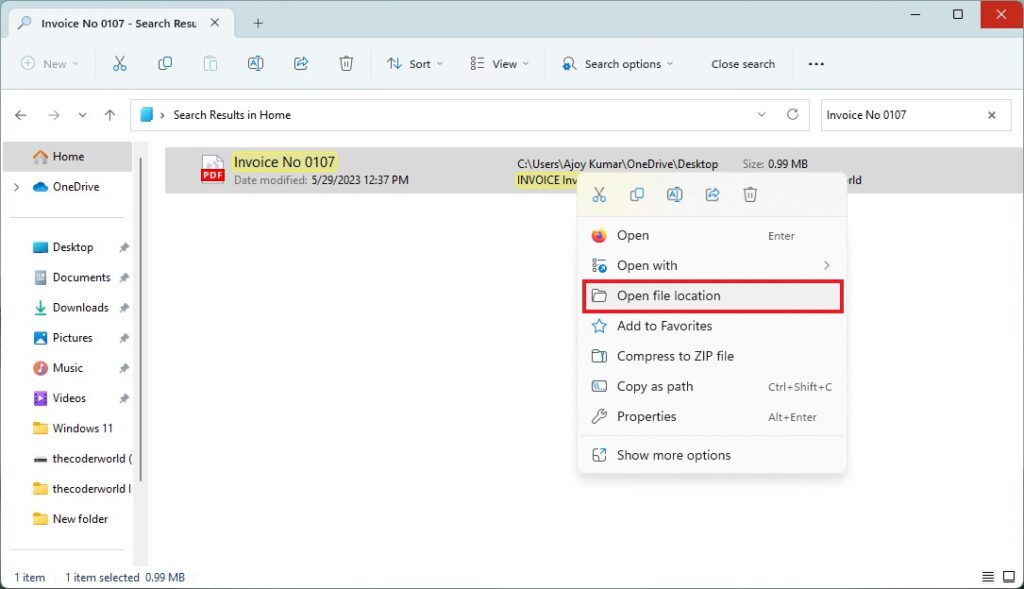
5. Alternatively, you can copy the location of the file. To do that, right-click on it and select the Copy as Path option.
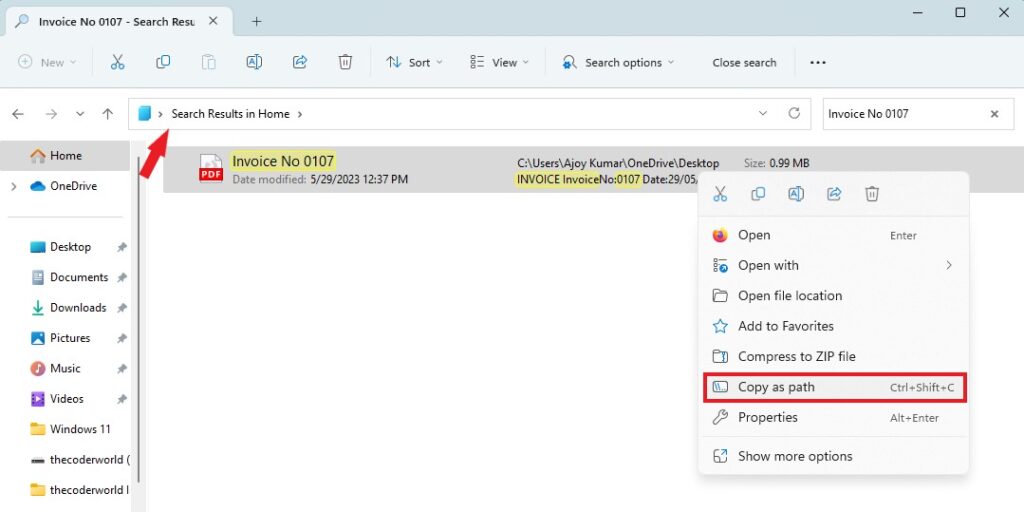
6. After that, paste it into the File Explorer address bar and remove the double quotes from the beginning and end.
7. Then hit the [Enter] key.
8. It will open the file location where the file is present.

3. Using Command Prompt
You can also use the Command Prompt to find the file path by using a few lines of code. Command Prompt is a command-line interpreter application found in almost every Windows operating system.
It is used to execute commands, where tasks are executed via scripts and batch files. It is very useful for performing various functions related to troubleshooting, allowing you to change, view, and handle files in your system, giving you better administrative control.
Here are the steps you can follow to get the file location using the command prompt:
1. Open the Command Prompt as Administrator on your device.
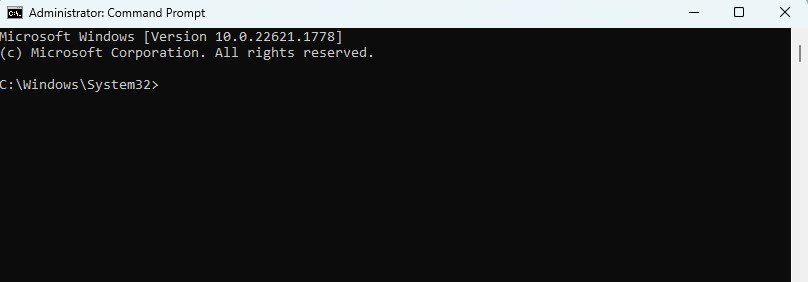
2. On the Command Prompt tab, type dir “\file_name*” /s and press the [Enter] key. Now, wait for a few seconds to get the information.
Note
You also need to provide the proper extension for the file name. For instance, if I want to know the location of Invoice No 0107.pdf, I will run this command: dir "\Invoice No 0107.pdf*" /s
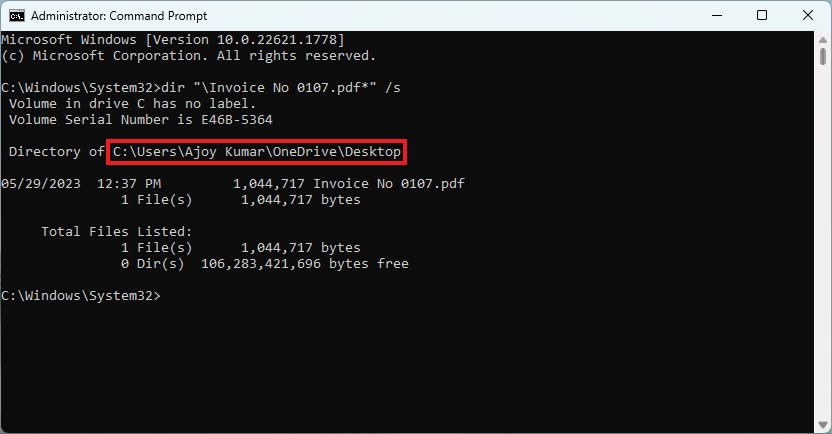
Now, you can simply follow that path to reach that particular file location on your Windows computer.
How to Open the File Location of Desktop Apps
Now, let’s discuss how we can find the installation location or desktop app shortcut location on Windows. For that, we’re going to use two methods: the Start Menu and the Task Manager.
1. Using the Start Menu
Sometimes, certain desktop app shortcuts may not work due to various reasons, such as the app being removed or updated to a newer version while the older shortcut remains. In such situations, you can locate the location and remove those shortcuts.
To do that, you can follow the steps mentioned below:
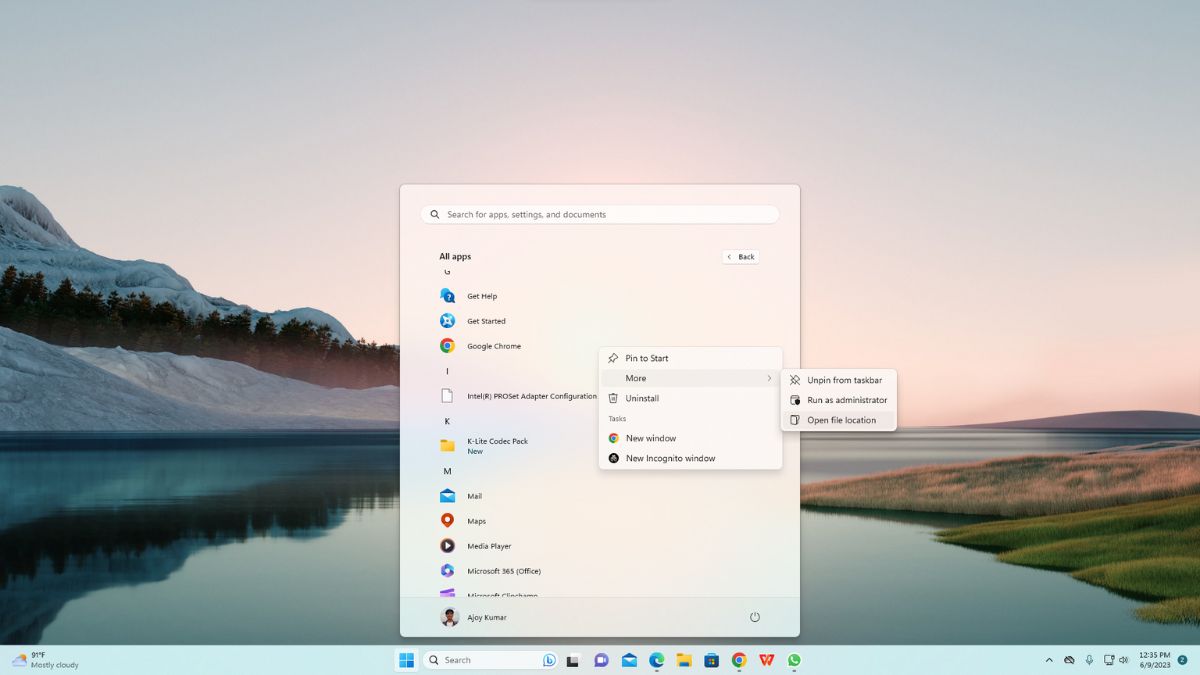
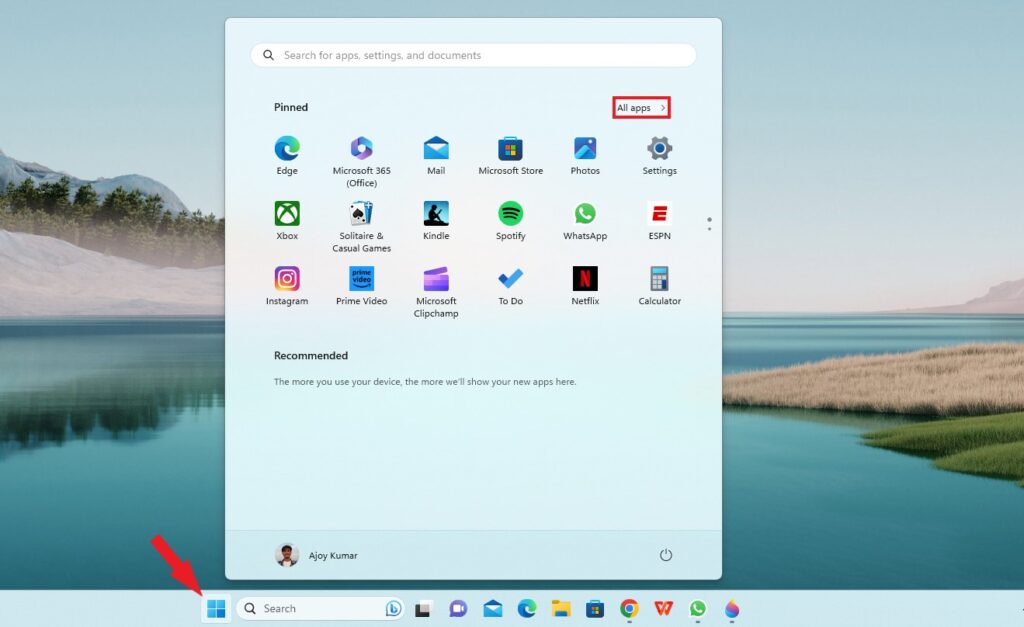
1. Click on the search bar and search for the desktop app you want to locate. Alternatively, click on the Start Menu, select the All Apps option, and locate the desktop app.
2. For instance, if the Rockstar Games Launcher is not working on my system, I will right-click on it, select the More option, and then choose the Open file location option from the menu that appears.
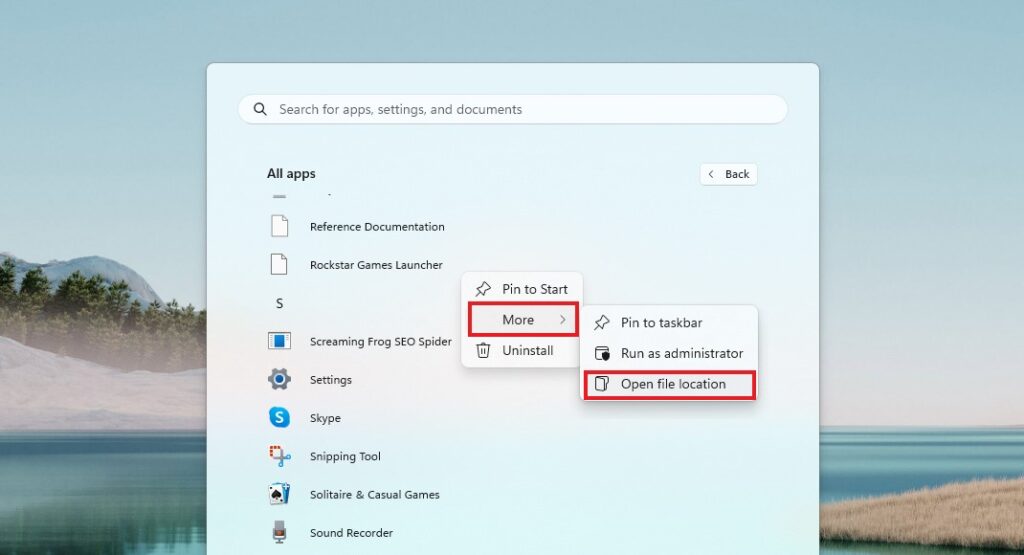
3. It will open the program shortcut location. You can select the shortcut and click on the delete button to remove it from the All Apps list.

2. Using Task Manager
Task Manager shows you the programs, processes, and services that are currently running on your computer. You can monitor the system’s performance through the task manager and terminate any application or process presently running according to your priority.
You can also open any program location through the task manager. Let’s check how.
1. Open the Task Manager. You can search for it in the Start Menu search bar and open it, or use the shortcut keys Ctrl + Shift + Esc to open the Task Manager.
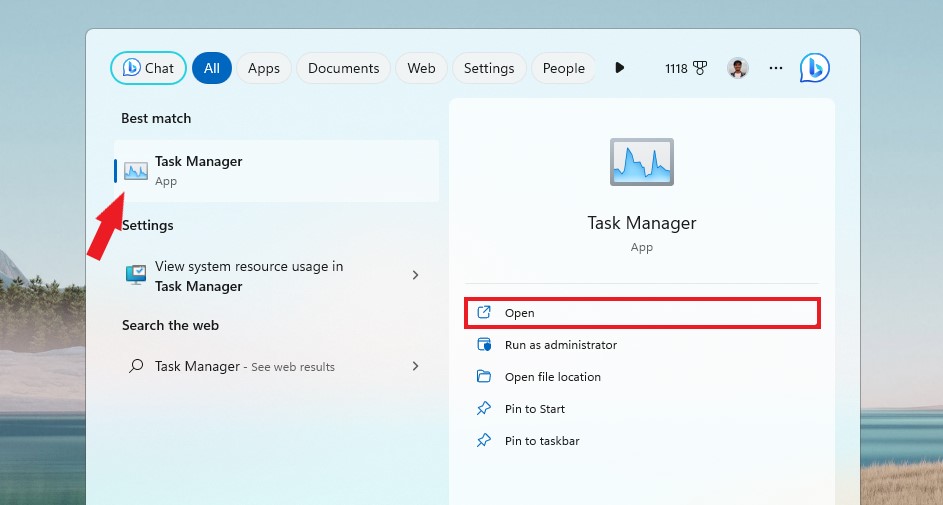
2. It will open up the Task Manager window.
3. Click on the Processes tab and right-click on the app and processes for which you want to know the location.
4. Then select Open file location from the context menu that appears.
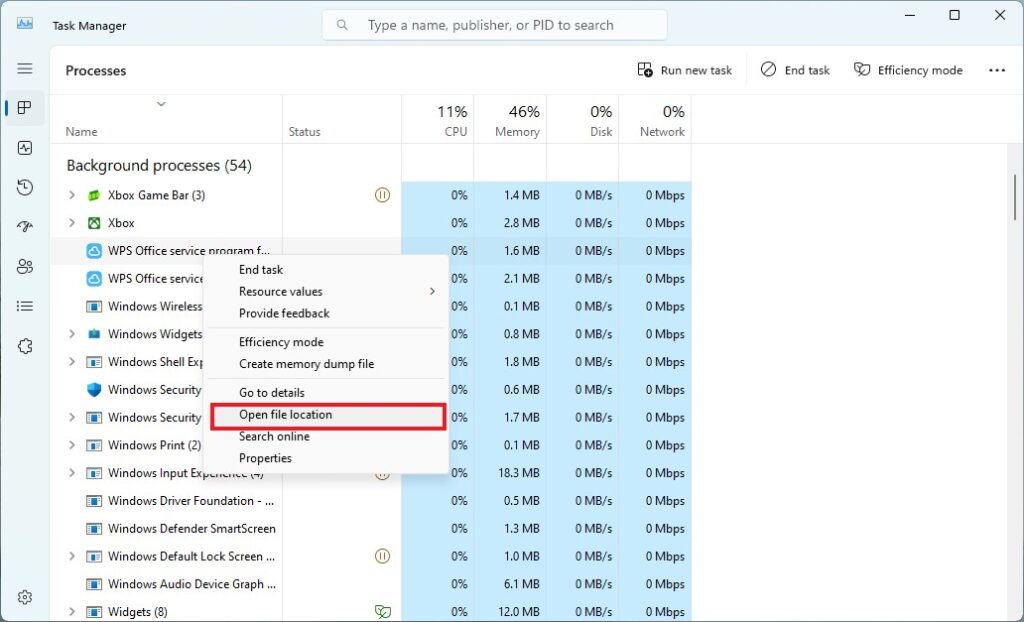
5. It will take you to that existing app file location.
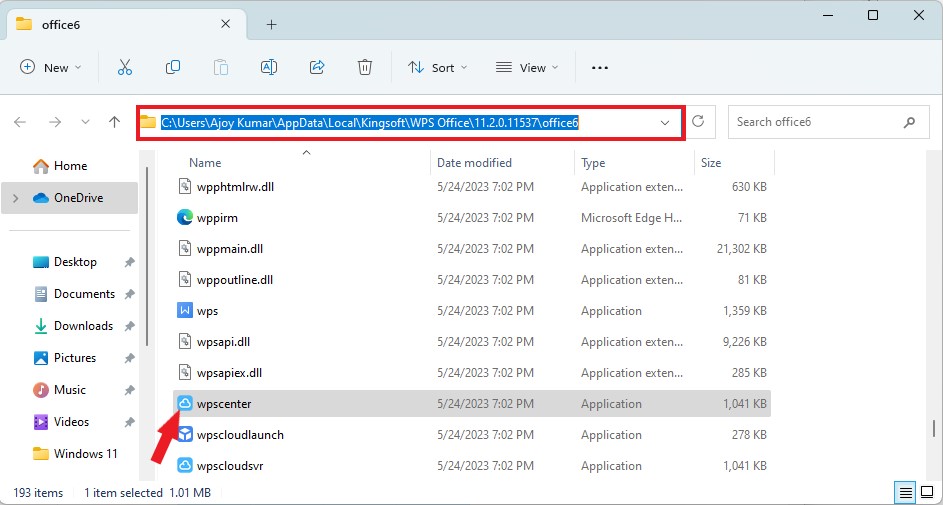
You can use these methods to find the location of unwanted apps or software that are using your system resources. This way, you can locate them and remove them from your system. Make sure not to delete any system-related files, as it can cause system failure.
How to Open the File Location of Desktop Shortcuts
If you’ve created a desktop shortcut for your files or apps and you want to know how to find the shortcut location in Windows 11, you can access their main location with a click.
To do that, follow the steps mentioned below:
1. Select the desktop shortcut and right-click on it.
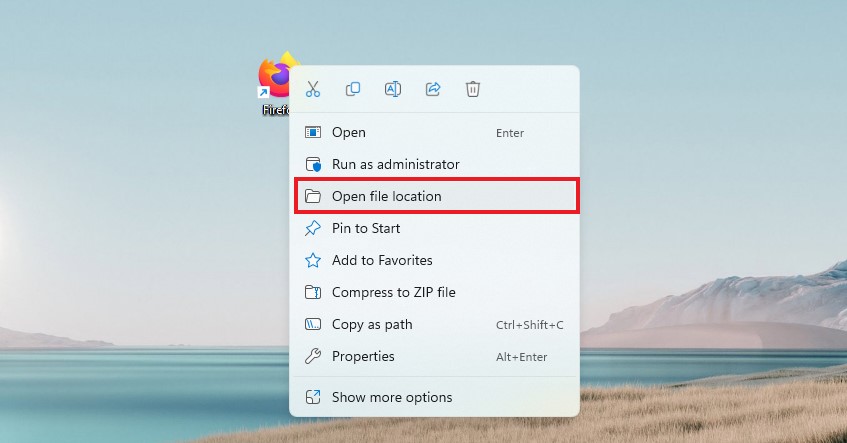
2. From the context menu that appears, click on the Open File Location option. After that, you will be redirected to its original location.
Note
The file location won’t show if you’ve directly downloaded or pasted it onto the desktop.
Conclusion
Thus, depending on your ease and workflow, you can choose any of the steps mentioned above to open a file location in Windows 11. So these are some quick methods that can help you navigate to the file, folder, or app you’re desperately searching for.
We hope that this article was helpful for you all. If you liked this article and found it interesting, do share it with your friends. If you’ve any doubts or queries regarding any step, do not hesitate to leave them in the comment section. We would be happy to assist you and resolve your doubts.
