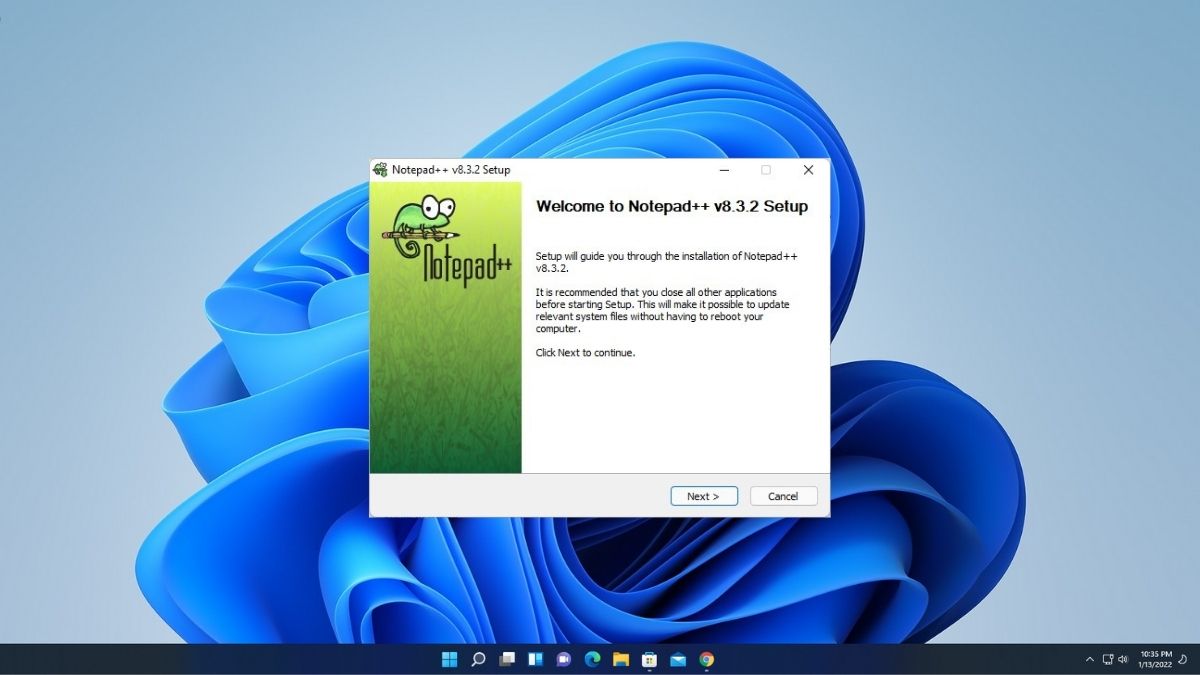
Normally we use notebooks and diaries to write down something whereas on the computer we use some text editing software. For Windows, we use Notepad, which is the default text editor. As we know Notepad is a simple text editing software for Windows, now if you want an advanced text editor then you can use Notepad++.
Notepad++ is a free and open-source text editor for the Windows operating system. It is an updated version of the notepad. In simple terms, we can say that Notepad++ is the alternative to the default Microsoft Notepad.
How to Download Notepad++ on Windows 11
Here we are going to discuss how we can download and install Notepad++ on Windows 11. To download Notepad++ on Windows 11 follow the following simple steps:
1. Open any browser and search for Notepad++. Or, visit this link notepad-plus-plus.org
2. To download the software, click on Download from the left menu.
3. On the download page, there are two options Download 32-bit x86 and Download 64-bit x64. Download according to your computer system type. Don’t worry if you don’t know whether your computer is 32-bit or 64-bit. For that, check out our guide on how to check system type on a Windows PC.
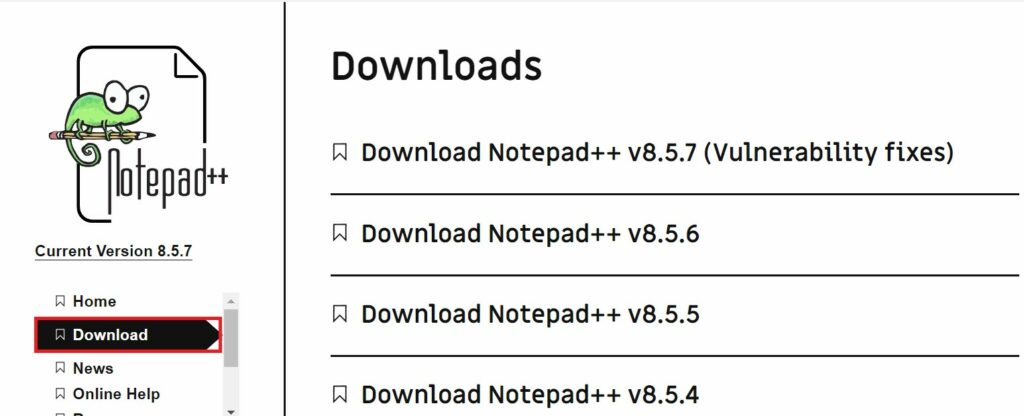
4. If your computer is 64-bit then just click on the Notepad++ Installer 64-bit x64 and for 32-bit click on the Notepad++ Installer 32-bit x86 option.
How to Install Notepad++ on Windows 11
In this section, we’ll discuss how to install Notepad++ on Windows 11. After the download has been completed, just open the downloaded file to install the Notepad++ on Windows 11.
To install follow the following simple steps.
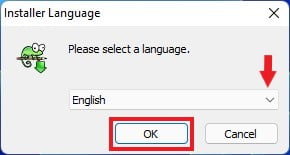
1. You’ll get a small window where it will ask you to select a language. It’s English by default, you can also select your preferred language from the drop-down menu.
2. Then click on the OK button.
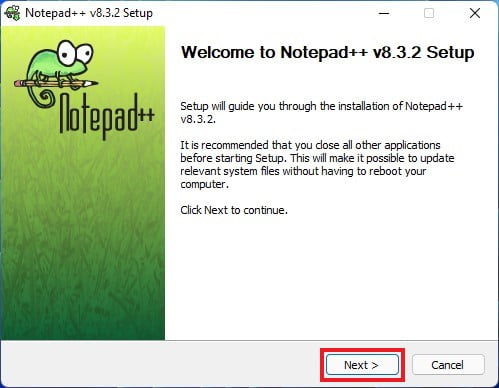
3. After that, you’ll get Notepad++ Setup windows. Here, click on the Next button to continue.
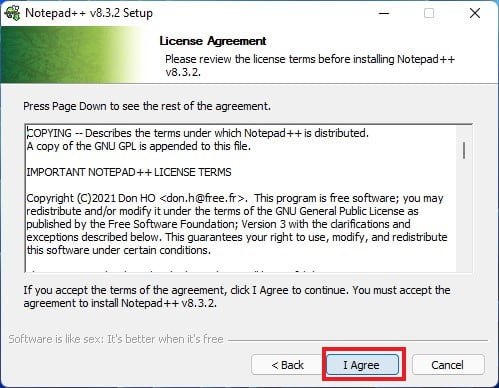
4. On the next window you will get the license agreement option. You’ll have to agree with the license agreement to install Notepad++. For that, click I Agree.
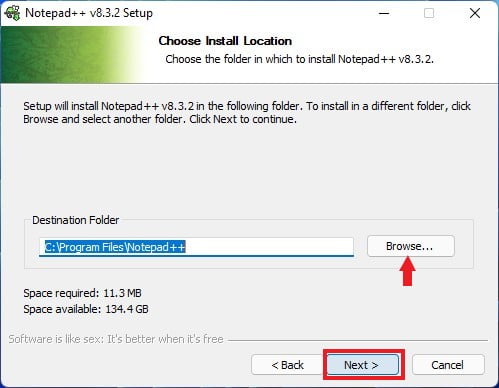
5. If you want to change the installation location, you can do so by clicking on Browse. Simply select the location where you want to install the software, then click OK and subsequently the Next button.
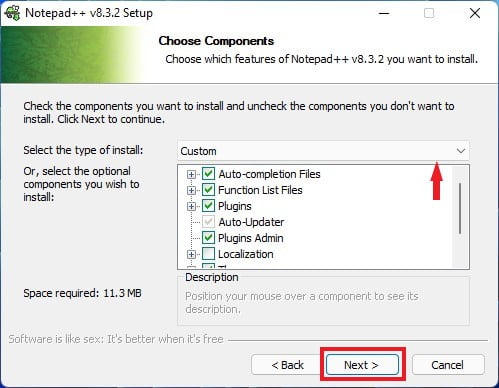
6. You’ll get a new window. Here, select the installation type from the drop-down menu. If you don’t wanna change it, leave it as default and click Next.
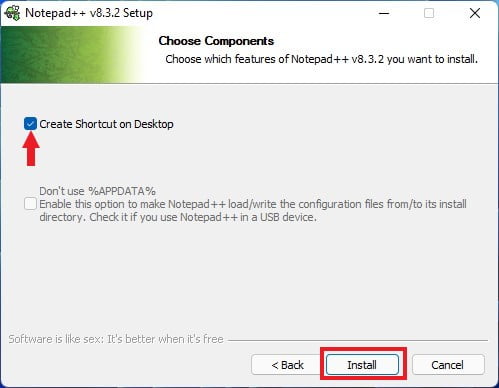
7. If you want to create a desktop shortcut then check the box Create Shortcut on Desktop option.
8. Now, finally click on Install to begin the installation process. Soon after, it’ll be installed on your Windows 11 computer.
That’s it, this is how you can download and install Notepad++ on Windows 11. If you want to make Notepad++ a default text editor on Windows 11. Then follow the article until the end to find out.
How to Make Notepad++ Default Text Editor on Windows 11
By default, on Windows 11 you get a basic text editor with limited features. Now that Notepad++ is installed, you can make it a default text editor on Windows 11 by following the steps below. Always use it as your preferred text editor on Windows 11.
Here are the steps to make Notepad++ the default text editor on your Windows 11:
1. Click on Start Menu and click on Settings.
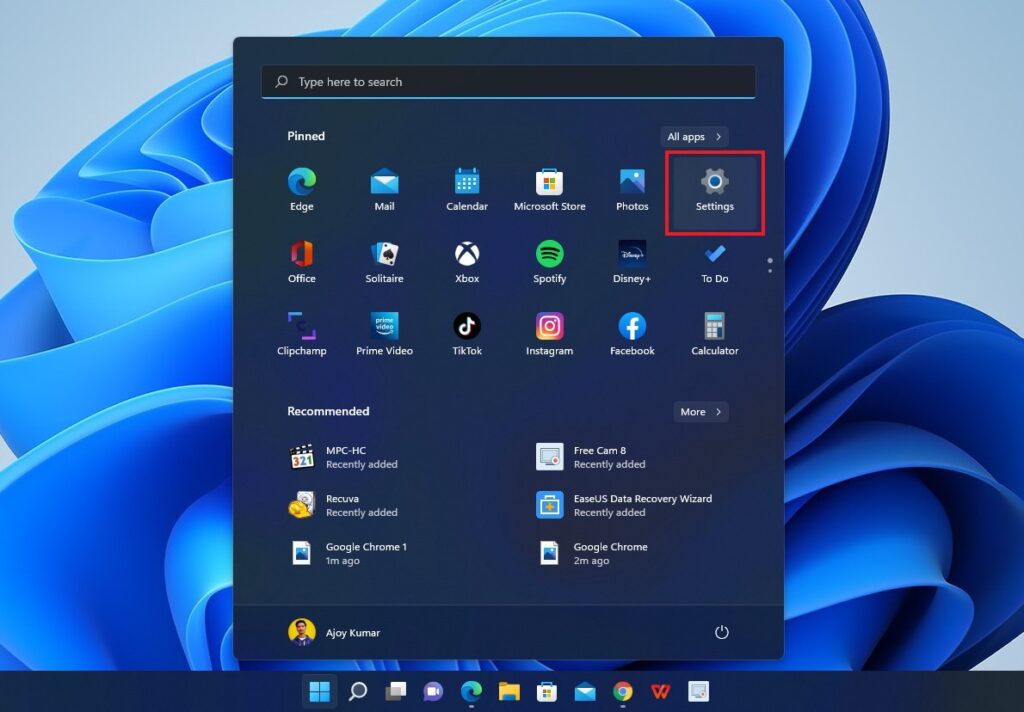
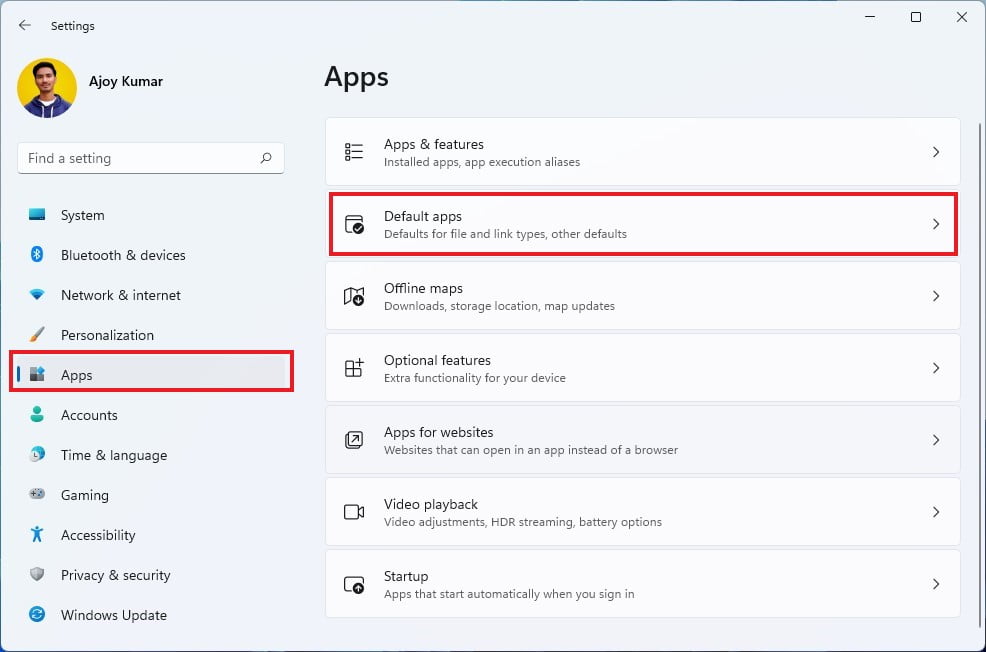
2. Next, click on the Apps tab from the left pane of the Settings window.
3. Then, select the Default Apps options present to the right of your screen.
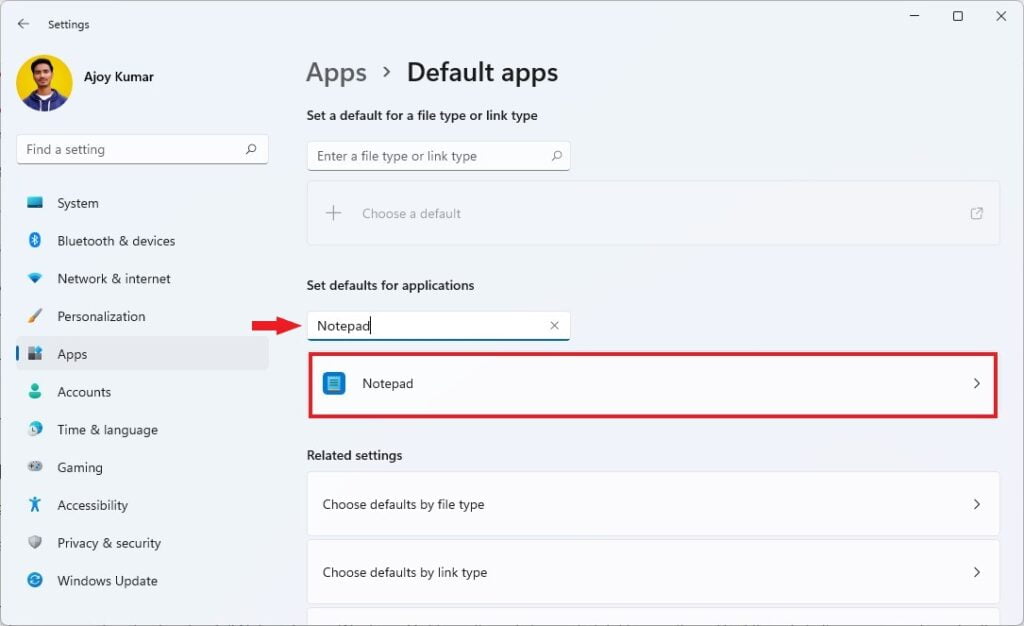
4. Now search for Notepad on the search box and select the app from the search result.
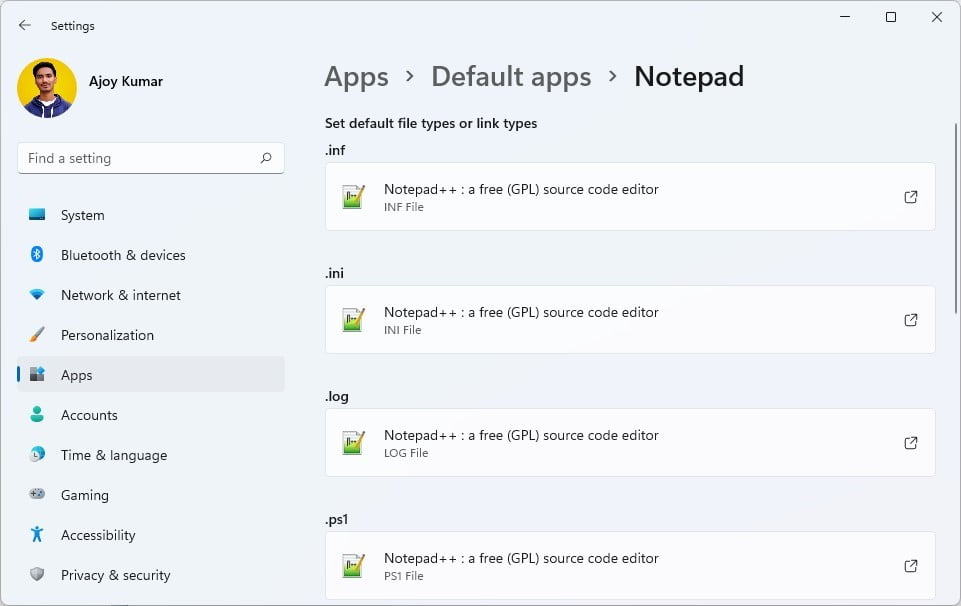
5. You’ll see a list of text-related files. Under each file name, you will find the name of the app with which it is currently associated. By default, Notepad is a preferred text editor on Windows 11.
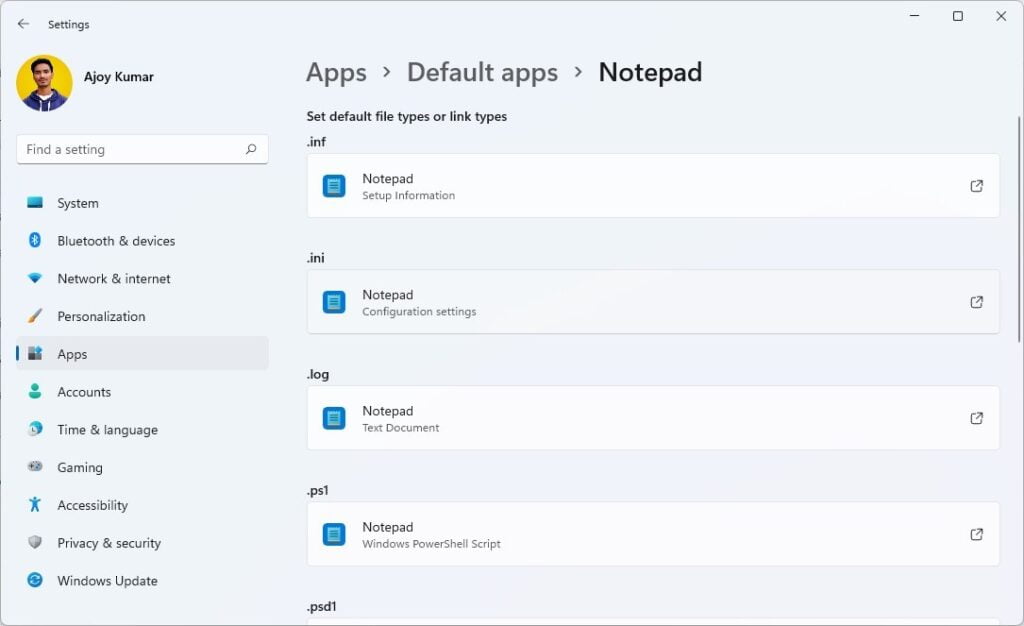
6. In Windows 11, you can’t simply change your default app with a single click. You have to change the assigned app for every specific file type. For that, you have to change it from Notepad to Notepad++. To do so, click on each file type and select More Apps.
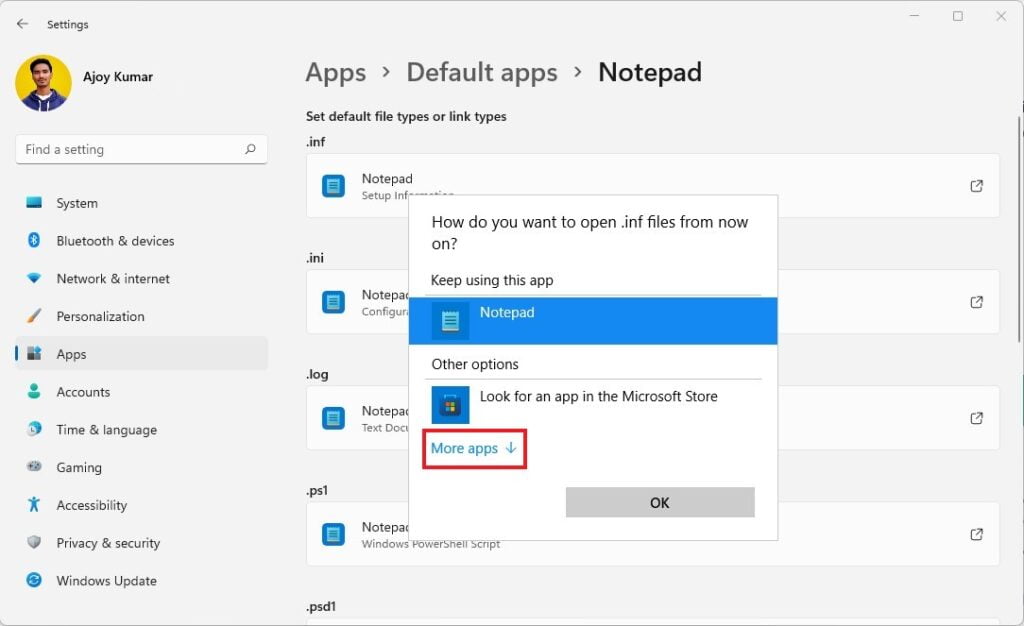
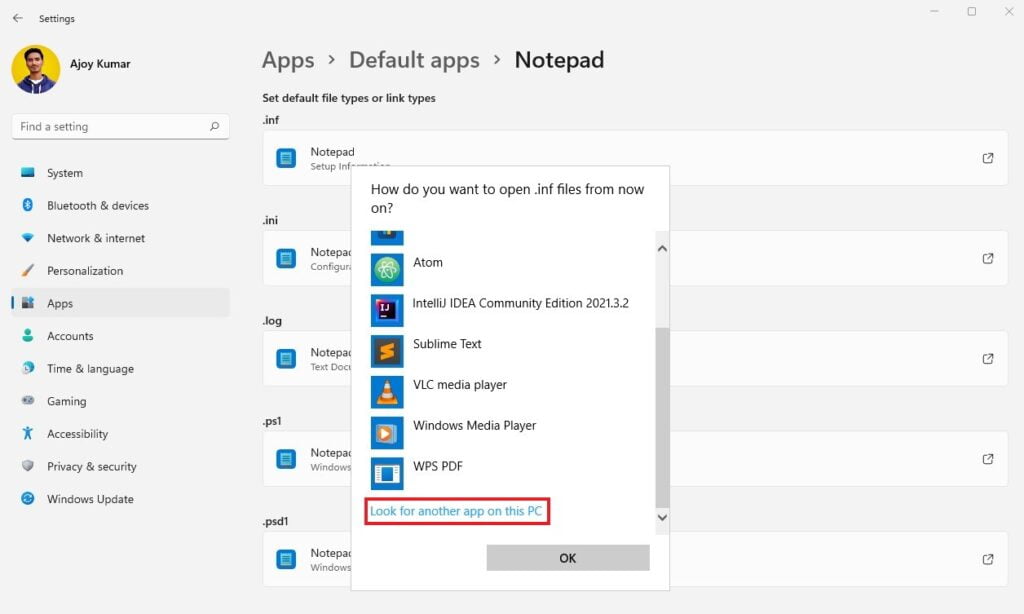
7. Now it will open a list of apps, here simply select Notepad++ and click on OK. But if you don’t get the Notepad++ option, then select the Look for another app on this PC option.
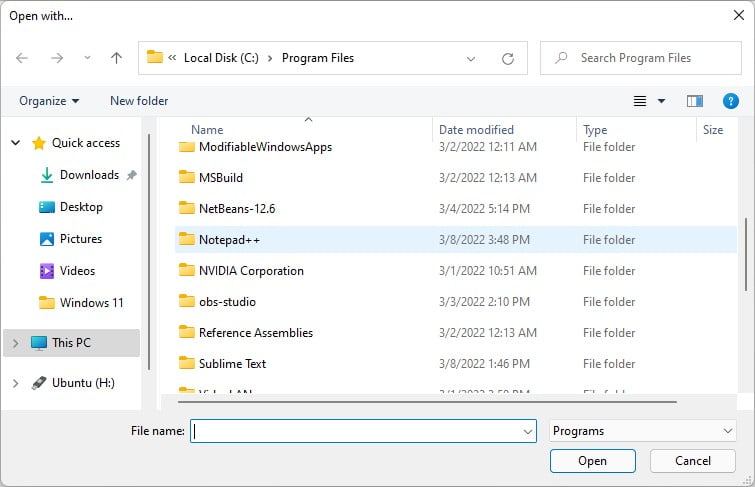
8. It will open the C:\Program Files directory. Here, look for the Notepad++ folder and open it.
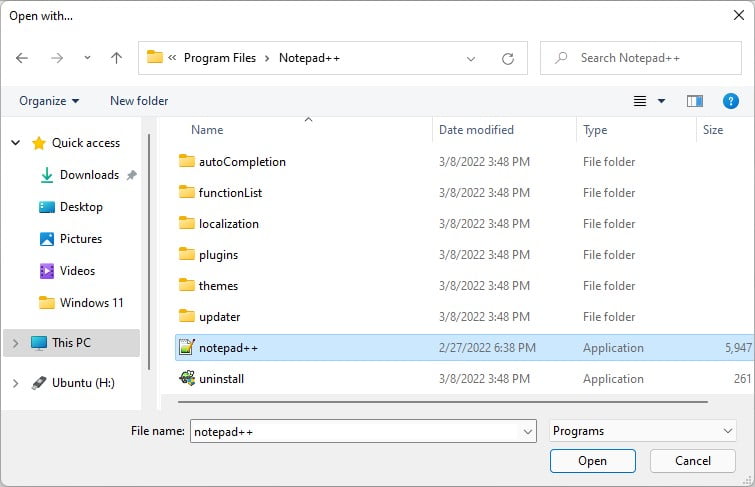
9. After that, select the Notepad++ app and click Open to always open this file with Notepad++.
10. Do for each file type until Notepad++ is chosen as the default to open all these file types.
Conclusion
Notepad++ is a powerful and versatile text editor that can replace the built-in Notepad in Windows 11. Using the steps above, you can easily install the Notepad++ text editor on your Windows 11 PC. However, if you are experiencing issues with Notepad++, then check out our guide on how to fix Notepad++ not working on Windows 11.
That’s it! This is how you can download and install Notepad++ on Windows 11 and make it the default text editor. We hope this article was helpful to you. However, if you have any doubts regarding the installation process, you can leave them in the comment section.
