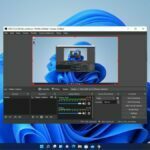
Open Broadcaster Software(OBS) is free and open-source software that allows you to efficiently record and do a live stream of your computer screen. You can easily install and set up OBS Studio on Windows 11.
However, after following all the steps to set up OBS, you may encounter an issue where OBS Studio records everything in silence. If you are unable to find a solution to fix it, here are some simple tips that can help you resolve this issue with OBS Studio on your Windows 11.
Fix OBS Microphone Not Working
Why is the microphone not working on Windows 11? It may happen due to a bug, the microphone is using an outdated audio driver, or maybe you have not set up an audio device in the OBS Studio. Whatever the reason, here are a few quick tips to fix it. Let’s check them one by one:
1. Restart OBS
Before diving into advanced troubleshooting, consider restarting OBS Studio. To do this, close OBS Studio, restart your computer and reopen OBS.
Sometimes, a simple restart can resolve microphone issues. However, if restarting the application does not resolve the issue, you can try other troubleshooting methods.
2. Double-Check Physical Connections
Before proceeding with any troubleshooting steps, it is important to double-check the physical connections. If your microphone isn’t working, ensure that it is securely connected to your PC. In some cases, a loose connection may give the impression that the microphone is properly plugged in, but it may not function correctly.
Therefore, ensure that the microphone jack is properly connected to your system to ensure a secure connection. Once you have confirmed the connection, you can proceed with other troubleshooting steps.
3. Update the Microphone Driver
Sometimes, this issue can occur due to an outdated audio driver being used by the microphone. To resolve this, you can manually update the driver from the Device Manager. Alternatively, on the latest version of Windows 11, you can update the microphone driver directly from Settings.
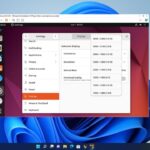
Here’s how you can update the Microphone Driver:
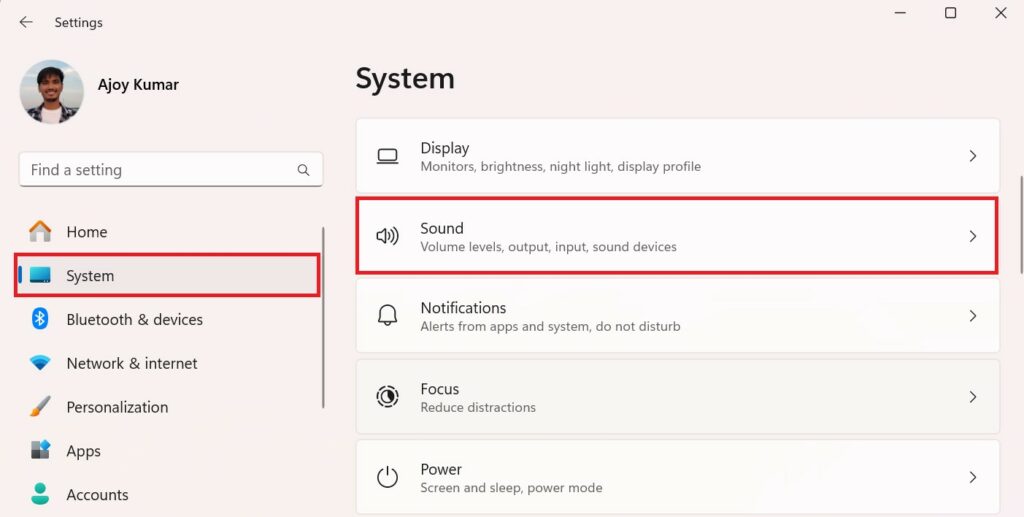
1. Open Settings by pressing the Win + I keys.
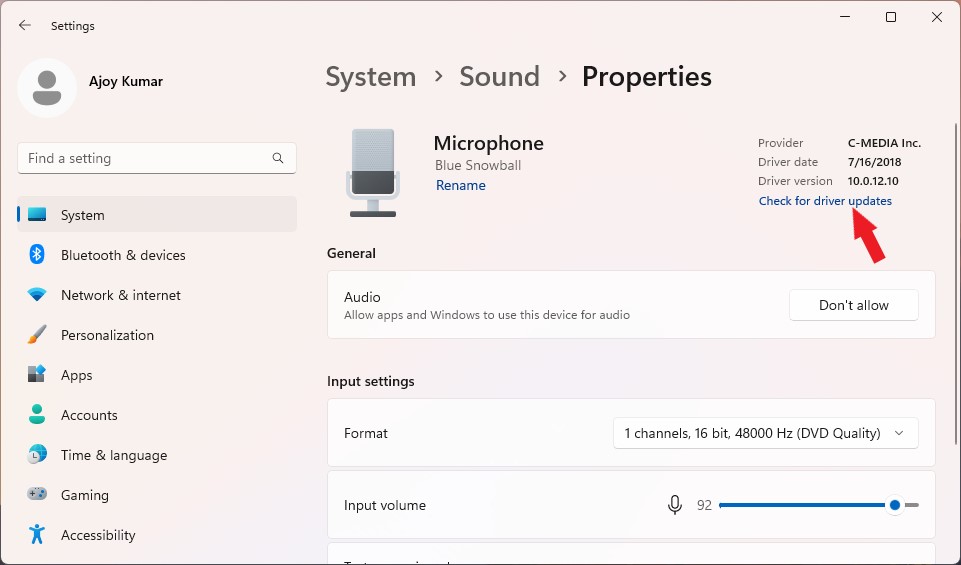
2. Click on the System tab, and to the right, click on the Sound option.
3. On the Sound settings page, locate the Input section and select the microphone.
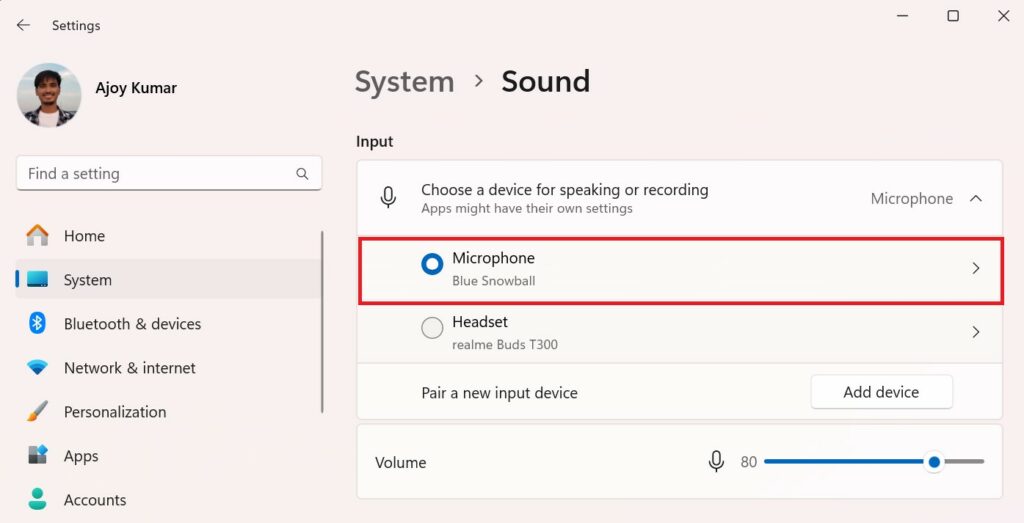
4. On the microphone properties page, you will find information about the device and driver. Click on Check for Driver Updates to update the driver to the latest version.
5. After that, restart your device for the changes to take effect.
4. Allow Microphone Access to OBS
Windows 11 prioritizes privacy and security, allowing users to control app access to specific computer services. For example, you can restrict apps from utilizing your computer’s microphone.
If the same restrictions apply to OBS Studio, it will not be able to record your audio. To fix this, you need to allow microphone access to OBS Studio.
To do so, you can follow the following steps:
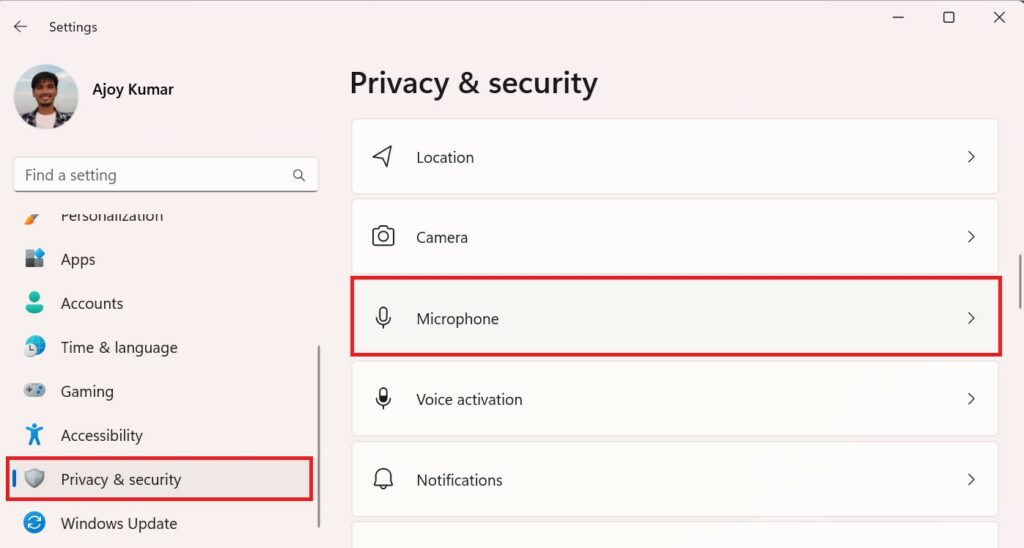
1. Open Settings.
2. Click on Privacy & Security and then select the Microphone option.
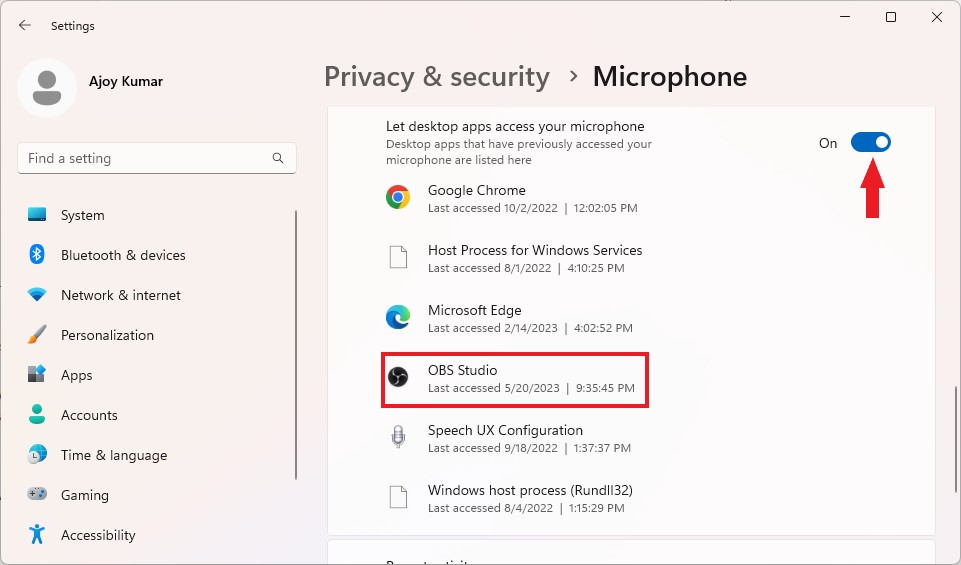
3. From here, turn on the toggle next to the Microphone Access and Let desktop app access your microphone option.
5. Setup Microphone on OBS
If you are still experiencing the issue, it might be due to OBS Studio settings. Open the software and check if you have the “Audio Input Device” option available in the “Audio Mixer” tab.
If it’s not present, follow the steps below to set up the audio input device on OBS Studio:
1. Open the OBS Studio.
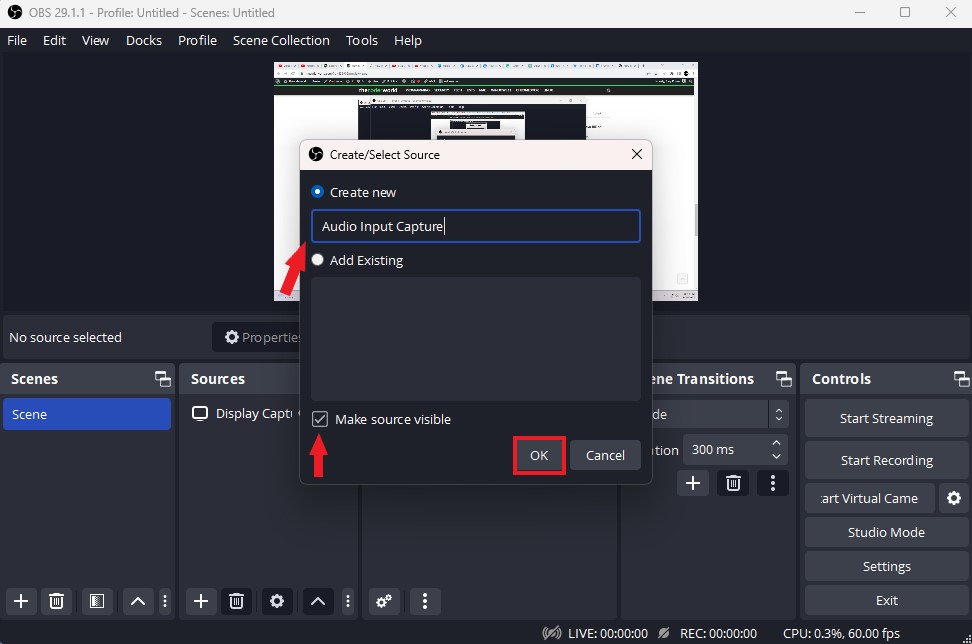
2. Now, you have to add the audio source. For that, click on the plus icon on the Sources tab and select Audio Input Capture option.
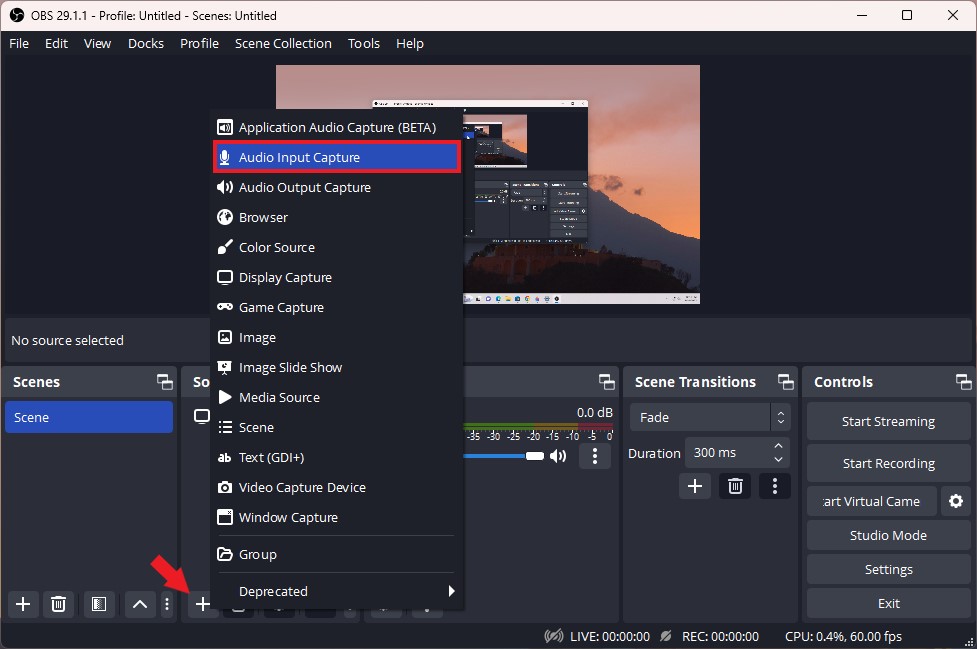
3. It will open up the Create/Select Source window.
4. Here, name your audio input capture device and check the Make Source Visible option.
5. Then click on the OK button.
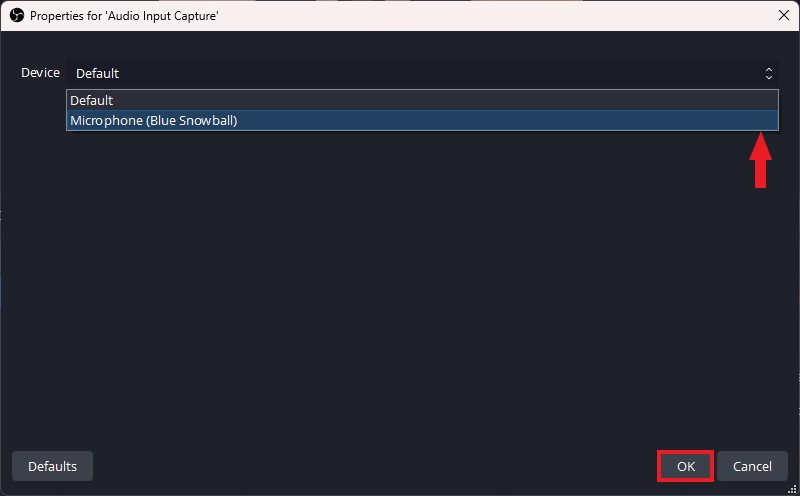
6. After that, it will open a window to select your mic, to select the mic, click on the drop-down menu and select the mic.
7. Finally, click on the OK button.
Conclusion
Now, this should resolve the issue of audio not recording with OBS Studio. Are you still encountering the problem? If so, it indicates that there might be an issue with the OBS Studio installation file. In such cases, the only solution is to reinstall OBS Studio. For that, check out our guide to download and install the latest version of OBS Studio on Windows OS.
That’s it; this is how you can fix the OBS microphone not working or the audio not recording with OBS on Windows 11. I hope this article was helpful to you. However, if you have some suggestions or doubts, do not hesitate to leave them in the comments section. We are here to assist you.