After the COVID-19 pandemic, we have seen a significant surge in live video streamers, YouTubers, and video call meetings. As everyone was getting work from home, we all had to attend meetings, play live video games, etc. However, it is not possible with cheap earphones, which can’t suppress the background noise. It was troubling the users very much over time. But it was not the same for all.
Many users with NVIDIA GTX GPUs overcame this problem by using the NVIDIA RTX Voice. It is an app that helps users modify the input and output audio. There are a lot of users who might not know about this. However, it’s very easy to install and use NVIDIA RTX Voice on GTX GPUs. Anyone can use it by following some simple steps. If you don’t know the GPU you are using, you can check out our guide on how to check your graphics card on Windows 11.
What is NVIDIA RTX Voice?
NVIDIA RTX Voice is a software developed by NVIDIA that can work on GTX GPUs. With the help of RTX Voice, users can quickly eliminate background noise from the input and output audio. Interesting, right? It lets the user modify the audio received from the output and input audio devices, making it one of the best features you can get with this software.
Users can modify the input audio, which will be very helpful during streaming, video calls, and other activities, as background noise from our surroundings can often interfere with the quality of the video.
Moreover, with the help of output audio modification, users will be able to remove background noise from the audio they receive from others. Whether it’s your manager, employee, or teacher, you can receive clear audio without any noise. Now, let’s see how you can install NVIDIA RTX Voice on your laptop or PC.
How to Download and Install NVIDIA RTX Voice
To download and install NVIDIA RTX Voice on your Windows 11, you can follow the steps mentioned below:
1. Open any browser on your PC and search for NVIDIA RTX Voice. Then open the link from nvidia.com
2. Once the website is loaded, scroll down to the Setup Guide and click the RTX Voice download link.

3. Now, the app will start downloading on your PC.
4. Once the download is complete, open the downloaded file. It will open up the NVIDIA Installer window.
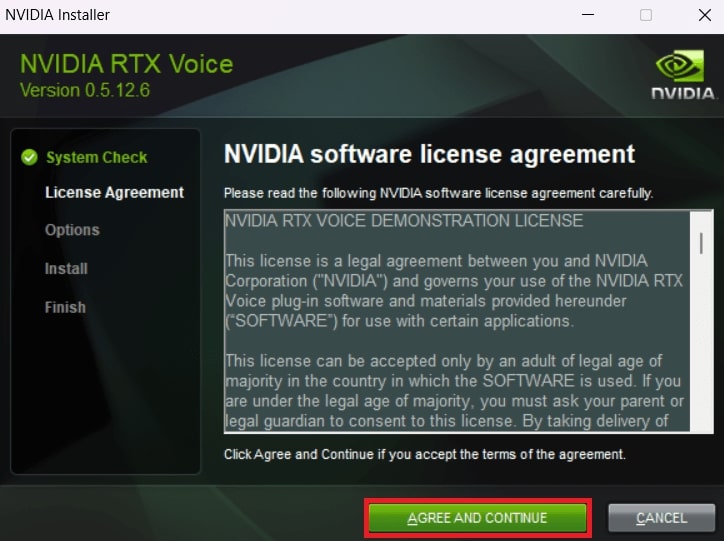
5. Here, read the software license agreement and click on the Agree and Continue button.
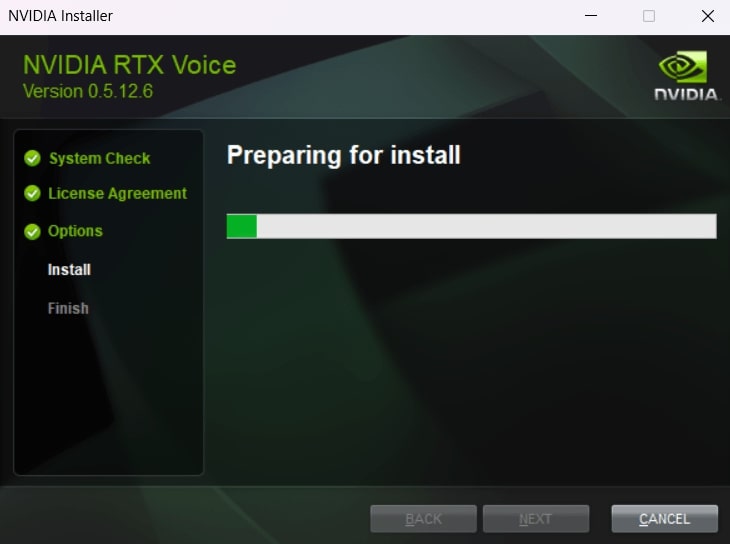
6. Now, wait for the installation process to complete. Once done, you are ready to use it on Windows 11.
How to Use NVIDIA RTX Voice on GTX GPUs
Before you start using NVIDIA RTX Voice, you need to configure it to remove background noise from your microphone and speaker.
To do that, you have to follow the steps listed below:
1. Open the RTX Voice on your system.
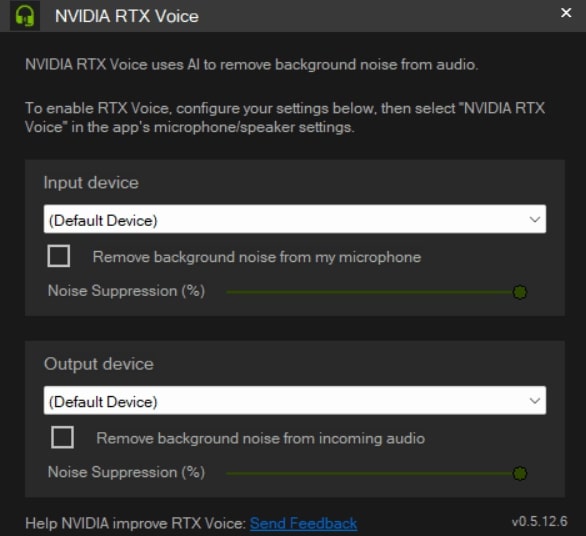
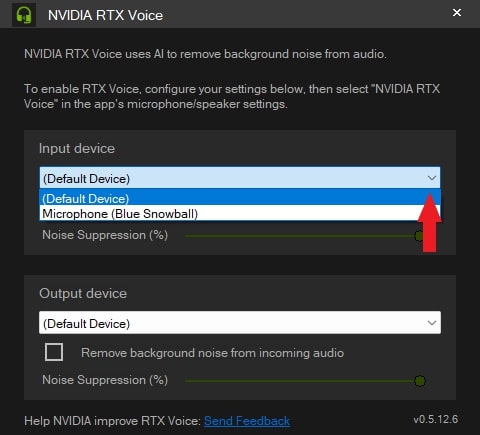
2. Now, you will get the Input Device and Output Device options. From the drop-down menu, you have to select the devices.
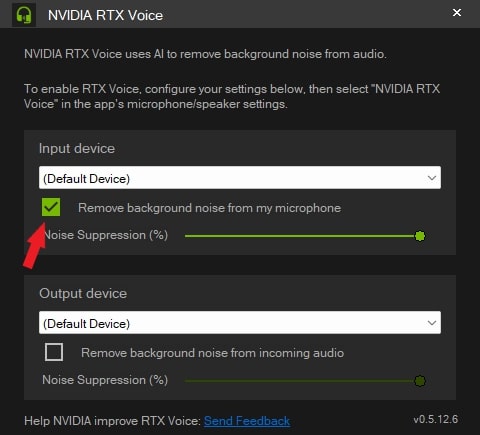
3. To remove background noise from the selected devices, check the box that says, Remove Background Noise.
Note
The background noise captured by a microphone is typically removed using it. However, if you want, you can also remove the background noise from the incoming audio.
4. Once you have configured the tool, open the software that allows you to record audio.
5. Then, from the microphone option, select the device with NVIDIA RTX Voice.
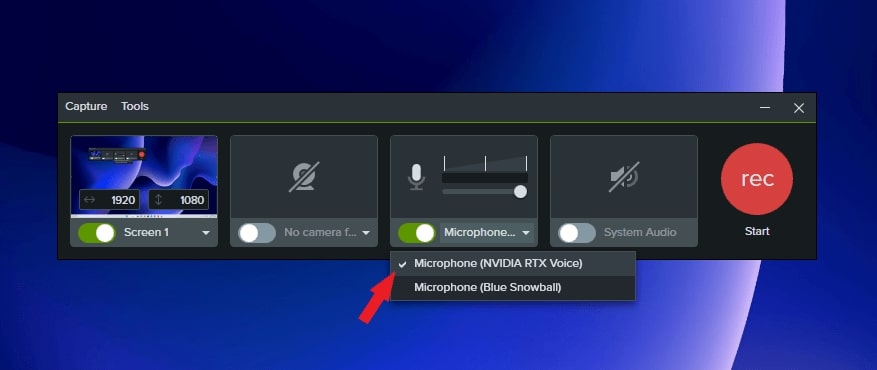
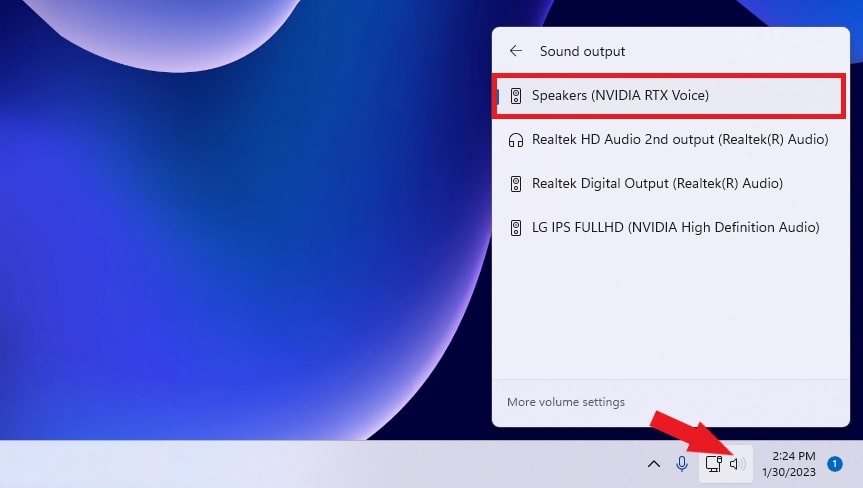
6. For incoming audio, click the Speaker icon on the taskbar and select the device with NVIDIA RTX Voice.
We have all been facing a lot of background noise problems during video calls, recording video content, etc. We can quickly fix this issue with the help of RTX Voice.
NVIDIA RTX Voice Supported Apps List
If you are wondering which applications support RTX Voice, here is the list of apps you can modify. You can follow the official RTX Voice Setup Guide to set up the below individual applications.
- Battle.net Chat
- Discord
- Google Chrome
- OBS Studio
- Skype
- Slack
- Steam Chat
- Streamlabs
- Teams
- Twitch Studio
- WebEx
- XSplit Broadcaster
- XSplit Gamecaster
- Zoom
Conclusion
That’s it; this is how you can download and install RTX Voice on GTX GPUs and use it on Windows 11. However, if you have an NVIDIA RTX GPU, you need to install NVIDIA Broadcast to remove background noise.
We hope this guide is helpful to you. Moreover, if you have any suggestions or doubts regarding the setup process of RTX Voice, do not hesitate to leave them in the comments section. We are always here to assist you.