In today’s fast-paced and interconnected world, the ability to remotely access and control computers has become increasingly vital. AnyDesk, a popular remote desktop software, offers a seamless solution to this need. Whether you are a remote worker, a technical support professional, or simply someone who needs to access a computer from another location, AnyDesk can provide you with the tools to do so efficiently and securely.
In this article, we will guide you through the process of installing and using AnyDesk on Windows 11. By following our step-by-step instructions, you will be able to harness the power of remote access and take advantage of the features offered by AnyDesk. So, let’s dive in and discover how to make the most of this powerful remote desktop software.
How to Download and Install AnyDesk on Windows 11
Let’s discuss how you can download AnyDesk on your Windows 11 computer. You can do so by following the straightforward steps mentioned below.
1. Open your preferred web browser.
2. Go to the official AnyDesk website – https://anydesk.com/. Here, you will get a download option, click on the Download Now button.
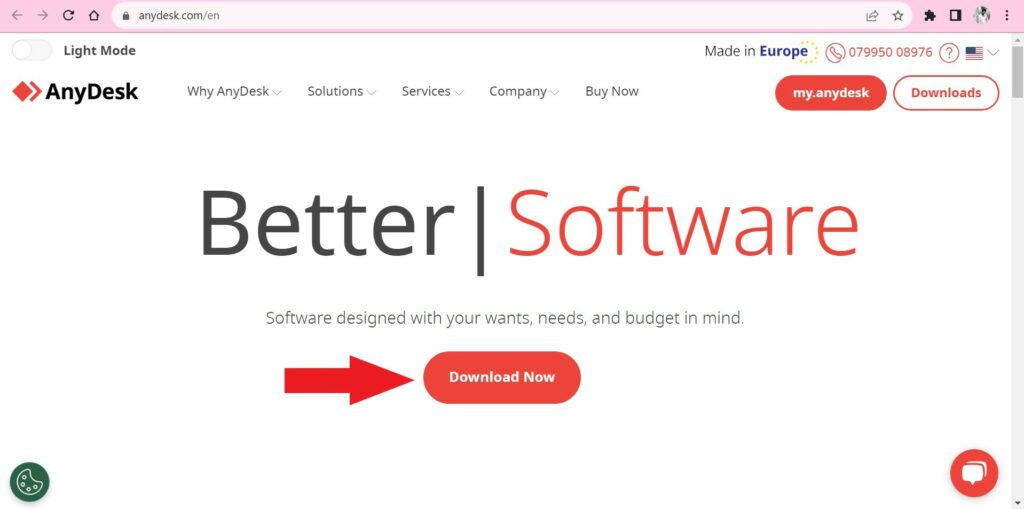
3. It will automatically detect your operating system and start downloading.
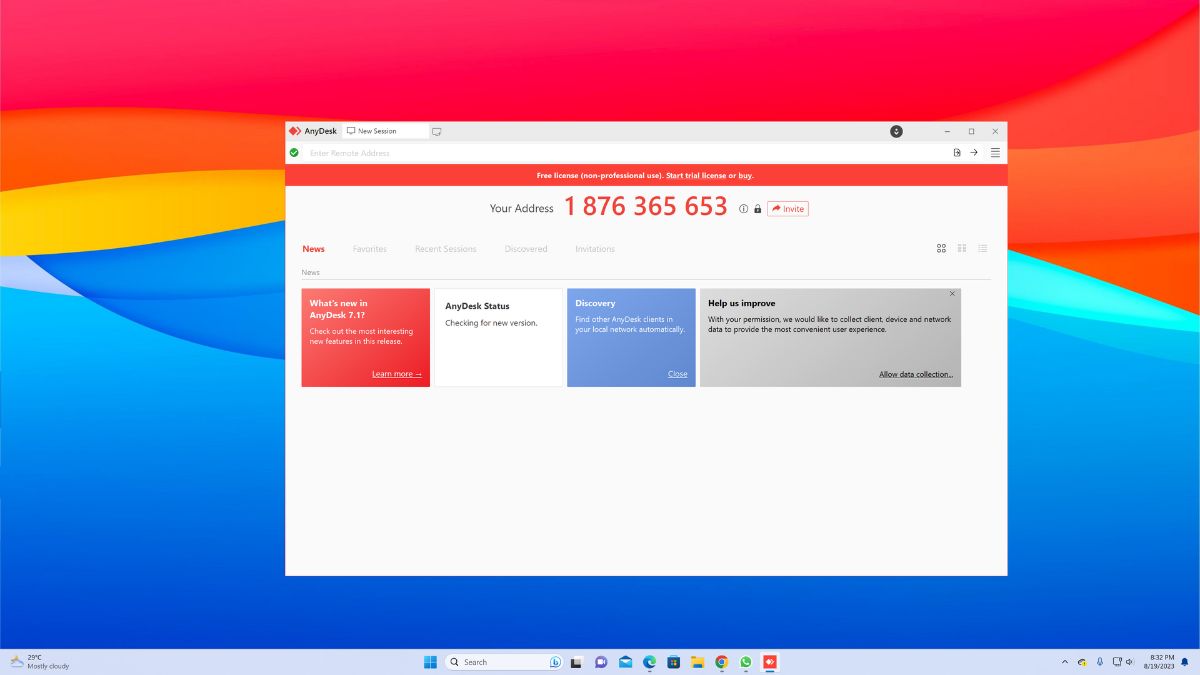
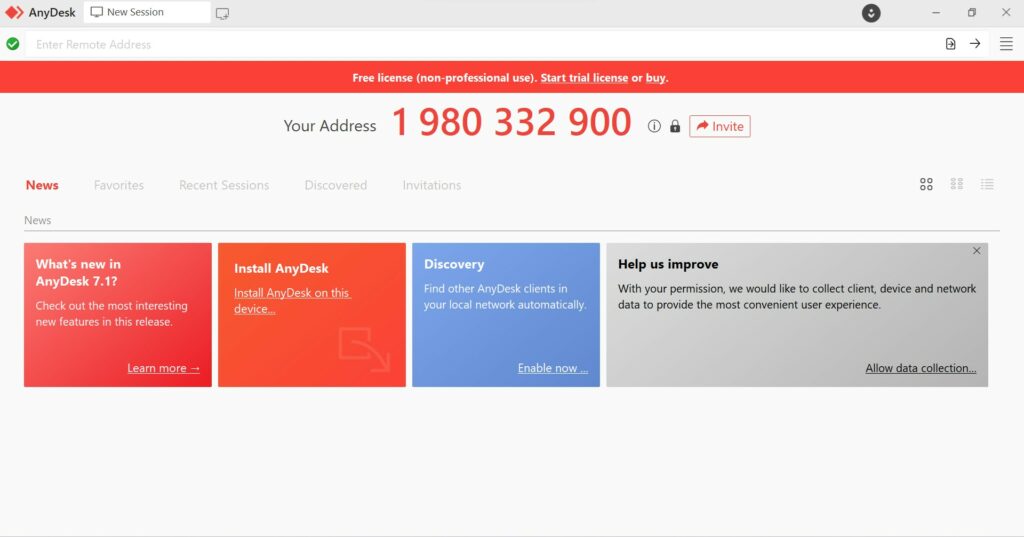
4. Once AnyDesk is downloaded successfully, click on the executable file to open it. This is how the AnyDesk home screen will appear.
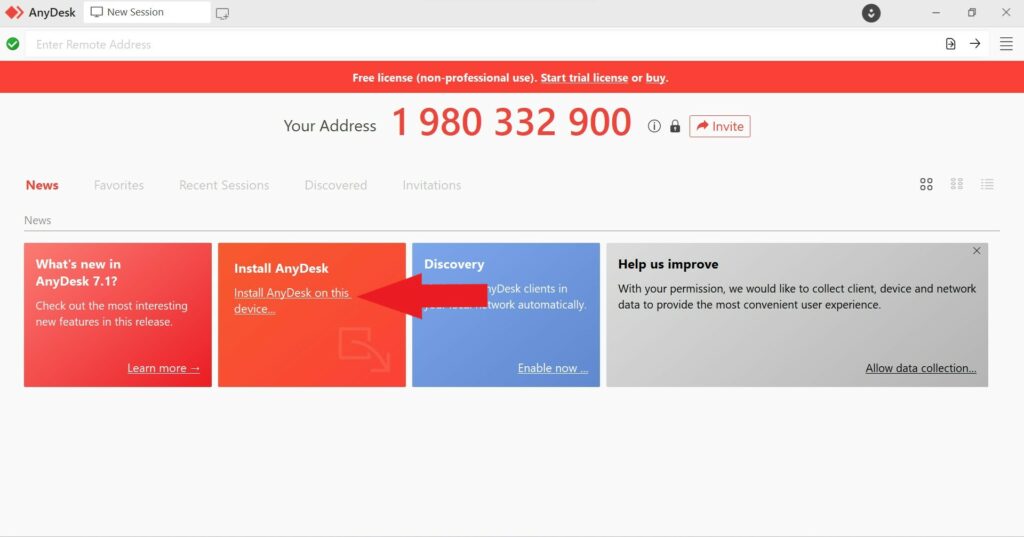
5. Now to install it, click on the Install AnyDesk on this device option from the News tab.
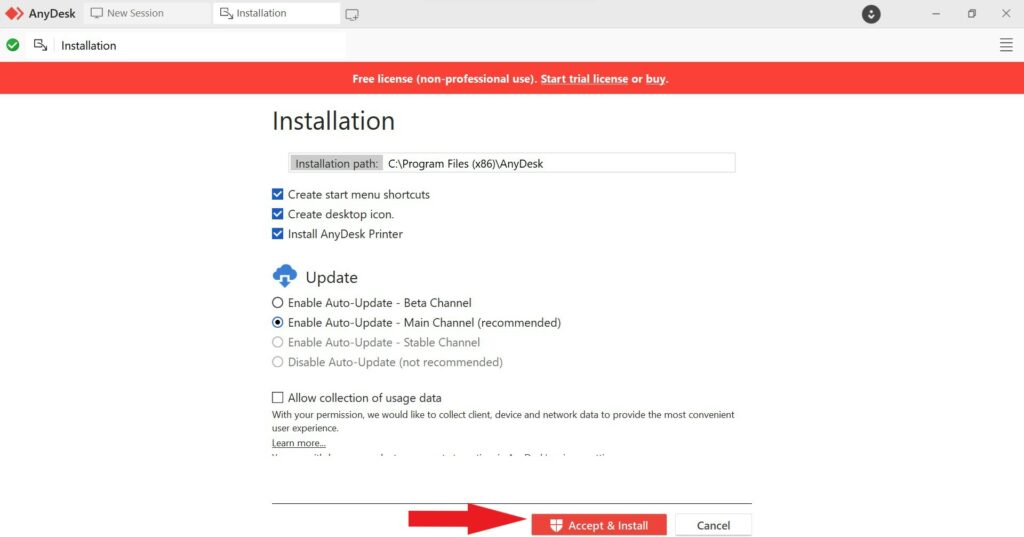
6. On the next screen you will be prompted to configure your installation settings. Here, select the Installation path and select the Update channel.
7. For this installation, we chose to stick with the default recommended settings. Once you have altered the options according to your needs, click on the Accept & Install button.
8. The installer will take a few moments to install AnyDesk on your PC. This is the confirmation screen you will get after successful installation.
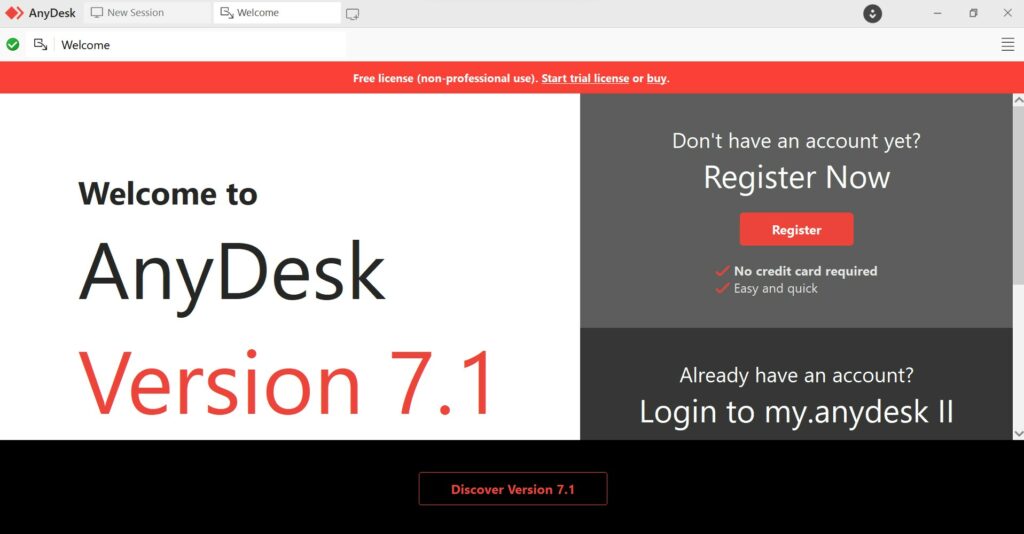
That’s it! This is how you can download and install AnyDesk on your system. However, to use it, you need to set up and create a session. For that, check out the methods below.
How to Set up and Use AnyDesk on Windows 11
Now, that you have installed AnyDesk on your Windows 11 computer, let’s explore how to use it.
For that, you can follow the steps mentioned below:
1. Launch the AnyDesk application on your Windows computer.
2. You will be presented with a unique AnyDesk ID for your computer. Share this ID with the person who wants to connect to your computer remotely.
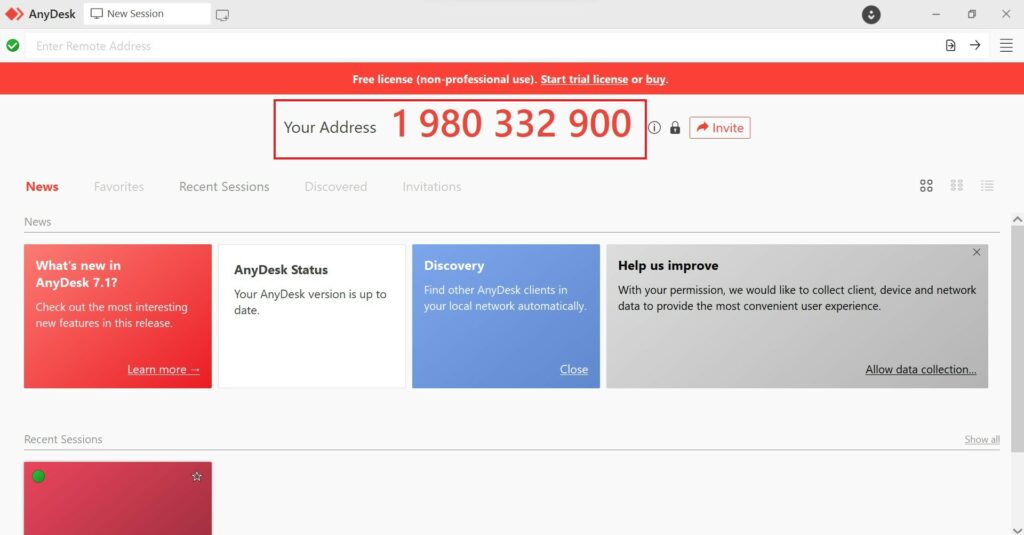
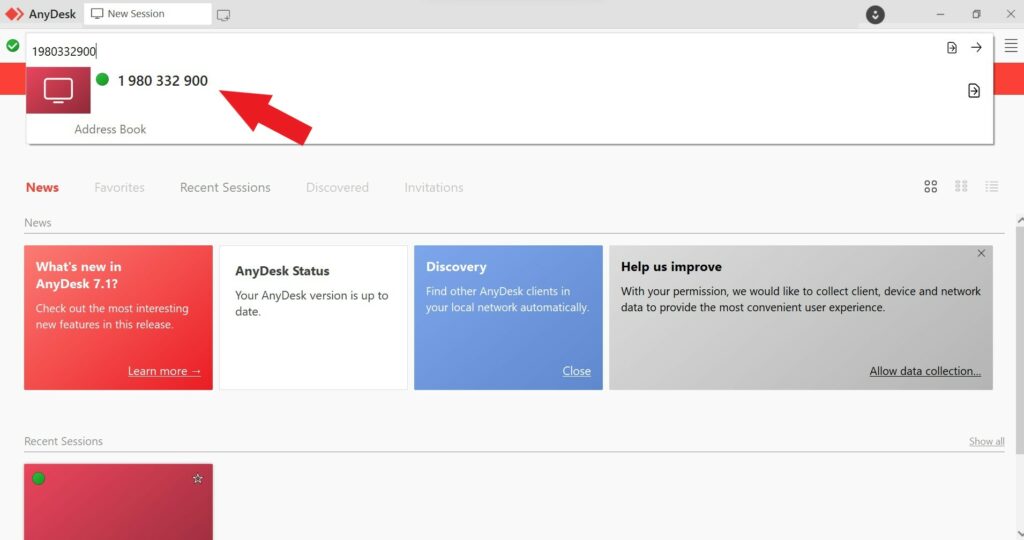
3. On the other device, open the AnyDesk application. Enter the AnyDesk ID of the remote computer in the Enter Remote Address field and hit Enter.
4. After that, the remote user will be prompted to grant you access. Here, click the Accept button to initiate a remote session.
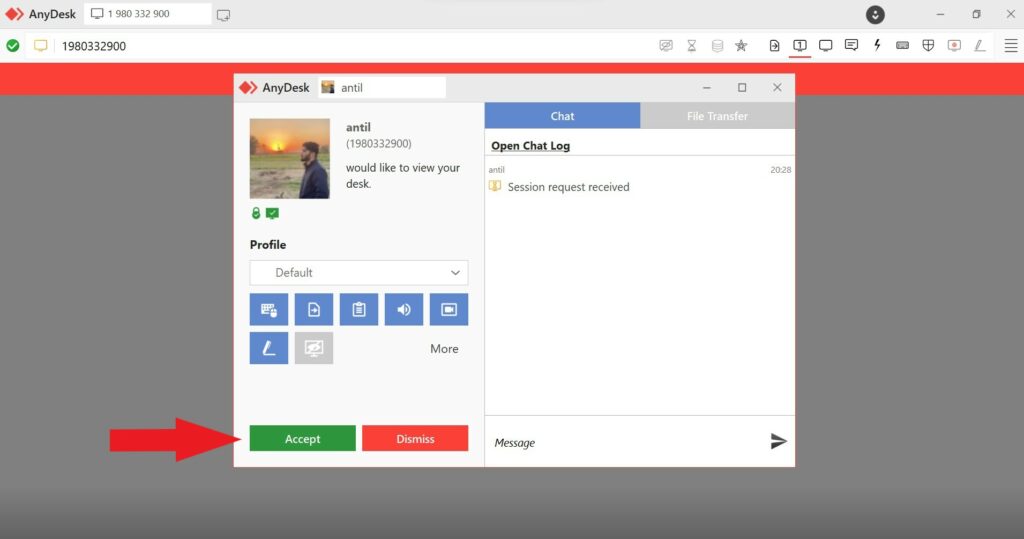
5. Once connected, you will be able to see and control the remote computer’s desktop. Use the toolbar at the top of the screen to access additional features and settings.
6. Now, to end the remote session, click on the Disconnect button or simply close the AnyDesk application.
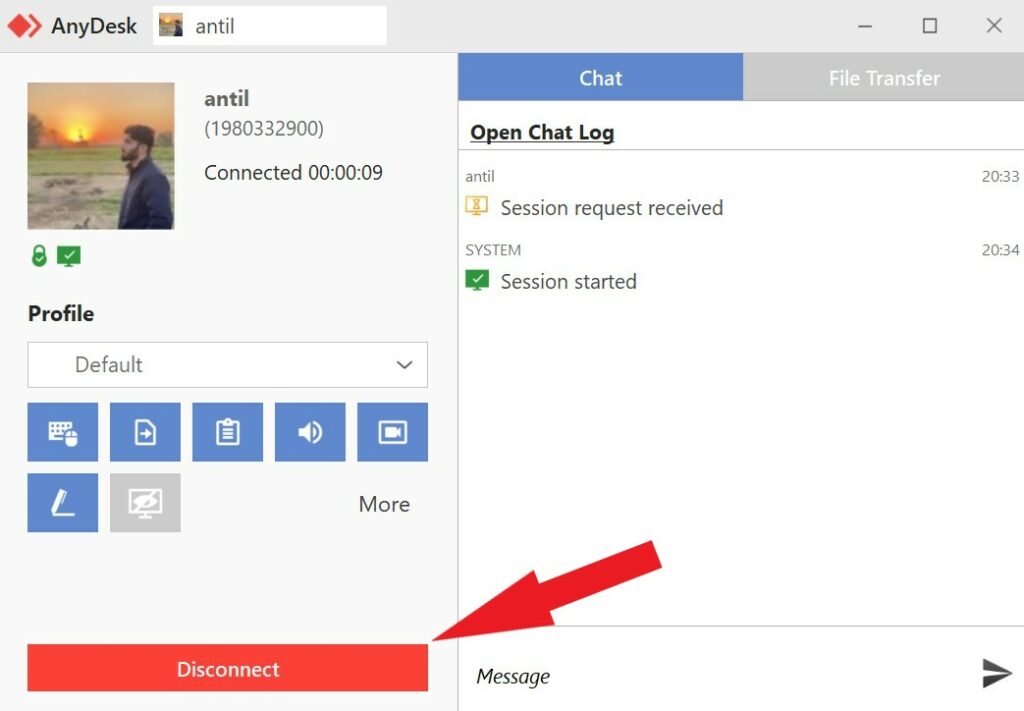
Always bear in mind the importance of respecting privacy and obtaining consent from the remote user. Connect only to computers for which you have the owner’s permission. It is essential to verify your authorization to access and control the remote computer before initiating any connection.
Conclusion
Installing and using AnyDesk on Windows 11 can streamline remote access and collaboration tasks. By following the steps outlined in this article, you can easily download, install, set up, and begin using AnyDesk on your Windows 11 PC. With its array of features and user-friendly interface, AnyDesk offers a reliable and efficient solution for remote desktop access.
So go ahead, give it a try, and experience the benefits of seamless remote access and collaboration. If you encounter any issues or get stuck at any step, or if AnyDesk is not functioning properly on your system, check out our guide on how to fix AnyDesk not working on Windows 11.
