TeamViewer is a user-friendly software that lets you remotely connect and control other computers from your device. This powerful tool is widely used by people and businesses for various reasons. For example, you can use TeamViewer to help someone fix a computer problem without actually being there. Or, if you’re working on a project with colleagues who are in different locations, TeamViewer lets you collaborate and share screens as if you were all in the same room.
TeamViewer is compatible with different types of computers and devices, so you can use it on your Windows, Mac, smartphone, or tablet. In this tutorial, we will show you how to install and use TeamViewer on your Windows 11 PC. So, you can enjoy the convenience of remote access and control.
System Requirements for TeamViewer
Before you download and install TeamViewer, make sure your Windows 11 system meets the following system requirements:
- Processor: A processor with a minimum clock speed of at least 1 GHz
- RAM: At least 2 GB of RAM
- Storage: Your PC should have at least 250 MB of free disk space
Along with all the above-mentioned system requirements, you will also require a high-speed stable internet connection for the smooth working of TeamViewer on your PC.
How to Download and Install TeamViewer on Windows 11
Once you fulfill the system requirement, downloading and installing TeamViewer is an easy task; simply follow the steps mentioned below:
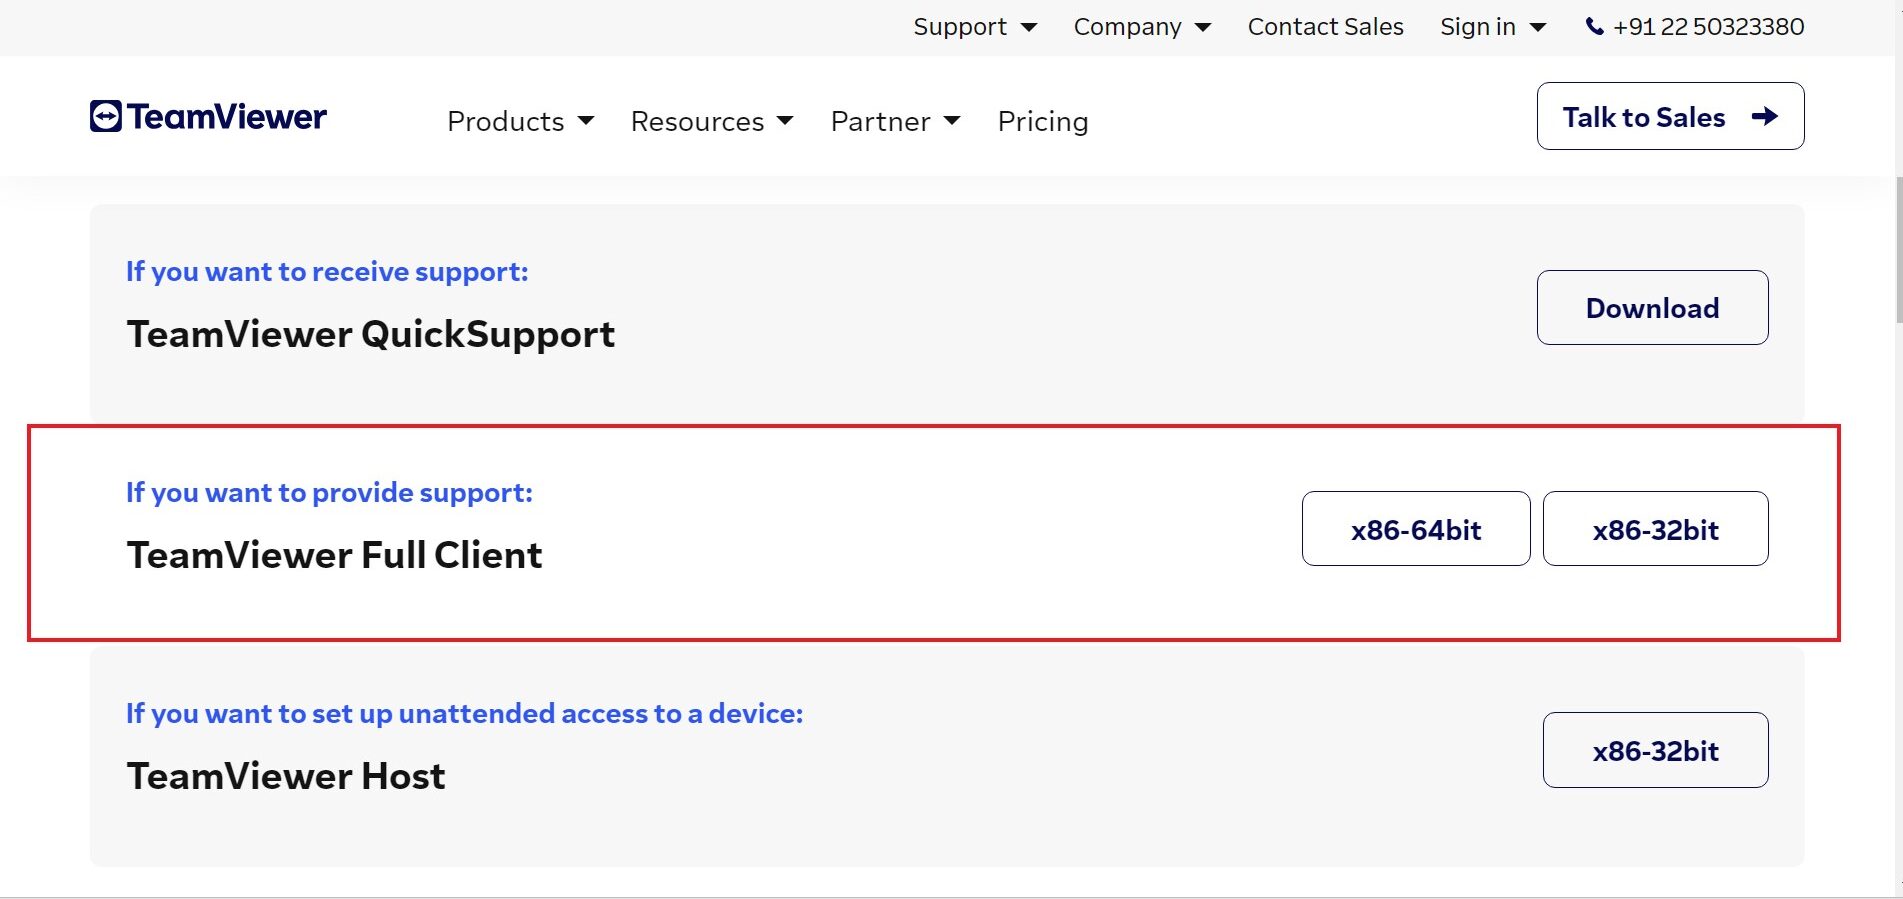
1. Open any browser and go to the official download page of TeamViewer. Or visit this link – teamviewer.com/download/windows/ and click on the Windows logo.

2. You will now get a list of different versions to select from; here, locate TeamViewer Full Client and proceed with downloading. You can choose between 64bit and 32bit depending on your system requirements.
Note
If you don’t know the system type on your system, you can check out our linked guide.
3. Once you click the button, it will start downloading automatically.
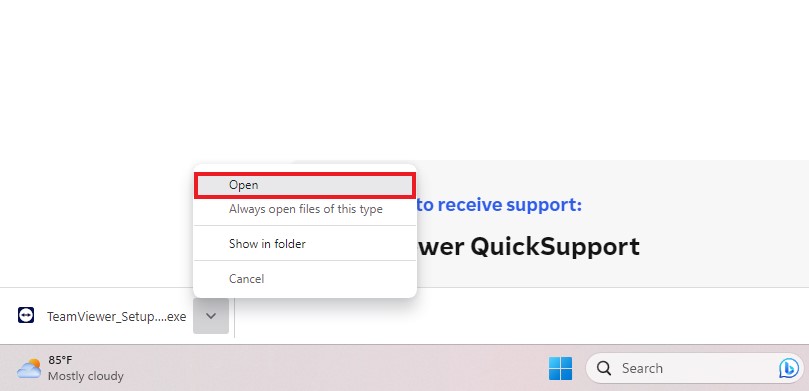
4. Now, wait for the download to complete. Once it is successfully downloaded, locate the download folder and double-click on the setup file to begin the installation process. Alternatively, you can directly open the setup file from the browser itself.
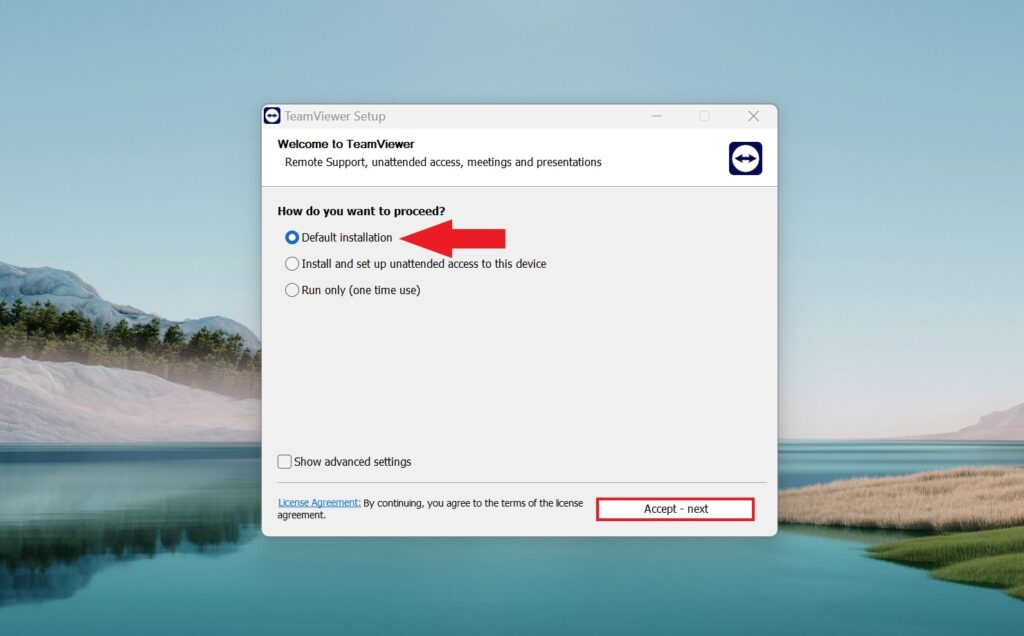
5. The TeamViewer Setup wizard will now launch, and you will be prompted to choose from three different installation options. It is suggested to select Default Installation and click on the Accept – Next button. The installation process will now start, and it will take some time. Please wait for the installation process to complete.
6. You will now see the TeamViewer License Agreement screen, Carefully read the Privacy Policy, and click on I accept the EULA and DPA to agree with the terms and conditions.
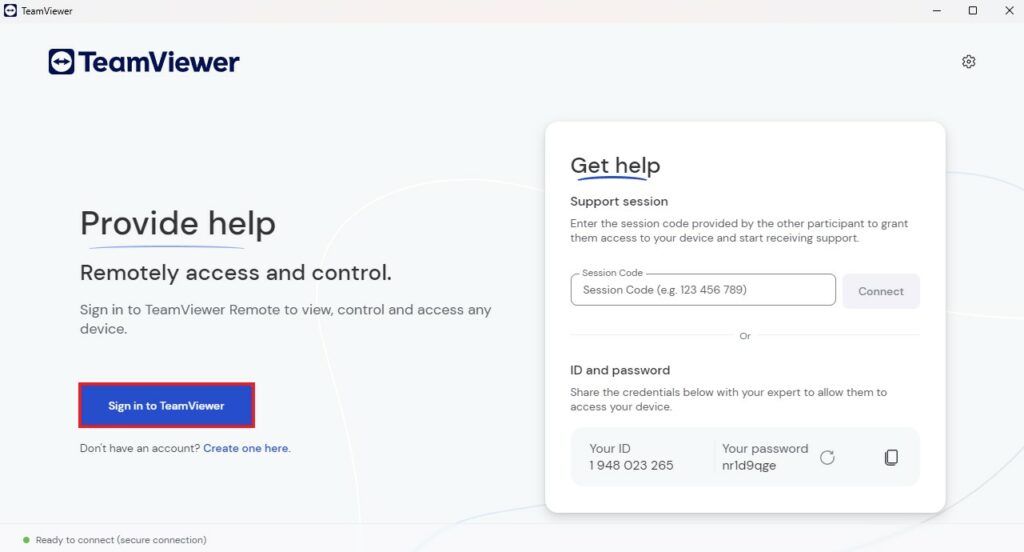
7. After that, click on the Continue button to launch the TeamViewer on your PC.

8. Now, to use TeamViewer, you need to create a TeamViewer account to enable additional features. For that, you can click on the Create one here button, or if you already have an account, click on the Sign in to TeamViewer button.
How to Install TeamViewer via Microsoft Store
Alternatively, you can download TeamViewer from the Microsoft Store, but downloading it from the website provides more flexibility and options. However, if you prefer, you can also install it from the official Microsoft Store.
To install it, you can follow the following steps.
1. Open the Microsoft Store from the taskbar. Or, you can search it on the Windows search option and open it.
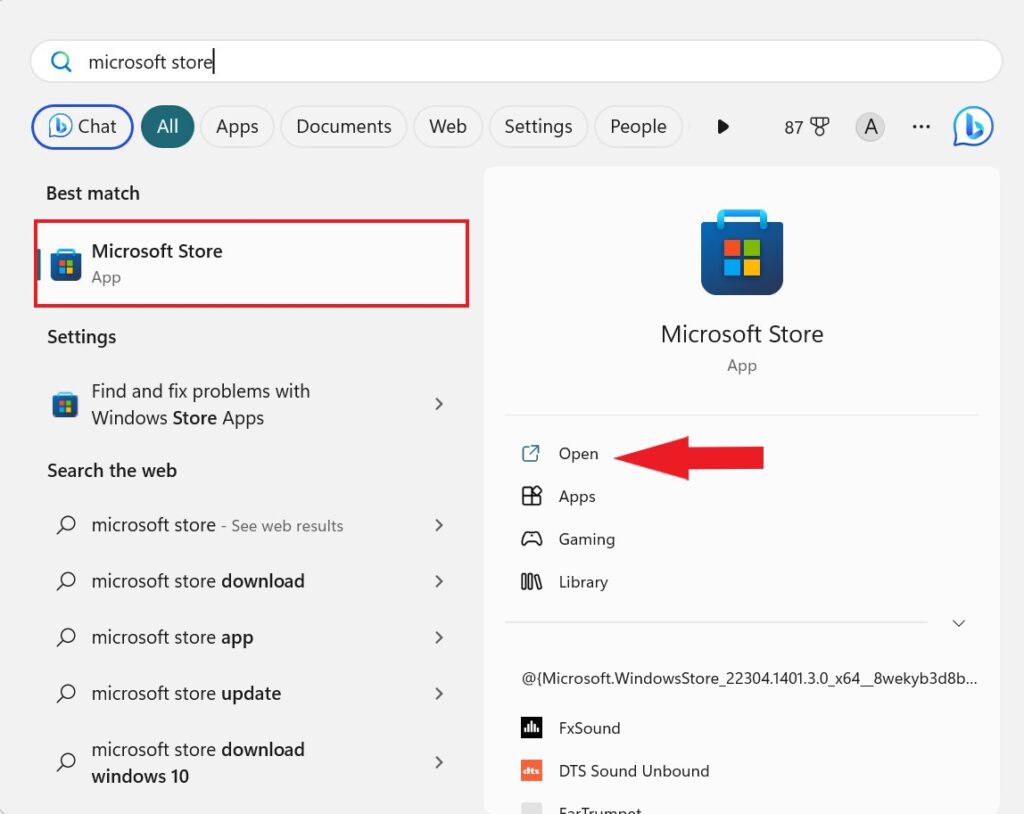
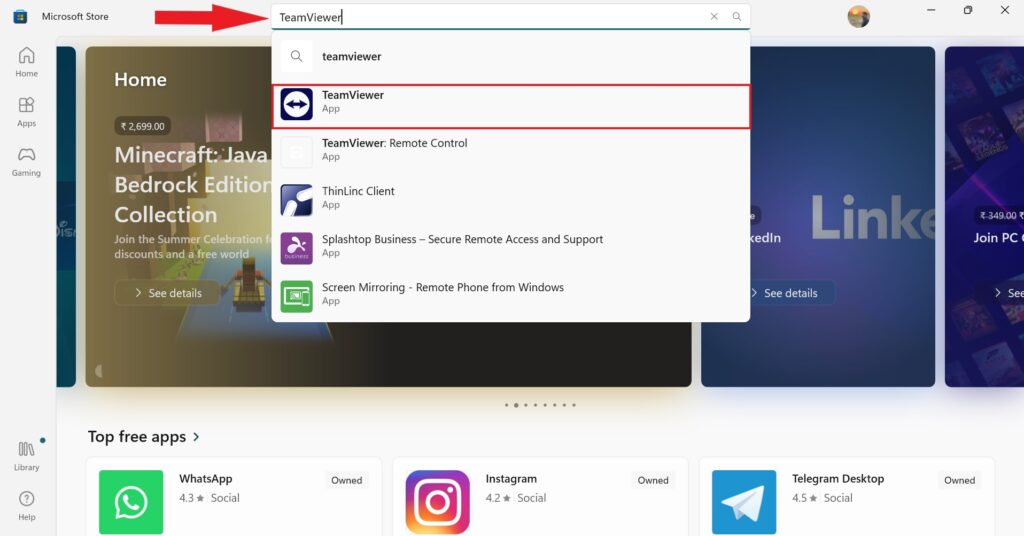
2. In the search bar, type TeamViewer and select it from the search list.
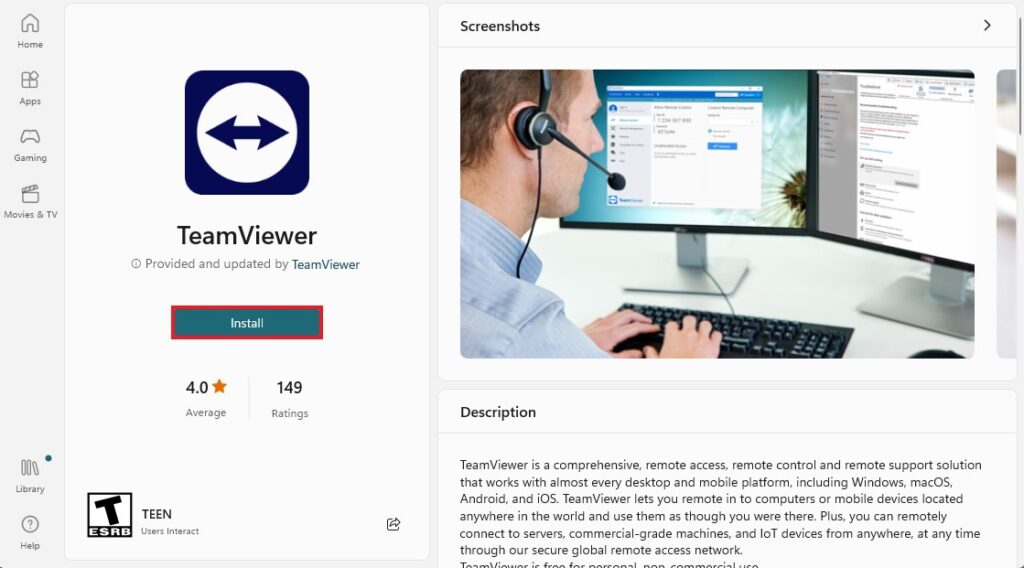
3. Now, click on the Install button to install the latest version of TeamViewer on Windows 11.
4. Once the installation is complete, open the application and sign in to your TeamViewer account to start using it.
That’s it! You can follow any of the above methods to download and install TeamViewer on Windows 11. Now, let’s move further and see how to start a remote session using it.
How to Use TeamViewer for Remote Access
To use TeamViewer for remote access, you need to have TeamViewer installed on both the host computer (the one you want to access) and your computer. Additionally, you need to have a TeamViewer account. If you don’t have one, sign up for TeamViewer with your email ID, Microsoft ID, or Gmail ID. Furthermore, make sure you have an internet connection on both computers.
Now, let’s discuss how to create a session and join a session on TeamViewer Windows 11 application.
1. Create a Session on TeamViewer
Let’s discuss how to create a session to connect to a remote computer using TeamViewer. For that, follow these steps:
1. Open the TeamViewer.
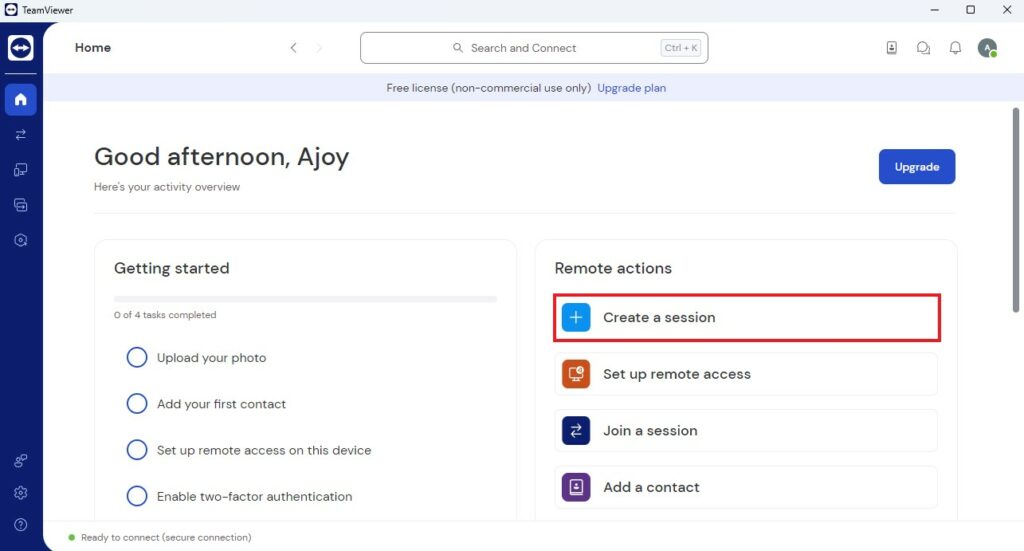
2. Once you launch the TeamViewer on your Windows 11 PC, this is how the screen will look like. Here, click on the Create a Session option.
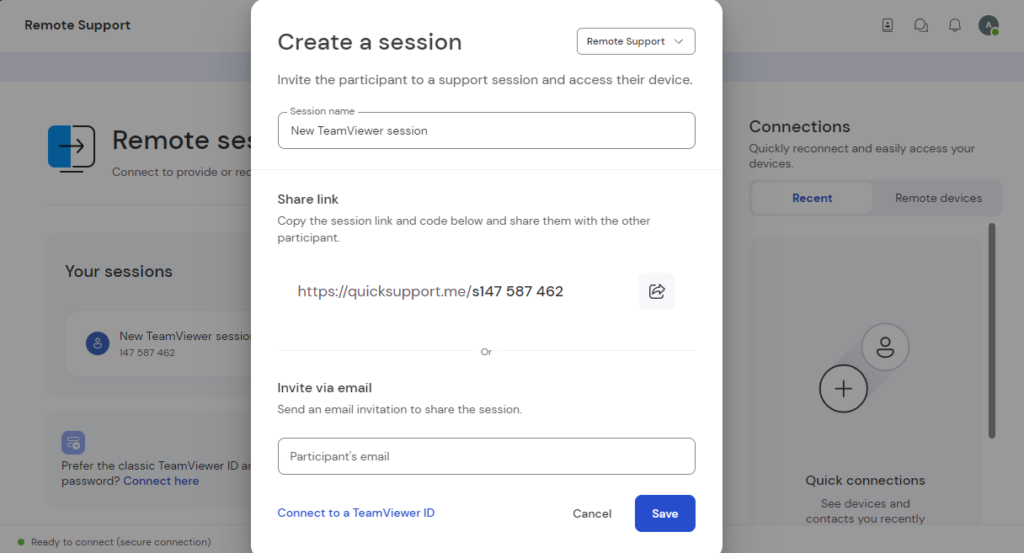
3. In the following window, provide the session details, including the Session Name and email IDs of the participants. Additionally, you have the option to share the session link directly with the participants for easy joining.
4. Alternatively, you can create a session using the TeamViewer ID by clicking on the Connect to a TeamViewer ID link.
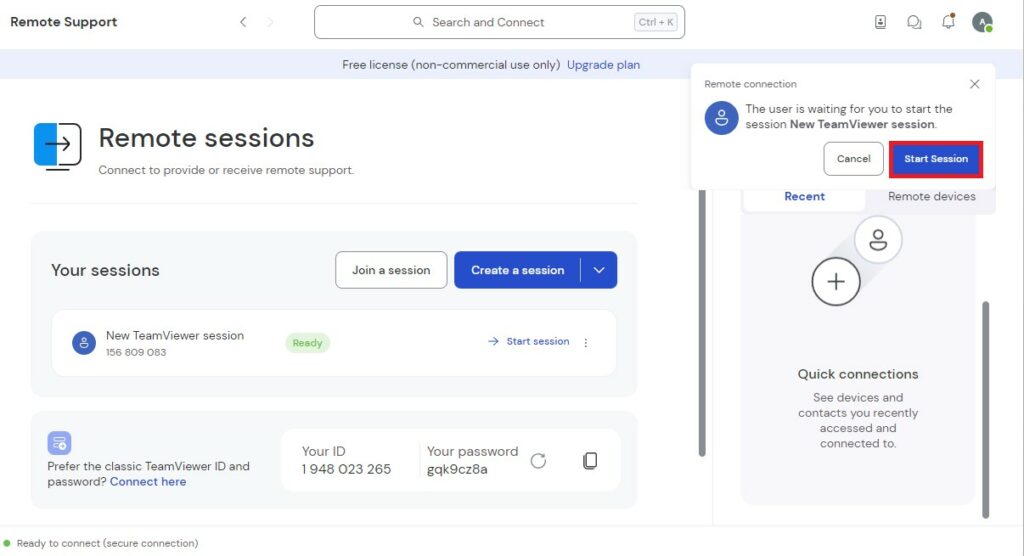
5. Once you have created the session, ask the participants to join the session. After that, as the host, you need to allow them into the session. You will receive a notification when the participants join the session. Here, you need to click on the Start Session button.
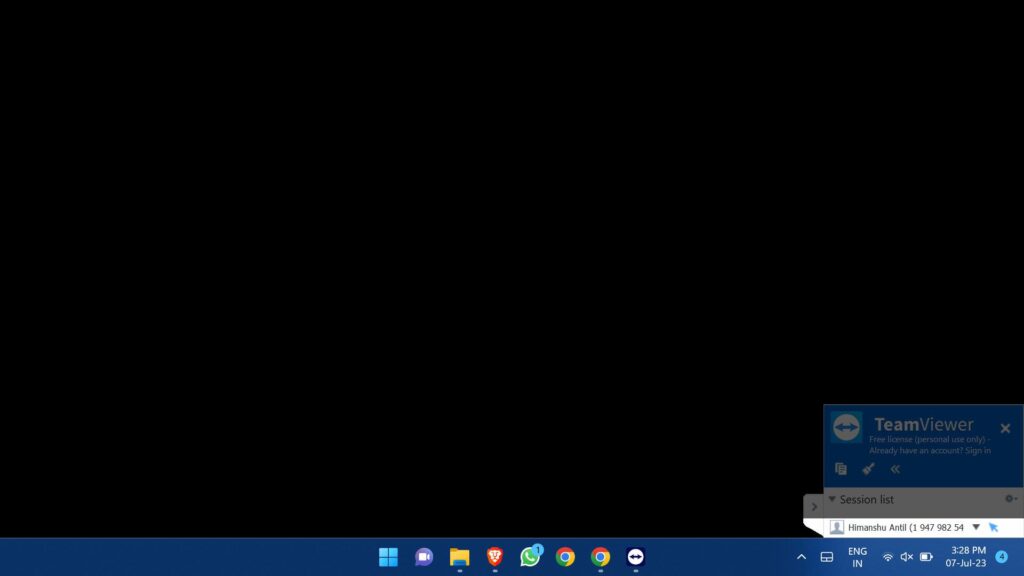
6. You will then see the screen of the host computer on your computer. You can use your mouse and keyboard to control the host computer as if you were sitting in front of it.
Finally, to end the session click on the cross icon on either of the computers, and it will end the session.
2. Join a Session on TeamViewer
Now, one user needs to join the session on TeamViewer. For that, follow the following steps:
1. Open the TeamViewer application on your system.
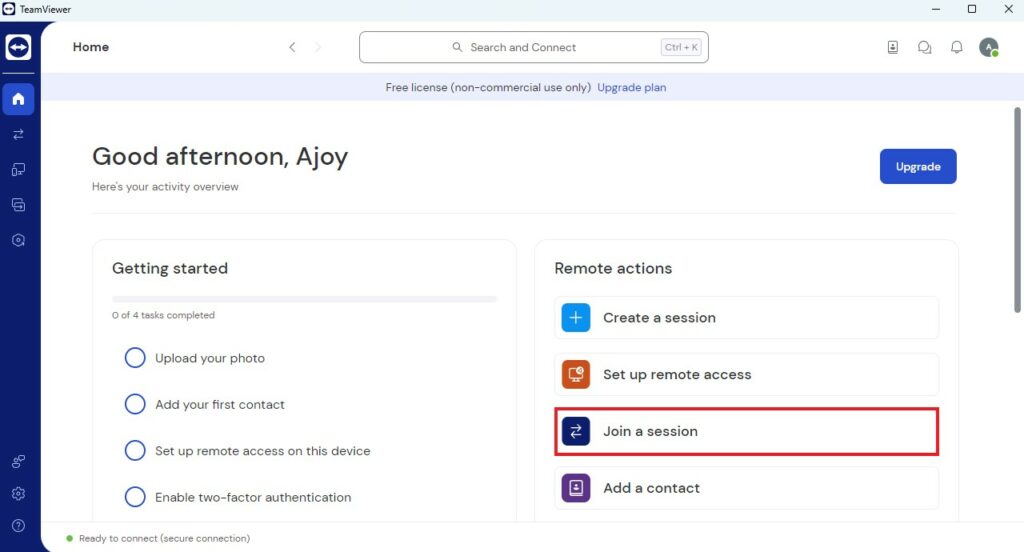
2. You will get this window. Here, click on the Join a Session option under the remote actions section.
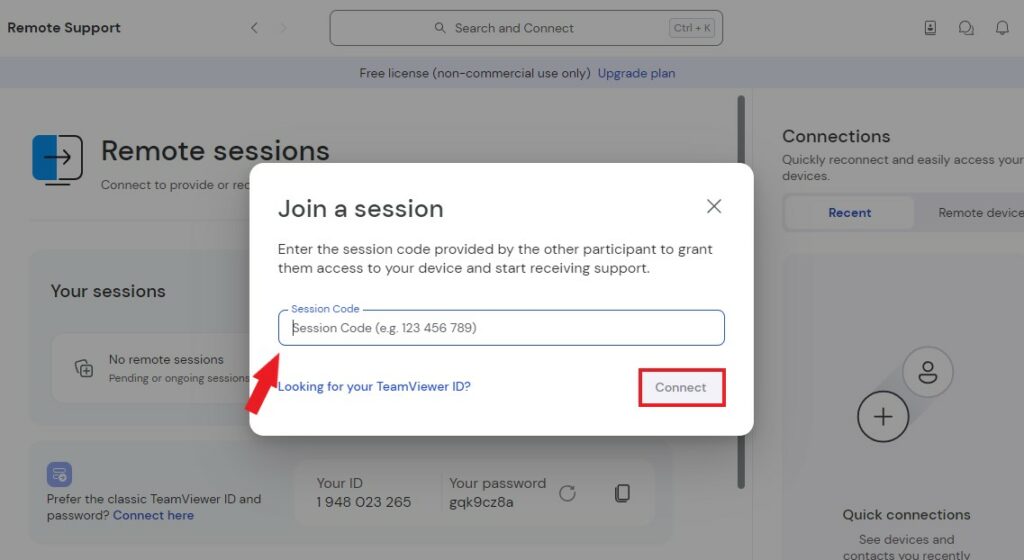
3. To establish a remote connection, you will need either the Session Code or the joining link. Ask the remote user to provide these details.
4. Once you have them, enter the session code and click on the Connect button.
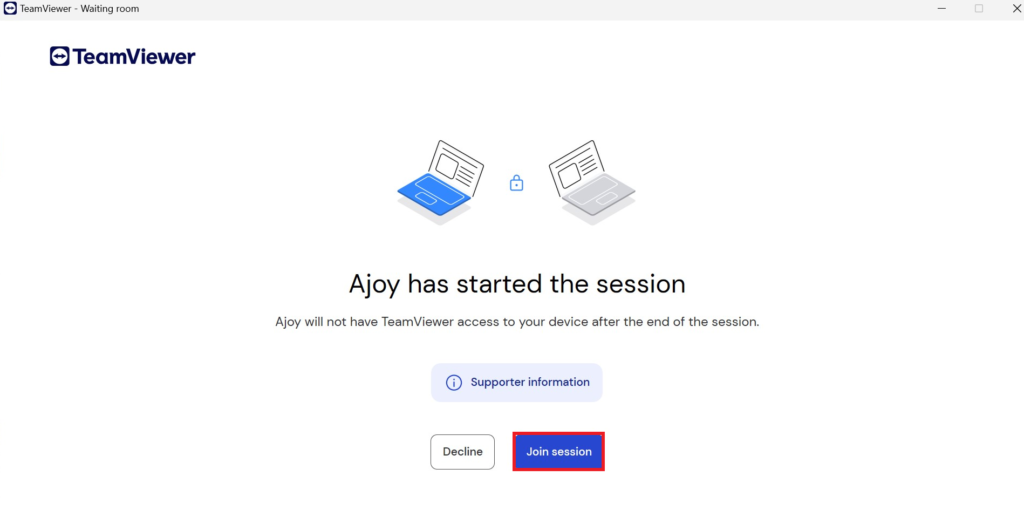
5. If the remote user accepts the connection request, you can grant access to your device. After that, click the Join Session button to start the session.
How to Uninstall TeamViewer on Windows 11
However, if you no longer require TeamViewer on your system and wish to uninstall it from your Windows 11 device, here are the steps you can follow to do so:
1. Click on the Start Menu and search for TeamViewer.
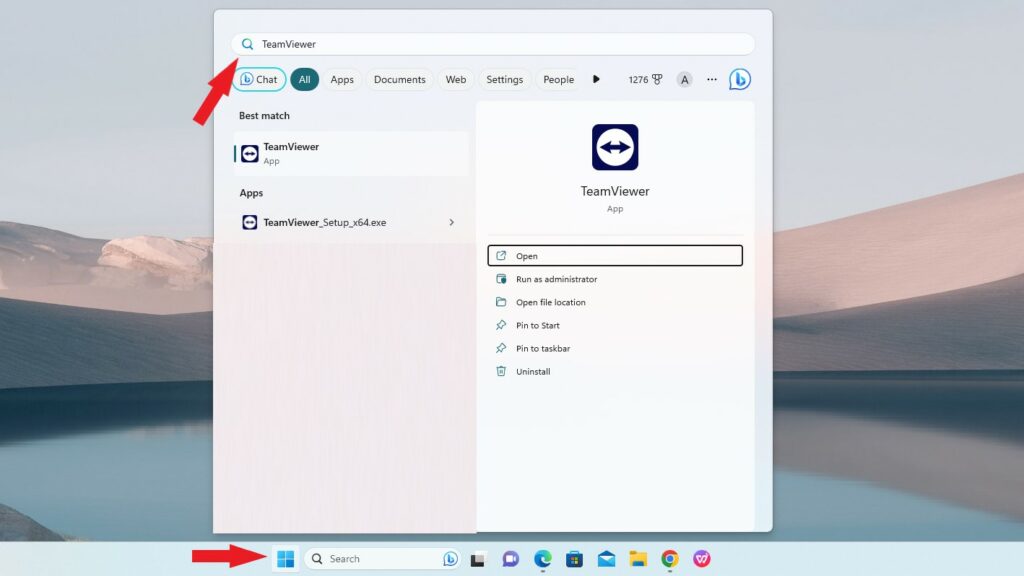
2. In the Best match section, you will find the TeamViewer app.
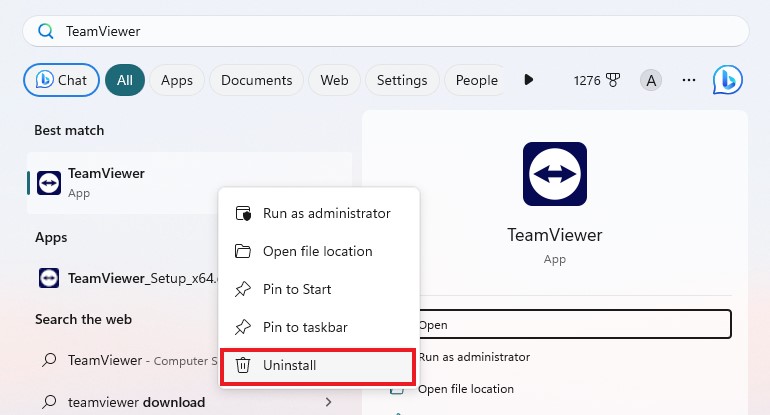
3. Right-click on it and select the Uninstall option from the context menu that appears.
That’s it; this is how you can uninstall TeamViewer. However, there are other ways to uninstall programs on the Windows operating system. You can check the linked guide to know more.
Conclusion
TeamViewer is a powerful tool that simplifies remote access and collaboration, allowing you to connect to and control a remote computer effortlessly. In this tutorial, we covered the installation process of TeamViewer on Windows 11 and demonstrated how to use it for remote access. However, if you are facing any errors, you can check out our guide on; how to fix TeamViewer not working on Windows 11.
By following these steps, you should now be able to install and use TeamViewer effectively. Always remember to use TeamViewer responsibly and only connect to devices with the owner’s permission. That’s it! Feel free to comment in case you are stuck on any step or need any advice.