Did you know that you can now remove the background of images using Microsoft’s latest build of Windows 11? This means you no longer have to pay for expensive photo editing software. You can easily remove the background of any image using Microsoft Photos and the Paint app.
In this guide, we will take you through the simple step-by-step process of removing the background from an image on Windows 11 using these two apps. Let’s begin and learn how to do so.
How to Remove an Image’s Background on Windows 11
Microsoft Photos and Paint are two pre-installed apps on Windows that allow users to edit their photos with a variety of tools such as Selection, Layers, Size, Remove Background, Brushes, blurring the background, and more.
The Remove Background tool allows you to quickly and easily remove the background from an image.
Below, we have outlined the steps to remove an image background on Windows using the Photos and Paint apps.
1. Using Photos App
Microsoft Photos is a built-in tool on Windows that lets you view your photos. Additionally, you can enhance your photos by using various editing tools to apply new looks. If you want to remove the background of an image, you can do it using the Microsoft Photos app as well.
To remove the image background using the Microsoft Photos app, follow these simple steps:
1. Open the image in the Photos app that you want to remove the image background.
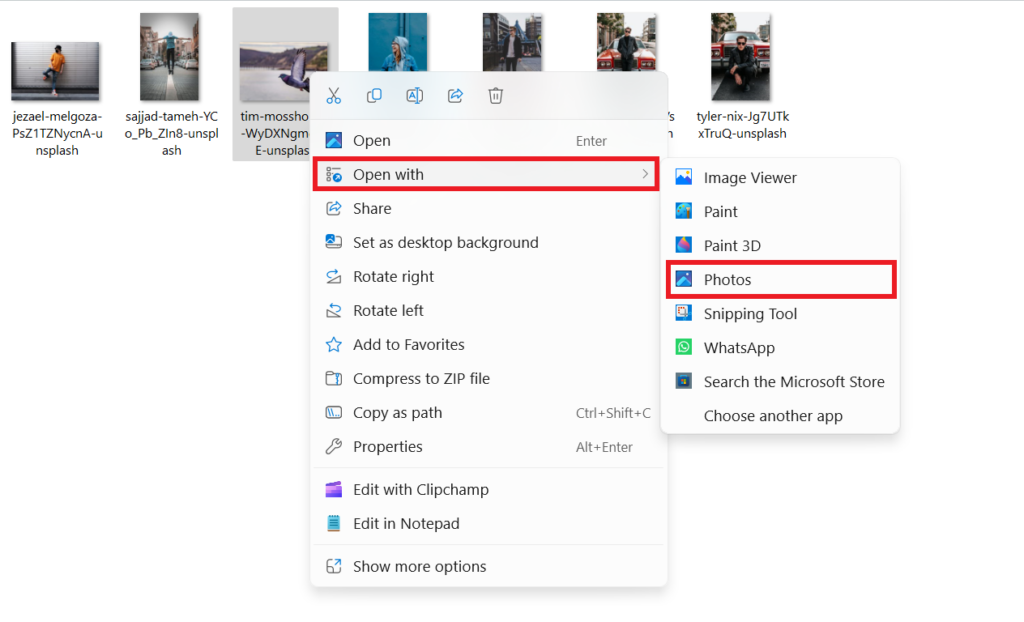
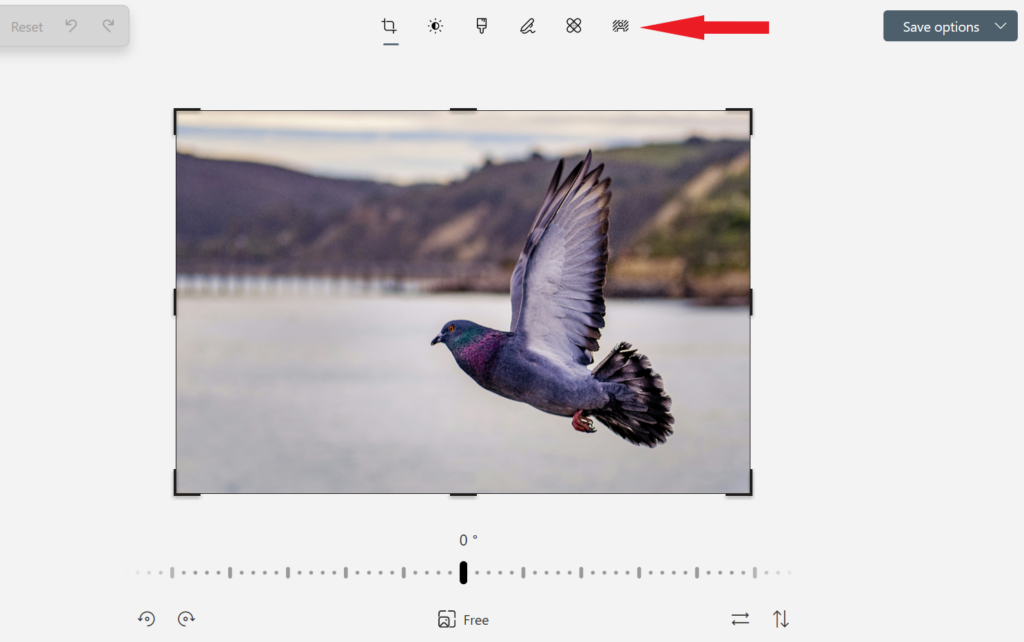
2. Once you choose the image in the Photos app to remove the background image, click on the Edit image icon which is located at the top. Alternatively, press Ctrl + E keyboard shortcuts to launch the editing mode.
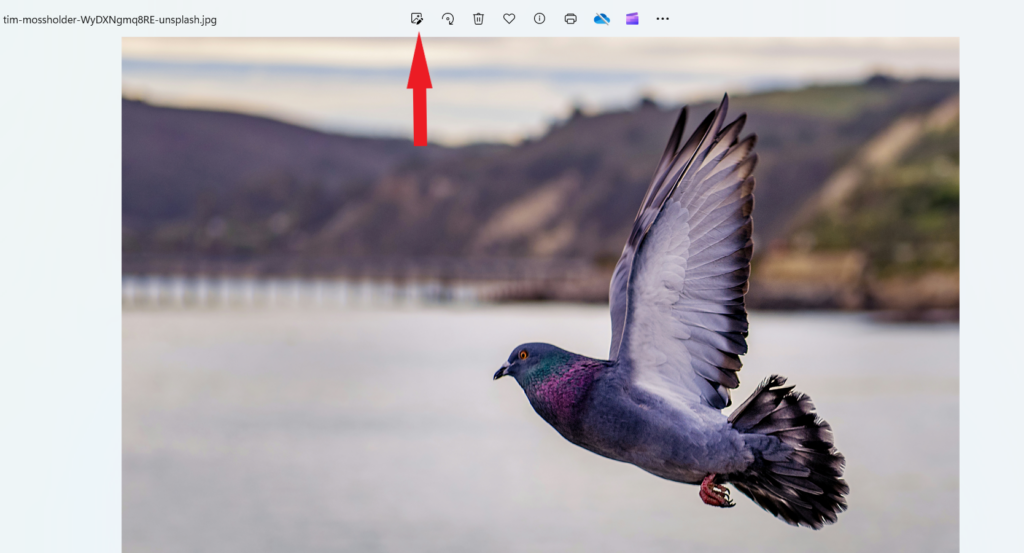
3. Next, click on the Background icon on the editing toolbar.
4. Now, the Photos app will automatically analyze the picture and find the background of the image.
5. Once it analyzes the background, click on the Remove option on the right side to remove the background of an image.
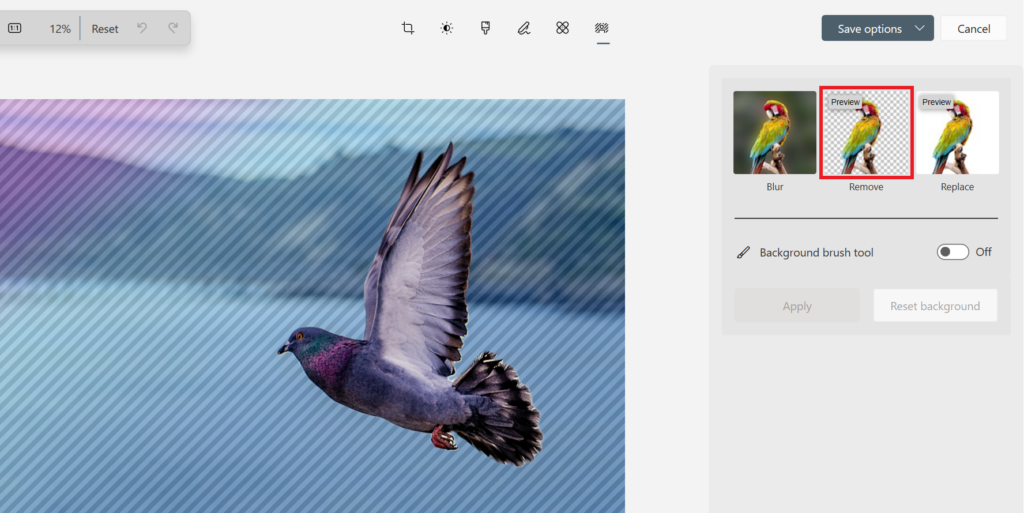
6. Now the background of an image will automatically be removed.
7. You can also manually remove the background using the background brush tool. Toggle on the background brush tool and click the Subtract option.
Note
The Subtract option allows you to select the background part that you want to preserve, while the Add option allows you to select the area of the image background that you want to remove.
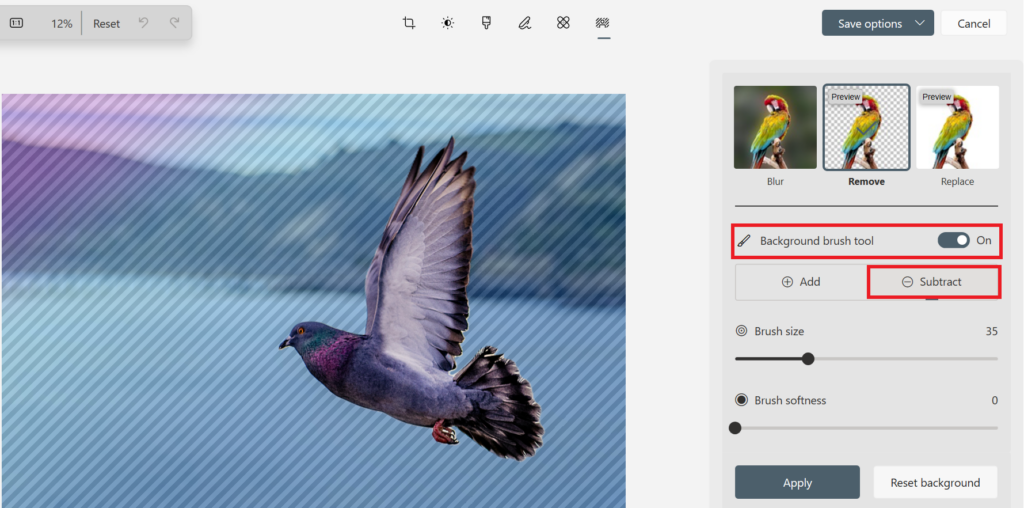
8. Adjust the Brush size and Brush softness settings according to your preference to select the area of the background you want to remove.
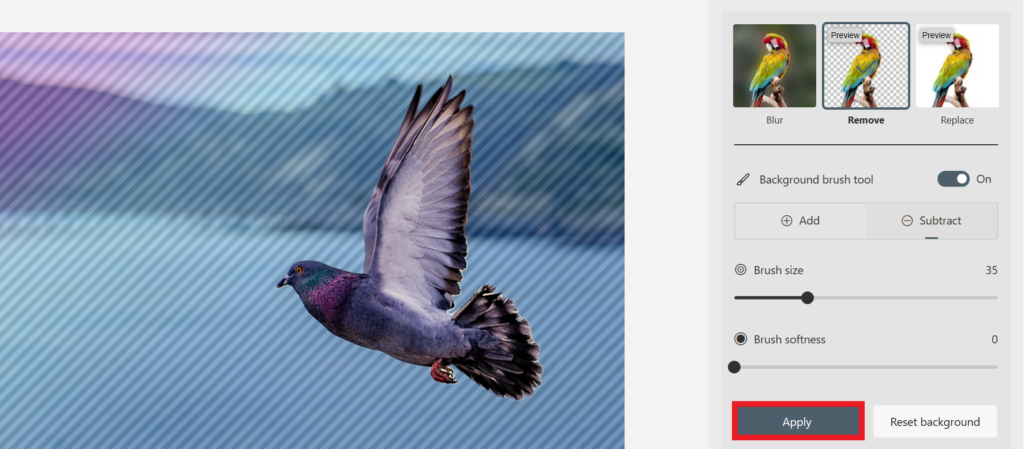
9. Once you are done with removing the background of an image, click the Apply button.
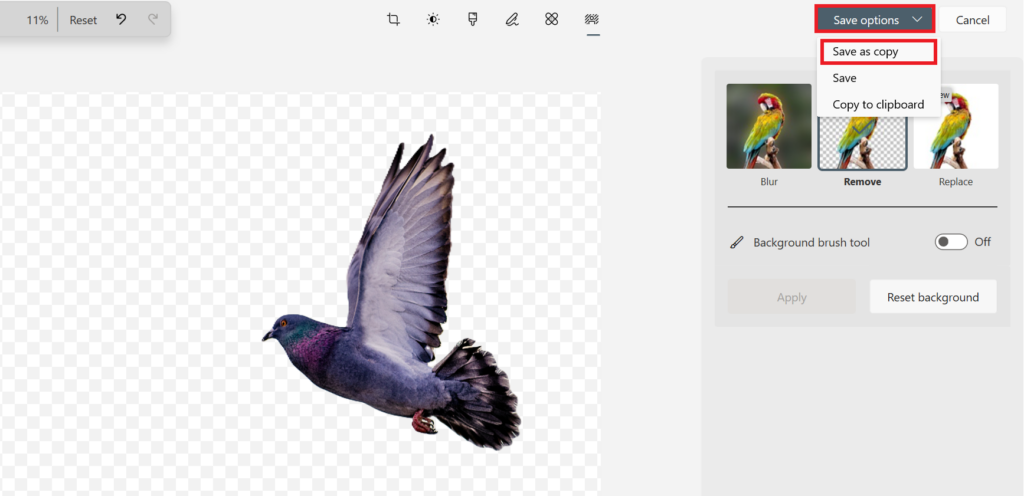
10. Then, click on Save options and then choose the Save as copy option.
11. Choose the specific location on your computer where you want to save the images, name the file, and then click Save.
2. Using Paints App
Another best way to remove the background of an image is by using the Paint app on Windows 11. The new version of Paint has introduced several features, including a new AI feature that allows you to remove the background from images with just one click. With the Paint app, you can remove the background from the image and enhance your photo by removing and adding the background.
Here are the steps you can follow:
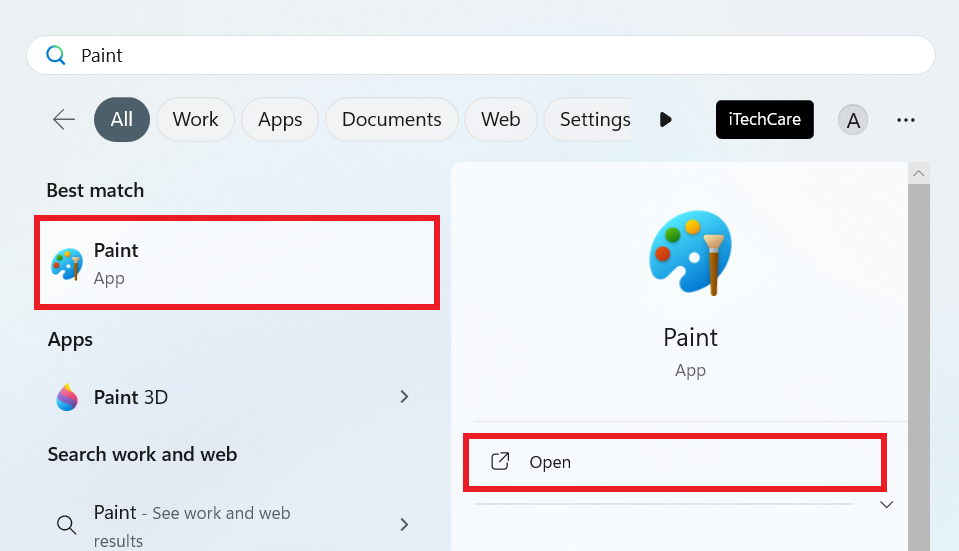
1. Press the Windows icon on the taskbar to get the Start Menu.
2. In the search bar, type Paint and click Open to launch the Paint app.
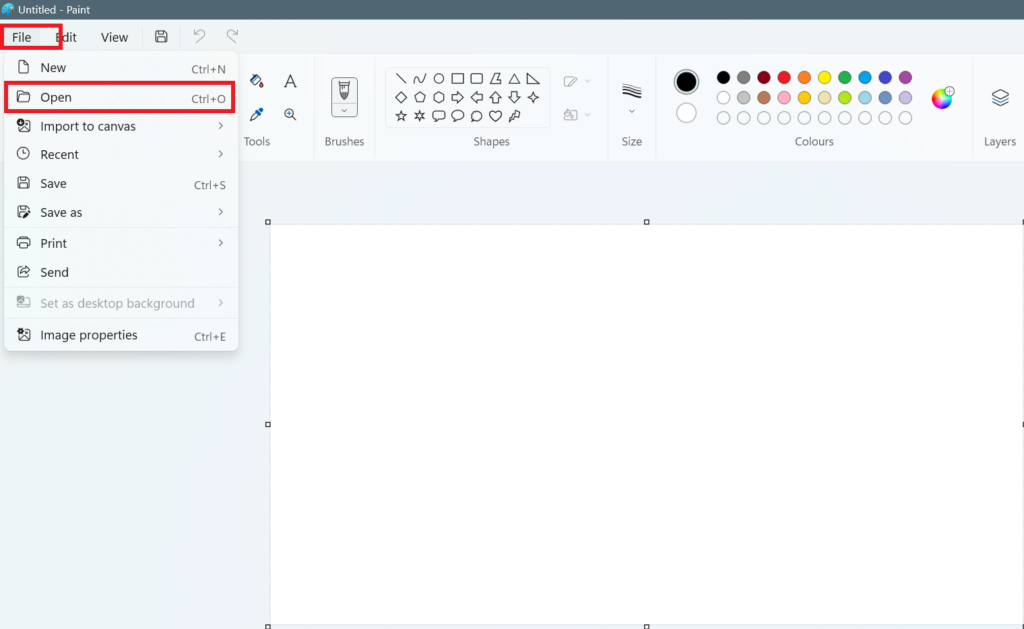
3. Once Microsoft Paint is launched, click on File > Open. Alternatively, press Ctrl + O keyboard shortcuts to import the image that you want to edit.
4. Once you choose the image, then the photo will appear on the screen.
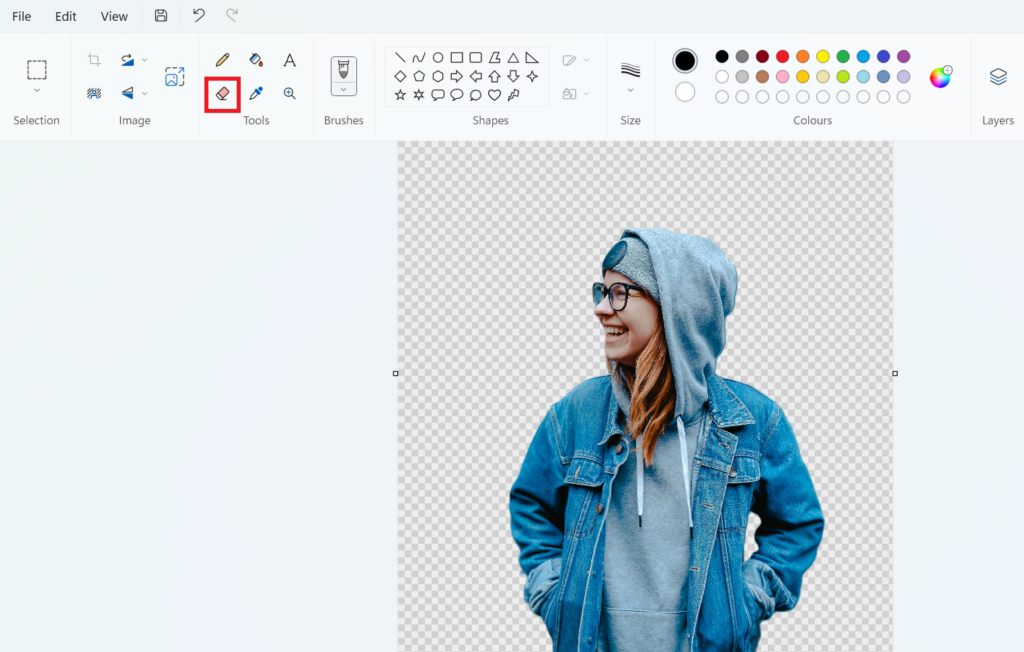
5. Locate the Background Remover Tool from the tool section area and then click on it to access the tool.
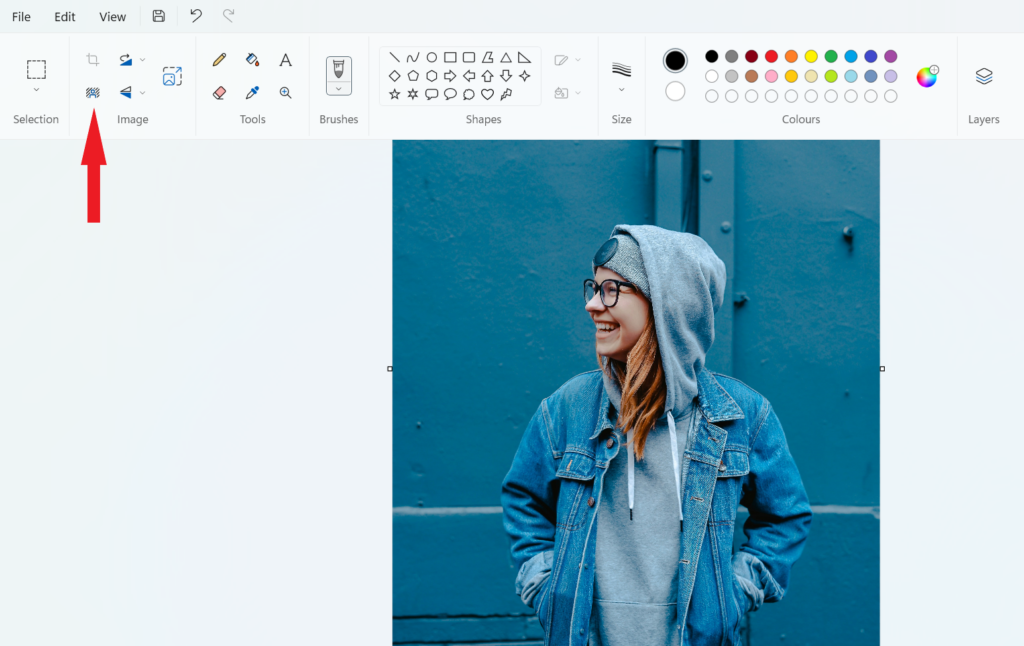
6. Now, the Paint app automatically analyzes the image and finds the background with the help of AI algorithms and then it will remove the background of the image.
7. Moreover, if you want to manually remove the background, select the Eraser tool icon and move it to the portion you want to erase.
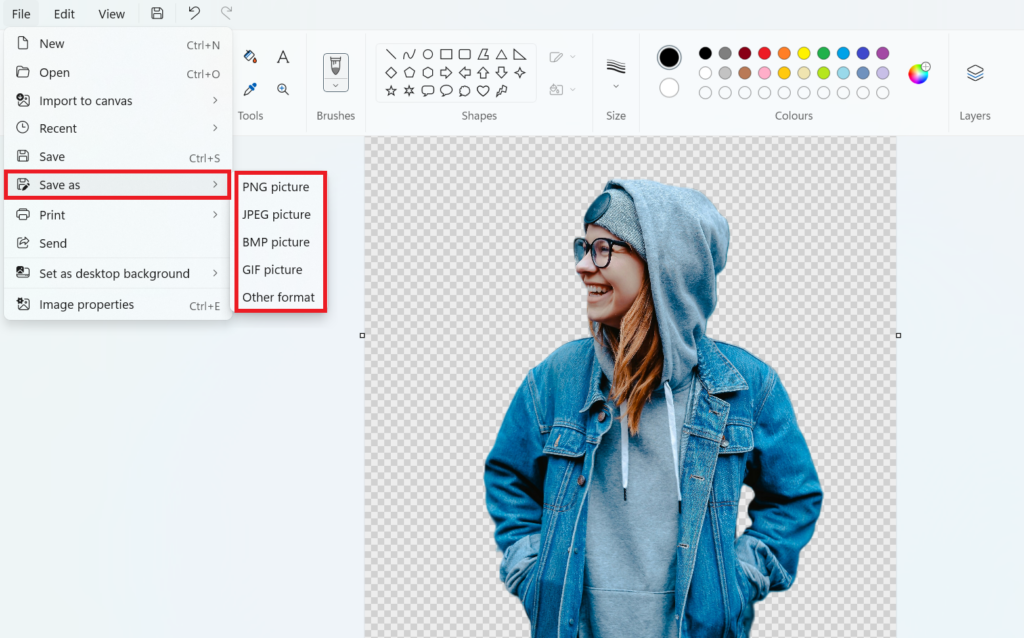
7. Once you’re satisfied with the result then save the image to your Windows PC.
8. Click on the File menu and choose Save as option. Now, from the menu that appears, select any image format. You can save your image in either PNG, JPEG or even GIF file format.
Conclusion
Removing image backgrounds using Microsoft Photos and Paint on Windows 11 is a simple process. By following the steps outlined above, you can easily remove backgrounds from your photos. Whether you’re editing pictures for personal use or working on individual projects, background removal can save you a lot of time using these methods.
Not only can you enhance your photo by removing the background of an image, but you can also replace it with other stunning backgrounds. Give it a try and take advantage of the creative image editing capabilities of Windows 11.