To run Windows 11 on your system, you must install TPM 2.0 (Trusted Platform Module). TPM is a security chip on the motherboard that stores all passwords and security-related data. You can either enable it on your CPU if it supports it (Intel and AMD-supported processors) or ensure it’s installed as a separate module on your motherboard.
However, if you have enabled it and still encounter the ‘TPM Device Not Detected‘ error, you can easily fix it. Here’s a detailed guide on fixing the TPM device not detected issue in Windows 11. So, without further ado, let’s get started.
Fix TPM Device Not Detected on Windows 11
If your Windows operating system is functioning, but some features are not working due to a TPM error, there could be several reasons why the TPM is not detected.
However, you can easily troubleshoot this error by following the methods below or watching the provided video tutorial.
1. Enable TPM in BIOS
Sometimes, even if the TPM status is showing as enabled on your system, you may still encounter the error message. To ensure that TPM is correctly enabled, you need to enable it in the BIOS. Follow these steps:
1. Enter your system BIOS.
2. Now, navigate to TPM configuration, or check the product guide if you can’t find it.
3. Then, enable TPM support.
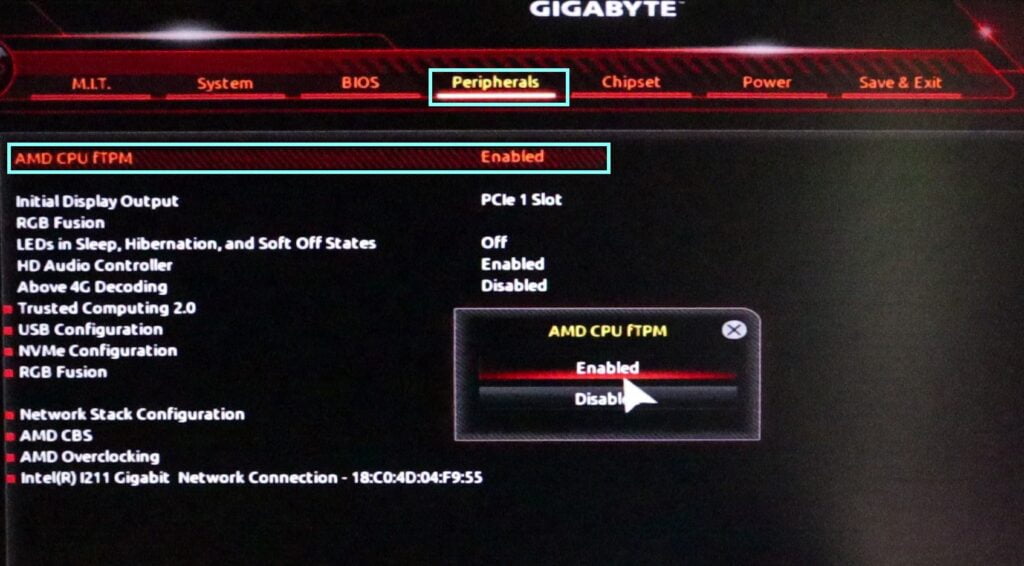
4. After that, save the changes and restart your device, and then TPM will be fixed. If you are using a Gigabyte Motherboard, we have a detailed guide on enabling TPM on Gigabyte Motherboards.
Note
BIOS options might vary depending on the manufacturer, so check the product guide on the official website.
2. Update TPM Driver
If your TPM is enabled in BIOS and you’re still facing the issue, you might be using an older version of the TPM Driver.
To update it to the latest version, follow these steps:
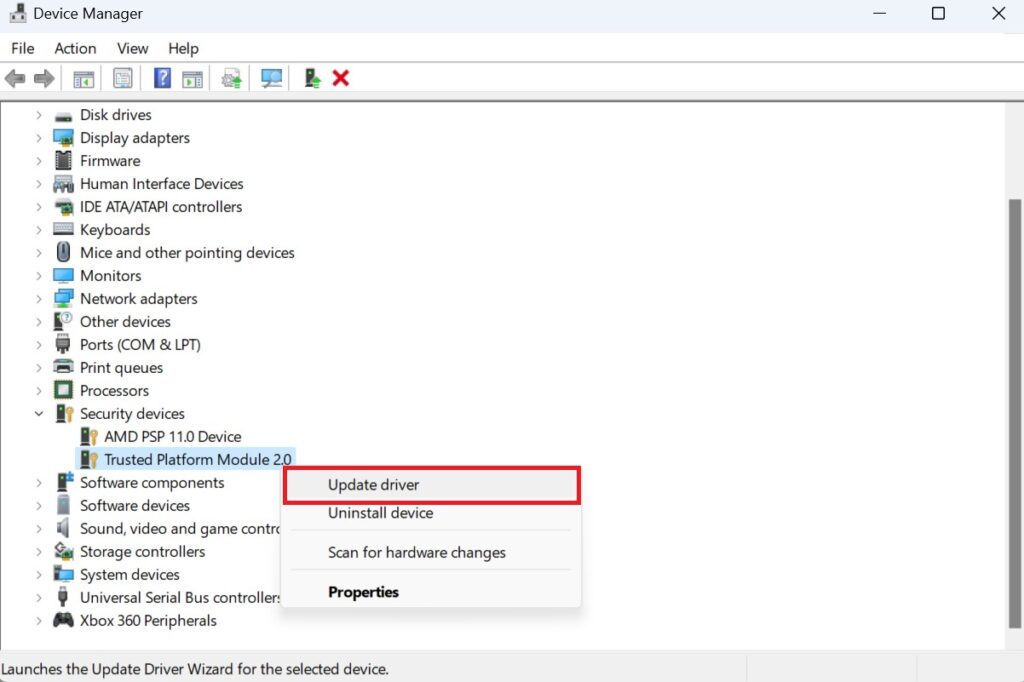
1. Open the Device Manager.
2. Expand the Security Devices category and select Trusted Platform Module 2.0.
3. Then, right-click on it and select the Update driver option from the menu.
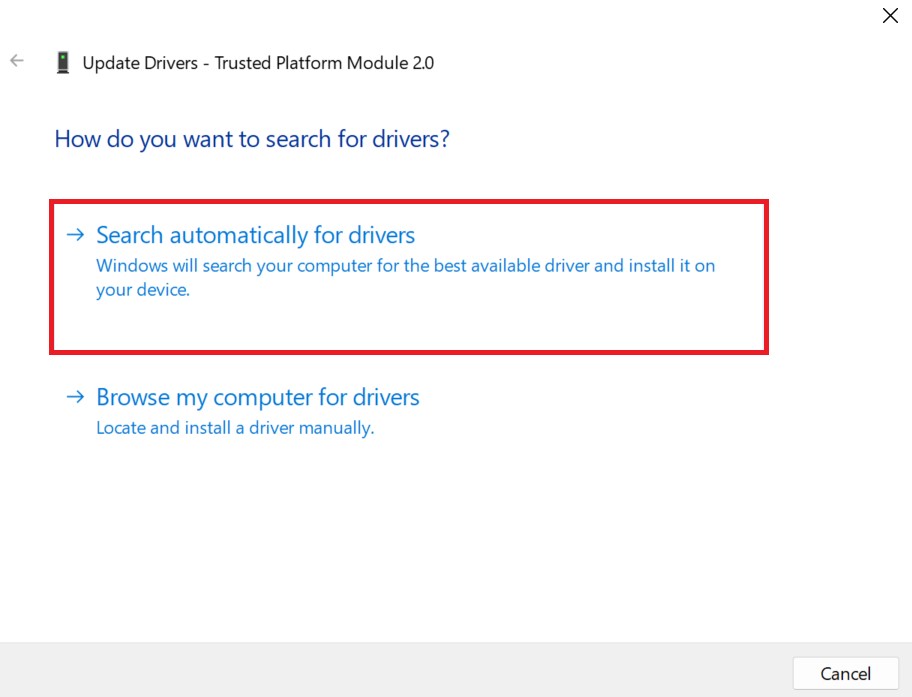
4. In the Update Driver window, select the Search automatically for drivers option to download and install the best available driver for your device
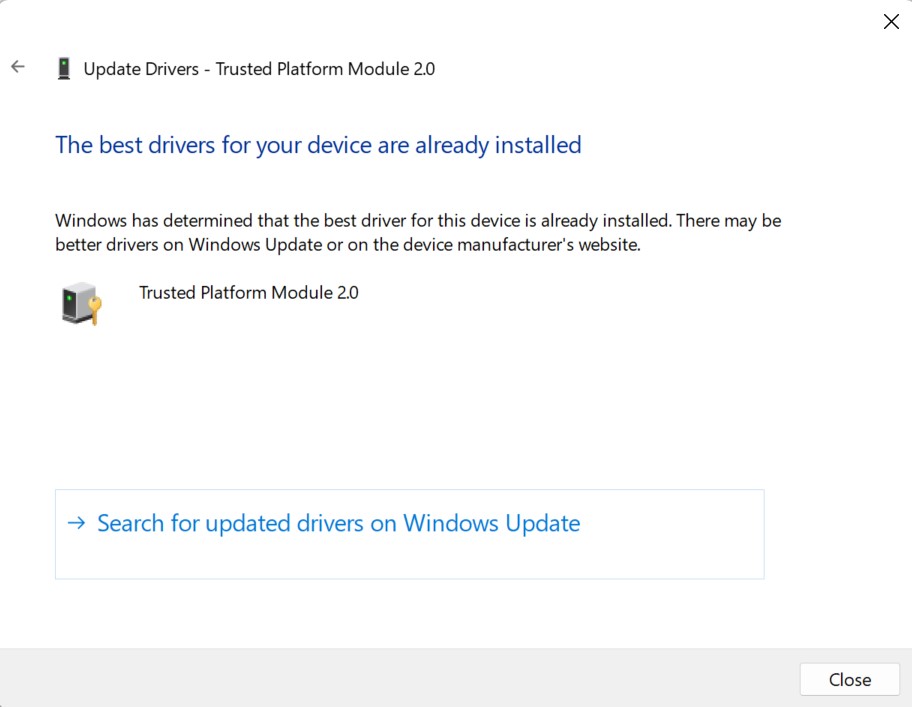
5. If there is any available TPM driver update, it will install it. Once done, click on the Close button and restart your computer to apply the changes.
3. Clear TPM
You can also try to clear the TPM caches; this will restore the TPM configuration to default, fixing the issue of TPM not being detected.
Here’s how you can clear the TPM cache:
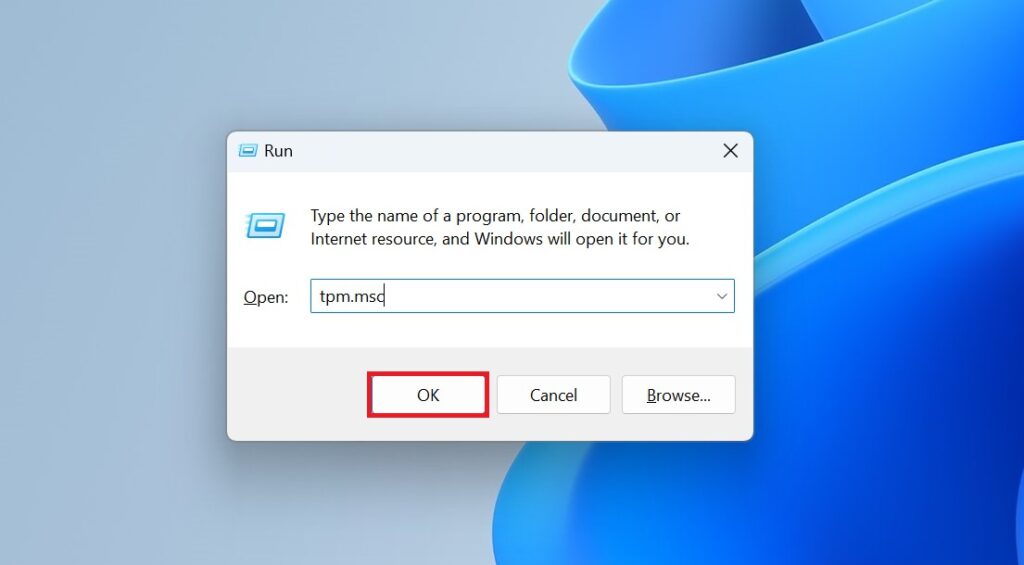
1. Press Windows + R to open the Run dialog box.
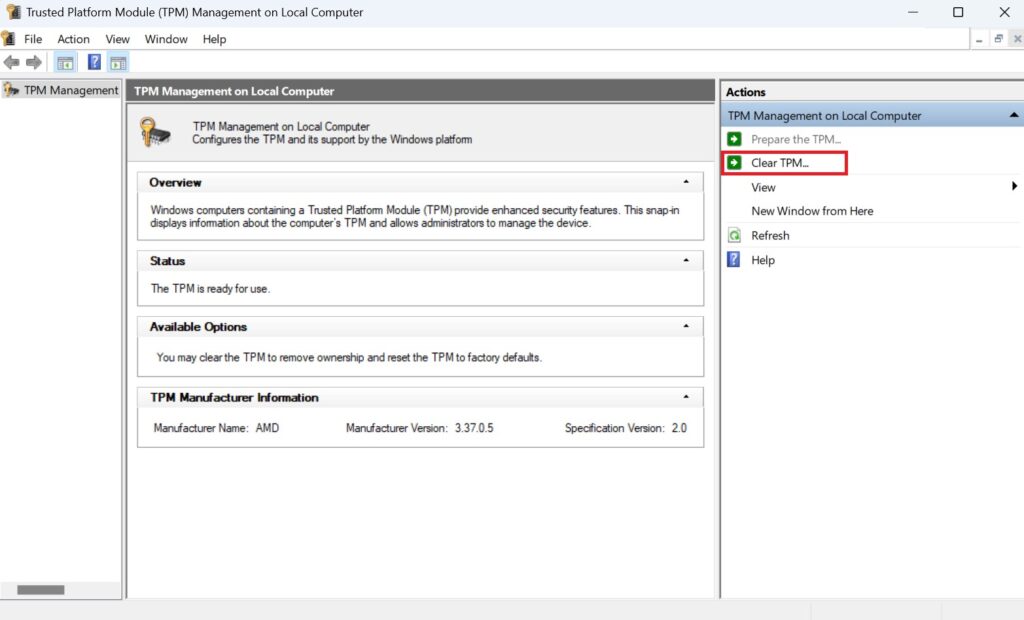
2. Type tpm.msc and click OK to open the TPM Management window.
3. Here, you will get all the information about TPM, such as Status, Manufacturer information, and more. If you don’t get the information, click on the Refresh option to retrieve it.
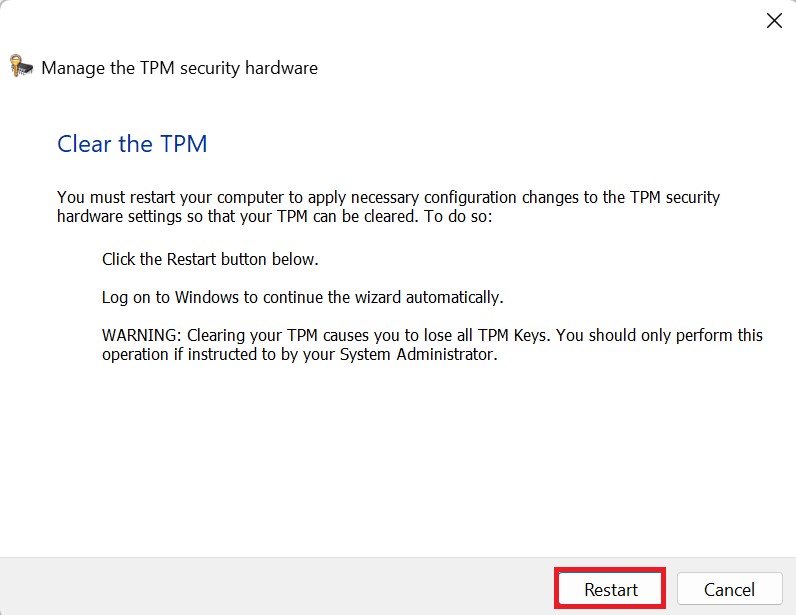
4. Now, to clear the TPM caches, click on the Clear TPM button.
5. Finally, click on the Restart button.
Conclusion
After that, the TPM not detected error will be fixed. If the problem persists, you might need to reset your BIOS by removing and reinserting the BIOS battery. If you’re still facing the issue after trying this, it’s possible that the separate TPM chip you’re using is defective, and you may need to replace it.