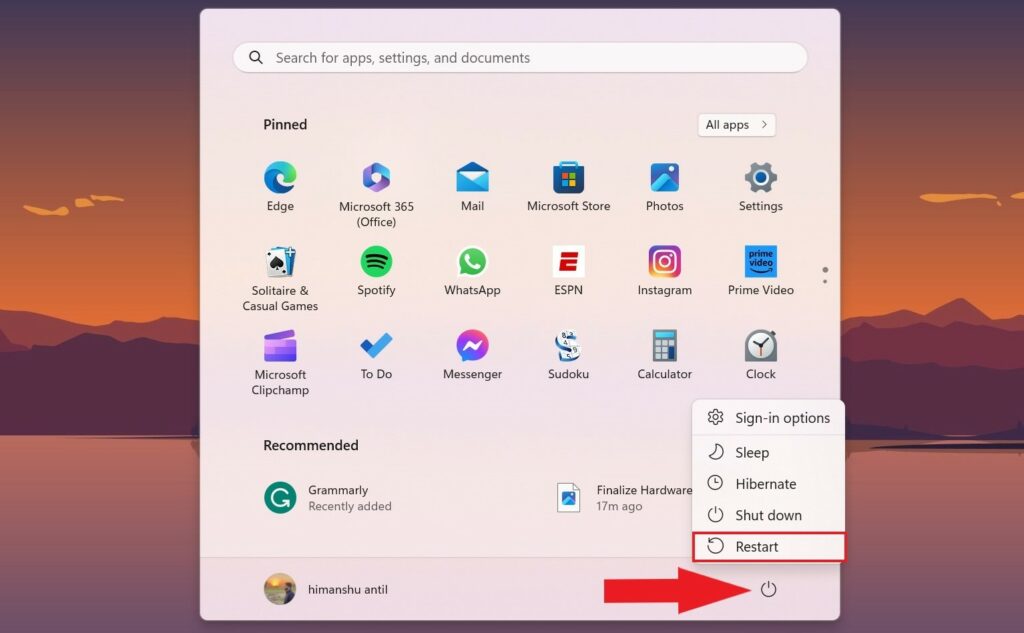
The BIOS menu is a crucial feature in Windows 11 that provides you with complete control over your system. It acts as a bridge between your hardware and software, allowing you to modify settings, troubleshoot issues, and optimize your computer with ease.
This program comes pre-installed with your computer’s motherboard and allows you to personalize your device. It’s especially useful for modifying various settings and monitoring system hardware such as CPU, GPU, and overclocking capabilities.
Ways to Access BIOS in Windows 11
To access features like Virtualization and TPM Secure boot, you will need to enter the BIOS Menu. There are several ways to do this, but we have listed some of the fastest ways to access the BIOS in Windows 11 below. Let’s get started without any delay.
1. Access BIOS at Startup
The most common way to access the BIOS is at startup; you just need to restart your system and use a shortcut key to enter the BIOS. In most cases, the keys are F2, Esc, and the Delete key.
Here are the steps you can follow:
1. Shut down your computer by using the Power button. Alternatively, you can restart your PC, but ensure to save the changes you’re working on.
2. When you get the splash screen during startup, press the F2, Esc, or Delete key immediately.
3. Once you press the keys, you will be directed to the BIOS window.
Note
The keyboard shortcut to enter the BIOS can be different for different manufacturers. So, to know the right key, you can visit the manufacturer’s support page.
2. Using Windows Settings
If you haven’t found the right keyboard key for your computer to enter the BIOS menu, do not worry. You can use your Windows Settings to access the BIOS on your computer.
Here is how you can access the BIOS on Windows 11 using the Settings app:
1. Press the Windows + I key to open Windows Settings.
2. Choose System from the left-hand side and then click on the Recovery option.
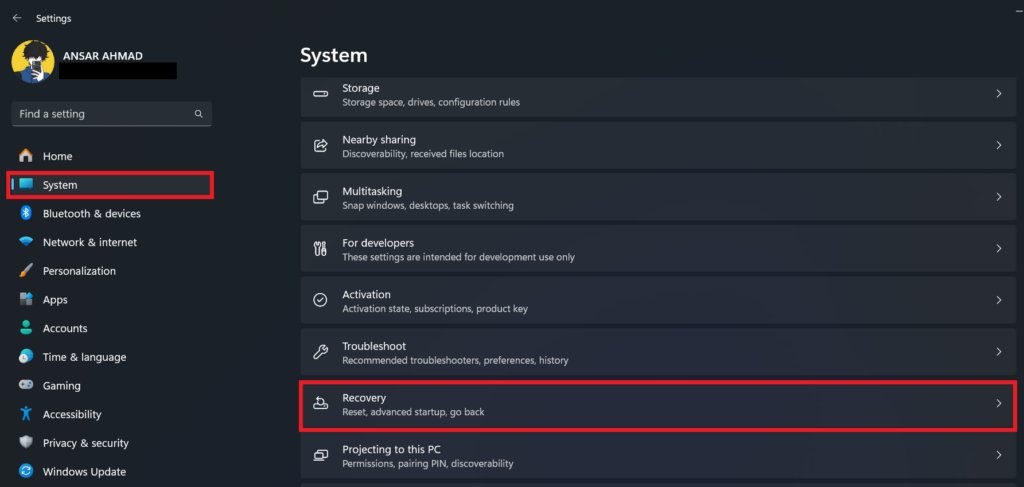
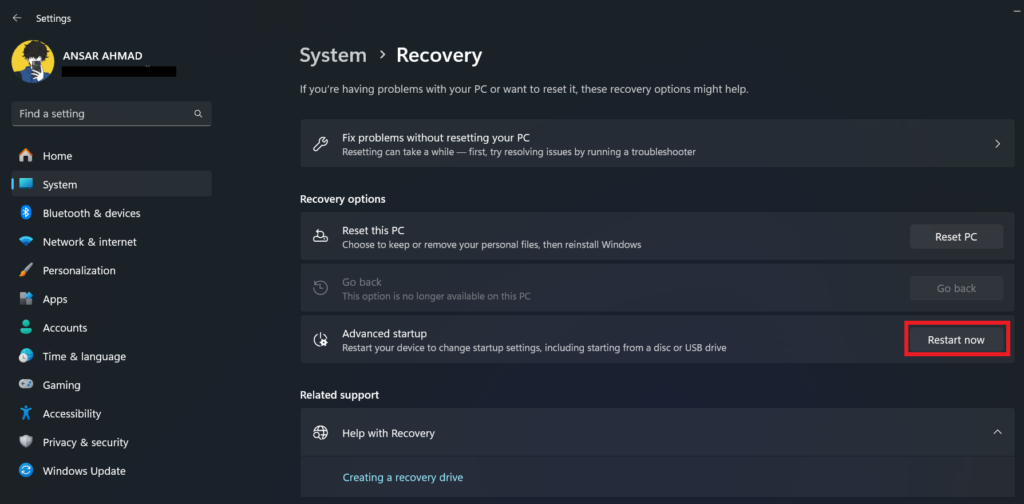
3. Under the Recovery options menu, click on the Restart Now button next to the Advanced Startup option.
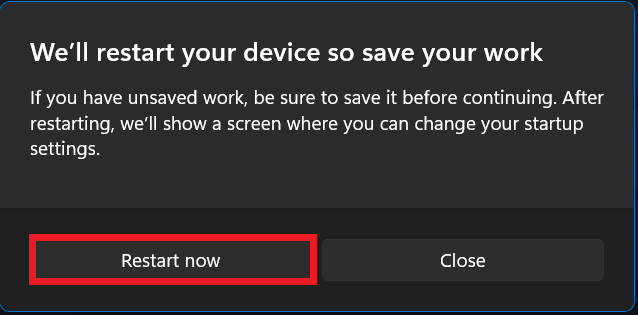
4. After that, a prompt will appear to confirm the action. If you have unsaved work, be sure to save it before proceeding to this step and then click Restart now button to confirm the action.
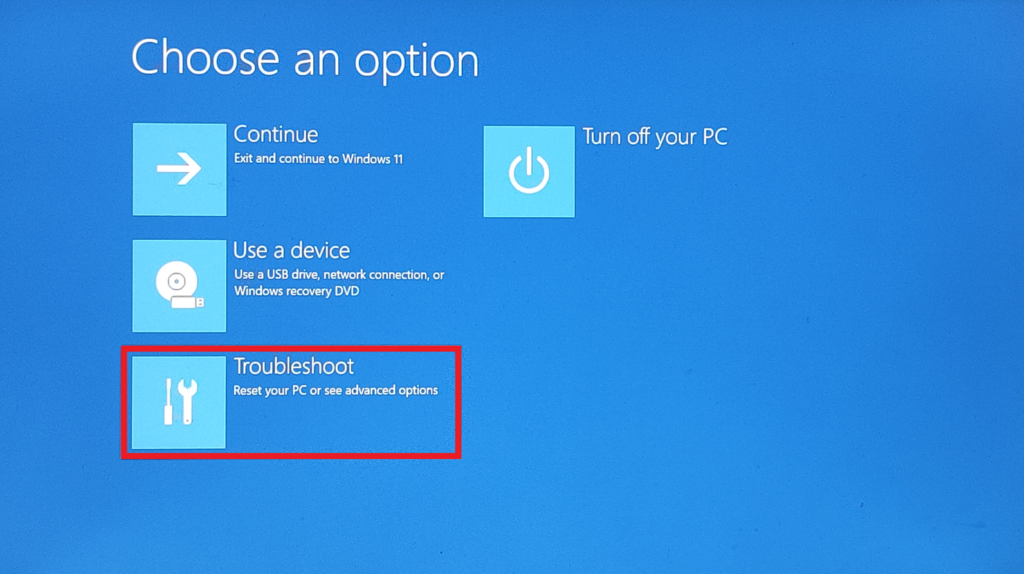
5. Under the Choose an option window, select Troubleshoot by using the key on the keyboard.
6. Next, choose Advanced options under the section.

7. In the Advanced options, select the UEFI Firmware Settings option.
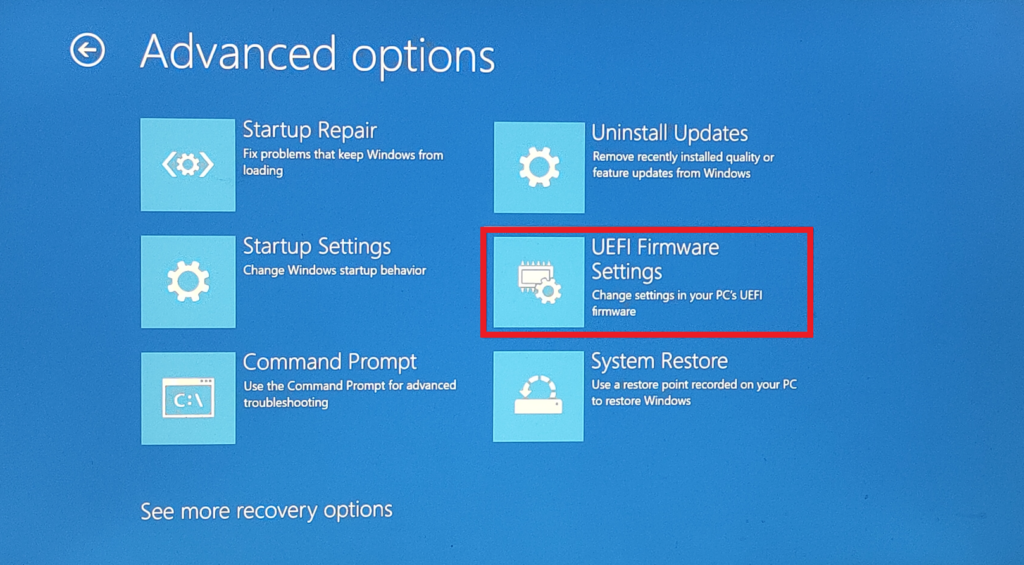
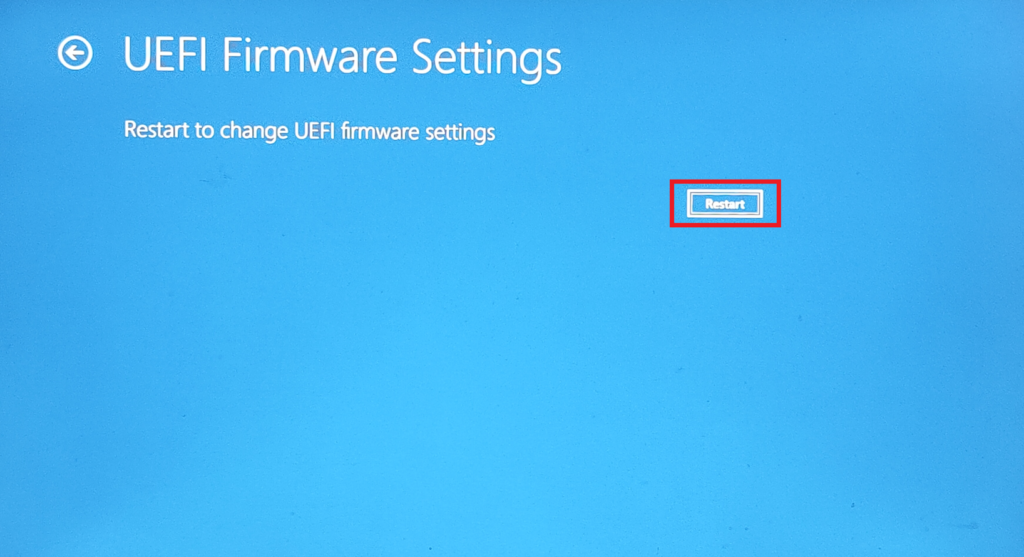
8. After that, click on the Restart button to restart the computer and you will be directed to the BIOS Menu.
3. Using Shift + Restart Button
Another convenient way to access the BIOS is by using the Shift + Restart shortcut keys. This method is noteworthy because it allows you to access the BIOS with just a few clicks.
Here’s how:
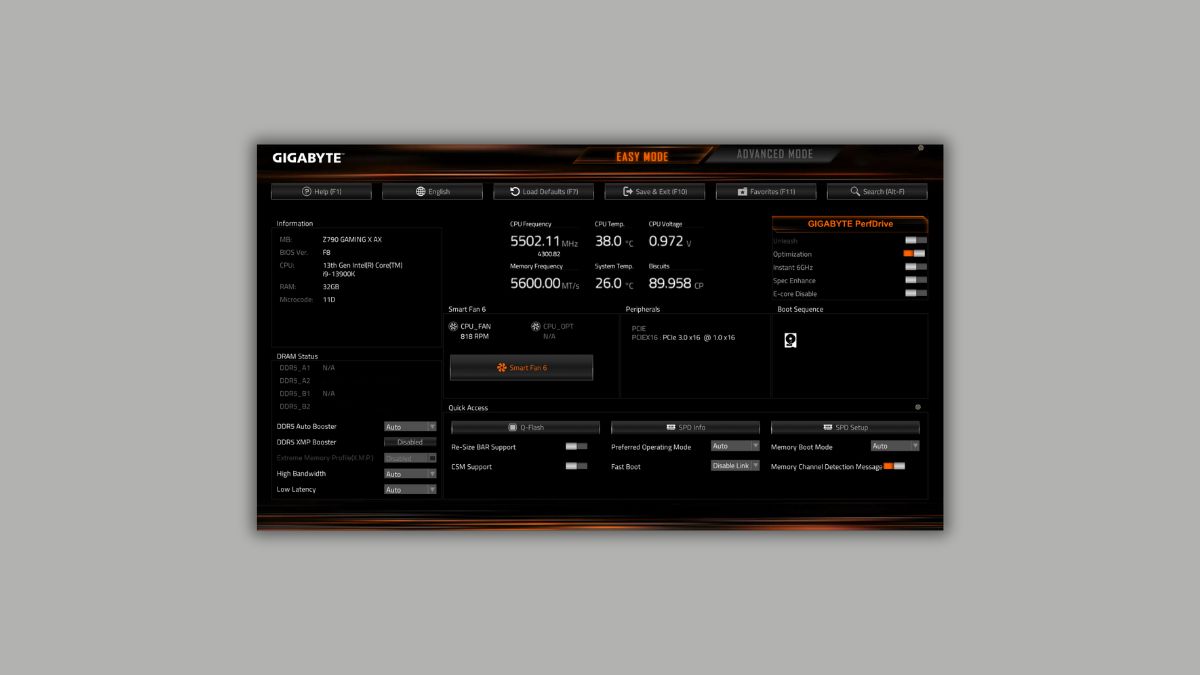
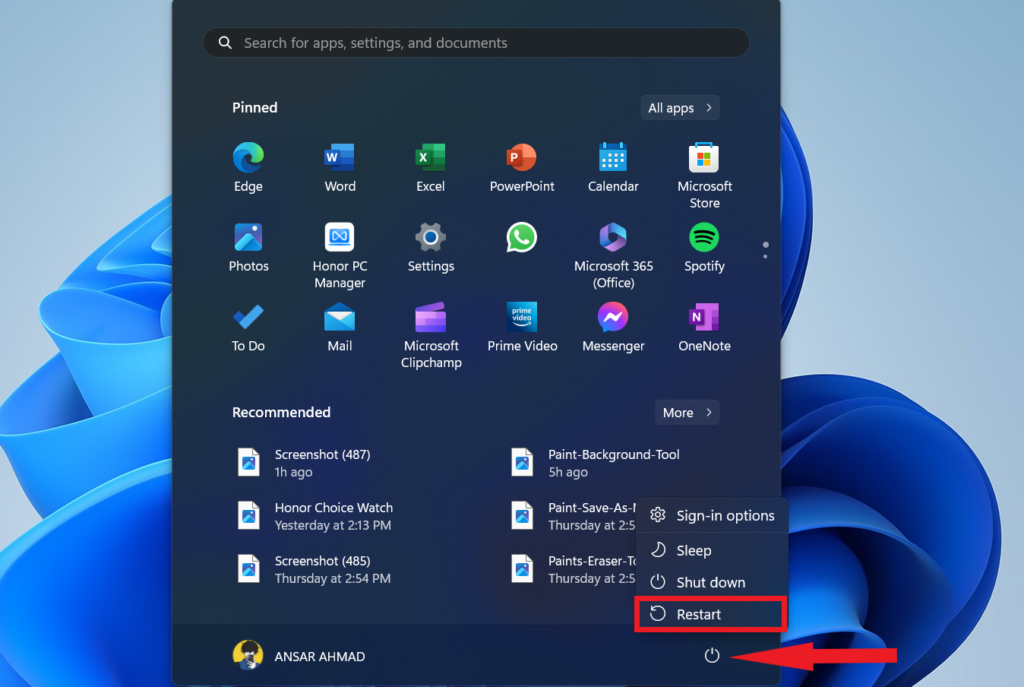
1. Click the Windows icon on the taskbar to launch the Start Menu and then click on the Power icon.
2. Place the mouse over the Restart option, then hold the Shift key and click on the Restart option.
3. Under the Choose an option menu click on the Troubleshoot option.
4. Next, choose Advanced options.
5. In the Advanced options, select UEFI Firmware Settings.
6. Click on Restart and you will be directed to the BIOS Menu.
4. Using Run Window
The Run window command is a prominent tool in Windows computers that allows users to access programs, folders, files, services, settings, and much more. With the Run window, you can also effortlessly access the BIOS menu on your computer by entering a command.
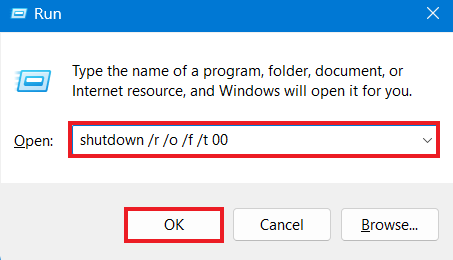
1. Press the Windows + R key to open the Run window.
2. In the Run tool’s search bar, type the below command and click OK to access BIOS.
shutdown /r /o /f /t 00
3. After that, you will be directed to the Advanced Boot Menu. Click the Troubleshoot > Advanced options.
4. Then, click on the UEFI Firmware Settings and select Restart to confirm the action. This will boot your computer into the BIOS.
5. Using Command Prompt
You can also use Command Prompt to access the BIOS menu on your Windows computer. Additionally, you can utilize the Windows Terminal and PowerShell.
Let’s take a look at accessing the BIOS using the Command Prompt:
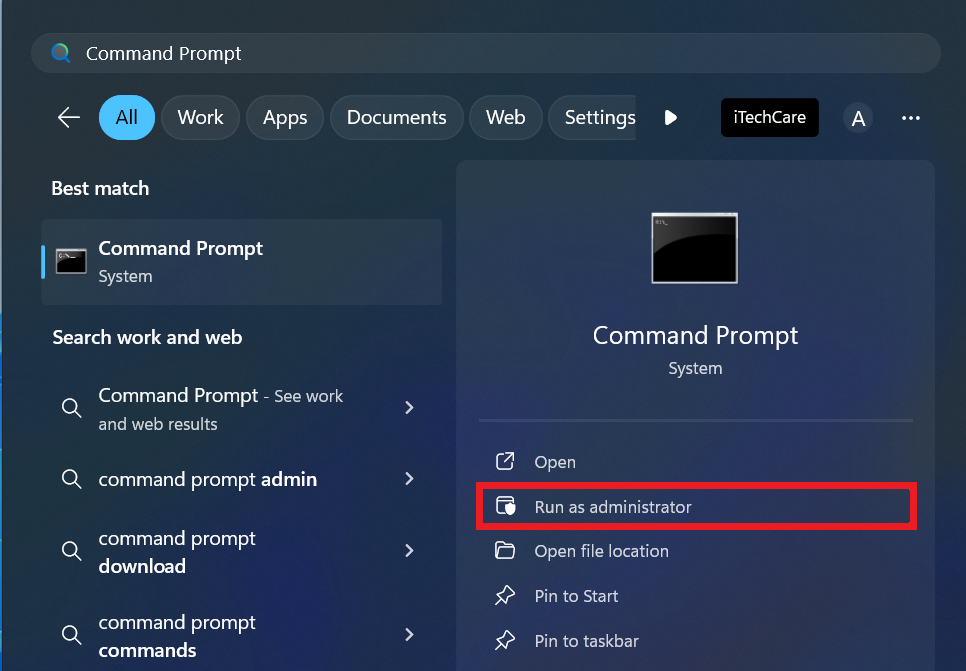
1. Click on the Start button and type Command Prompt in the search bar.
2. Now, click Run as Administrator on the right-hand side.
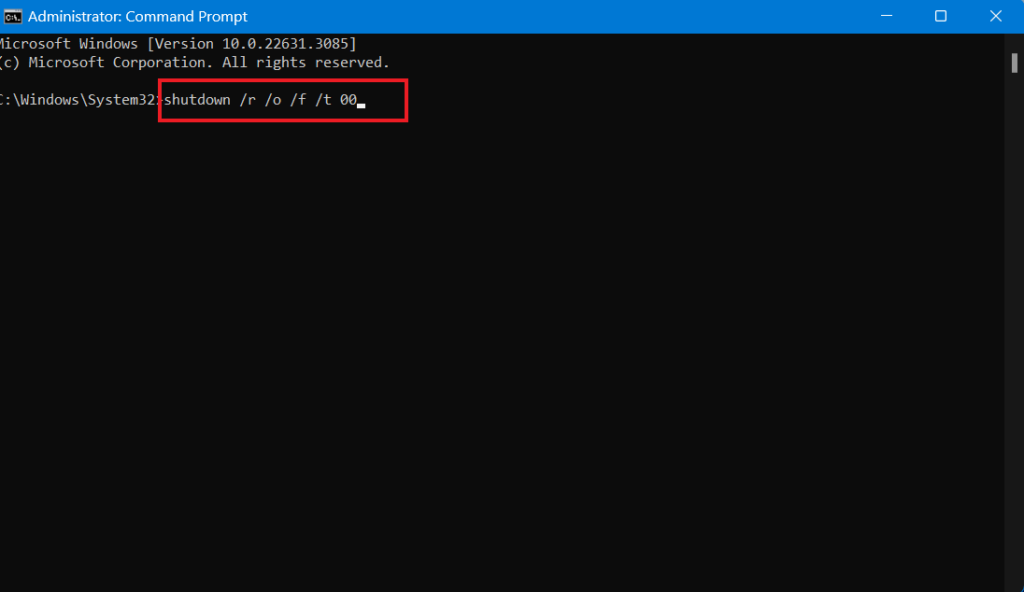
3. Under the User Account Control (UAC), click Yes.
4. Type the following command in the command line interface and then press Enter.
shutdown /r /o /f /t 00
5. Now, your Windows computer will direct you to the Advanced Boot Menu. Here, you will have to click on Troubleshoot, then Advanced options.
6. After that, choose UEFI Firmware Settings and select Restart to confirm the action. This will launch the BIOS on your computer screen.
Note
You can use other command-line interfaces like Windows Terminal and PowerShell. Make sure to run them as an administrator, and the steps are likewise.
Conclusion
Accessing the BIOS in a Windows 11 PC is pretty simple. By following any of the methods discussed above, you can effortlessly access the BIOS to troubleshoot issues, change Windows settings, and much more.