The ability to record your screen activity in Ubuntu is a helpful feature that you may use for a variety of tasks, including making tutorials, displaying software functioning, or recording troubleshooting steps. The Linux distribution Ubuntu offers a built-in tool and a few third-party apps to capture the screen.
In this extensive guide, we will look at the various ways to record your screen in Ubuntu 22.04 LTS, providing you with detailed instructions and insights into the most popular and user-friendly methods. We will discuss both built-in tools and third-party applications so that you are able to find a solution that best suits your preferences and needs.
How to Record Screen in Ubuntu 22.04 LTS
Recording the screen in Ubuntu is quite an easy task, as you just need to configure and run the dedicated application for screen recording or you can use the built-in tool. Let’s discuss them one by one:
1. Using Built-in Tool
Screencast is a built-in screen recording tool in Ubuntu Linux. It is a part of GNOME Shell and has been provided with shortcut keys to operate like other operating systems.
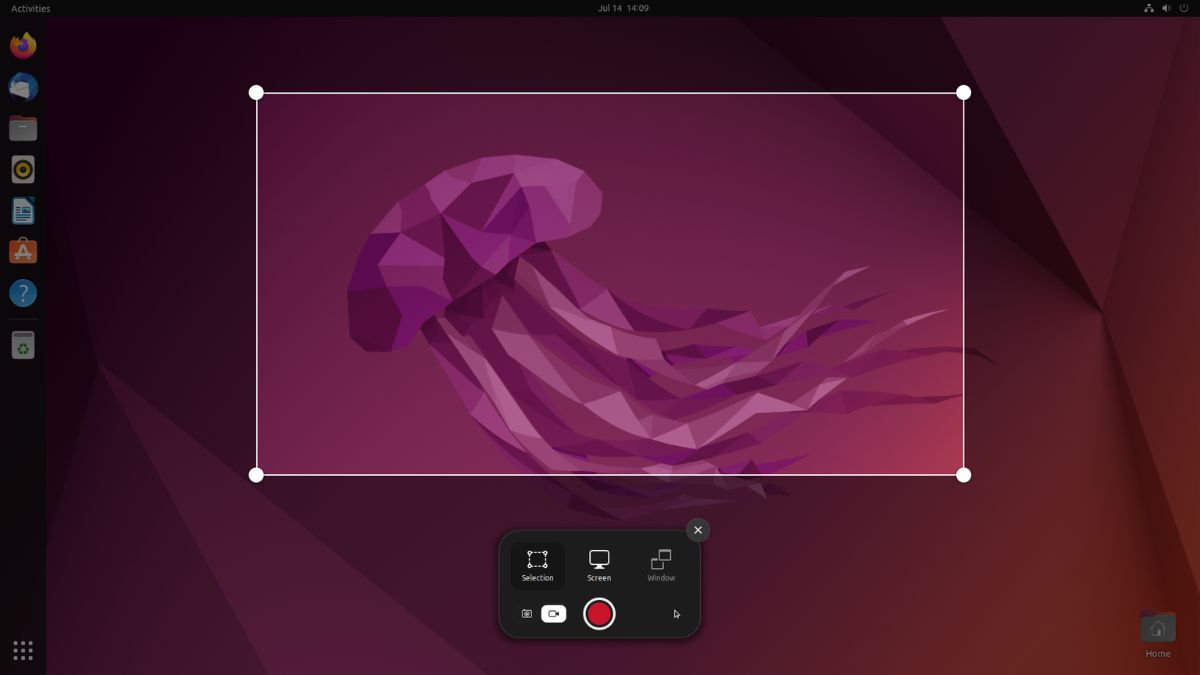
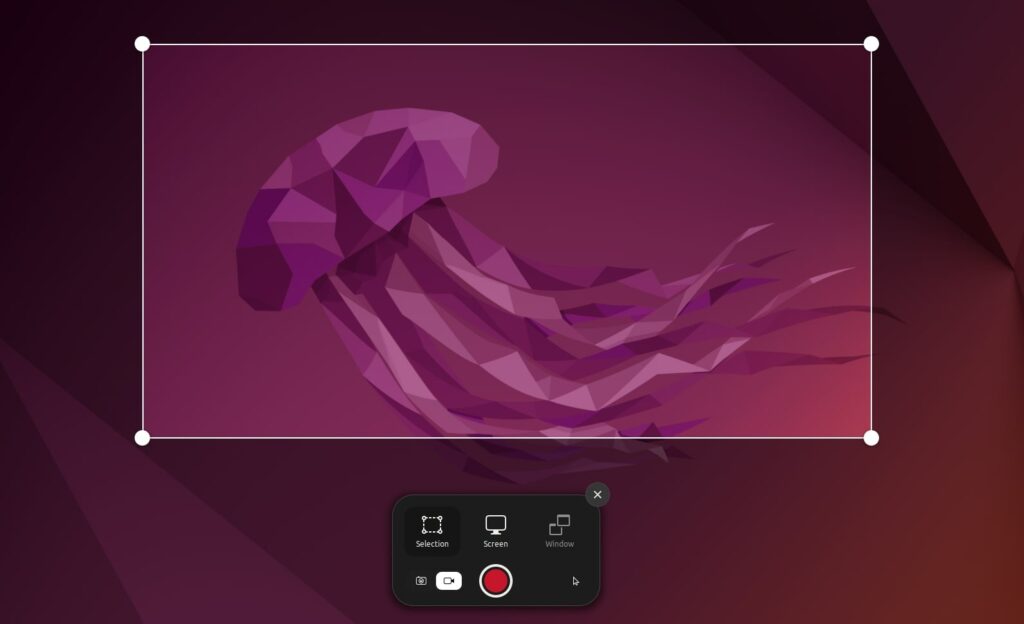
Using Screencast not only allows you to record the screen but also enables you to take screenshots. One crucial feature that Screencast provides is its three options for screen recording: full-screen recording, window recording, and area-specific customization. Let’s find out how to use Screencast.
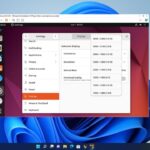
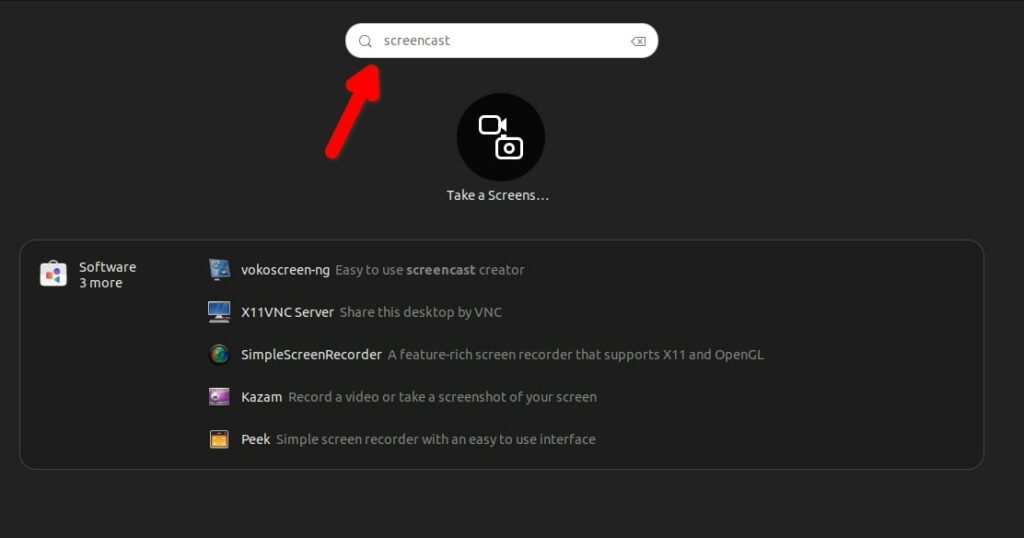
1. Go to Applications Finder, and search with the name Screencast. Or, use the shortcut key to open the application by pressing Ctrl + Alt + Shift + R.
2. Once the screencast dashboard is open, select the recording preference. There are three options: Selection, Screen, and Window. Select any of the options according to your requirements and click on the Camcorder icon to start the screen recording. It will begin capturing your screen.
3. Once the recording is complete, you can click on the stop button located in the notification panel.
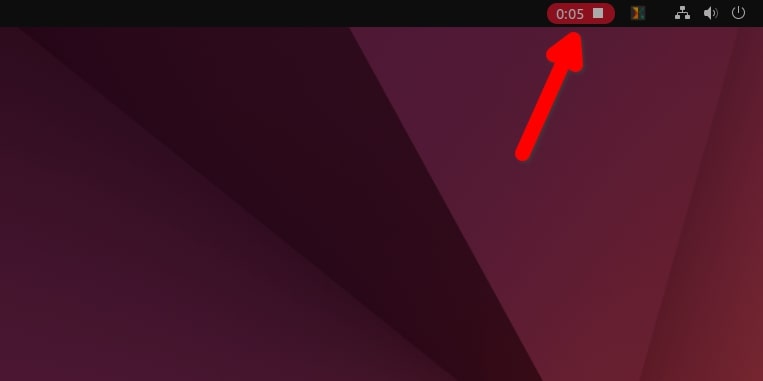
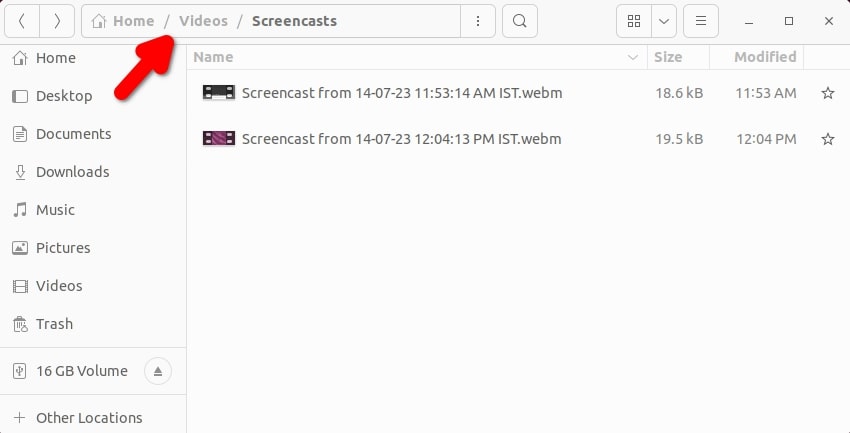
4. Now, navigate to Home/Videos/Screencast to access the recorded screencast video.
That’s it! This is how you can record your screen using Screencast in Ubuntu Linux. Now, let us discuss how you can record the screen using third-party tools.
2. Using a Third-Party Tool
There are also third-party tools available for screen recording in Ubuntu. We will explore the top three well-known screen recording tools and learn how to use them in Ubuntu to capture your screen.
Record with SimpleScreenRecorder
SimpleScreenRecorder is an open-source Linux application for screen recording. It enables you to capture and record your desktop activities as well as audio from various sources, such as a microphone or system sound.
SimpleScreenRecorder has an intuitive and user-friendly interface, making it suitable for both new and advanced users. You can install it by running the following command on the Terminal:
sudo apt install simplescreenrecorder
Here are the steps you can follow to record the screen in Ubuntu with SimpleScreenRecorder:
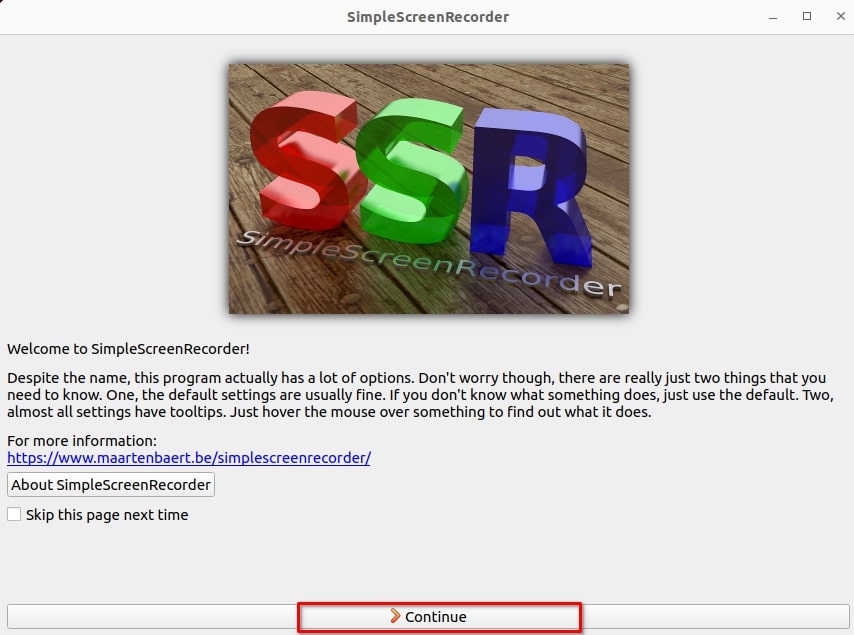
1. Go to the application menu and search for SimpleScreenRecorder. Now, select the SimpleScreenRecorder icon to open it.
2. Once the interface of the application is open, click on Continue.
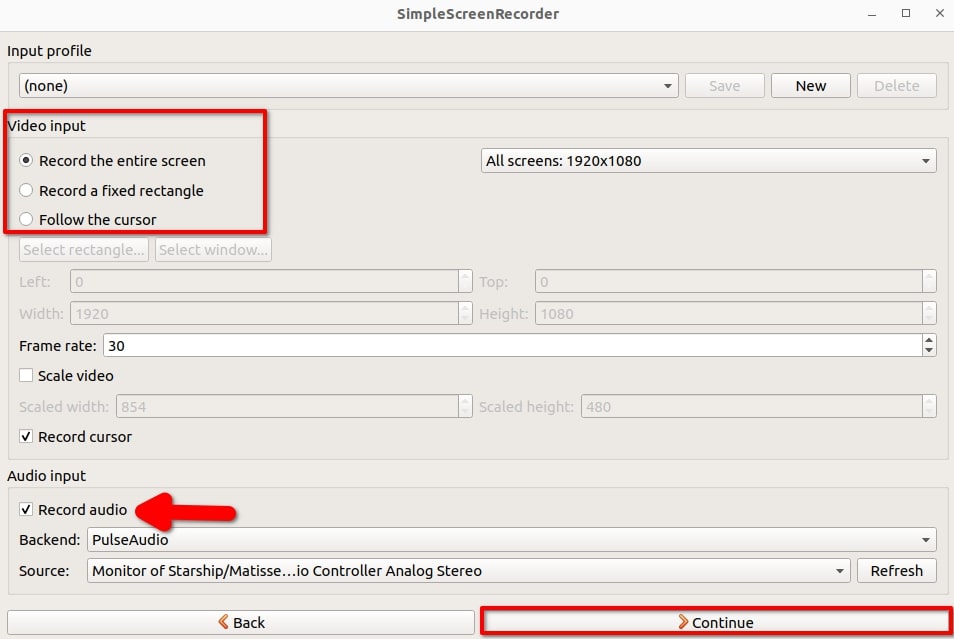
3. Then we need to configure the video input profile of the application. In this screen, you will find all the preferences for screen recording.
4. Here, choose the recording area – Record the entire screen, Record a fixed rectangle, Follow the cursor, and Record OpenGL. You can also customize other settings, including the frame rate, record cursor, and audio input.
5. Then click on Continue to move to the next screen.
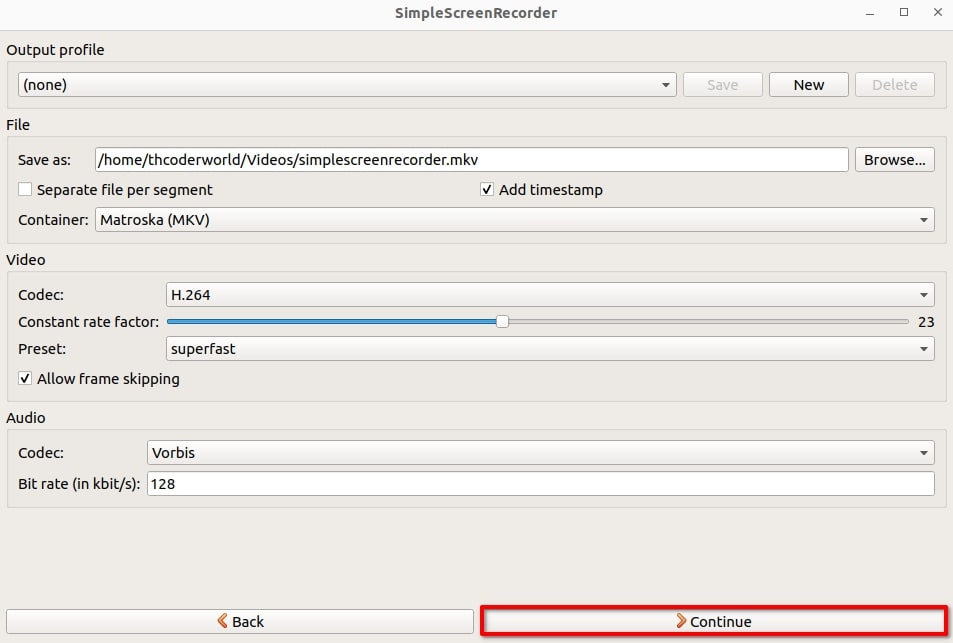
6. Next, we will have to configure the output profile of the application. Here, you get the option to change the default location for saving the recorded files and to change the recording file types as per your requirement. MKV is the default file format. You can change it to MP4, WebM, Ogg, and others.
7. Here, you will also get the option to change the audio codec and its bit rate as well as per your requirement. Now, click on Continue to move to the last configuration screen.
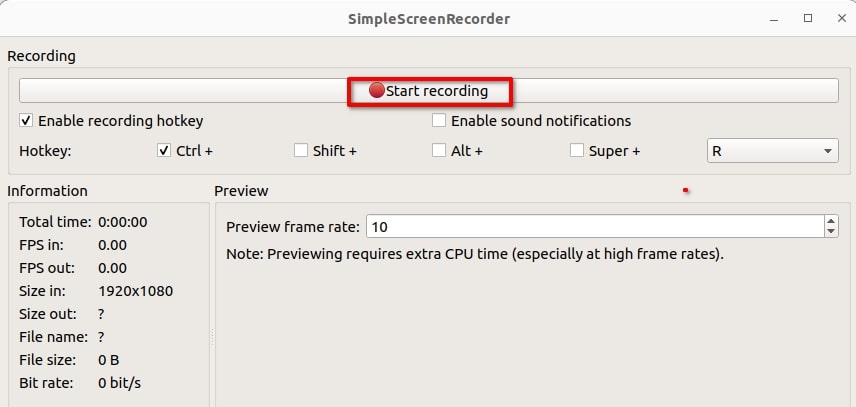
8. To start the recording click on the Start Recording button. It will begin capturing your screen right away.
9. Once you are done with the recording, you can open it by clicking on the notification panel and selecting the Save Recording option to save the recorded video.
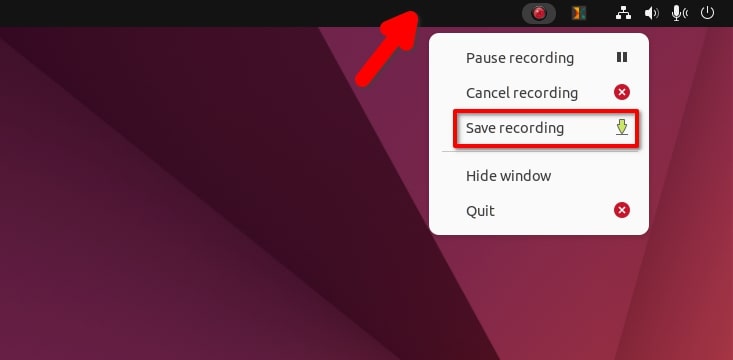
That’s it! The screen recording will be saved under Home/Videos or on the location you have selected.
Record with OBS Studio
Open Broadcaster Software, commonly known as OBS Studio, is a widely available and powerful open-source application available for Ubuntu and other platforms. It is predominantly utilized for live streaming and recording audio and video from your computer. OBS provides an extensive set of features that enable users to create broadcasts and recordings of professional quality.
You can install OBS Studio in Ubuntu. To do so, open the Terminal and run the below commands one by one:
sudo add-apt-repository ppa:obsproject/obs-studio
sudo apt update
sudo apt install obs-studio
Here are the steps you can follow to record the screen with OBS Studio:
1. Open the OBS Studio.
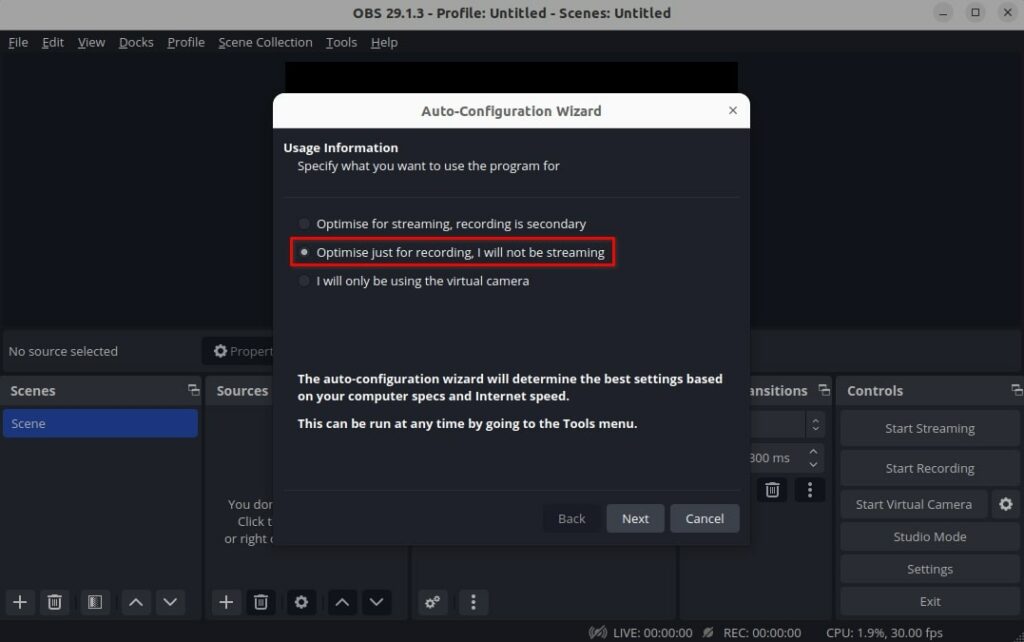
2. Once you open the application, it will pop up with an Auto-Configuration Wizard window.
3. Here, choose Optimize just for recording and select the base (canvas) resolution during the initial setup. After that, click on the Apply Settings button.
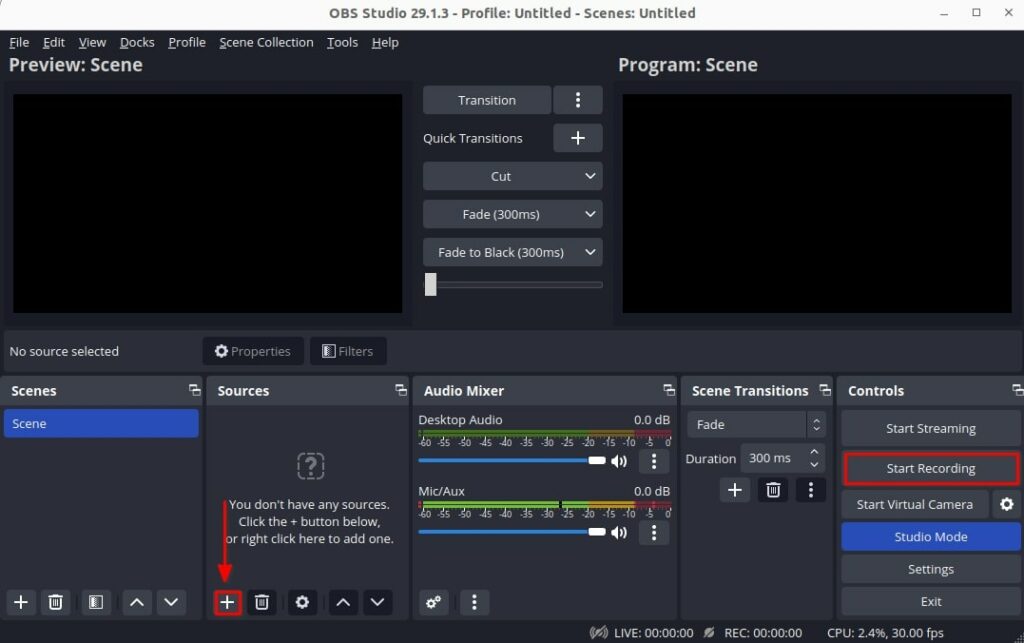
4. Once the interface is up on the screen, Locate Sources and click on the ‘+‘ to add Sources. Here, from the menu option select the option Screen Capture option.
5. You can also add Audio Input Capture (PulseAudio) to capture the sound using an external microphone. After that, click on the Start Recording button.
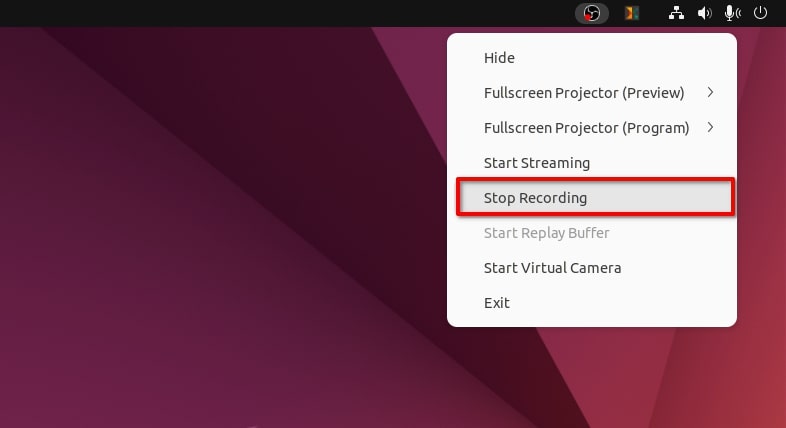
6. To stop the recording, click on the OBS Studio icon in the notification panel on Ubuntu and choose the Stop Recording button.
Navigate to the Home/Videos directory or /home/snap/obs-studio/1284 if you have the snap version of OBS to get all the screen recording videos.
Record with Kazam
Kazam is a screen-casting and screen-recording application for Ubuntu and other Linux distributions. It enables you to capture screen activities and create desktop video recordings. It has the most simple user interface to work with.
Here are the steps to record the screen in Ubuntu with Kazam:
1. Open Kazam from the application menu.
2. Select Screencast and then choose a window frame to record the screen, You get options of recording Fullscreen, Any particular Window, and selecting an exact Area on the screen. Also, select sound from the microphone to record audio from external devices.
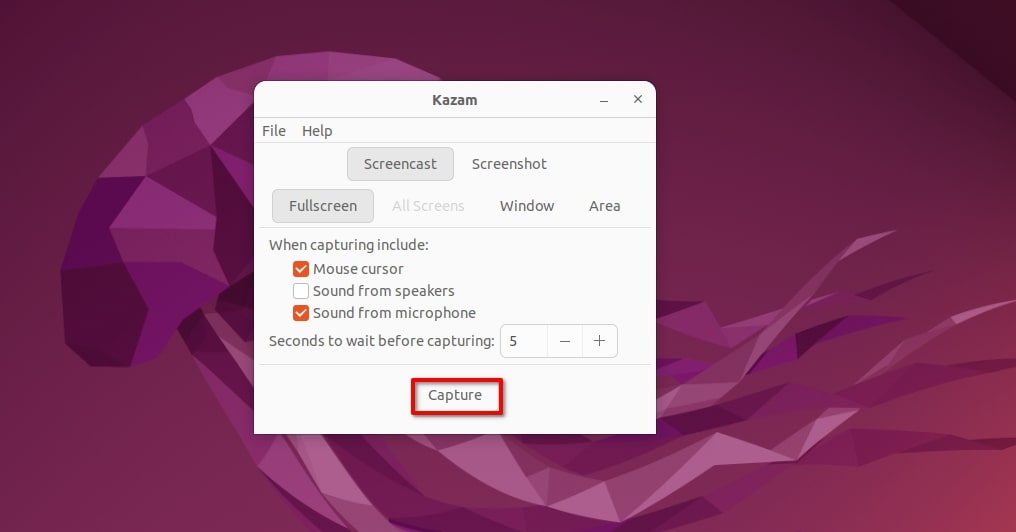
3. After that, click on the Capture button to start the screen recording.
4. Now, to stop the screen recording, click on the camcorder icon on the top right corner of the screen and then click on the Finish recording option.

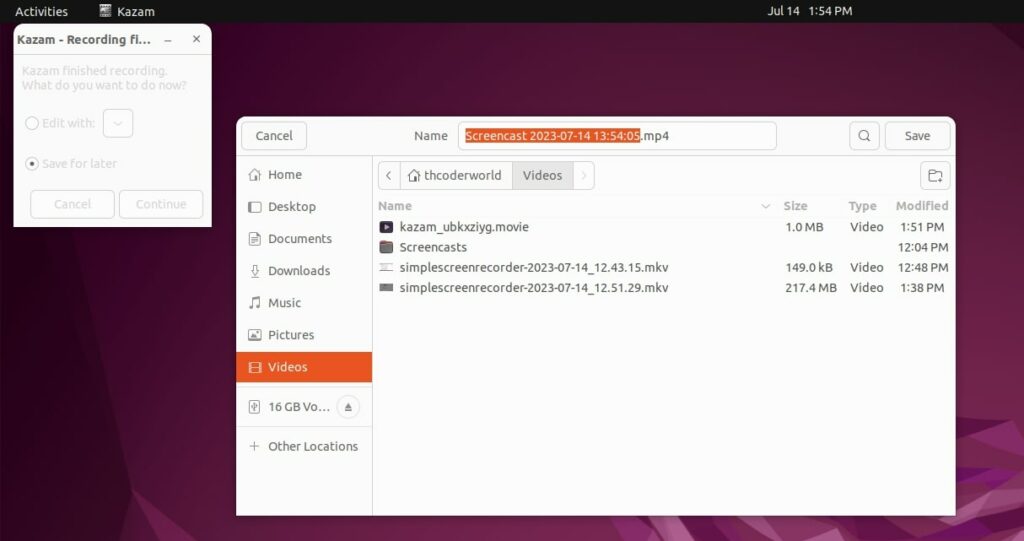
5. To save the recorded file, select Save for later and click on the Continue button.
6. It will now open the Files app. Select the path to save the file, give it a name, and click on the Save button.
Conclusion
In this article we have tried to portray how to record screens in Ubuntu with the built-in app Screencast and with three of the well-known third-party screen recording applications; Simple Screen Recorder, OBS Studio, and Kazam. You can use any of the tools to record your screen on Ubuntu.
Hope you find this guide knowledgeable. Share your feedback in the comment section below and do share this article with your friends who are looking for some easy screen recording applications for Ubuntu.